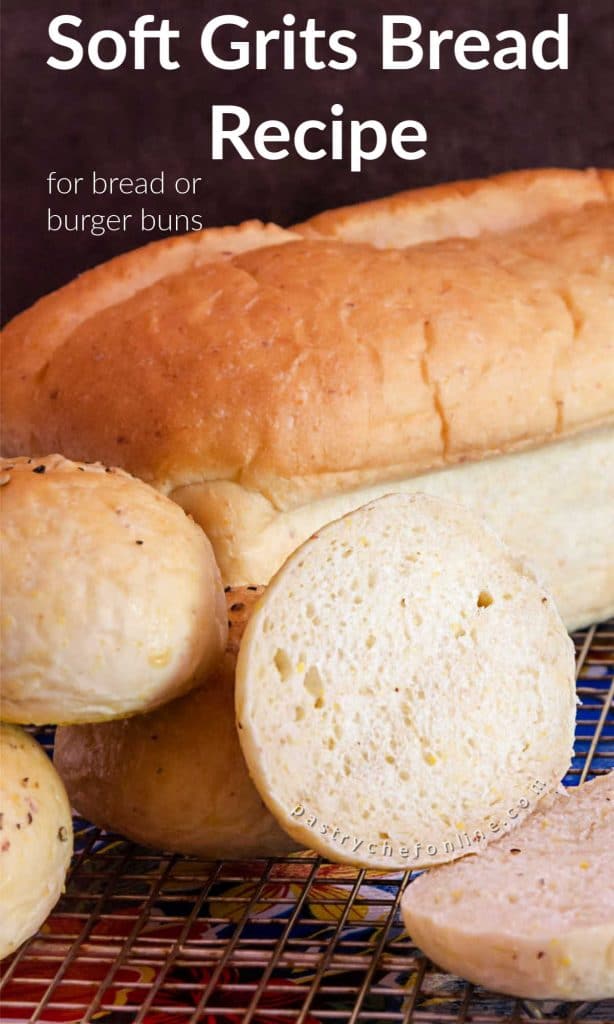
Y’all, have I got a treat for you today! Wondering what to do with leftover grits? Well, I am going to show you how to make a delicious soft sandwich bread (or burger buns) using leftover stone ground grits! That’s right–grits bread!
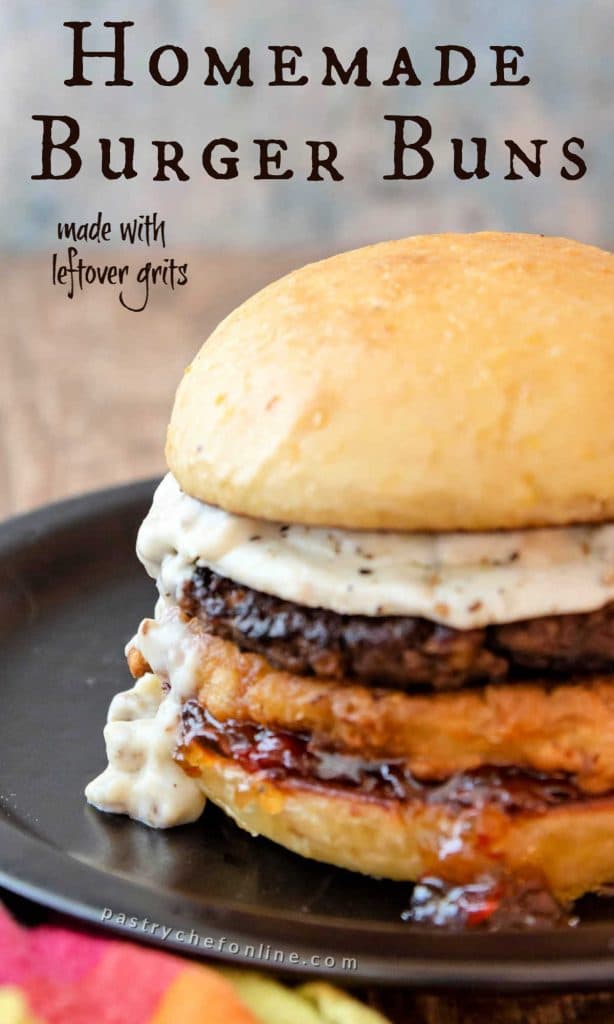
The cool thing about this bread is that, because of the way the grits swell up when cooked, it stays soft for a good week or so at room temperature. The grits behave in very much the same way that the potatoes do in my potato sandwich bread. I’ve made this bread several times, and I’ve even made them into the burger buns for my breakfast burgers. And I’ve had two of my very best baking friends test it, and they are fans as well!
For ease of browsing, here are all of my bread and roll recipes. Thanks for visiting. Now let’s get on with the recipe.
Pastry Chef Online Participates in Affiliate Programs. If you make a purchase through one of my links, I may earn a small commission. For more information click to read my disclosure policy
Grits Bread, At a Glance
✅Skill Level: Intermediate
✅Skills: Cooking Grits, Making and Kneading Dough, Shaping, Proofing, and Baking
✅Type: Bread (or Burger Buns)
✅Number of Ingredients: 7
✅Prep Time: 20 minutes plus the time it takes to cook the grits
✅Cook Time: 30 minutes
✅Rise Time: about 2 hours and 15 minutes
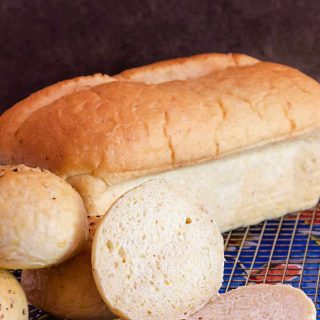
✅Yield: 1 loaf or 7-8 burger buns
Jump Straight to the Recipe
I’ve had this bread pinned for quite a while and finally made it. It is wonderful! Such nice dough and it was perfect even though my grits had cheddar, sautéed peppers and a tiny bit of Canadian bacon.
Chef and Reader Carlin B
Why Grits in Bread?
For the same reason I use potatoes in bread: for the swelled up starches in the grits.
The starches swell through cooking in water, and the water slowly penetrates the hard little bits of corn, gelatinizing the starches in them.
When grits cool off, do they turn back into dry coarse crumbs?
Nope. They cool into sort of a gummy, cold slab of a bunch of starch that is holding onto water even once cool.
And those cooked grits will keep holding onto that water, even when baked into bread.
This slows down the staling process and increases the keeping ability of bread.
I’ve made this loaf many times now, and I kept a couple of pieces out of one loaf to see how long it would stay soft, and the bread got moldy long before it staled. Nice!
Grits Bread Q&A
At room temperature and well-wrapped (I usually wrap it in heavy duty foil), this grits bread will stay soft and fresh for a good five days.
Please don’t. Keeping bread in the refrigerator actually encourages staling. Keep this bread, well-wrapped, on the counter for a good 4-5 days.
Most bread does very well in the freezer. Once I bake and cool it completely, I slice the loaf and then put it back together, wrap it well in plastic wrap and foil, and freeze for up to 3 months. I just take pieces out as I need them, thawing them at room temperature, putting them in the toaster oven, or in the microwave for about 10 seconds.
I don’t recommend it. This dough is very sticky until it has been properly kneaded, and even then it’s pretty soft. This recipe really is a reason to bust out your
That’s a good question, and the answer is that I don’t know. I have made this as a loaf and as buns many times, but I always use stone ground grits that have a 4:1 cooking ratio. That is, you need 4 cups of water to cook 1 cup of grits. Check your package labels. If the instructions are 4:1, you should be fine. If it’s less, like 3 cups or 2 cups of liquid per cup of grits, you will have to increase the amount of liquid you add to the recipe.
About the Video
Note the video is a real-time video in which I make and knead the bread dough live.
It is about 50 minutes long. If you do not want to watch the entire thing, you can click over and watch it on Facebook. There you will be able to fast forward to get to the parts you are most interested in.
Please, especially if you do not bake a lot of yeast breads, take the time to watch the kneading in particular. You will be able to see how the dough changes and gains structure as it is kneaded.
Watching it in real time will help you resist the urge to add additional flour to your dough while it’s in the mixer. And we don’t want that.
Adding too much extra flour can lead to a dense loaf that doesn’t rise as much as it should.
What My Testers Said
I don’t often ask other folks to test my recipes. I generally do all the testing myself. But I think I am onto something pretty special here, and I wanted to make sure that other folks who don’t bake a lot of bread would have success with this recipe.
I asked two cookbook author friends, Nancie McDermott and Jill O’Connor to give the bread a try and see what they thought.
Here’s a photo of Nancie’s bread:
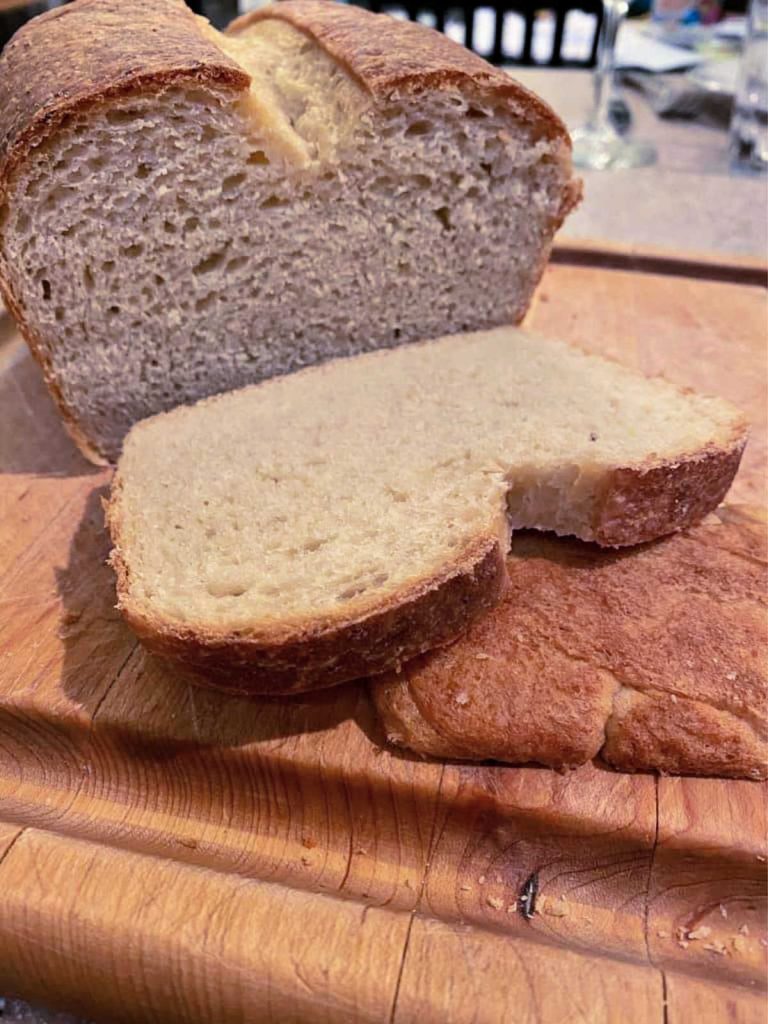
And here’s what she said about it:
It is delicious and a lovely texture. A great, wonderful, doable recipe.
Nancie McDermott
And here is how Jill’s bread turned out:
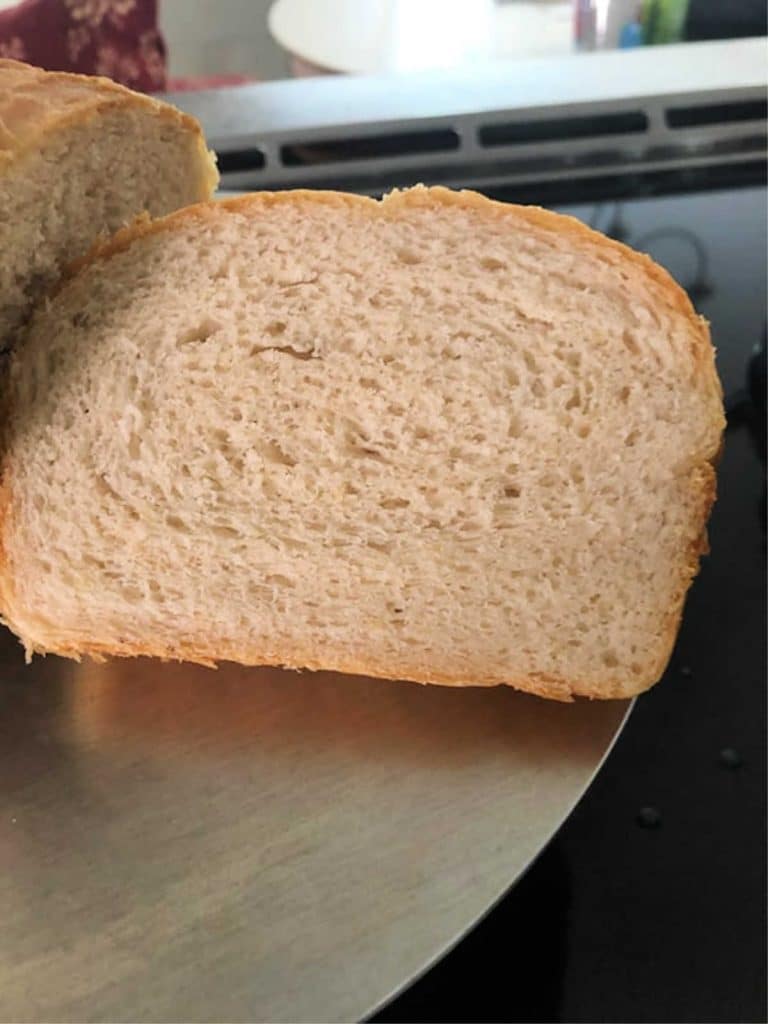
And this is what Jill had to say about the recipe:
This Southern California girl didn’t know grits from granola until Jenni Field introduced me to this super simple recipe for a delightful loaf of bread. The grits give the dough a great texture and a dollop of honey adds a whisper of sweetness. Even when sliced, the bread stays fresh and tender for days. A definite winner, even for beginning bakers.
Jill O’Connor
I was thrilled with their reactions, and I am sure you will find this bread easy to make and really delicious as well!
Another Reader Rave
Wonderful , moist, Tasty , EASY to make Bread!! OUR favorite bread In our weekly rotation! We have shared a slice with friends and neighbors and THEy LOVED it! TRY it YOU will LOVE it TOO. I used polenta initially I really liked the bread with polenta but have used grits, as well. Since we eat Polenta more than grits here I use polenta to make the bread generally. Jenni has WONDERFUL videos and will answer questions. I enjoy many recipes and videos! Thank You Jenni!
Reader Athena
Ingredients
NOTE: The full recipe is at the bottom of the post. This section is just letting you know what you’ll need to make the bread.

The players:
- leftover cooked stone-ground grits (and yes, you can cook some special just for this recipe. Just let them cool before adding them to the mixer bowl. And cold out of the fridge is fine too.) NOTE ABOUT GRITS MEASUREMENT: measure your cup of cooked grits once they’ve cooled down. If you weigh them, you will need 10 oz cooked grits. Otherwise, measure a full cup of cooked then cooled grits
- salt
- bacon fat: if you don’t have bacon fat, you can substitute clarified butter or vegetable oil
- honey: Adds just a touch of sweetness and also assists in browning. Honey also is a humectant and holds onto moisture
- whole milk: The liquid for the bread. Adds some sweetness in the form of milk sugars (lactose) and assists in browning
- flour–either all purpose or bread flour will work here
- yeast–I use instant, but you can dissolve active dry yeast in some of the milk and use that instead
Ingredient Substitutions
- You can use either white or yellow stone ground grits. I use yellow, because the little specks show up. Either will work just fine though.
- I use kosher salt, but if all you have is fine table salt, you can use it. You will probably only need a teaspoon and 1/4-1/2 rather than the 2 teaspoons of kosher salt called for. NOTE: I use Mortons. If weighing your salt, you will need 10 grams
- Instead of bacon fat, feel free to use very soft butter, soft coconut oil or even olive oil if you like. It will change the character of the bread slightly, but any of these substitutions will work just fine. Oh, and I’ve also used the fat from cooking sausage too, and that’s really good!
- You can use sorghum syrup instead of honey. Maple syrup is also a good option. I think that would be especially nice if you use sausage fat as the fat in the recipe.
- You can substitute 2% milk for the whole milk. You can also use buttermilk, but since it is thicker, if you do use it, you will probably need to add an additional tablespoon or two of water or milk.
- I have not tried to make this bread with whole wheat flour, but I’ve tested with both bread flour and all purpose flour with great results. Do not use a lower protein flour like White Lily or cake flour. It doesn’t have a high enough protein content to work here.
- I used instant yeast, but you can also use active dry. Note if you have less than the 1 1/2 teaspoons called for, you can use less. Your rise time will be longer, but what you lose in time, you gain in additional flavor.
Measuring the Grits
I have had a couple of people tell me that their dough has not come together and they had to add a whole bunch of extra flour to make their dough workable.
Would you like to save this post?
So this doesn’t happen to you, I want to reiterate how to measure the grits.
- Bring 4 cups water plus a teaspoon or so of salt to a boil.
- Stream in 1 full level cup of stone-ground grits.
- Stir and cook until tender, about 30-40 minutes.
- Eat some grits now if you want.
- Cool down the remaining grits and chill them in the fridge.
- Weigh out 10 oz of the cooled, cooked grits. If you don’t have a kitchen scale (please get one), measure out 1 full dry measuring cup of cooled cooked grits.
Procedure
This bread is made using the straight dough method.
That means everyone goes in the pool at the same time.
The one “rule” I have about it is to keep the salt and the yeast away from each other until the mixing begins.
That’s because high concentrations of salt can kill yeast. Just to clarify–not dry salt, but still.
So I keep the flour between them until I start mixing.
If you add everything to your mixer in the order I suggest, all will be well.
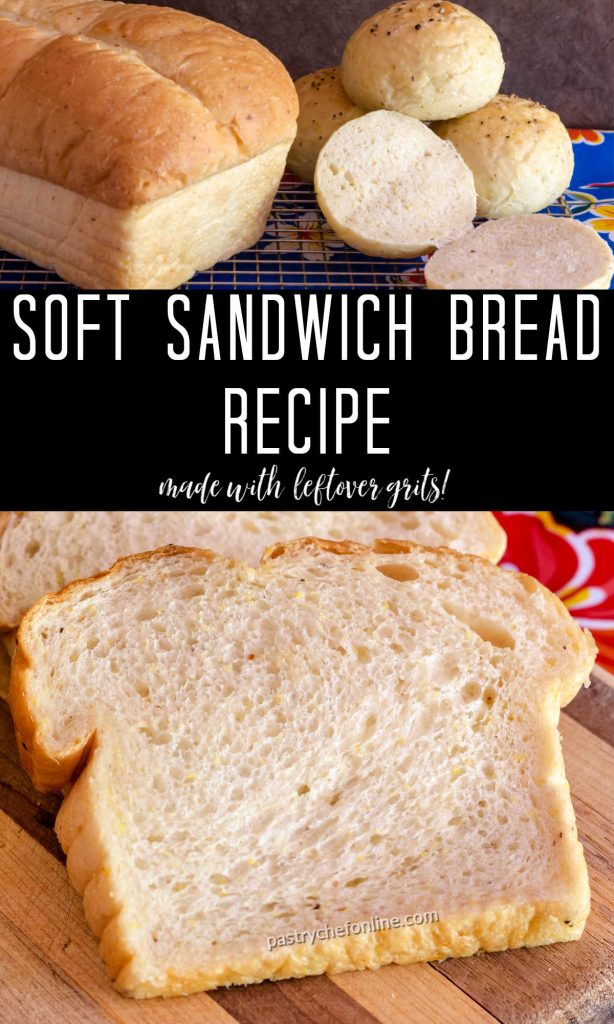
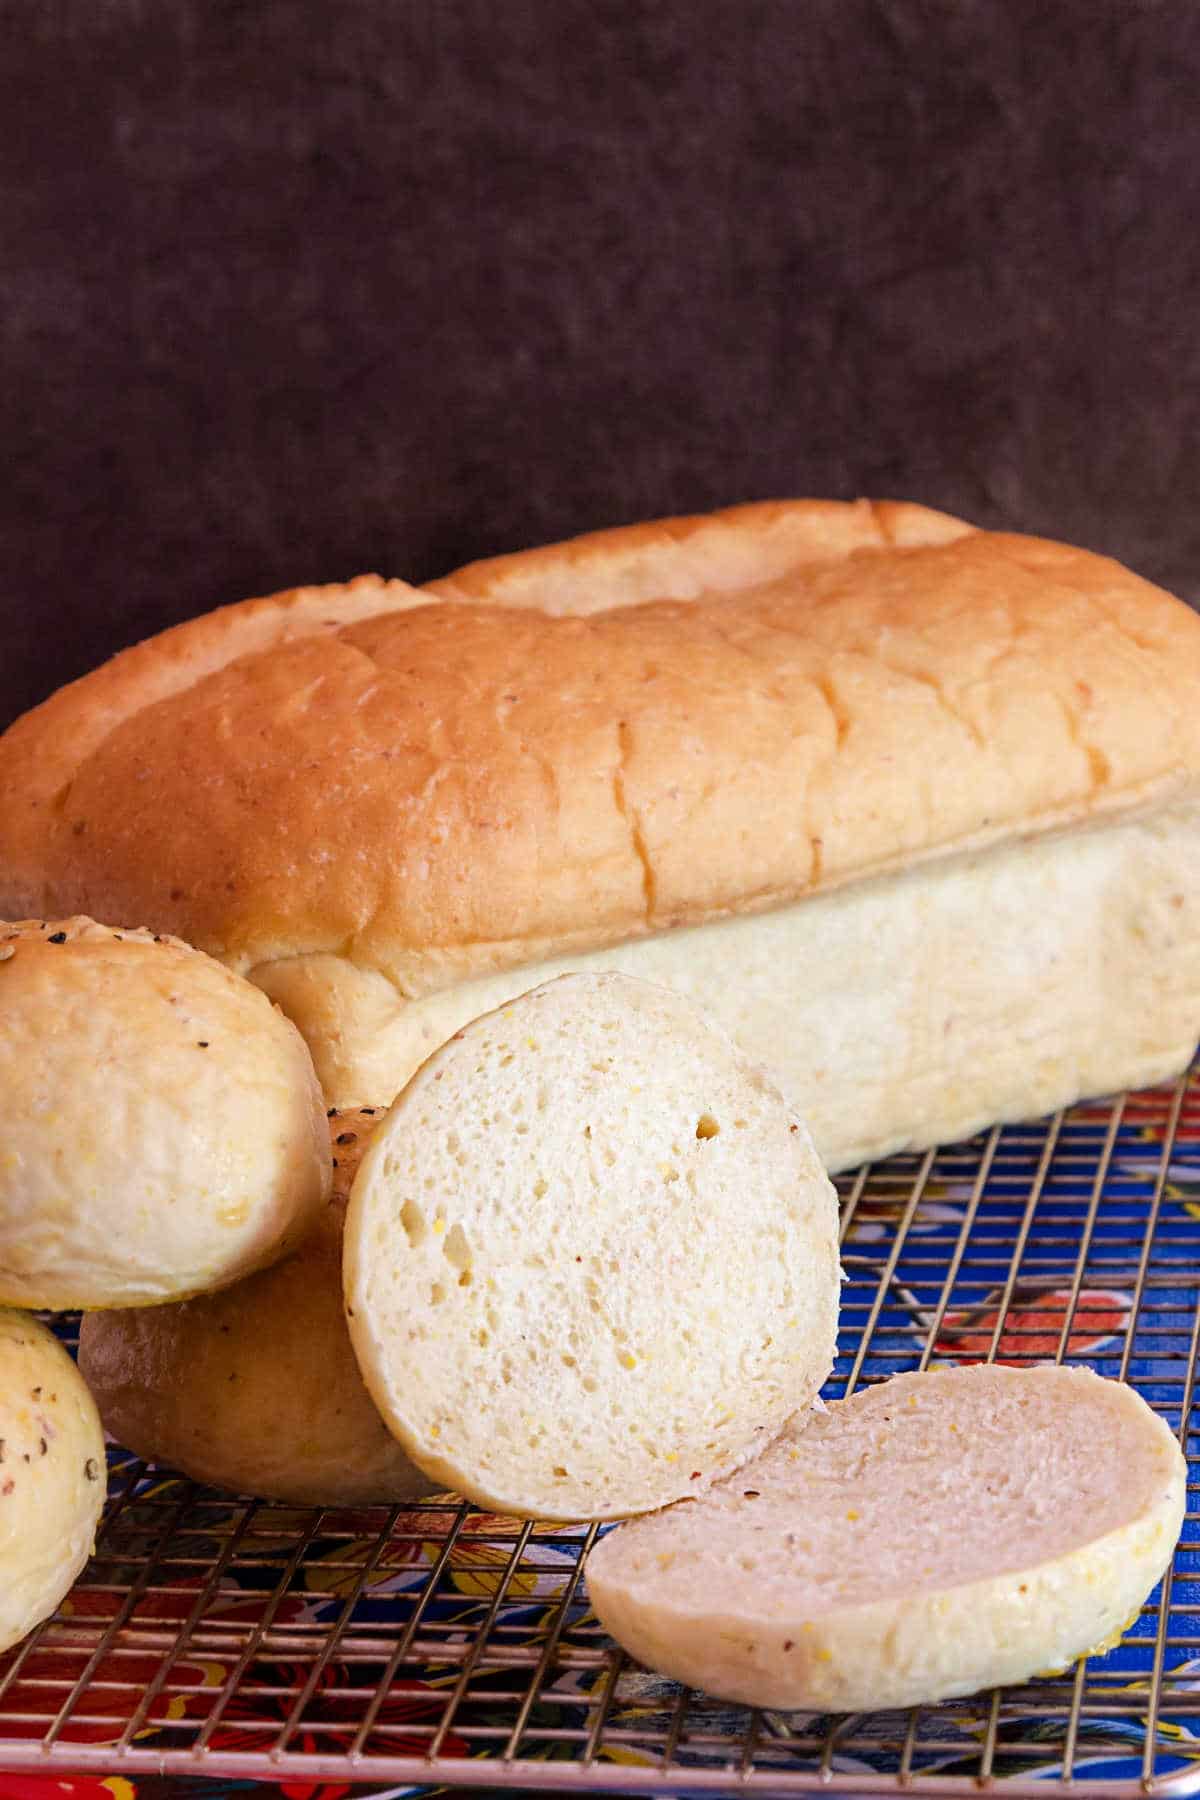
What Is the Crumb Like?
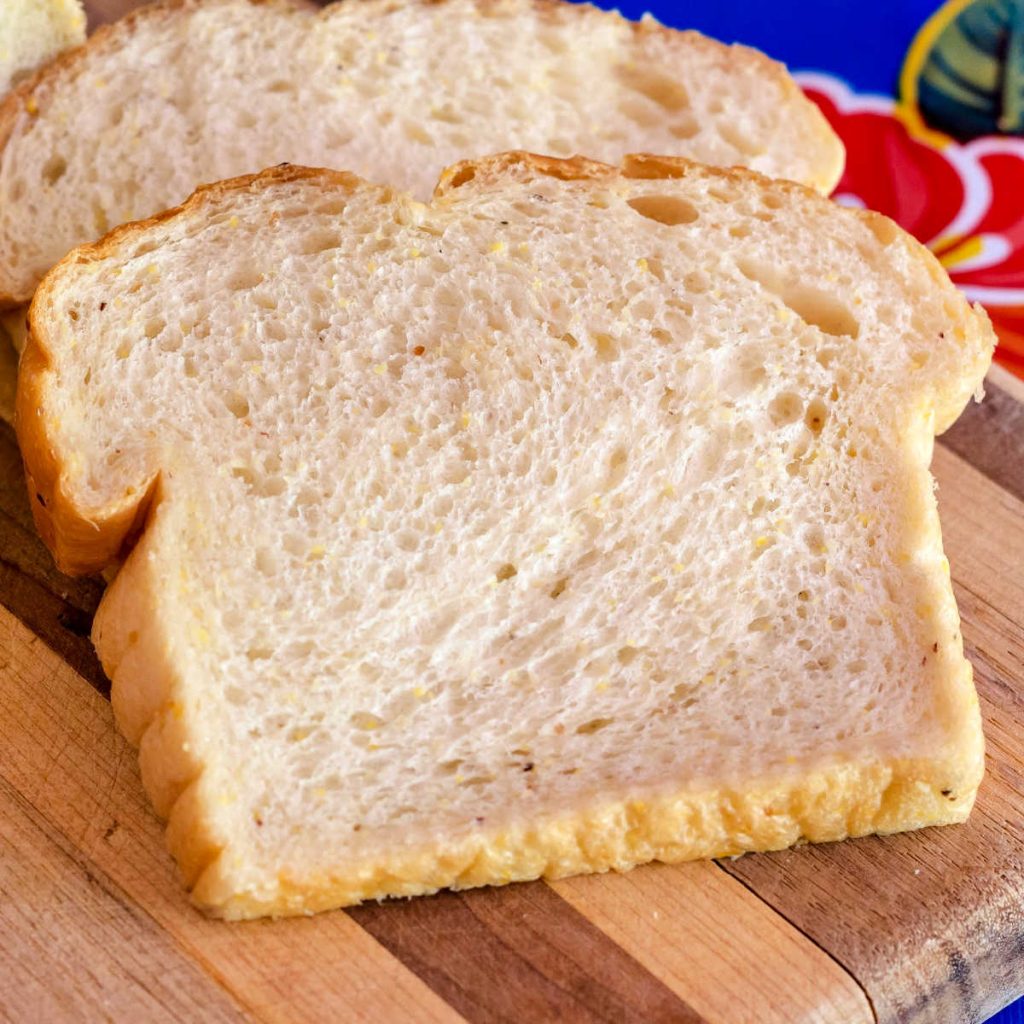
In a word, excellent. This bread has a fairly tight crumb but is also light and chewy. If you look closely, you can see the little specks of cooked grits in the finished bread, too.
Serving Suggestions
Honestly, any way you’d use store-bought bread, you can use this bread.
Here are some things I’ve made with it so far:
- peanut butter and jelly using peach plum jam (or mixed berry jam)
- ham and cheese
- grilled cheese
- bologna and cheese
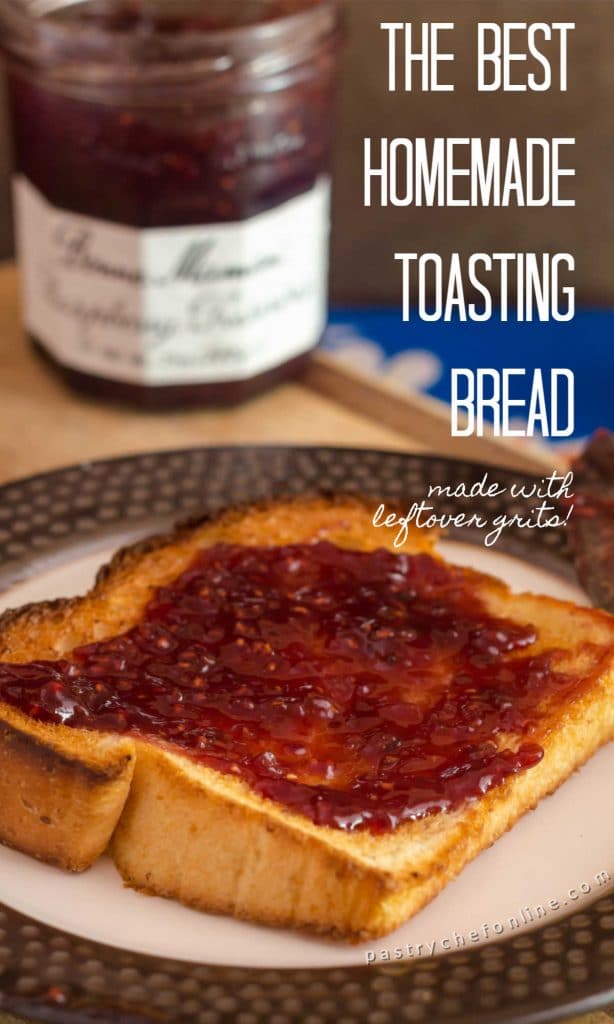
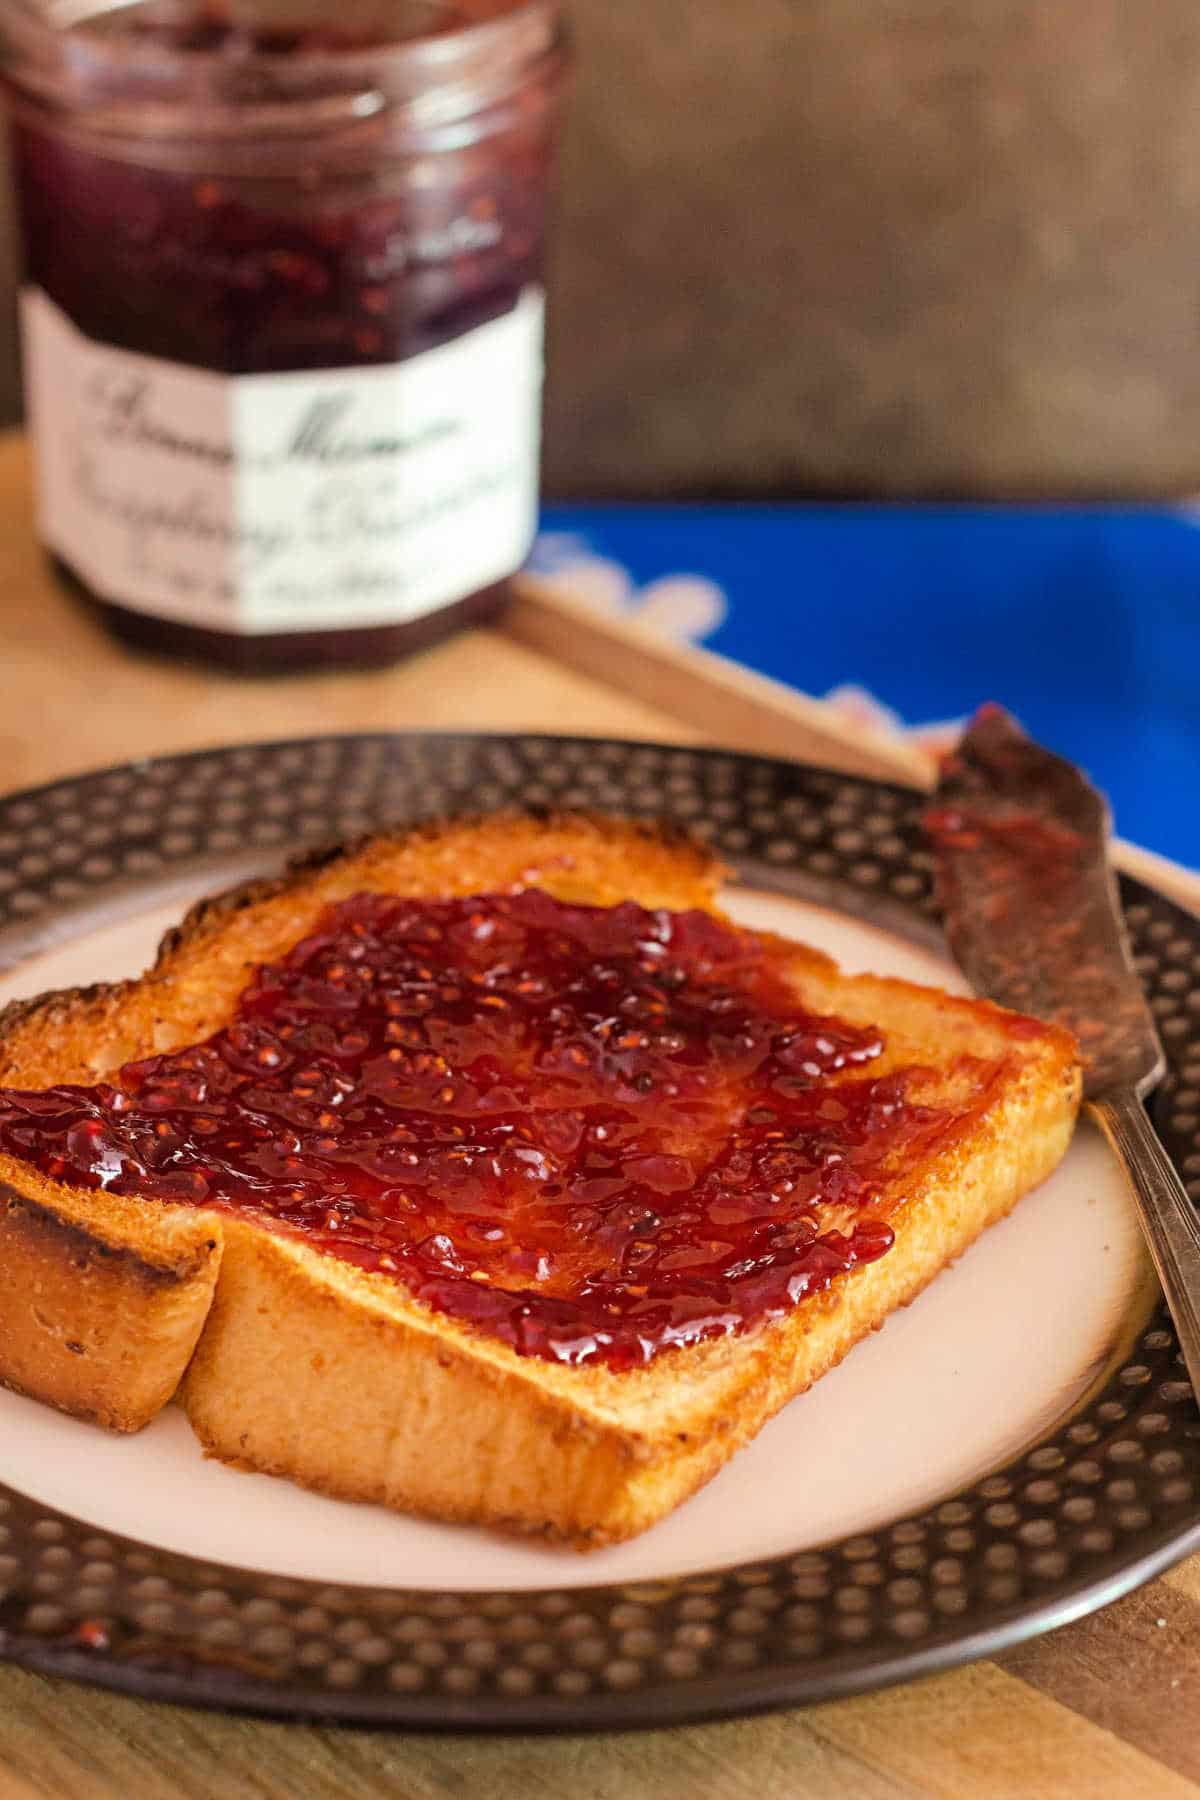
- toast with butter and jam
- bread, butter, and sugar sandwich
- fresh and un-toasted with butter
- buns for sandwiches and burgers
- make a fancy BLT
- toast it and spread it with bacon jam, tomato jam, or both!
I will say that this bread makes gorgeous toast, so if you have a loaf of this and a loaf of some other bread and are trying to decide which one to make toast with, choose the grits bread.
I mean, just look how perfect!
If you love a good toasting bread, give my cinnamon raisin bread recipe a try. It’s delicious toasted with jam or as the bread for grilled cheese.
The Kind of Flour Matters
I recently had a reader comment that her grits bread dough needed a full 1/2 cup extra of milk.
She was using a combination of white and whole wheat flour but said she followed the recipe to the T, otherwise, including weighing her ingredients.
You can use whatever higher-protein flour or mix of flours you’d like, but do know that the amount of liquid may change accordingly depending on how much liquid your flour can absorb.
Once she added the extra liquid, all was well and her bread turned out fine.
Yours will too!
Here’s her complete comment, and I’m adding this section to the post so it can help everyone:
I made this bread yesterday but i had an issue I haven’t seen in posts.
Reader Kathy
I followed the recipe completely, weighing each ingredient. However when it came to mixing, the dough was so dry it wouldn’t come together at all.
I ended up adding nearly another 1/2 cup of milk to finally make a nice dough ball.
It turned out fantastic, and I’m going to need to make another loaf very soon.
I did do 50% white whole wheat that I keep refrigerated along with regular AP flour. Could that have been my issue?
I’d appreciate any thoughts you have. Thanks for the great recipe.
Do You Have More Bread Recipes?
As a matter of fact, I do!
I love making bread and playing with the Tangzhong method to create breads that stay soft for days like my Tangzhong pain au lait or milk bread recipe.
I also have a great recipe oatmeal bread that is just as soft as this bread is. It’s sweetened with maple syrup, so your whole kitchen will smell like a delicious breakfast while your bread bakes.
And if you are having difficulty finding baking yeast, I also have a few breads that I make with yeast used for making beer or wine. You may want to check out my posts on baking with brewers’ yeast, champagne yeast pita, and champagne yeast brioche.
A Note About Measurements
NOTE: Most of my recipes are written by weight and not volume, even the liquids.
Even though I try to provide you with volume measurements as well, I encourage you to buy a kitchen scale for ease of measuring, accuracy, and consistency.
This is the scale I use, love, and recommend is the Escali Primo.
Questions?
If you have any questions about this post or recipe, I am happy to help.
Simply leave a comment here and I will get back to you soon. I also invite you to ask question in my Facebook group, Fearless Kitchen Fun.
If your question is more pressing, please feel free to email me. I should be back in touch ASAP, as long as I’m not asleep.
Love This Grits Bread Recipe? Please Rate and Review. Thanks!
It will help me and other readers so much if you take a moment to rate and leave a review for this recipe.
You can use the stars to rate 1-5 (5 is best), and leave a review in the comments. It helps me make adjustments if any are needed, and comments help others decide whether the recipe is worth making.
Other ways to share include pinning, and/or sharing on your favorite social media platform.
Thank you so much for taking the time!

Grits Bread Recipe
NOTE: Instructions for including an overnight rise as well as for making burger buns or dinner rolls are in the Notes section.
Video
Would you like to save this post?
Equipment
Ingredients
- 10 oz 1 level cup cooked stone ground grits, cold measure 10 oz AFTER cooking and cooling the grits
- 2 teaspoons kosher salt I use Morton’s
- 1 oz honey or sorghum syrup
- 1 oz bacon fat or soft butter
- 4 oz whole milk
- 13.5 oz all purpose or bread flour
- 1 ½ teaspoons instant yeast
Instructions
- Combine all the ingredients in your mixer bowl in the order given.
- Fit your mixer with the dough hook and mix on low speed until all the ingredients have been incorporated and you have a shaggy dough.
- Increase the mixer speed to medium and knead for 10-12 minutes, until all the dough gathers in a ball around the dough hook. NOTE: Please watch the video to see in real time what the dough looks like while kneading. It will help you resist the urge to add more flour.
- Once the dough is smooth, shiny, and nicely stretchy, oil your hands and form the dough into a ball. Plop it back in the mixer bowl, spray lightly with oil or pan spray, and cover it with a lint-free towel or plastic wrap.
- Allow to rise in a cozy place until doubled in size, about 90 minutes. I like to put a mug of boiling water in the microwave, place the covered dough next to it, and shut the door.
- Plop your dough onto a clean surface. Press out all the gas bubbles you can and then fold the dough a couple of times just to redistribute the yeast.
- Pat the dough into a rectangle about 6" wide and 14" long. You don’t have to measure, honest.
- Starting at a short end, roll up the rectangle of dough tightly, like a jelly roll. At this point the dough cylinder will be about 9" long because it will stretch out as you roll it up.
- Tuck the ends of the roll down towards your work surface and then place the roll of dough into a greased 9" x 5" loaf pan, again pointing the ends of the log down towards the bottom of the loaf pan.
- Spray with pan spray and let rise until it is about 1" over the top of the pan, about 45 minutes.
- Preheat the oven to 350F.
- When the loaf is nicely risen, make a 1/2" slash with a sharp knife right down the center of the loaf.
- Bake until nicely golden brown with an internal temperature of between 195F and 200F. If the loaf seems to be browning more than you would like before it’s ready, loosely tent with foil for the last 5-10 minutes of baking.
- If desired, brush the top of the loaf with melted butter as soon as it comes out of the oven. This will keep the crust from getting crispy as it cools.
- Allow the loaf to cool in the pan for 10 minutes. Then remove to a cooling rack to cool completely before slicing.
Did You Make Any Changes?
Notes
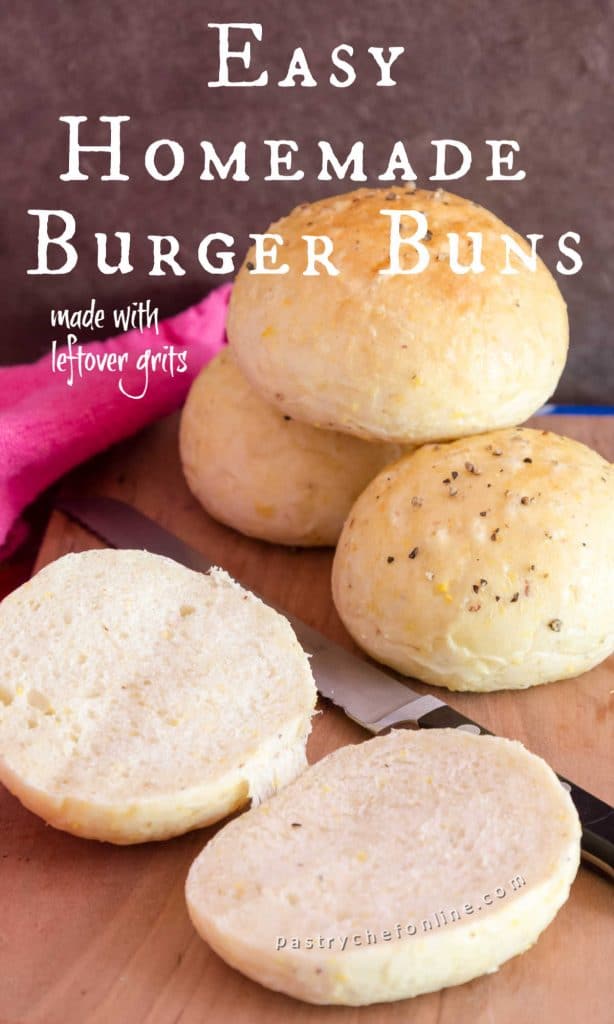
To Make Burger Buns
- Make the dough following the above instructions, 1-6.
- After you press out the gases, divide into 7-8 equal sized portions. For accuracy, I always weigh my entire amount of dough and divide by the weight I want my buns to be. The ones in these photos, I scaled out at 3.6 ounces each, and I made 8. You can also scale out to just over 4 ounces apiece and end up with 7 buns that are the perfect size for a large burger.
- Place the portioned dough on a parchment lined tray, cover with plastic wrap, and refrigerate for 45 minutes. This will make the dough easier to work with as it is pretty soft.
- Remove the tray from the fridge, form each piece of dough into a smooth ball and then, with cupped hands, scoot them around on the counter, using the friction between the dough and the work surface to pull the surface tight so you have a nice, smooth ball. I have a video showing how to shape burger buns if you’d like to see it in action.
- Place 4 burger buns each (or 4 and 3) on 2 parchment-lined baking sheets. Allow the buns to rise in a warm place for about 45 minutes.
- If you’d like, you can egg wash the buns and then sprinkle with sesame seeds or poppy seeds. I used smoked salt and smoked pepper on mine.
- Bake on 2 separate racks, for about 20 minutes, rotating the pans and switching shelves halfway through the baking time. The buns should be a light golden brown and the internal temperature should be between 195-200F.
- Remove to cool on the pans for 10 minutes and then remove to racks to cool completely.
To Include an Overnight Rise
For a Loaf of Bread- Once you shape and pan the dough, spray the top with pan spray, cover with plastic wrap, and refrigerate overnight.
- Remove the pan from the fridge the next day. It will probably have visibly risen, even in the fridge.
- Allow to sit in a cozy place until the dough is peeking over the top of the pan by about an inch or so.
- Make the slash down the center, and bake as directed.
For the Buns
- Follow the main instructions through step 4.
- Cover the bowl of dough with plastic wrap and refrigerate overnight.
- The next day, press out any gases that have formed, scale your dough, and continue with the burger bun variation, by scaling and shaping your buns.
- Spray with pan spray and allow to rise in a cozy place for about 45 minutes.
- Bake as directed.
Nutrition

Hi, y’all! I hope you’ve enjoyed this post and hopefully also learned a thing or two.
If you like my style, I invite you to sign up for my occasional newsletter, The Inbox Pastry Chef.
Expect updates on new and tasty recipes as well as a bit of behind-the-scenes action. I hope to see you there!

And there you have it. Deeply flavorful, slightly chewy and savory grits bread. I hope y’all enjoy it!
Take care, y’all.


Join in Today!
I often have left over cooked cornmeal (polenta.) Can I use that in this recipe?
Yes, you can absolutely sub leftover polenta, which is virtually identical to grits. Enjoy!
Hello Jennifer,
I realize this is an older post but I am looking for a bread recipe that replaces some of the flour with barley. We love barley grits (they do not spike blood sugar like most other carbs do) and so I am wondering if this recipe could be adjusted to be made with cooked barley grits. You are making your corn grits at a ratio of 1 cup grits to 4 cups water. Barley grits are made with a 1:3 ratio. How would I adjust the recipe to compensate?
Hi, Sheri! I always monitor my comments, no matter how old the post. 🙂 I would start with the same cooked amount, by weight. You may have to add a bit more water, but I think that will be a good starting place for you. Please let me know how it turns out. Hope you love it!
Thanks! Will be trying it out this weekend. Caveat: I am not an experienced yeast bread baker but will follow the recipe and hope for the best 🙂
Please report back! If you have any questions about anything, shoot me an email. [email protected]
I love this bread! So easy! I don’t eat much bread myself (but my husband does). I couldn’t keep my hands off this.
Slather on some good butter and enjoy! I used yellow stone ground grits, and otherwise followed the recipe. I brushed it with butter to get the softer crust. If you’re hesitating, give it a try! I was so pleasantly surprised at how good this bread is! And while it was baking, it was one of the most fragrant loaves I’ve ever baked. The house smelled heavenly!
Dawn, I am SOOOO happy you guys like the bread! Maybe I have been underselling it! 🙂
I made this bread yesterday but i had an issue I haven’t seen in posts. I followed the recipe completely, weighing each ingredient. However when it came to mixing, the dough was so dry it wouldn’t come together at all. I ended up adding nearly another 1/2 cup of milk to finally make a nice dough ball. It turned out fantastic, and I’m going to need to make another loaf very soon. I did do 50% white whole wheat that I keep refrigerated along with regular AP flour. Could that have been my issue? I’d appreciate any thoughts you have. Thanks for the great recipe.
Hey, Kathy! Thanks for getting in touch. You were 100% correct to add extra liquid even if the recipe didn’t call for it. Different flours absorb differ t amounts of liquid, so your flour blend almost certainly made the difference. The general rule of thumb is that the lower the protein ci tent, the less liquid it will absorb, so your blend must be higher in protein than what I used. I will add to the post, noting this so others can adjust accordingly. Thanks again, and I’m so pleased you like the bread! Makes a mean burger bun too!
Hi Jennifer, I haven’t made this bread yet but want to.
I was wondering if maybe I could use the bread machine to knead and make this bread. I can’t knead much anymore like I used to and never used a mixer.
Thanks for recipe and your help.
Hi, Faye! I’ve not tried it that way, but I see no reason that you couldn’t let the machine do the kneading for you! Go for it, and then let me know how you like it. 🙂 Reach out if you have any other questions. If you need a response urgently, you can email me directly at [email protected] I hope you enjoy the bread!
Hi, I am having the same difficulty with the bread coming together. I wind up having to add a good amount of flour, and I’m not sure why. For the 10 ounces of grits, cooked, does that mean cook 10 ounces (about 1 cup), because that’s what I did, and that seems like a lot of grits to put in one loaf. So maybe it should be 10 ounces of cooked grits? I’ve made this twice, and it still turned out well, tasted good, and was easy to slice, lol. But I would like to get it right without having to add a lot of flour. I measured everything with a scale, too. Thank you!
Hi, Linda. Yes, it’s 1 cup of cooked grits which weighs about 10 oz. 10 oz of grits, cooked, would indeed be a lot! I guess I need to go back in and clarify that!
Thank you so much! That is very helpful! As an editor, I know those commas can be confusing, lol!
You’re very welcome, and thank you! I try to be as clear as I can, but folks let me know when I could do bette. I really appreciate it, too, because I want everyone to have success with my recipes!
After 10 minutes of kneading, I still had a wet mess. I added 2 cups of flour and the dough still hadn’t come together after another 10 mins of kneading. Very frustrating.
One other person has commented to say that they had this issue. The only thing I can think is that you didn’t pre-cook the grits and added a cup of grits and 4 cups of water to the mixer. I’m going to email you to hopefully pinpoint exactly what happened, because this is an excellent loaf and my testers had zero problem making it. Still, there must be something I’ve left unclear. Check your email, Lisa! 🙂
Thank you so much for the email and being willing to help me trouble shoot this bread issue. I did cook the grits (we had them for dinner last night and these were the leftovers). I’ve sent an email with some more details. That being said, despite not turning out right, the end result was incredibly flavourful… but very dense and moist.
So glad you emailed me–I’m sure I can help you figure this out! Thanks, Lisa!
Hi Jenni
I am new to yeast bread making but I thought that I would give this a try. Well, after twenty minutes of kneading in a KitchenAid Mixer with the dough hook, I knew I was in trouble. All I had was a gluey, sticky mess. There was no pulling away from the sides and forming a ball around the dough hook. At that point, I added some flour just to see if I could salvage my mess, but I really think that I should just throw it out now. I had to use regular yeast but I used the warmed milk to proof the yeast so I don’t know why it ended up so gooey. Have you got any ideas before I run from trying yeast bread again, in terror? Thank you!
Hmm, if you used more liquid than I did to make your grits, it’s possible you ended up with too much liquid in your dough. When I make this bread, I use leftover cold grits that I cook 1 cup grits to 4 cups liquid. The dough is generally fairly sturdy. Did you use bread flour, all purpose, or some other kind of flour? Those are the only 2 variables I can think of that might throw off your proportions. Let me know so I can help troubleshoot.
Your bread recipes always turn out perfectly! Thank you!
Yay, I’m so glad!! And thanks for letting me know! xo
This bread comes together quickly. Made it in stand mixer twice: last 3 times I just
Used my hand s and that’s the best. Regular rotation because
It’s simple, delicious and forgiving.
I made this loaf with stone ground grits, honey and butter— it never got stale! Stayed soft and sliceable for a week at least. Easy and delicioys!
Yay! Thanks for weighing in–I love this bread so much!
Wonderful , moist, Tasty , EASY to make Bread !! OUR favorite bread In our weekly rotation ! We have shared a slice with friends and neighbors and THEy LOVED it ! TRY it YOU will be LOVE it TOO. I used polenta initially I really liked the bread with polenta but have used grits, as well. Since we eat Polenta more than grits here I use polenta to make the bread generally. Jenni HAs WONDERFUL videos and will answer questions . I enjoy many recipes and videos ! Thank You Jenni !
Loved everything about your post, Jenny. So detailed and informative. The crumb is awesome. This recipe is bookmarked 🙂
Thank you so much! I hope you love it, Namita!
You had me at bacon fat- this looks incredible and with a perfect crumb for toasting toow
Thank you–and yes, it does make gorgeous toast!
Grits bread looks so amazing , so soft and beautiful!
Thank you, Sneha! I am super happy with it. It keeps for a super long time, even longer than I’d expected!
Grits bread, looks so amazing , love the way you used cooked cornmeal to make this bread, amazing!
YEEET! I LOVE it. we basically did the same bread. You went with sophisticated yeast I went with wild one! But then.. is there any surprise there! I am the wild one!
The texture is great and even!! Awesome work, chef!
You have always been the wild one! Grits in all the bread!
Looks just beautiful, love the little peekaboo color of the grits and I know the texture is brilliant. Would love this toasted. Perfect loaf and buns!
Thank you! And yes I think those little flecks are my favorite part, too!
This grits bread looks delicious, perfect with jam. I will change this recipe to sourdough as you know I love sourdough.
I would love to see a sourdough version, Swathi!
Thanks for all of the science lessons! This sounds a lot like a corn tangzhong! Genius!
Exactly! I knew you’d appreciate it. I am not wanting to experiment with using all sorts of different gelatinized starches in bread. I wonder if I could even do it with chickpeas or something? And rice!
Hmmmmmm. I can’t wait to see your experiments!
I’m kind of excited about it too!
My chief requirement for sandwich bread is that it stay soft because I never toast mine. Definitely going to give your grits bread a try. It sounds ideal!
I think you will be very, very happy with this for many many days, Stacy!