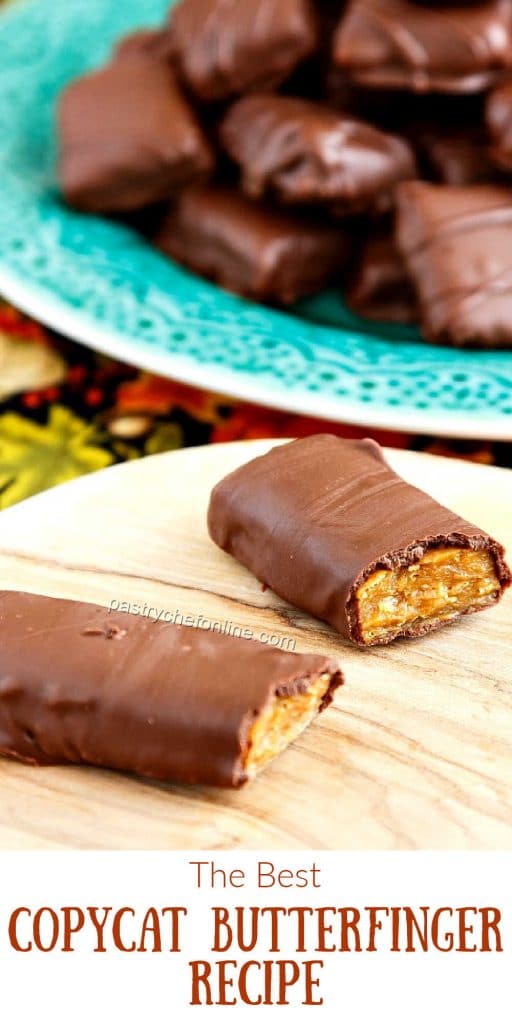
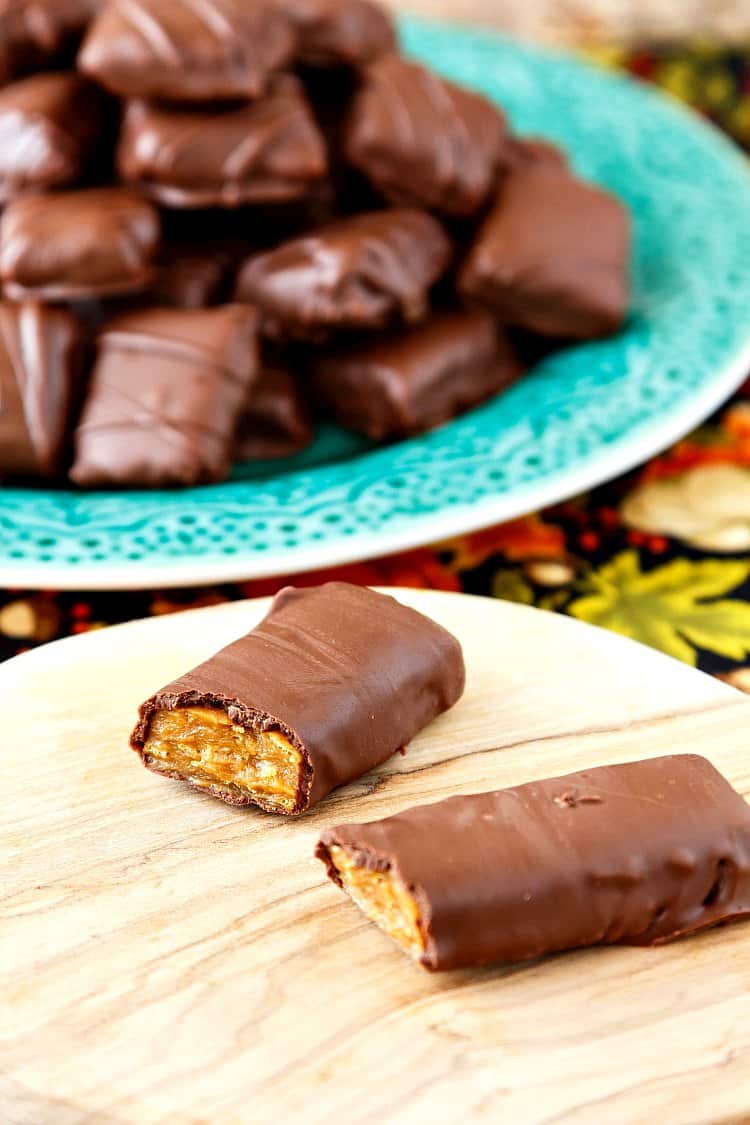
Butterfinger Candy bars are one of my favorite candies ever, so I really wanted to make a copycat version, because I’m like that. Most homemade versions are chewy rather than crunchy, though. For my homemade Butterfinger recipe, I wanted to make sure the results were crunchy and crispy rather than soft and chewy. If I want chewy, I’ll eat fudge, am I right?
For an easier candy recipe packed with Butterfinger flavor, you may want to check out my Butterfinger bark recipe. It doesn’t require a candy thermometer and would be appropriate to make with your kids. My Butterfinger ice cream is also a great way to get your Butterfinger fix!
Anyway, settle in friends, and I’ll show you exactly how to make this Butterfinger candy. For ease of browsing, here are all of my candy recipes. Thanks for stopping by!
Pastry Chef Online Participates in Affiliate Programs. If you make a purchase through one of my links, I may earn a small commission. For more information click to read my disclosure policy
Watch my Butterfinger candy bar web story.
These are DELICIOUS! You did an amazing job! I made another recipe that didn’t require a candy thermometer but they really were not even close to a butterfinger.
Reader Patty G.
Your recipe is spot on and it is really good even without chocolate coating.
I do suggest for people trying this for the first time to read through the instructions and keep them close to refer back to. Your steps are well written and easy to understand.
Crunchy Butterfinger Bar Recipe, At a Glance
✅Skill Level: Advanced
✅Skills: Cooking Sugar, Folding and manipulating molten sugar, dipping candies
✅Type: Candy
✅Number of Ingredients: 10
✅Prep Time: 10 minutes
✅Cook Time: 20 minutes
✅Yield: 60 pieces if cut in small squares. Maybe 12-15 “full size” candy bars
Jump Straight to the Recipe
Recipe Testing to Get It Right
I am Extremely Excited, stoked even (and I never use that word), to bring you this crispy Butterfinger recipe, you guys. This is my most tested recipe ever.
I submit I have developed a homemade copycat for Butterfinger candy bars that is as close to the factory-produced kind as I can get while using my regular kitchen equipment.
Nine times.
That’s the number of times it took me to get these Butterfingers just right.
- I made some with a sugar syrup.
- I made others with melted down candy corn.
- Some I added molasses to.
- I tried different proportions of peanut butter to syrup.
- I tried folding the candy around the peanut butter (never try that. You’re welcome).
- And finally, after 8 tries and a two week break, I have it. Potion #9 is it.
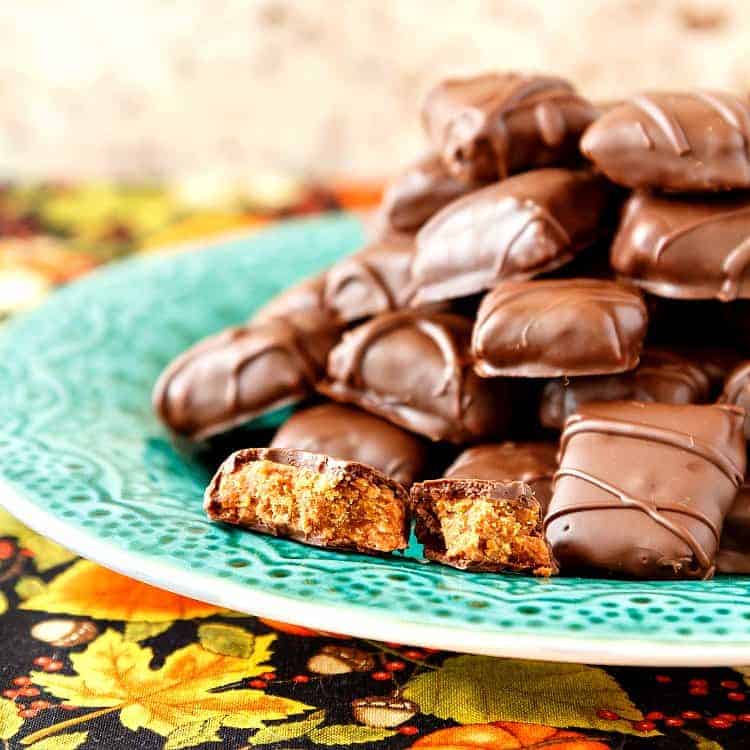
Crispy.
Crunchy.
Peanut buttery.
It’s notable that the new version of Butterfingers no longer contains molasses or confectioner’s corn flakes.
Honestly though, my copycat version is pretty darned good just the way it is, so I’m not changing it!
Made these today. Wow! Absolutely delish and exactly what I hoped for! Thank you for your efforts to perfect this recipe. You succeeded! Working with exact weights and temperatures makes it almost foolproof.
Reader and Hero to Her Kids Trina
There is a bit of a learning curve on the folding at the end. You warned me to err to the side of too soft, but I made one fold too many so the final layers didn’t quite marry. Once cool most of my pieces peeled into two thinner pieces. Not ideal, but twice as many! Lol. And the crumbly bits got stirred into a bit of chocolate and dropped by spoonfuls to set up. Nothing wasted!
Gonna try another batch tomorrow. My kids think I’m a genius, but you get all the credit! Thanks for sharing!
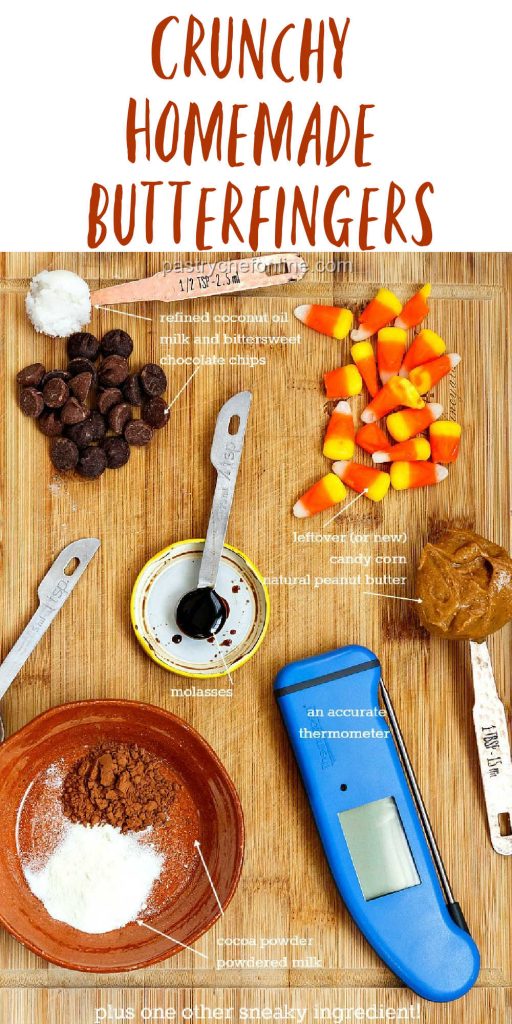
Ingredients and Substitutions
Here’s a rundown of what you’ll need to make them, with the exception of one sneaky ingredient you’ll get in the recipe.
If you’re adept at working with and manipulating molten sugar, you can skip down to the recipe.
Otherwise, I’ll go over the ingredients, the steps to make them, and give you some tips that will help you be successful with this recipe.
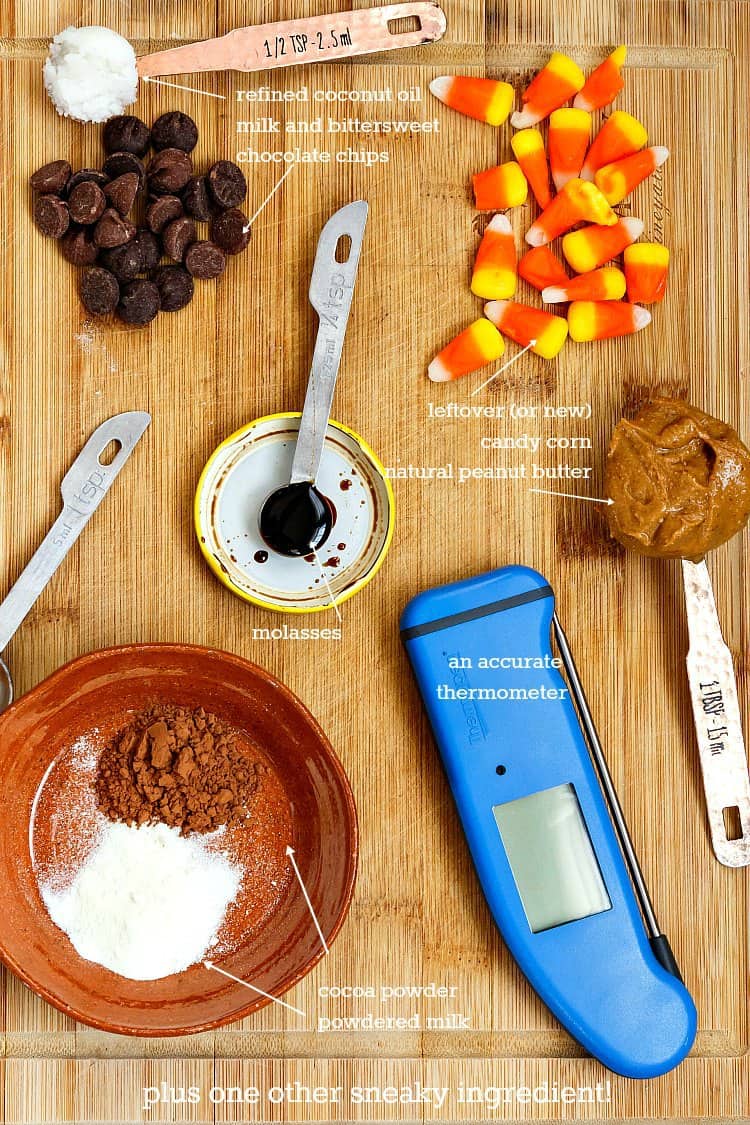
- cornflakes: Adds a bit of textural contrast and helps to create the layers in the Butterfingers. NOTE the “new version” of commercially available Butterfingers doesn’t contain cornflakes anymore, but they are readily available and work well in this recipe, so I’m not changing it
- peanut butter: I use Smucker’s Natural. I expect you could use a peanut powder like PB2, but I have not tested it. And Smucker’s works great and lends a truly peanutty peanut taste to the candy
- cocoa powder: There is just a touch of cocoa powder in the official recipe, so I use it here too
- dry milk powder: Ditto
- candy corn: Provides the perfect balance of sugars. If it’s not Halloween and you can’t find candy corn, you can substitute orange fondant (see below)
- water: Added to the pan with the candy corn so it can dissolve evenly before it gets too hot
- molasses: Adds a bit of backbone to the candy centers. The new formula leaves it out, but I’m a fan of the OG Butterfinger, so in it stays
- milk chocolate chips: A mixture of two chocolates to pretty closely approximate the kind of chocolate used in the “real” ones. I use Ghirardelli chips for both milk and dark
- dark chocolate chips: Opt for bittersweet over semisweet if there is a choice
- coconut oil: Melted together with the chocolate, adding coconut oil turns the chocolate into coating chocolate, which you do not need to temper to ensure it sets up nicely
What To Use Instead of Candy Corn
Candy corn is basically fondant with some confectioners’ glaze on the outside.
If you don’t like candy corn, use fondant.
Don’t go with the standard, found-in-craft-stores fondant, because it doesn’t taste very good.
Here’s my recommendation:
This is such a beautiful treat but it tastes delicious at the same time! And what a great treat for Halloween!
Reader REbecca
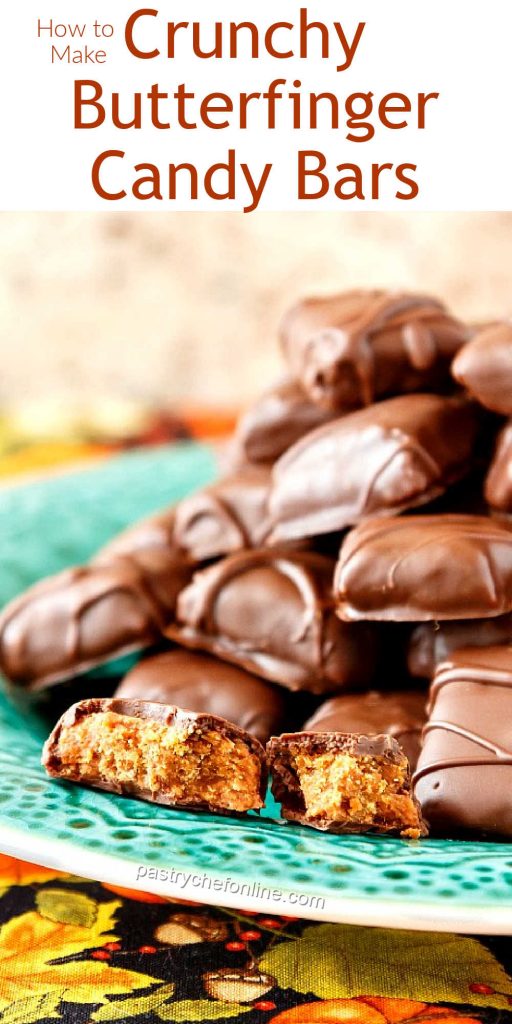
How To Make Homemade Butterfingers, Step by Step
It will take roughly 30 minutes to make your Butterfingers, not counting cooling time, dipping time, or time for the coating chocolate to set up, so plan accordingly.
- Get Corn Flakes Ready
Spread out your corn flakes in the center of a Silpat-lined half sheet pan. Put the pan close to the stove. - Mix Up Your “Dry” Ingredients
Stir together the peanut butter, milk powder, and cocoa powder. Place that bowl convenient to the stove as well. - Cook the Candy
Add candy corn and water to your pan. Heat over medium heat until the candy corn has melted. Then you can raise the temperature and cook the candy until it reaches 290F. Add the molasses and continue cooking until the candy reaches 305F. - Stir all ingredients together.
Once your candy reaches 305F, immediately remove from the heat and stir in the peanut butter mixture. Be careful and use a long-handled wooden spoon to minimize your chances of burning yourself. - Pour candy out onto prepared Silpat.
Scrape the candy out onto the corn flake-lined Silpat. Use the Silpat to fold the candy over to incorporate the corn flakes. - Roll and fold the candy.
As the candy cools and becomes more solid, you will be able to fold the candy over on itself into thirds, like folding a letter. Do this a couple of times using the Silpat to help you so you don’t burn yourself. As the candy continues to cool, you’ll be able to roll it out and fold it without the Silpat (although it will still be very hot, so be careful.) - Score, Cool, and Dip. Done!
Give the candy a final roll to about 1/3″. Use a pizza wheel to score the candy about halfway through. You can make whatever shapes you like. I’m a fan of tiny squares rather than large bars, but make them how you want them. Once cool, break the candies apart and then dip them in the chocolate coating and let harden.
You really do need Silpat or some other silicone baking mat in order to make these. Otherwise, the sugar is entirely too hot to touch safely.
Are These Candy Bars Hard to Make?
I would definitely categorize this recipe as intermediate to advanced.
Would you like to save this post?
It’s not hard to make, per se, but you are working with molten sugar, and you have to be careful. This is not a recipe to make with your kids unless they are older. Like maybe teenagers.
Let younger kids help you dip the candies in chocolate, but keep them out of the kitchen or at least at a respectful distance while you’re making the centers.
And definitely keep pets out of the kitchen while working with boiling sugar. Much better safe than sorry.
PRO TIP 1: When working with molten sugar, keep a bowl of very cold water handy so you can immerse your finger or hand if a little bit of sugar splashes on you.
Whatever you do, don’t stick your finger in your mouth. You’ll just end up with a burned finger and a burned mouth.
PRO TIP 2: unless you’re making a ton of specialty chocolates, using a regular fork for dipping will work just fine. No need to get fancy chocolate dipping forks unless you really want them.
What Can Possibly Go Wrong?
For one, you can burn yourself. We’re cooking the candy corn mixture to just over 300F, and then we have to stir in some really thick peanut butter so be careful.
Once I stir in the peanut butter, I scrape the molten candy out onto a Silpat and then knead it through the Silpat by folding it over.
But, I have a fairly high tolerance for heat. If you don’t, consider using an oven mitt or even better, get an Ove-Glove to help you in kneading through the Silpat.
You could also cook the candy too hot so it caramelizes, which is not what we want.
Or you might not get it hot enough so that when it cools, your candy won’t be crispety crunchety.
The only help for that is to have an accurate instant read thermometer or candy thermometer so you can monitor the temperature and know just when to add the peanut butter to the pot.
Please note that a candy thermometer clipped to the side of the pot might not take a true temperature as the candy is generally cooler at the sides. Also, it might not read accurately unless the molten candy is deep enough.
For this candy, you’re only looking at 8 oz of candy, so either double it or plan on tipping the pan to get a good reading with a clip-on thermometer.
Are Butterfingers Gluten Free?
According to the Celiac Disease Foundation: regular Butterfinger bars are gluten free, but: “…only in fun size, singles, and share pack (Butterfinger Bites, Butterfinger Minis, Butterfinger Cups, and special holiday-shaped Butterfinger items are NOT considered gluten-free).”
Be cautious if you have a gluten allergy or are Celiac.
These copycat crispy Butterfinger bars are gluten free as long as you are careful with your ingredient sourcing.
Do I Have To Temper Chocolate To Make This Recipe?
No. I mean, you could use couverture and temper it, but since tempering can be finicky and I don’t know what the conditions are in your particular kitchen, I wrote this recipe to use homemade coating chocolate.
It still sets up shiny like tempered chocolate, but it requires no special skill except for the ability to wait for the chocolate to set completely. And that can take a couple of hours if not more.
The secret? Refined coconut oil. The formula is this: use 10% of the weight of the chocolate in oil. So for 10 oz of chocolate, you’ll need one ounce of oil. I will say it again.
If you don’t have a kitchen scale yet, please get one. I promise it will make your life much easier. You will be so happy.
Other Homemade Candy Recipes You Might Enjoy
Looking for more candy? Try this bourbon honeycomb candy. Or maybe this cashew toffee is more your style. And do not miss my butterscotch hard candies. Seriously.
If you’d prefer to not work with molten sugar, try my butter mints. No cooking necessary, and they’re really tasty!
And don’t sleep on my latest copycat candy bar recipe for Zagnut bars. My Zagnut recipe has thin, crispy layers much like the Butterfingers but is dipped in peanut butter coating and rolled in coconut. They are excellent!
Don’t deny yourself. Make some candy. It’s rewarding and delicious!
And remember, if something goes awry and your candy gets crumbly (this happened to me AT LEAST TWICE while testing), stir the crumbles into ice cream. Seriously, they’ll still be delicious!
Questions?
If you have any questions about this post or recipe, I am happy to help.
Simply leave a comment here and I will get back to you soon. I also invite you to ask questions in my Facebook group, Fearless Kitchen Fun.
If your question is more pressing, please feel free to email me. I should be back in touch ASAP, as long as I’m not asleep.
A Note About Measurements
My recipes are almost all written by weight, including liquids, unless otherwise specified.
For accuracy and consistency of results, I encourage you to buy–and use–a kitchen scale.
I promise that baking and cleanup will be so much quicker and easier.
This is the scale that I recommend for home use. I have owned and used one for years.
Please Take A Moment to Rate and Review
It helps me and other readers so much if you take a moment to rate and review this recipe.
Your star rating and comments help others decide whether the recipe is worth making, and your feedback helps me continue improving recipes here at Pastry Chef Online.
Other lovely ways to share include pinning or posting on your favorite social media platform.
Thank you so much for taking the time!

Crispy Homemade Butterfinger Recipe
Equipment
Ingredients
For the Centers
- ½ cup corn flakes cereal lightly crushed
- 8 oz peanut butter I use Smucker’s Natural
- 2 teaspoons cocoa powder sifted
- 2 teaspoons dry milk powder
- 8 oz candy corn
- 2 oz water
- 2 teaspoons molasses I use Grandma’s
For the Coating Chocolate
- 8 oz milk chocolate chips I use Ghirardelli
- 8 oz 60% bittersweet chocolate chips I use Ghirardelli
- 1.6 oz refined coconut oil
Instructions
For the Centers
- Spread the corn flakes out in the center of a half-sheet-sized Silpat. Set aside convenient to the stove.
- MIx together the peanut butter, cocoa powder, and milk powder in a small bowl. Set aside convenient to the stove.
- Put the candy corn and water in a medium saucepan. Melt over medium-low heat, smashing the candies down with the side of a heat resistant spatula until the mixture is smooth.
- Increase heat to medium/medium-high and bring to a boil. Cook until the mixture reaches 290F.
- Add the molasses and swirl the pan to distribute it. Continue to cook until the candy reaches 305F.
- Immediately remove from the heat and scoop the peanut butter mixture into the candy. Be careful, and stir it together as completely as you can.
- Scrape the candy onto the corn flaked Silpat. Using the Silpat (and possibly an Ove Glove) fold the candy together with the corn flakes so it is somewhat layered. Fold the candy over, then press it out (again, with the Silpat folded over it), then use the Silpat to fold that.
- The candy will firm up in a couple of minutes at which point you can use a rolling pin directly on the candy to roll it out to about 1/4″ and then fold it in thirds, like you’re making puff pastry. Continue rolling and folding until the candy is stiff but not hard. Err on the side of too soft rather than too hard, or you won’t be able to score it.
- Roll the candy one last time to 1/3″ or so. Use a metal pizza cutter or a bench knife to score the candy about halfway to three quarters of the way through. You can choose to make them into small squares or into traditional bar shapes. It’s your call.
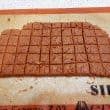
- Allow candy to cool completely. Break along score marks.
To Dip in Chocolate
- In a microwave-safe bowl, melt the two kinds of chocolate chips and the coconut oil on medium power in 30 second bursts. Stir in between. When chocolate is mostly melted, stir until it is completely melted.
- Line a half sheet pan or two with Silpat. Keep them close.
- Brush off any errant candy crumbs from your centers. Put 5-6 into the melted but not super hot chocolate.
- Using a candy fork or just a regular fork, turn them to coat. Pick one up on the tines of the fork and tap it against the rim of the bowl to even out the chocolate and let the excess drip off. Make sure the candy is right-side up. You can tell because the bottoms are completely flat and the tops have a slight curve from the scoring. Place each dipped and drained center on Silpat to cool completely. This could take a couple of hours.
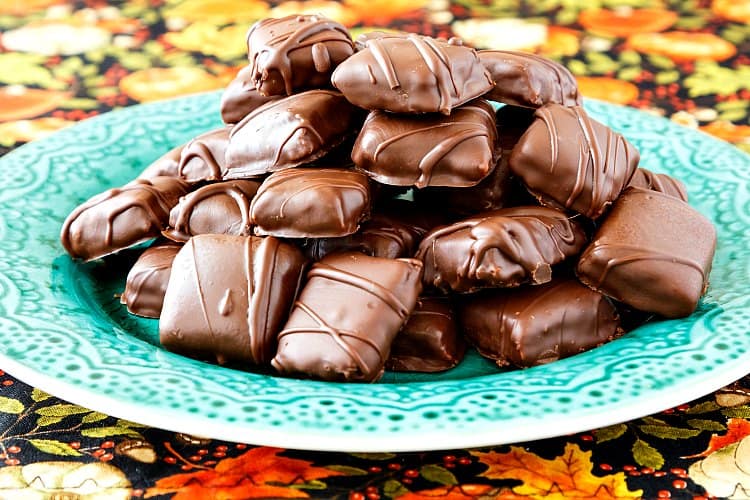
- You can stop with one dip, but I like chocolate, so I double dipped mine. Reheat the chocolate and dip and drain all the candies a second time. Allow to cool. I drizzled some additional melted chocolate over the tops of the candies. This is completely optional, but it looks cool.
- Store, uncovered, in a dry place to cool/set for a few hours or overnight. I put my tray in the microwave. The oven (as long as it’s off and you don’t forget they’re there) is a great place to put them as well, especially if you have animals or kids who might try to sneak them. As long as you know where they are and you can sneak them, it’s all good.
- Package however you’d like, in cello bags or small candy boxes, or just put them on a plate. Share, or don’t. I’m not judging.
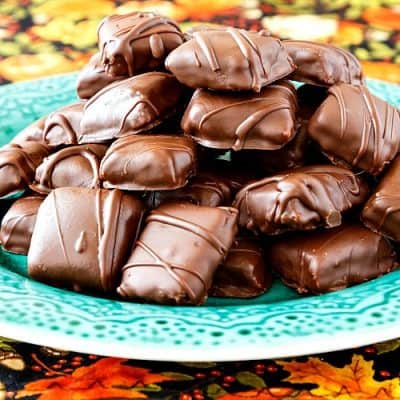
- These crunchy Butterfinger candy bars will stay crunchy for at least a week or two, depending on humidity. They will be gone well before they lose their crunchiness, though. Trust me.
Did You Make Any Changes?
Notes
- 4.5 oz of light corn syrup
- 3.5 oz granulated sugar
- 2 oz water.
- Stir together well, put the lid on your pan and bring to a boil.
- Allow this mixture to boil for a minute or two to wash down any sugar crystals off the sides of the pan, and then continue with the recipe as written.
Nutrition
Would you like to save this post?

Hi, y’all! I hope you’ve enjoyed this post and hopefully also learned a thing or two.
If you like my style, I invite you to sign up for my occasional newsletter, The Inbox Pastry Chef.
Expect updates on new and tasty recipes as well as a bit of behind-the-scenes action. I hope to see you there!

And that’s it, you guys. Maybe not quite as crispy as the originals, but just as crunchy. Homemade Butterfinger candy, y’all. Nine times is the charm.
Thanks for spending some time with me today, friends. Enjoy the copycat crunchy Butterfinger candy bars!
Take care, y’all.


Join in Today!
A fantastic deep dive into a homemade classic! The crunchy Butterfinger candy bars look perfectly crisp, flaky, and packed with that signature peanut-buttery crunch—amazing attention to detail to recreate the real texture at home. A fun and impressive candy-making project for any sweet tooth!
Thank you! I hope you give them a try!
I wish all of those requests for ratings and comments actually linked all the way down here to the comment box. I almost didn’t find it!
This is my only complaint though. This recipe definitely pushed the edges of my ability level with candy-making, but it worked out in the end. I’ll need to get one of the recommended thermometers for future endeavors because my clip-on definitely didn’t read hot enough and I nearly burned my sugar. However, I make salted caramel regularly so I fortunately know that smell and what to do to salvage it.
The candy centers turned out perfectly and my partner is going to freak out when he wakes up to a batch of homemade butterfingers…if there are any left.
Woohoo! Ty so much for this one.
It is definitely one of the more advanced recipes on the site, Erin, and I’m so glad it worked out for you. Sense of smell really comes in handy to check yourself! Hope your partner loves them! Check out the Zagnut recipe, too. It is sooooo good!
The first batch I made I messed up but didn’t know it! I couldn’t tell because the taste was phenomenal! I didn’t cook the candy corn long enough or hot enough. I was afraid the thermometer wasn’t working because I couldn’t see the temp go up in my shallow pot. I doubled the recipe then I was able to actually get a correct reading. Mistakes still taste so so so so so delicious
Oh, yeah, if you are making a single batch, you do need to use a smaller pot so you can get an accurate temp reading. So glad it didn’t go to waste and that you still enjoyed it, Terri!
I’ve not made ” any” candy or weighed my ingredients before this! I used crunchy Pbutter nearly ate the whole batch to myself (batch is too small) great for practice. Doubled the batch, now I’m gonna share! Superb recipe, friends want this recipe now! Thank you so very much I will treasure this! Better than any store!
Terri, you are showing great willpower to share–I am a terrible share-er when it comes to this candy! lol I am thrilled you love the Butterfingers!
if not using candy corn, I do not understand where exactly to come into the recipe. can you be .a little more specific?
You can substitute an equal amount of fondant for the candy corn. Use orange to keep the color “butterfinger-y” but white will work just as well. I hope that helps. Enjoy the candy!
I want to make these and hide a bunch in my freezer for ’emergencies’ – do you know if they freeze ok?
I like the way you think, Becky! Yes they should freeze just fine. I’d freeze them uncovered for an hour or so, and then individually wrap tightly in plastic wrap. Then put all your wrapped guys in a ziplock. They should last a good 3-4 months that way. Enjoy!
My candy crumbled too much to make into bars, but the basic recipe and the hints were “spot on” and the fault was completely my own. In any event, I used the crumbles, with a bit of peanut butter and chopped peanuts, to make truffle-like candies, which were a huge success. (I took them to a party and every single one was immediately grabbed, my beloved complaining that he didn’t get one. I reminded him that he had been the original taste tester who had declared the truffles to be yummy. That put an end to the complaining:) The taste of the candy was unbelievably delicious – better than commercially made Butterfingers IMHO. I didn’t find candy corn, so used the corn syrup alternative provided and it worked just fine. You can’t go wrong with any recipe Jenni provides and this is just one more example of that fact.
I love that these guys are super tasty even if they crumble. Good save with the truffles, and I’m so glad everyone enjoyed them!
I just made these using the alternative/no candy corn method, but w/ DARK corn syrup (recipe calls for LITE)….and they’re pretty amazing. I’ve made also made the original version w candy corn and it simply can’t be beat. Thank you for sharing this fun recipe!
Hey, Gino! I’m always so happy when someone tries and loves this recipe! It can sometimes be a bit temperamental, but I think it’s really great too.
These are amazing! My husband can’t have peanut butter, and wanted to give him a chance to try butterfingers, so I used this and substituted almond butter. These do not disappoint! I did a side by side taste test and they are spot on. I guess I’m going to have to bulk buy candy corn during the Halloween season to stock up…
Alia, I’m so excited you made these, and it’s great to know that almond butter works as well as peanut butter. Definitely stock up on candy corn.
Ich werde dein Rezept mal nachmachen, leider gibst du keine Gramm Angaben an, ich hoffe es geligt mir.
Bis jetzt habe ich imer das Rezept – https://americanbakeringermany.blogspot.com/2021/05/recipe-butterfinger-candy-bars-copycat.html nach gemacht, es ist großartig, bin gespannt, wie dein Rezept wird, wenn es mirgeligt.
Viele Grüße sendet,
Gabriel
Hey, Gabriel. My recipe is patterned after the ingredient list for “real” Butterfingers, so I hope you enjoy it.
The recipe is written in ounces by weight, so if your scale does conversions between ounces and grams, you should be fine. If not, multiply all the ounce amounts by 28.35 to get grams.
Enjoy!
MY peanut butter and sugar mixture keeps solidifying when I stir them together. Any help?
Hey there. This can definitely be a finicky recipe. Consider heating the peanut butter in the microwave to give you a bit more working time.
Um, hello, it’s CRISPETY, CRUNCHETY lolol
You are correct, but those extra letters made the title too long! lol
These were terrific, and everyone I asked before disclosure said “Butterfinger!” I used a bench knife for scoring. I only dipped once in chocolate, so next time I will only use 4 oz of each type. Next time I will add paraffin instead of coconut oil so that the chocolate sets up firmly and is less melty. I’m wondering if not using candy corn, adding a bit of orange food coloring would do the trick?
I’m so glad they passed the taste test! Candy corn is basically just fondant, so you could sub in the same weight in good-quality fondant (I wouldn’t use Wilton, because it does not taste good) and a bit of orange food coloring. 🙂
I think I’ll be making these soon. Wouldn’t a pinch of salt enhance the flavor? Maybe there’s salt in the corn flakes already?
Yes, I generally put salt in things, but there is no salt in the ingredient list for Butterfingers, so I left it out, trusting there was enough salt in the peanut butter to do the trick. Sprinkling the chocolate with a few flakes of Maldon would be lovely, though!
I’m glad you specified that you used natural peanut butter. Most recipes use un(?)natural and don’t say. This can make things go wrong in a recipe.
I see you prefer Smucker’s, but do you use creamy or chunky?
I would also like to know your preferred brand of candy corn for this.
Brach’s is the most common, but I’m not a fan. Zachary is my preferred brand because it is less cloyingly sweet and tastes less artificial.
Unfortunately, I’ve had other recipes go wrong using my Zachary leftovers since they often take into account the sweetness.
Hey, Stan. I’m glad you asked me to specify. I use Smuckers creamy, although at some point I want to try peanut powder and see how that works. I do use Brach’s and have not even heard of Zachary’s. I will have to check out the ingredient list to see if I think it would yield similar results. I shall report back.
Okay, I’ve looked at the ingredients of both. Both have the same 2 main ingredients, but the wild cards are egg white in Zachary versus gelatin in the Brach’s. So for that reason, I would go with Brach’s for this recipe and use Zachary just to enjoy straight.
Oh, I also want to make a suggestion. Ghirardelli makes ‘Melting Waters’. They’re available in milk and dark chocolate “flavors”. It is similarly made to be used to melt easily and coat while not requiring tempering for the shiny finish.
I’ve used it in other candy making and it’s very tasty and easy to use.
Since it comes in milk and dark, you can just get a pouch of both and mix them 50/50.
Oh, very nice! I used to get great coating chocolate from Chocoley, but they’ve been out of business for several year now. I’ll look for the Ghirardelli. Thanks!
Thanks for posting this recipe! I’m a big fan of the old butterfinger before they changed it a few yrs ago. I think your recipe for the peanut butter inside was very close to the original. The only trouble I had was after rolling and folding the mixture fell apart into a crumbly mixture so I wasn’t able to make into bars. Next time I will mix, roll out and cut into bars and not fold as much. Also I’d skip the coconut oil in the chocolate and maybe use butter instead since the chocolate had a coconut taste to it. Overall I really liked it.
The new butterfingers are terrible. They are so hard in the center, more like hard tack candy and the chocolate leaves an after taste in your mouth. I bough a couple and just thought they were old because they were so hard. I gave my dog a small bite after I sucked the terrible chocolate off of it and she had trouble chewing it. Will not be buying anymore. I will try to make some using your recipe. Seems they always destroy something that was tasty to please the health food nuts and the diet crowd. It is candy after all. Hershey also sold their Bar None candy bar to Ferrero. It was another one of my favorites. Thanks for your efforts in creating this for those of us who love the original.
I totally get that. I remember the oatmeal cream pies from back when I was a kid, and the current version is not at all like those, and I miss that texture and flavor. I hope these work out for you, Judi. Please let me know if you have any questions!
This recipe was very easy and so far they taste great even before the chocolate coating
Mine seem dark in color and not very ‘orange’ did I do something wrong? Taste great regardless
I’m not sure whether you did anything wrong–my guys are well lit in the photos, and that makes a difference. But if they taste good, I think you’re okay. If they were overcooked, they’d definitely taste a little bitter and borderline burnt. I hope you enjoy them once they have their chocolate robes on!
This is amazing! Looking at those yummy pictures… I will try it ! Thank you for sharing this.
I hope you enjoy them!
I’ve made this recipe 5 times over the last month. Butterfinger is my favorite candy bar, so I wish I discovered you years ago because I could’ve saved SO much money. This legit tastes like actual butterfingers!!! You are a genius!
I am thrilled you like it! It was definitely a hard-won recipe!
Dumb question, I have everything BUT powdered milk. Should I wait until I get some or is there a substitute?
Honestly, I never tried without it, and it was such a fussy recipe to figure out that I’m just not sure. It’s only 2 teaspoons, so it will probably be fine. Let me know how it goes!
I am shook!! Butterfingers are my favorite candy bars. I could’ve saved SO much money over the years if I had just found your recipe sooner. These were delicious!
Made these today. Wow! Absolutely delish and exactly what I hoped for! Thank you for your efforts to perfect this recipe. You succeeded! Working with exact weights and temperatures makes it almost foolproof.
There is a bit of a learning curve on the folding at the end. You warned me to err to the side of too soft, but I made one fold too many so the final layers didn’t quite marry. Once cool most of my pieces peeled into two thinner pieces. Not ideal, but twice as many! Lol. And the crumbly bits got stirred into a bit of chocolate and dropped by spoonfuls to set up. Nothing wasted!
Gonna try another batch tomorrow. My kids think I’m a genius, but you get all the credit! Thanks for sharing!
Yay, Trina! I’m so glad the directions helped you succeed. I admit it doesn’t always work out for me, so I tried to be as explicit as possible. I love that you made your own Butterfinger nuggets with the crumbly bits–I do love those crumbly bits!
These are DELICIOUS! You did an amazing job! I made another recipe that didn’t require a candy thermometer but they really were not even close to a butterfinger. Your recipe is spot on and it is really good even without chocolate coating. I do suggest for people trying this for the first time to read through the instructions and keep them close to refer back to. Your steps are well written and easy to understand. Lavender oil is very good to keep in the kitchen for burns. A lot of glass artists do this while making beads which gets close to 1000 degrees and really smarts when a little piece flies off and hits bare skin.
Wow, I am thrilled that you like them! And that tip about the lavender oil is great. I had no idea, so thank you for that!
Jenni, I am definitely going to try your recipe! I always did love the old Butterfinger center, and used to scrape off as much of the awful fake chocolate coating as I could before eating them. I disagree with Stephanie….I think that the new Butterfinger recipe IS actually much better, even the chocolatey coating is not as bad, but still not great. So glad I found your website, and thanks for sharing! I will come back and let you know how my effort turns out.
I’m so glad you’re going to try it! Wait for a day with low humidity to maximize your chances of success because this recipe can be a bit finicky. But it really is delicious!
Thanks for including a whole section berating men and telling them to not even try.
I’m folding in my peanut butter just cause u said not to.
Hahaha!!! You go for it. Sorry to have offended your manly yet delicate sensibilities!
Vagina owner here.
I’m seconding their sentiment about discouraging men. Up
The new butterfinger recipe is terrible! I am soooo disappointed that the flavor changed so much! I can no longer enjoy a butterfinger and every time I would eat one they made me think of my grandmother. Before she passed she would play bingo in the nursing home and would always save me her winnings (butterfingers)! Now they’re just plain GROSS and it makes me sad every time I see one… I know that’s silly… but it’s true! Is your recipe a copycat of the old version? After reading your comments, I believe it is, but I don’t want to purchase items and go through the trouble of making these only to discover that they taste like butterfinger’s new (terrible) recipe. Thank you so much!!
I’m sorry you have so many good memories tied up in the old recipe, because it makes it so hard when they change things. So it’s not silly at all. I get it. I created this recipe to be a copycat for the old version, but the chocolate I use is of better quality than what coated the old or new Butterfingers. lol But the centers are pretty dead on as far as I’m concerned.
If you are used to working with sugar at high temperatures, I think you’ll have good results. This is definitely not a beginner recipe, though. If you regularly work with candy, then by all means go for it. But the centers can be a bit temperamental, especially on humid days. You may end up with something more crumbly than solid. It’s not the end of the world, and you can still drizzle it with chocolate, top some ice cream with it, and call it a Butterfinger sundae!
If you’re going to go for it–and I’m not trying to talk you out of it–please give a shout if you have any questions at all before you start. You can leave another comment here or shoot me an email to onlinepastrychef at yahoo dot com. I check both frequently throughout the day. Good luck!
Another ding dang story with ads when i just want a recipe. argh.
Bless your heart, there is no real story here other than how I went about testing this recipe. Nine times. In hopes that my readers would find success with it. If you prefer, you can jump straight to the recipe with the “Jump to Recipe” button at the very top of the post, thus bypassing my ding dang story of how to actually make this candy successfully. Best of luck to you.
I don’t have a silpat. Can I use parchment paper instead? Thanks.
I would not recommend using parchment for this since you have to manipulate the candy while it is still very hot, and the Silpat will do a much better and safer job of this than trying to use parchment. You don’t have to get name brand Silpat. There are some much more affordable options if you look for a “silicone baking mat.”
I want to try this recipe but there are 2 ingredients I don’t have & won’t use in the future so my question is
Do I have to use powder milk & coconut oil. Can I use vegetable oil & plain milk
Thanks for your help
Mary Parent
Hi, Mary. You can absolutely try this recipe without the powdered milk and subbing veg oil for coconut. I’ve never tested it that way, so I cannot vouch for your results, but my gut feeling is it will turn out just fine. Let me know how it goes and how they turn out!
What can my husband do to help? LOL – you are a wise woman!
Holy cow you figured out the million dollar recipe! It’s like cracking the DaVinci Code! Can’t wait to taste the beauties!
Haha!! Thank you! All the tests were tasty, but I really do think I got it right on try #9!
I’m looking forward to trying this tomorrow. Thanks for posting! However, just a heads up – I’ll probably blacklist this domain because the layout is a nightmare. I’ll check back after a while, tho.
I take pains to make sure the user experience is as good as it can be. Please tell me specifically what the issues are that would cause you to “blacklist” my site and perhaps I can make it a bit more user friendly. I won’t be removing video though since that is how I am able to earn money to provide you with free recipes and instruction. Thanks!
First time on your website, and I agree with Dale- the layout is one of the less user friendly ones. There’s a bar at the top, a bar at the bottom, buttons on the sides plus ads on the sides, and I even had an ad pop over top the recipe while I was reading through it. If someone has their screen resolution set higher to make things bigger, all of that will cover up the content. Trying to read your process was also frustrating due to the ads taking up more space than the actual content!
I am looking forward to trying the recipe though- using candy corn is brilliant!
I hope you enjoy the Butterfingers. Took me 9 times to get it right, and my ad revenue allows me to keep the site free. Please give a shout if you have any questions about making the candy. Take care, and Happy Holidays!
This is a perfect example of persistence paying off – in a very delicious way. I can’t wait to give this recipe a try. Butterfingers are one of my favorite candy bars.
OH, yay! I am very much looking forward to your review!
THanks for sharing this recipe! I made it and it tastes just like the butterfinger crunch! Heads up to anyone who makes it; I got a little nervous heating as it smelled like it was burning… in the end; nothing had burned and i think that was just the smell of candy corn at 290 degrees.
These are not too sweet; which i love
I added 1/4 tsp salt; because i love salty sweets
Thanks again!
Yay, I am so happy you liked them! Good call on the extra salt–I am a salt girl too, and I never say no to extra!
What a great recipe! I’ll definitely be sharing this with my readers this Halloween 🙂
Awesome! I hope they enjoy it, and thank you!
So happy you got your recipe to work for you! I’ll have to try these when I come down off my Halloween sugar coma. First I have to get past Christmas. So much chocolate, so little time! And oh.em.gee these look fantastic!
Thank you, Sue! I’m so happy they finally turned out! I’m generally not quite this persistent, and the payoff was worth it! Maybe a lesson there? =) Can’t wait to hear what you think!
Good for you, Jenni! I knew you’d be successful! You’re not the type to give up, and your persistence certainly paid off. These look utterly fantastic!!! Butterfingers are my FAV!
Then you! I can’t wait for you to make them, Renee!
Woohoo! Super Chef does it again! Do you deliver?!?
I would if there were any left! These things are crazy easy to eat. Oops!
Thank you for doing all the work so we can just make them and enjoy! I’ve tried the candy corn recipes online and – not at all what I wanted. I really want the crunch. Can’t wait to give these a try!
The crunch is the most important part! I think these will make you so happy, Lorinda! =)
You did it! I’m just sad I wasn’t there to help you eat them 🙂
That would’ve been Very Helpful. Because I have no self control! Of if T were here, he’d have stolen a couple (before I dipped them in chocolate)! =)
I knew you could do it! So proud of you!!! 🙂
Thank you, Tina! I’m Very Excited! =)
You are Wonder Woman Jenni. Only you would keep trying and make it all the way to 9 tries! I can’t wait to get home and give these a try. If I have any luck with them (and I should given your excellent directions), my family may just be getting homemade Butterfinger candies for the holidays!! Smooches!
Eeep!! Yay! I know you guys will love them, Jane! xo