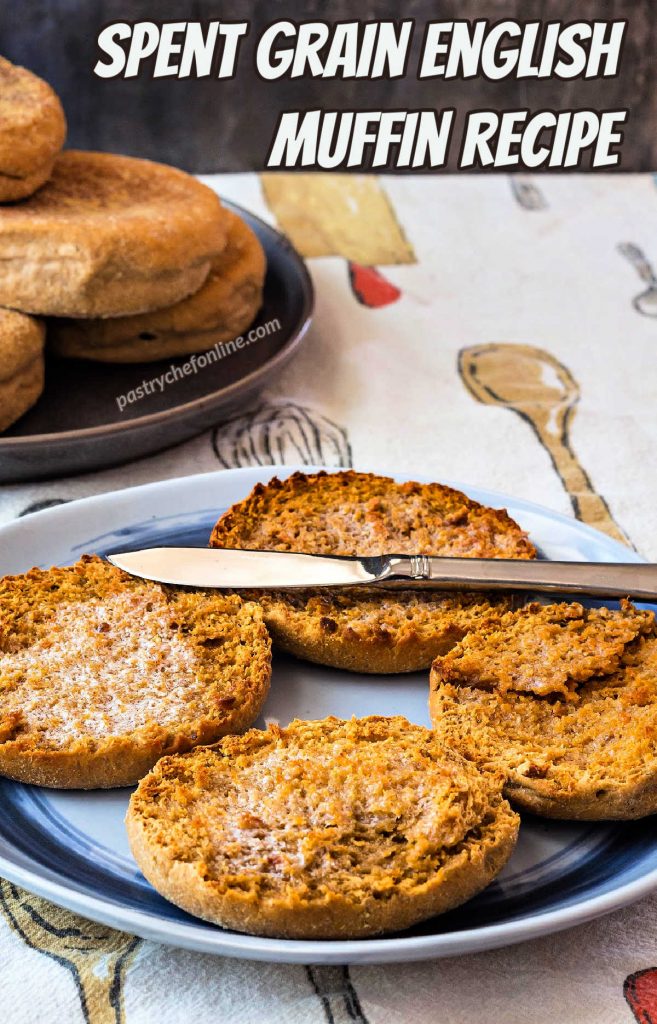
Today, I’m sharing with you how to take spent grains from brewing beer, dry them, whiz them up into flour in your blender, and then make some truly flavorful spent grain English muffins.
I love working with spent grains, either using grains from The Beloved’s brewing forays or getting some from local homebrew groups. My first attempt was a soft spent grain sandwich bread that is just wonderful. You may also be interested in my spent grain crackers, spent grain granola, or these soft, no-bake spent grain granola bars.
For ease of browsing you can find all my breakfast recipes in one place. Thanks so much for visiting!
Pastry Chef Online Participates in Affiliate Programs. If you make a purchase through one of my links, I may earn a small commission. For more information click to read my disclosure policy
Spent Grain English Muffins, At a Glance
✅Skill Level: Intermediate
✅Skills: Drying Spent Grains, Making a Sponge, Baking on a Griddle
✅Type: Yeast-Raised Muffins
✅Number of Ingredients: 8
✅Prep Time: 20 minutes
✅Cook Time: 25 minutes
✅Sponge/Rest/Rise Time: 6 hrs, 15 minutes
✅Yield: 10 English muffins
Jump Straight to the Recipe
Why Make This Recipe
Aside from feeling good about using an ingredient that would otherwise be tossed out, these English muffins are Good.
The spent grains give them so much flavor, texture, and color.
The recipe makes 10 nice-sized muffins, but you could also make 8 slightly larger muffins that would be suitable for making a breakfast burger or a larger, lunch-sized breakfast sandwich.
The recipe is easy to follow, and it’s fun to “bake” on the stovetop in a cast-iron skillet, so there’s that.
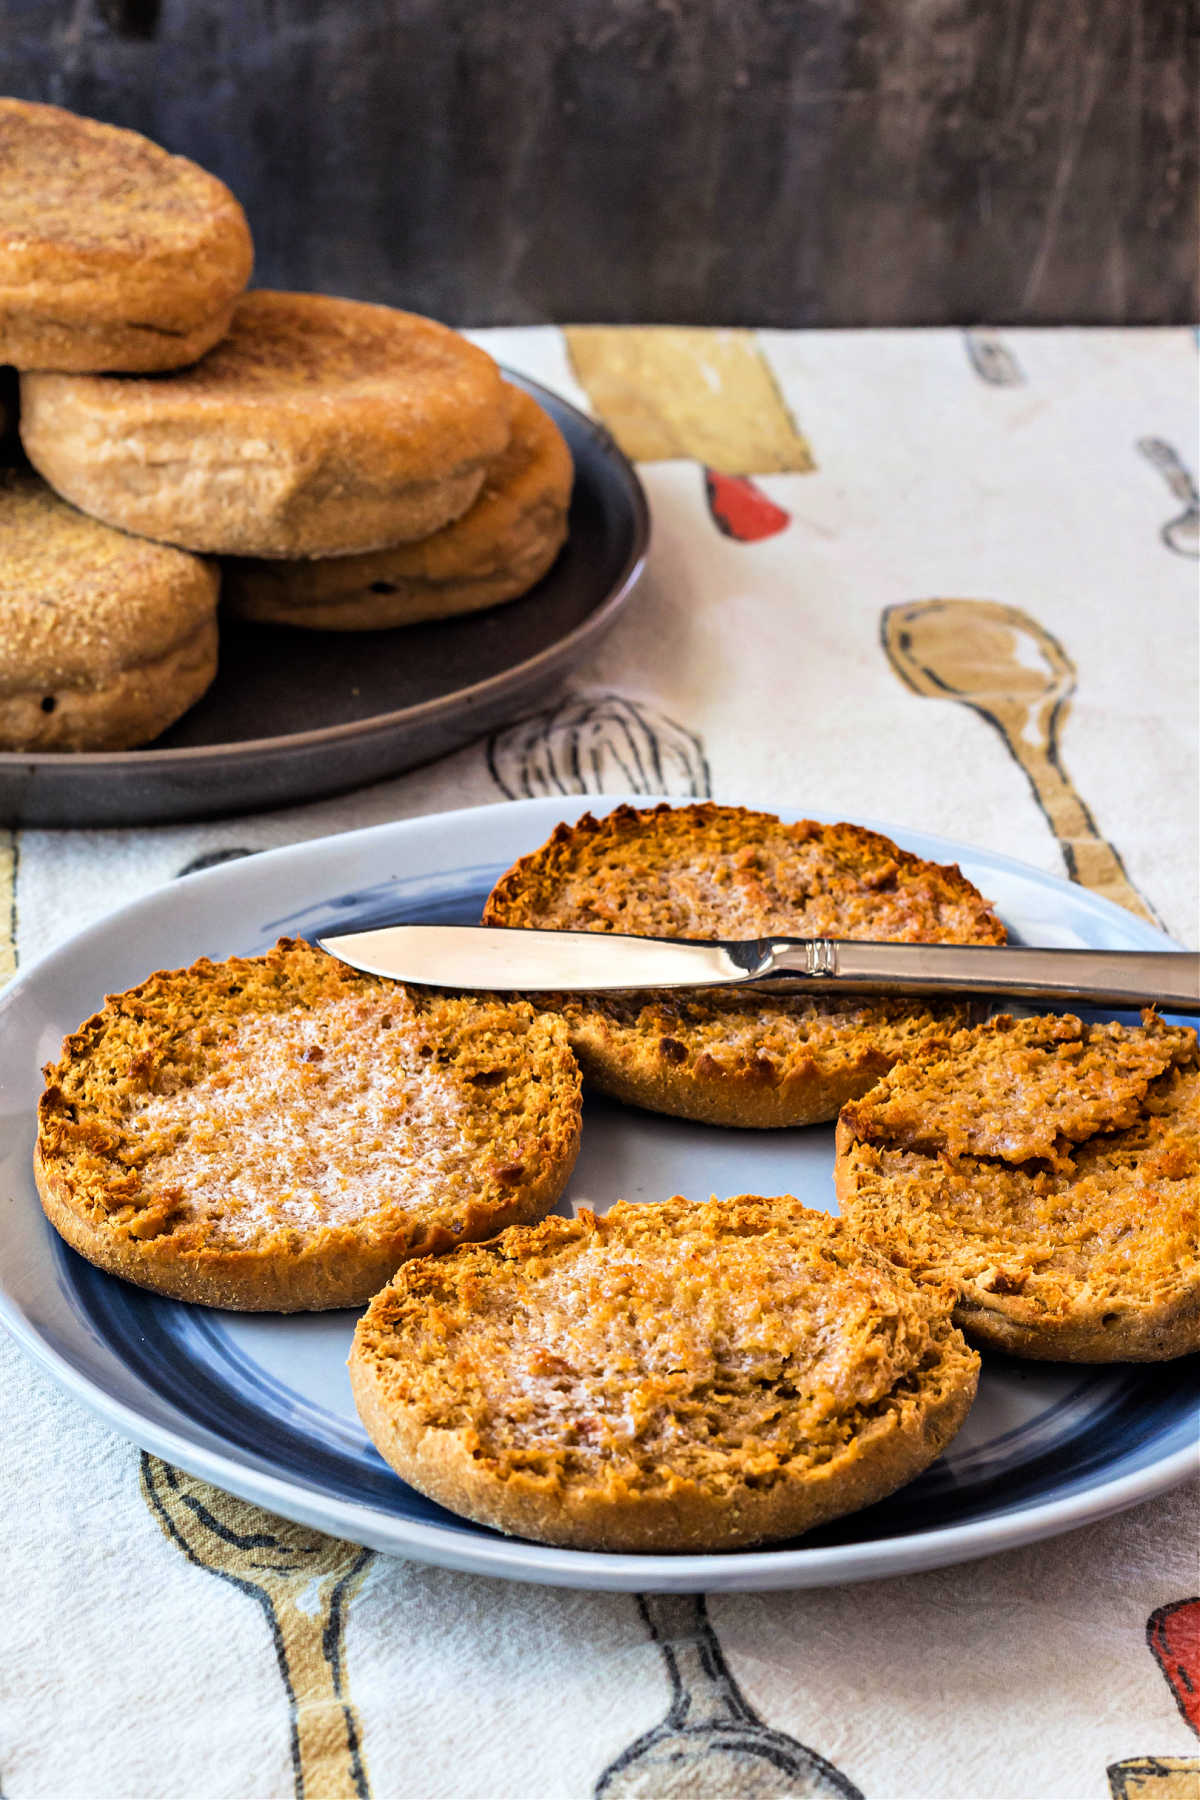
Spent grain English muffins taste just as amazing with sweet spreads on them as they do with savory, so they’re very versatile.
And maybe the best thing about this recipe is that, if you don’t have time to make them in one day, you can break up the action into two days.
If you decide to make these and you love them, I have a favor to ask:
When you do make this recipe, it will help me and other readers if you:
✅Rate the recipes using the stars in the recipe card
✅Leave a review when prompted in the recipe card (If it’s a positive review, and I hope it is, I’ll use it in the post as social proof)
✅Leave a comment on the post
Thank you so much!
How to Make Spent Grain English Muffins
Making spent grain muffins begins with drying spent grains. This is a very simple process, but it does take some time.
Drying Spent Grains
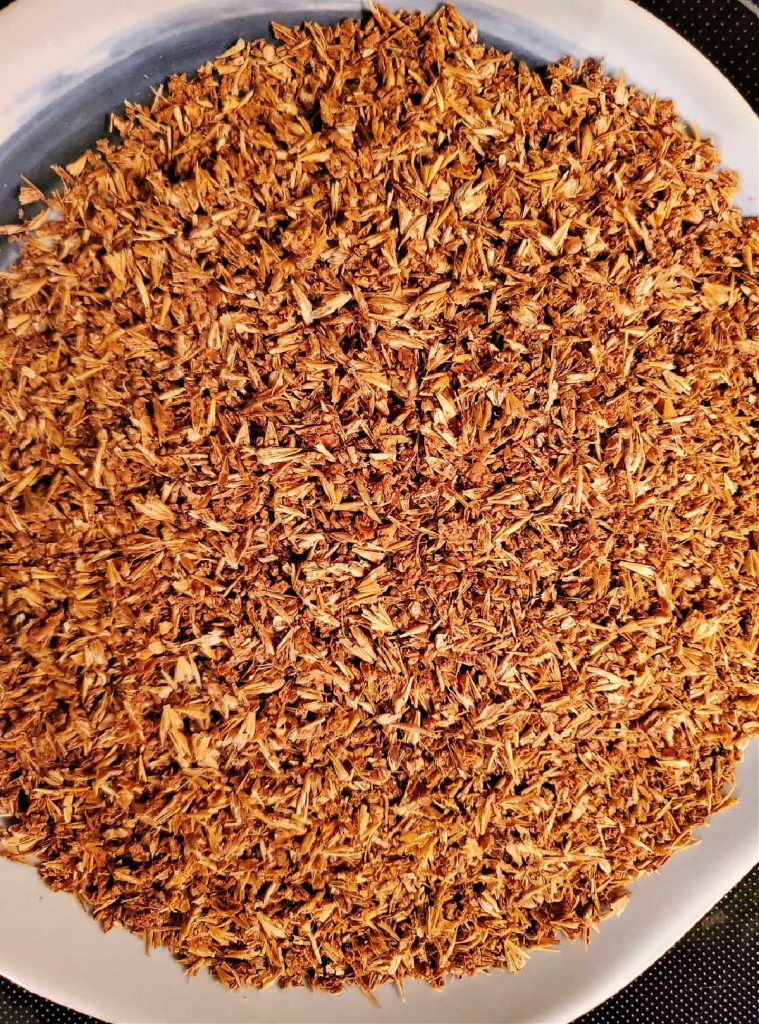
All you have to do is spread your spent grains out on a sheet pan and bake them on the lowest setting in your oven until they are completely dry. My oven’s thermostat will heat as low as 170F, so that’s the temperature I use.
Stir them every hour or so, until they are light and crisp.
This could take up to 8-9 hours, depending on how wet your grains were to begin with.
The only real caveat is to keep the depth of the grains to no more than about 1/2″ or so. If you have more grains than will fit in a 1/2″ layer in one pan, divide your grains up between 2 pans and switch the racks every time you stir, giving each pan a chance to be on the top rack where they will dry more quickly.
How to Make Spent Grain Flour
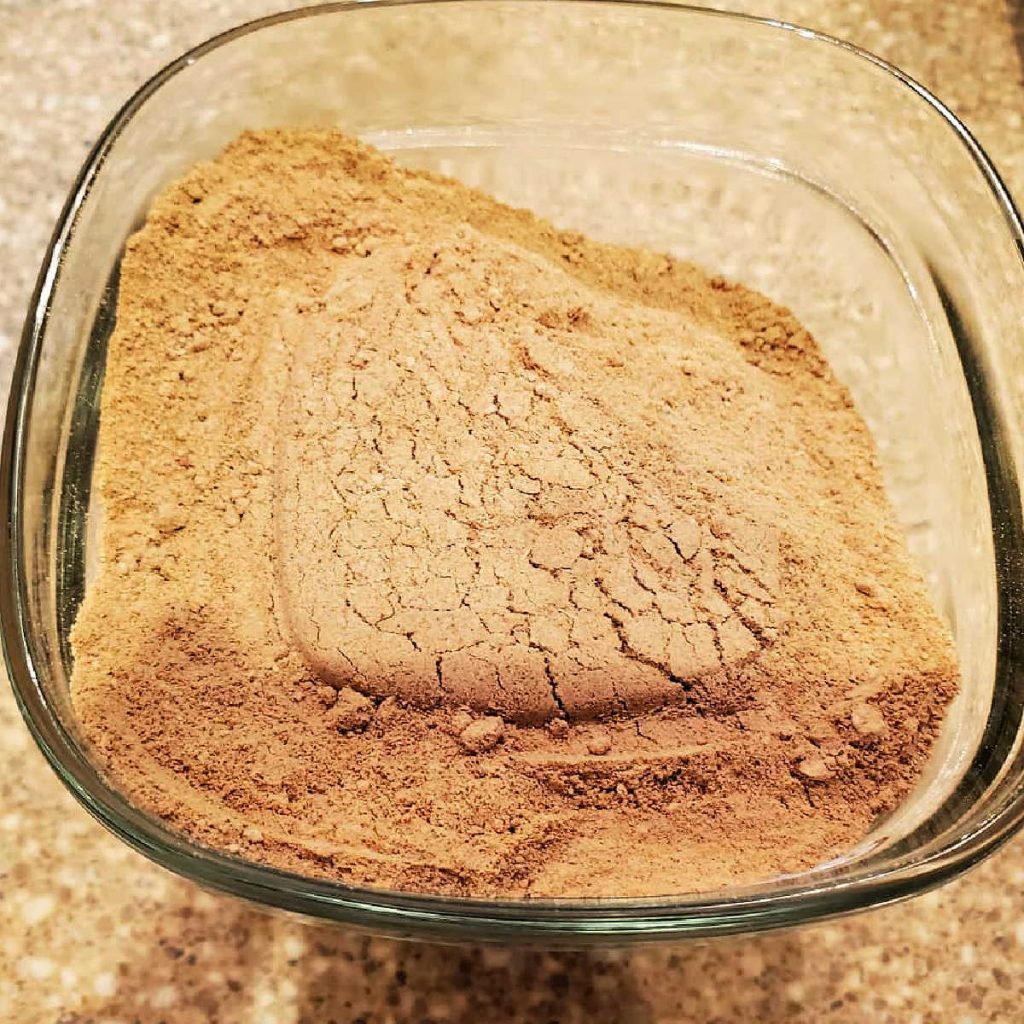
If drying the grains is easy, making the flour is even easier, because it takes way less time.
All you need to do to make it is to whiz up the spent grains in your blender until they are finely, finely ground. Like flour!
NOTE: You can further refine your flour by straining it through a fine-mesh strainer to get out any little pointy bits of bran, hulls, etc. I did not do this, but if I were making a finer textured bread, I’d have taken this extra step.
If you don’t need any more instruction or have made my whole wheat English muffins, feel free to skip ahead to the recipe.
English Muffin Ingredients
Here are the ingredients you’ll need to make your muffins.
- spent grains: I got mine by joining a local homebrew group on Facebook and asking for them. Free!
- bread flour: you need the higher protein content since the spent grains don’t contain a lot of gluten
- milk: I use whole milk. You can also use 2% if you prefer
- malt syrup: gives the yeast something to eat to begin with. You can also use brown sugar or granulated sugar here, but the malt syrup underscores the beer making process, so I like to give a nod to that by using malt syrup. NOTE: It is one of the stickiest syrups in the world, so be aware.
- yeast: I use instant yeast, adding it to the sponge. You can also use active dry yeast. As long as you know it’s alive, you don’t have to proof it. You can add it directly to the sponge. Between the sugars in the malt syrup and in the spent grains, the yeast will be very, very happy.
- butter: carries flavor, adds a touch of tenderness and flavor. I use unsalted butter and then add my own salt.
- egg: you need one large egg. It aids in browning, adds some fat and emulsifiers, a bit of structure, and more liquid (in the egg white)
- kosher salt: I use Morton’s. If you use Diamond Crystal, you’ll need more by volume. If you have a scale (please say you do), you’ll need 7 grams of either.
Procedure
As I’ve said previously, these muffins aren’t hard to make, but there are a few steps required.
First, you scald your milk. I am the first to say that 99.5% of the time, I don’t bother, but because I’m working with a coarse flour with little bits that can cut my gluten strands, I hedge my bets.
And scalding does denature the whey proteins that can inhibit your rise a bit. Again, normally I wouldn’t care, but with spent grains, it’s a different story.
You are welcome to read all about how to scald milk in this post, but here’s the short version for this recipe:
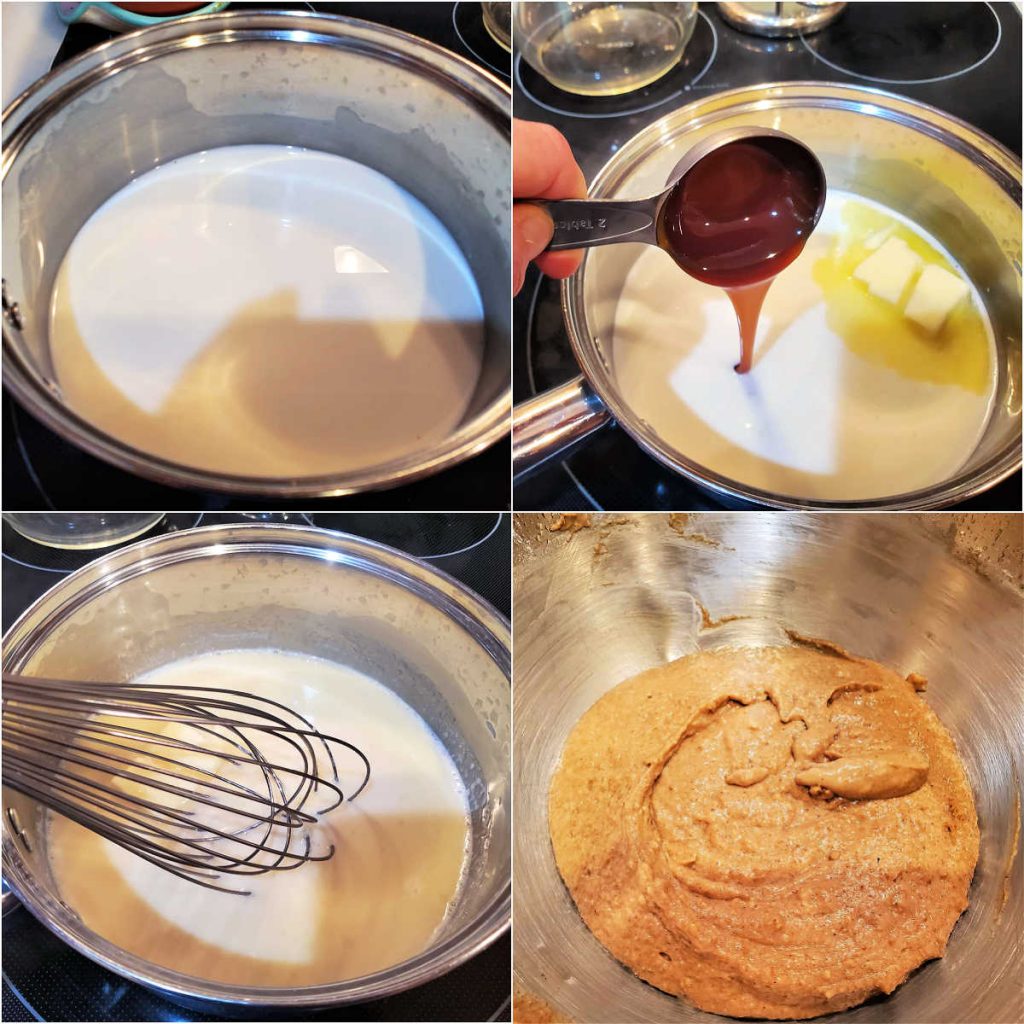
- Put your milk in a pan and heat over medium high heat until it is steaming and little bubbles are forming around the edges. You’re shooting for about 180F, which is close to boiling, but not quite. So don’t let it boil.
- Once you’ve scalded your milk, add butter and malt syrup and whisk it all in.
- Allow that mixture to cool to no more than 120F (which won’t take too, too long since you just added cold butter to your milk).
- Once it has cooled enough, mix together with the other sponge ingredients.
NOTE: To speed up the cooling process, pour your milk mixture into the bowl of your
Once you have made your sponge, let it hang out for 4 hours, covered. It will rise up and then most likely fall back. That’s okay.
This is what it’ll most likely look like after 4 hours. All is well.
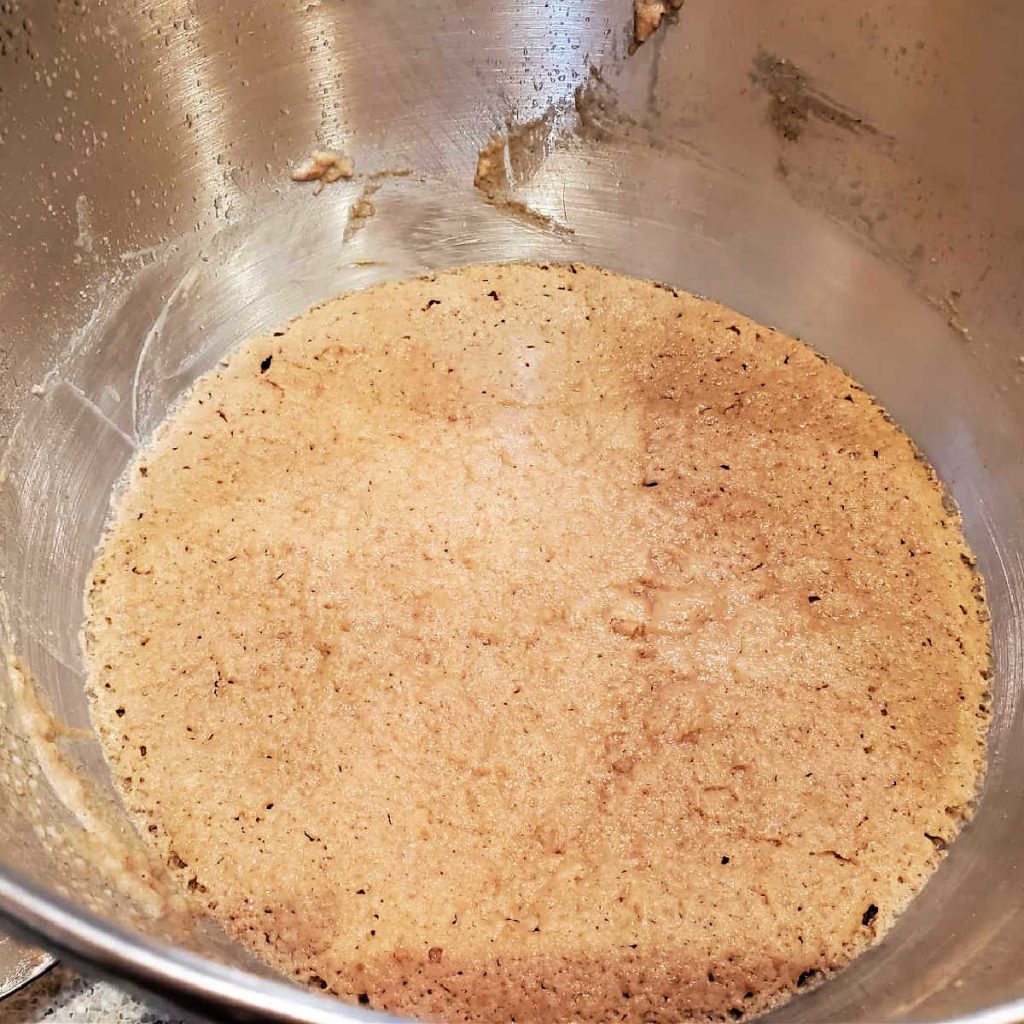
Why does the sponge fall?
While the sponge will rise up quite a bit at first, eventually it will fall back. That’s because there is not enough gluten in the one cup of bread flour to support all those bubbles.
Once you make the dough and add extra bread flour, the dough itself will rise nicely and hold onto the gases.
After you make the sponge, the rest of the process takes less time.
In short:
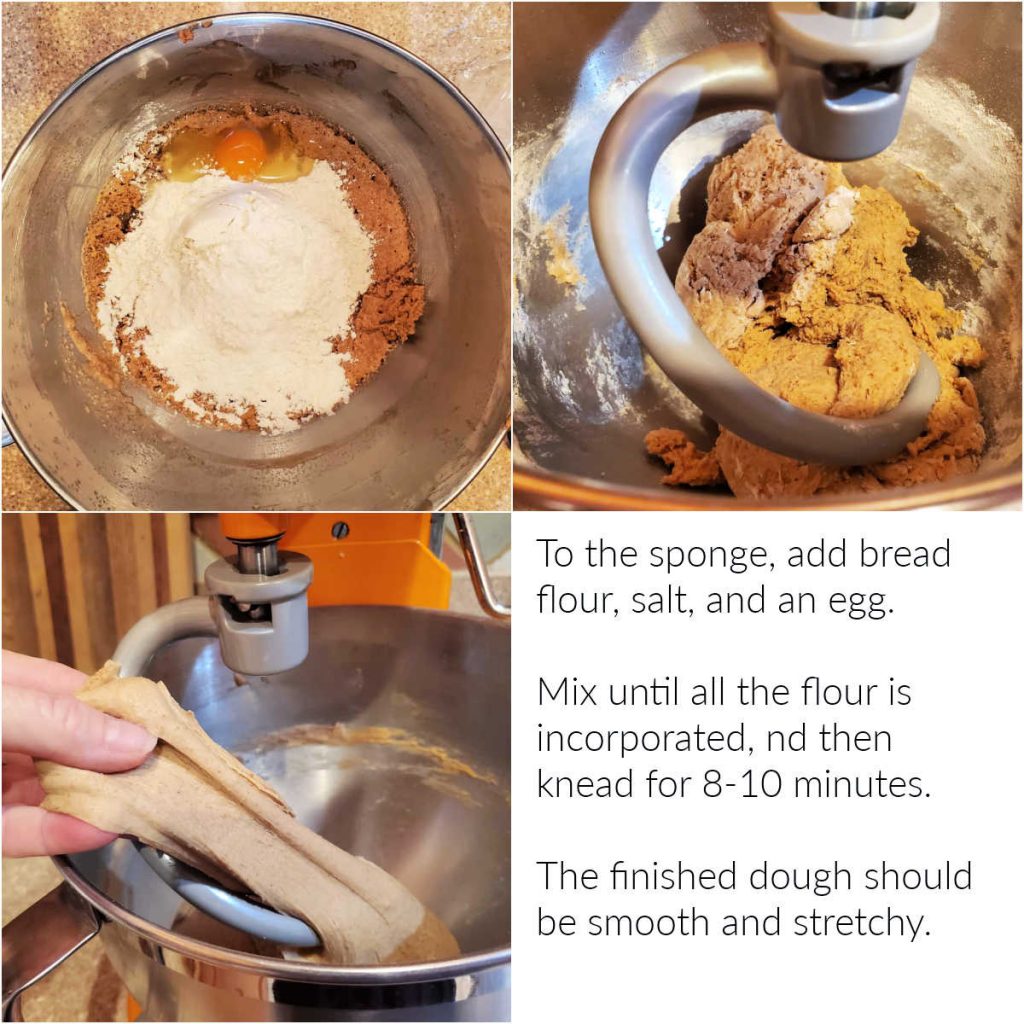
- Add more bread flour, salt, and an egg to the sponge.
- Mix and then knead until the dough is soft and stretchy.
- Form it into a ball.
- Let rise for about 1 1/2 hours.
Dough, before and after rising
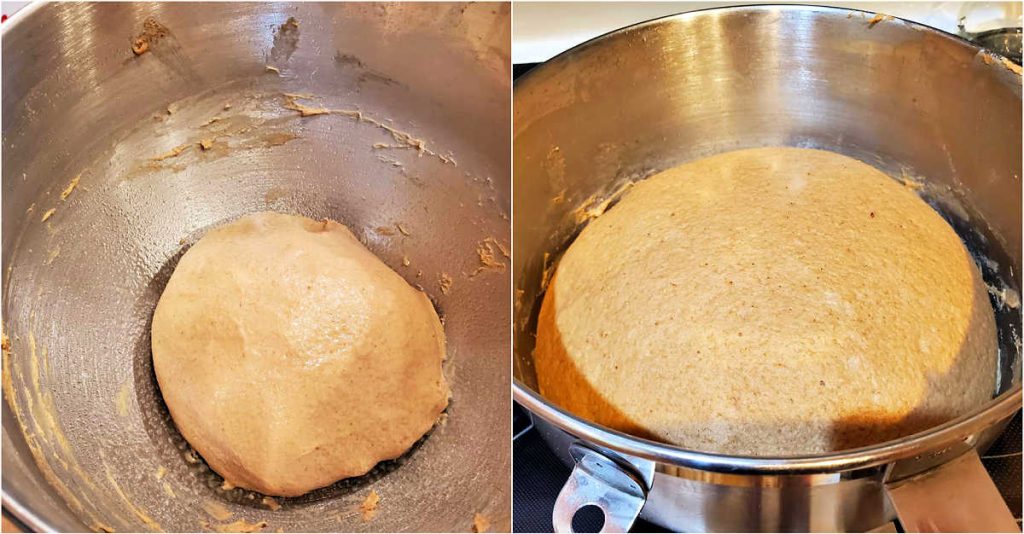
These images are of the dough, before and after rising.
It only took about 1 1/2 hours for the dough to expand this much. The yeast really likes the added sugars in the spent grains!
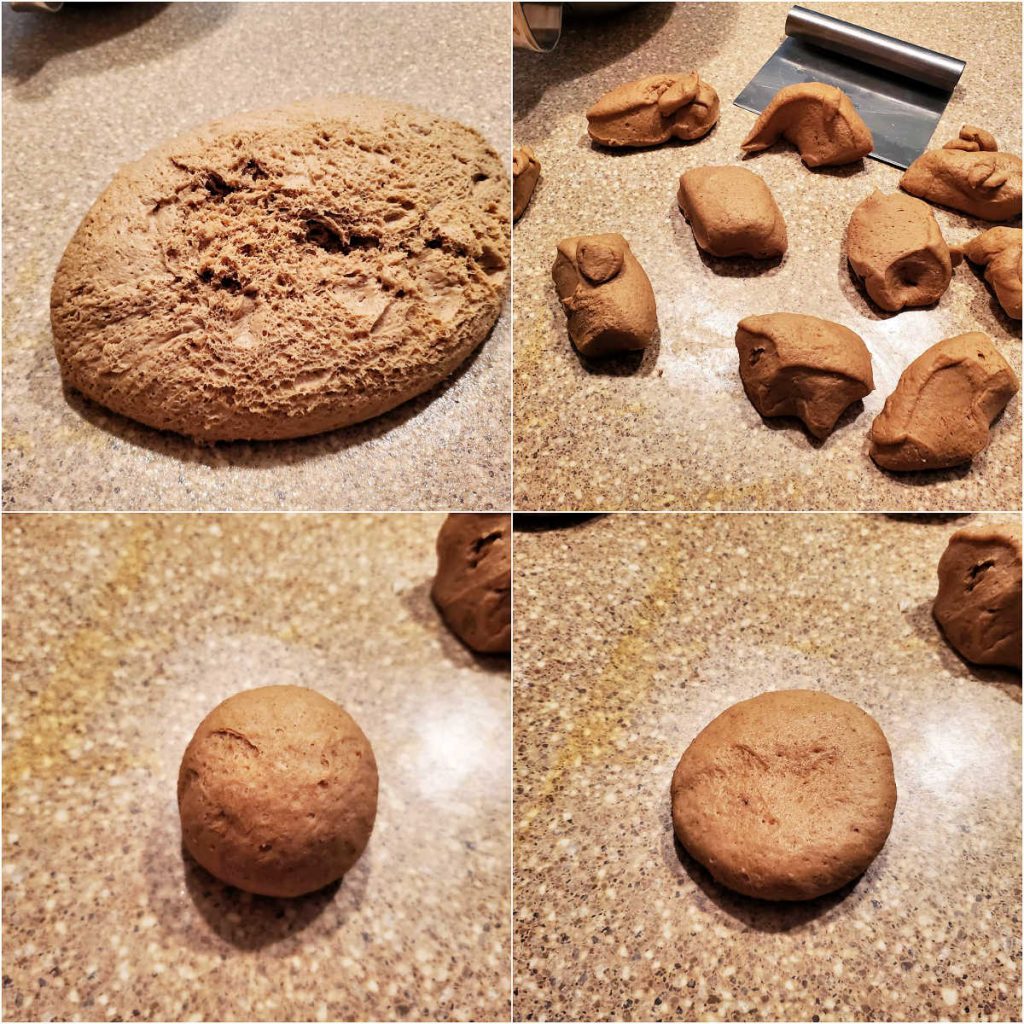
Shaping the Dough
Once your dough has risen, it’s time to shape the muffins.
Cut the dough into 10 equal pieces. I weigh mine and then divide by 10 to get an exact measurment.
Would you like to save this post?
Working with one piece at a time, gather each into a ball, roll the ball between your palms on your work surface, using friction to pull the dough taut.
Then take each ball of dough and flatten it into a round about 1/2-3/4″ thick.
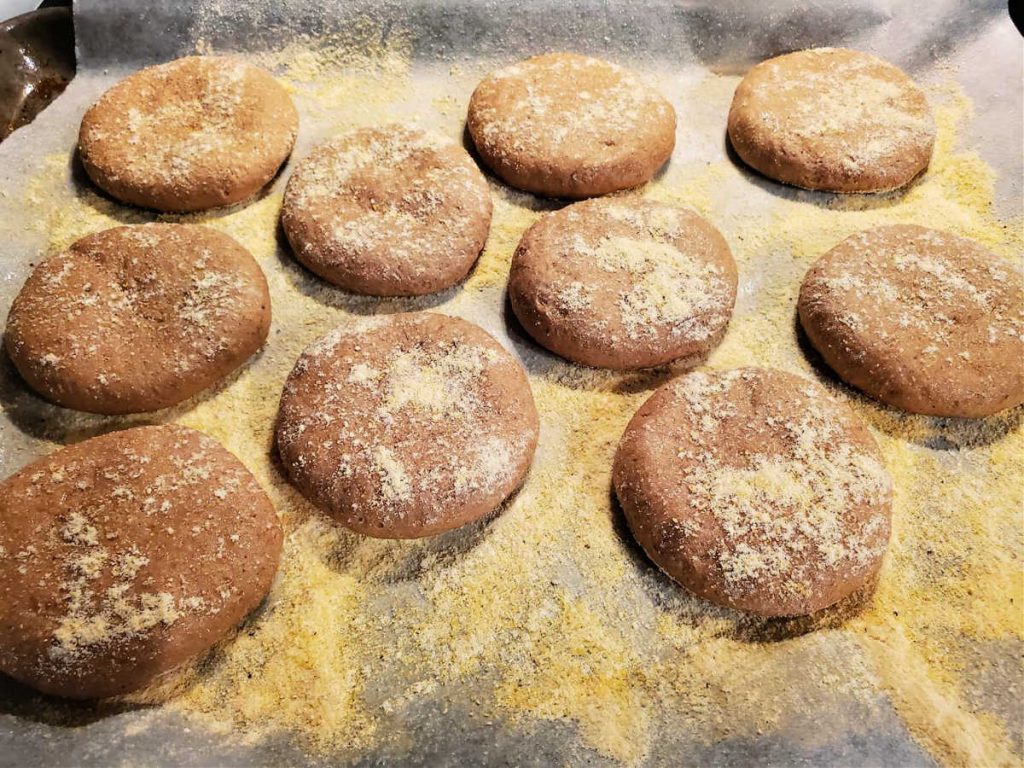
Prepare a sheet pan by covering it with a piece of parchment.
Lightly spray the parchment with pan spray. In this instance, the spray acts as “glue” for what comes next
Evenly sprinkle a light layer of fine cornmeal or semolina on the sprayed parchment.
Place your discs onto the prepared pan and give all of them a light sprinkle of more cornmeal or semolina.
Cover with plastic wrap and let sit out at room temperature until puffy, about 45 minutes.
Cooking the English Muffins
So here we are, ready to cook!
I cooked my guys in a 12″ cast-iron skillet. I could fit 5 muffins at a time, so I left the other 5 on the sheet pan and put it in the fridge until I was ready for them.
Here’s how to cook them:
- Spray the inside of your pan lightly with pan spray.
- Place your discs of dough close together but not touching in the COLD pan.
- Turn the heat on to medium-low.
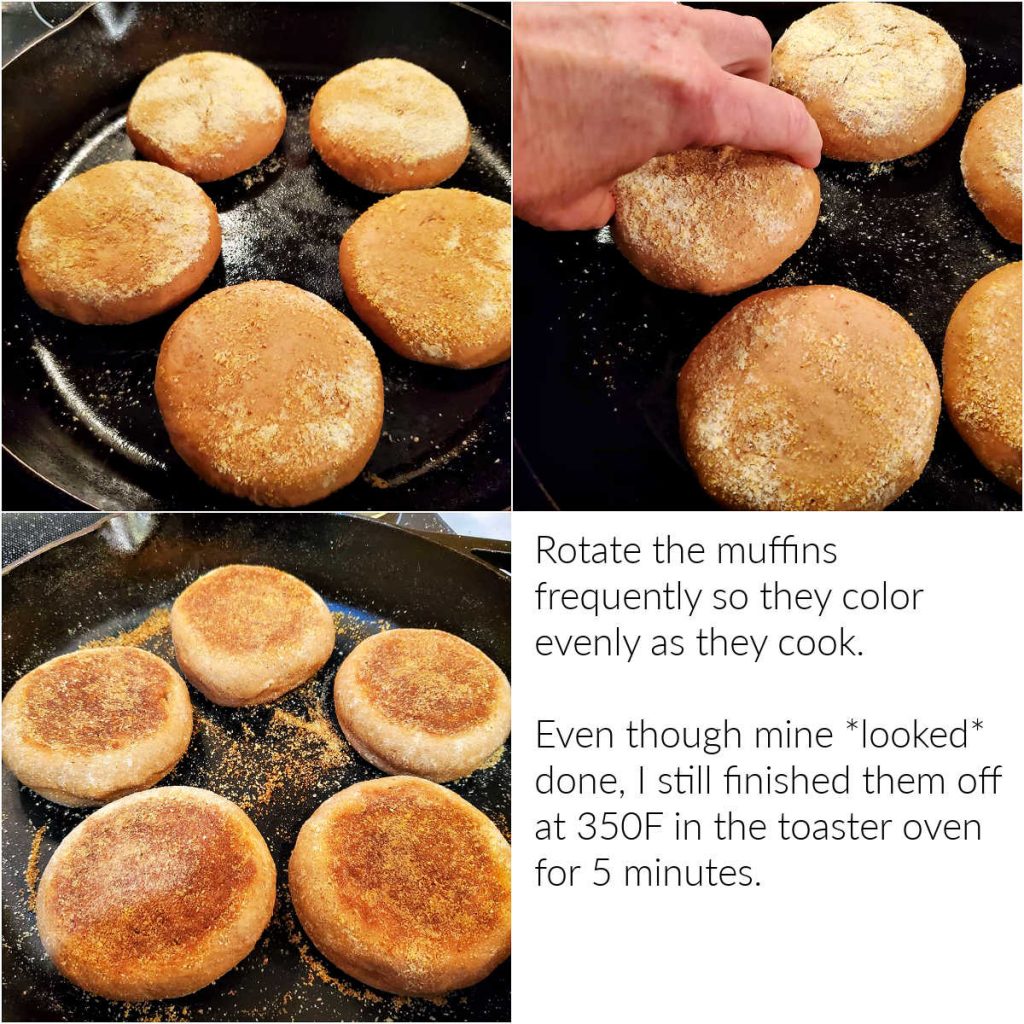
- Cook, twisting the muffins in the pan every minute or so to promote even cooking.
- The first side is done when the bottoms are deep golden brown and the sides feel firmer and less like dough.
- Flip the muffins and continue to cook until the second side is done.
NOTE: The first side will take longer than the second side, and the second five muffins will take less time to cook than the first five.
Timing: For the first five, it took 17 minutes on the first side and 12 on the second. For the second five, it took 12 minutes on the first side and 10 on the second.
Equipment Recommendations
My main recommendation is to have a large, heavy-bottomed skillet for cooking your muffins.
I like using my 12″ cast-iron skillet, but you could use another pan if you prefer.
I do recommend using a pan that heats evenly to prevent hot spots and possible burning.
Tips for Success
Tip for Mixing the Sponge
Rather than getting my paddle attachment dirty or spending money on a dough whisk that takes up more drawer space, I mix the sponge up using the handle of a wooden spoon.
It gets the job done, not much dough sticks because there’s not much surface area to stick to, and I didn’t have to spend any money on kitchen gadgets!
Tip for Making Sure the Muffins are Cooked
“Baking” on a griddle is not an exact science, and it will take a while to figure out the sweet spot as far as time and temperature go.
Starting your first 5 muffins in a cold pan helps the first batch to cook much more evenly so by the time you get to your second 5, you’ll feel more confident.
NOTE: Don’t feel bad about hedging your bets by finishing up in a 350F oven. Much rather your guys are baked all the way through, because nobody wants a gummy English muffin.
To Spread the Recipe Over Two Days
Start making your dough later in the day. Give the sponge its four hours of rising, finish making the dough, gather into a ball, oil it, cover it with plastic wrap, and put the whole shebang in the fridge overnight.
The next day, remove the muffins from the fridge, portion out the dough, and shape the muffins. Then allow them to sit on the prepared pan for about an hour before cooking on the griddle/cast-iron pan.
Note that baking will still take a total of almost an hour, so plan accordingly.
Serving Suggestions
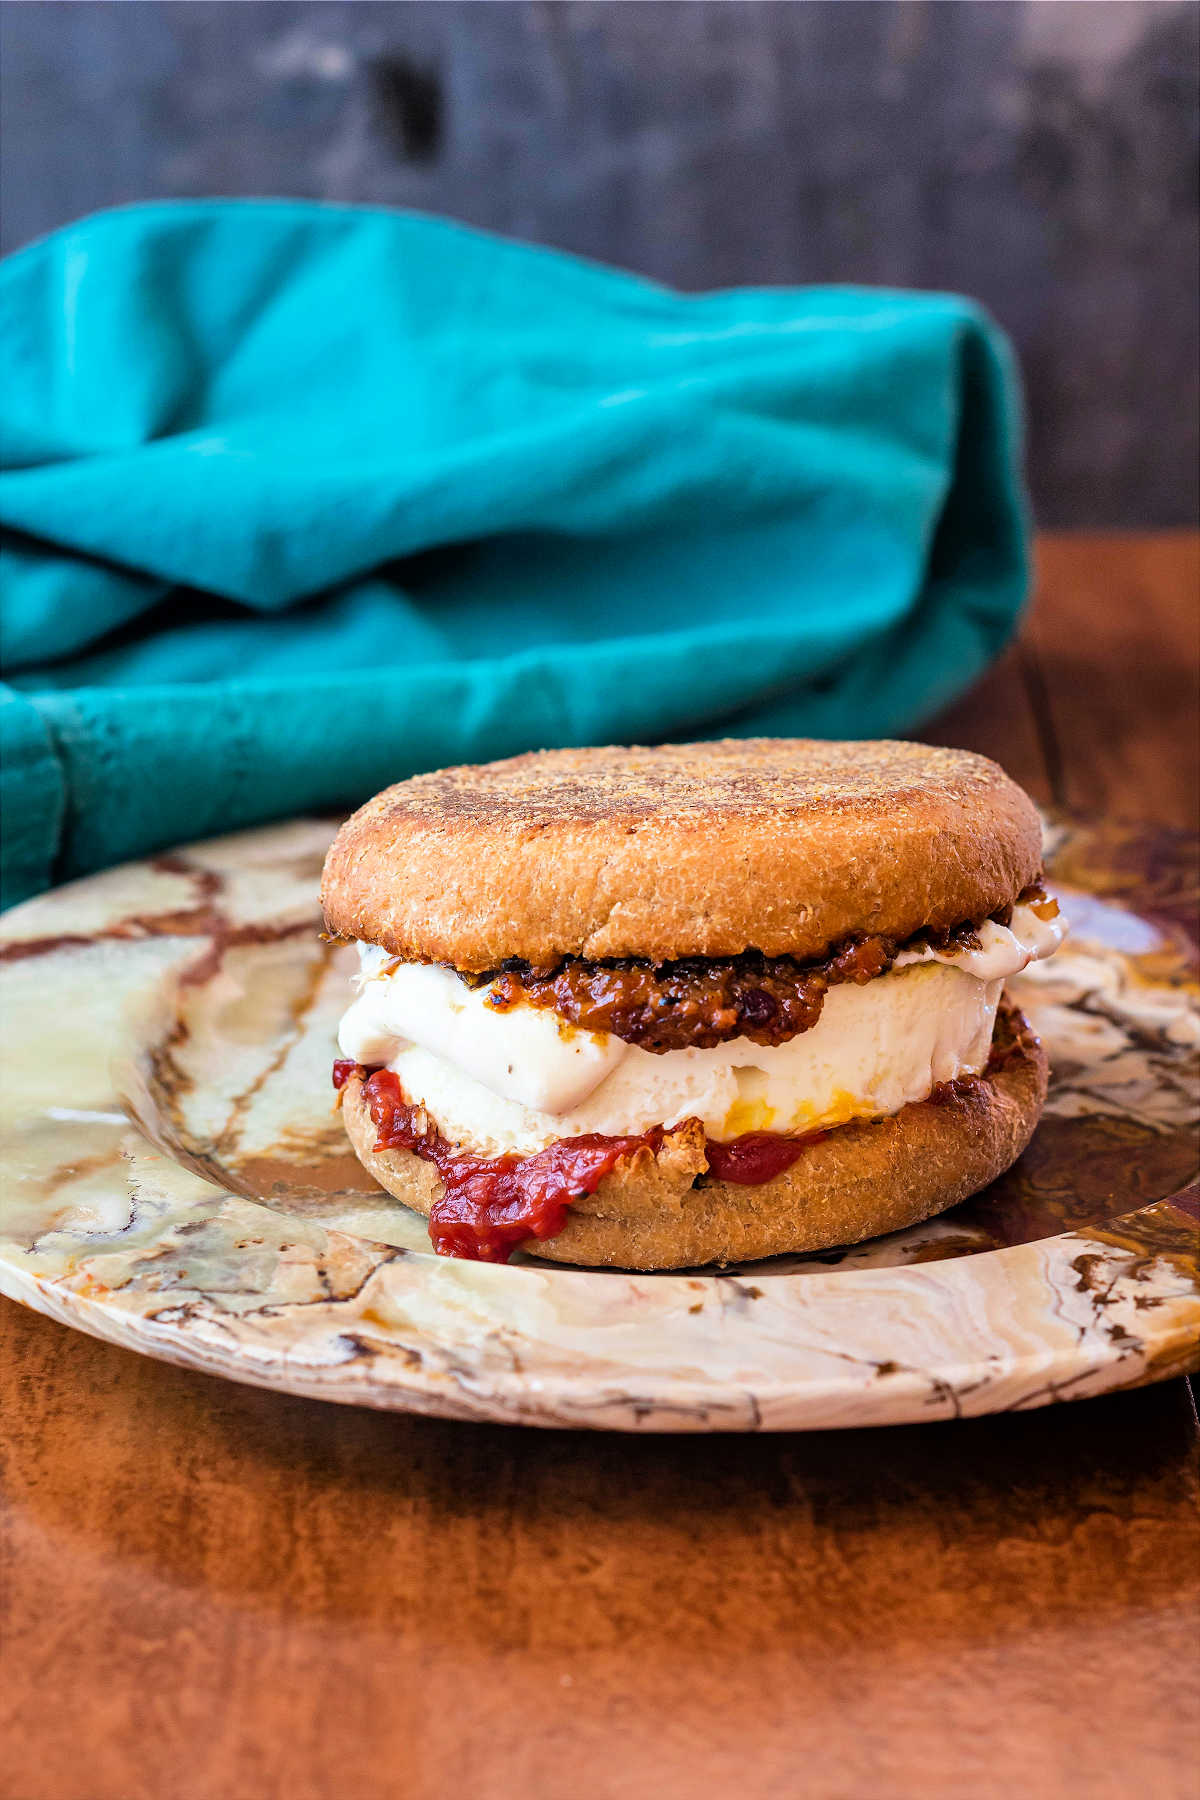
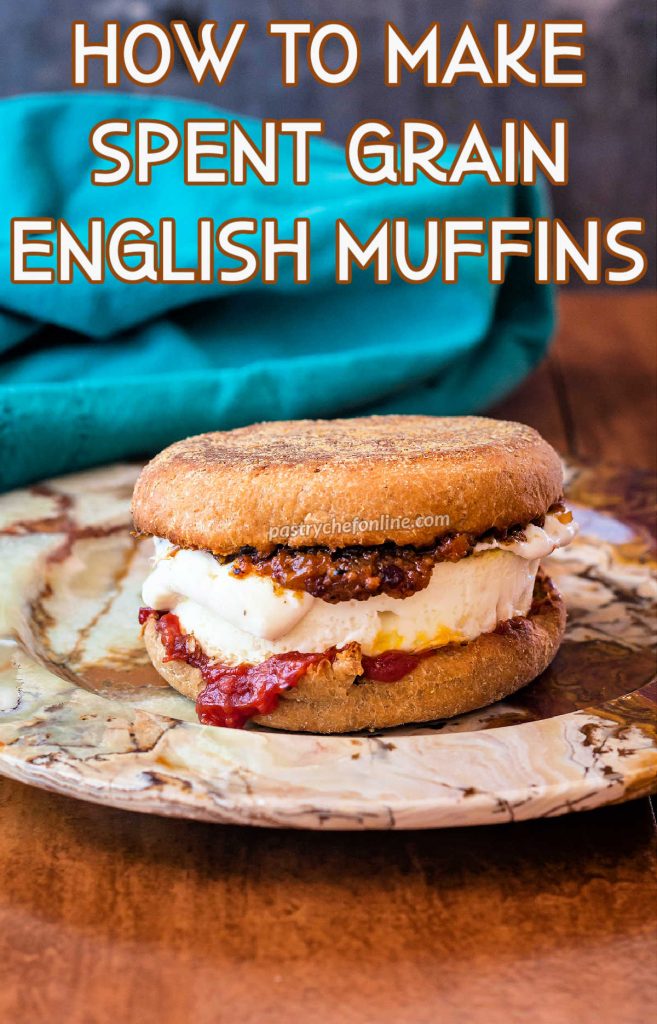
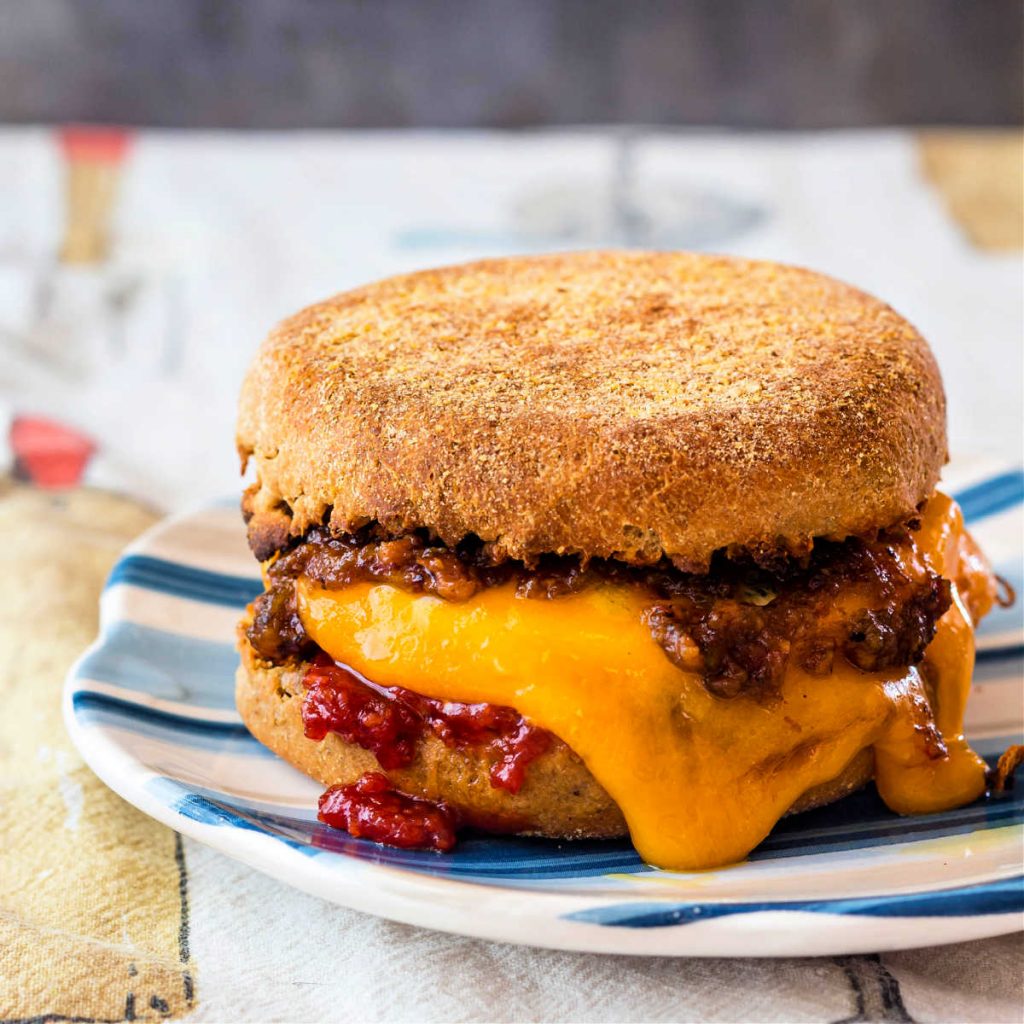
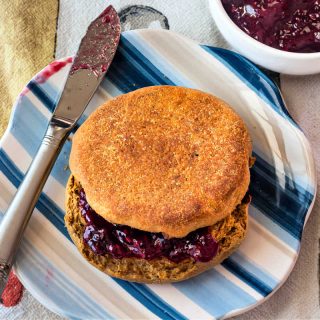
So far, we’ve enjoyed our spent grain English muffins with butter and mixed berry jam, and as breakfast sandwiches spread with broiled goat cheese, tomato jam, and/or bacon jam. For a two-in-one fruity/savory jam, try my bacon peach jam, too.
Or be super decadent and spread them with plum butter.
Build a sandwich on them. Or use them as burger buns.
Enjoy these guys however you’d enjoy a “regular” English muffin.
However you enjoy them, you’ll notice their beautiful, rich color and deep flavor, plus you’ll have the satisfaction of knowing you made them yourself!
Q & A
English muffins, even though usually served toasted, are really best eaten the first day. I could never eat 10 in one day, so I always wait until they cool completely and then store them in a heavy-duty zip-top freezer bag, pressing out as much air as possible before sealing. They’ll be fine in the freezer for up to 3 months. To thaw, I take out what I need, thaw them in the microwave for about 15-20 seconds, split them with a fork, and toast them in our toaster oven. They taste as fresh as the day they were made.
Speaking of splitting….
I always use a fork and stab the tines into the muffin all the way around the equator. Then I just pull the muffin apart. This way, I have the best chance and revealing all the storied u0022nooks and cranniesu0022 for optimal browning and holding onto butter and other spreads. As far as I’m concerned, you should never use a knifeu002du002deven a serrated knifeu002du002dto split an English muffin. You’ll have a split muffin, but you’re robbing yourself of much of the texture that makes them so irresistible in the first place. 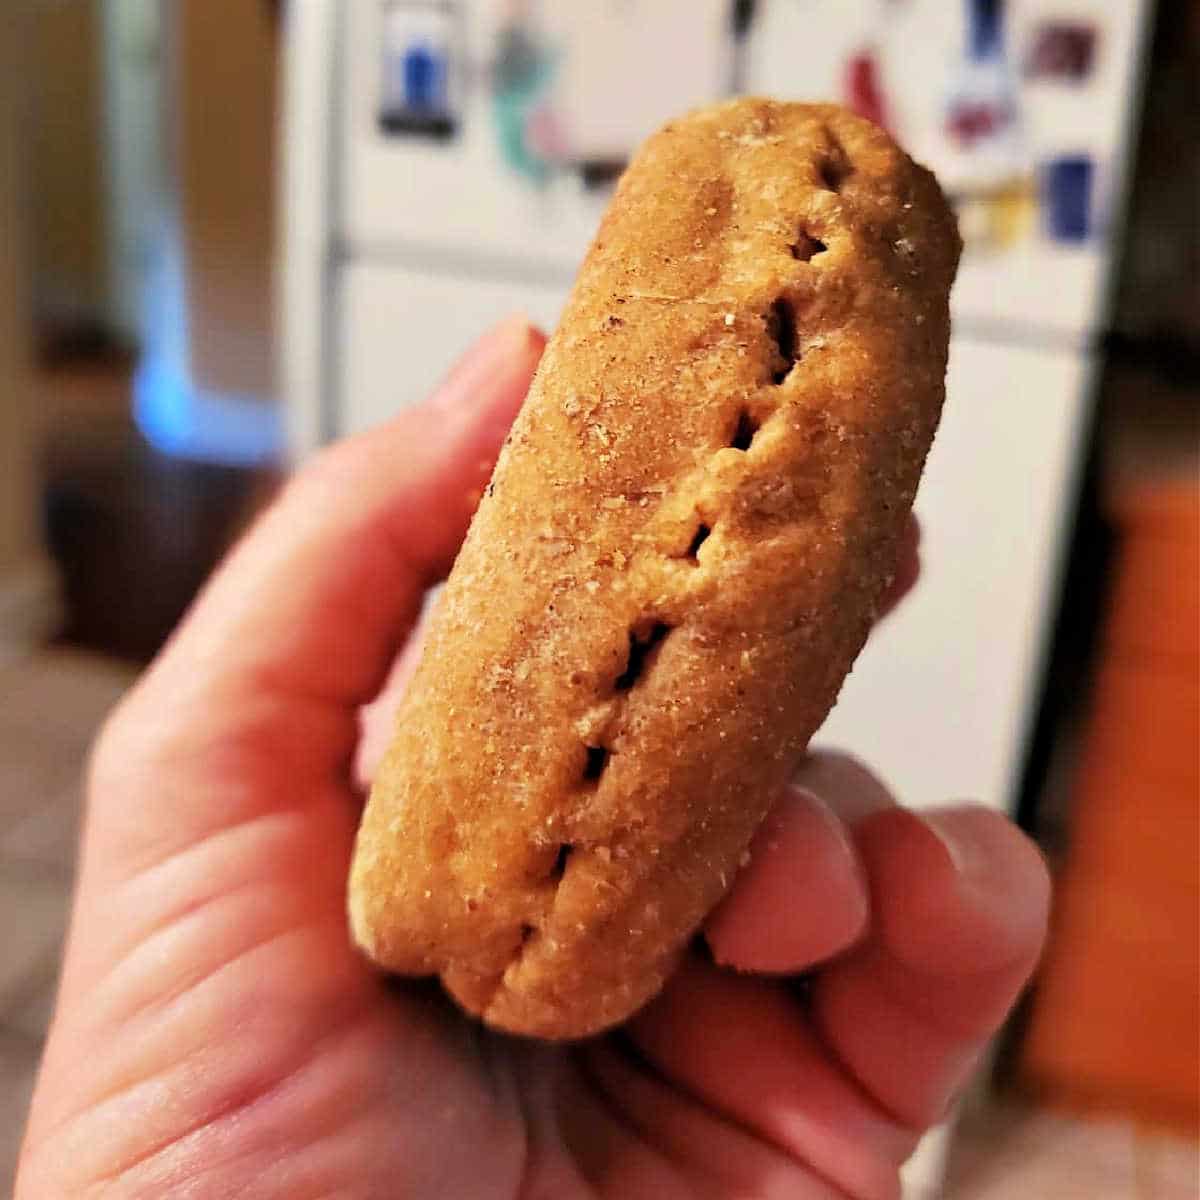
Questions?
If you have any questions about this post or recipe, I am happy to help.
Simply leave a comment here and I will get back to you soon. I also invite you to ask questions in my Facebook group, Fearless Kitchen Fun.
If your question is more pressing, please feel free to email me. I should be back in touch ASAP, as long as I’m not asleep.
A Note About Measurements
My recipes are almost all written by weight, including liquids, unless otherwise specified.
For accuracy and consistency of results, I encourage you to buy–and use–a kitchen scale.
I promise that baking and cleanup will be so much quicker and easier.
This is the scale that I recommend for home use. I have owned and used one for years.
Love These English Muffins? Please Rate and Review!
It helps me and other readers so much if you take a moment to rate and review this recipe.
Your star rating and comments help others decide whether the recipe is worth making, and your feedback helps me continue improving recipes here at Pastry Chef Online.
Other lovely ways to share include pinning or posting on your favorite social media platform.
Thank you so much for taking the time!

Spent Grain English Muffins
Ingredients
For the Sponge
- 8 oz whole milk 1 cup
- 3 oz unsalted butter 6 Tablespoons
- 2 Tablespoons malt syrup
- 4 oz spent grain flour
- 4 oz bread flour
- 2 teaspoons instant yeast
For the Dough
- 8 oz bread flour
- 1 large egg
- 1 ½ teaspoons kosher salt I use Morton’s. If weighing, you need 7 grams
For Shaping and Rising
- fine cornmeal or semolina about 1 cup
Instructions
To Make the Sponge
- Heat the milk to 180F. Scalding the milk will denature any whey proteins that could inhibit the rise. I generally don’t find it necessary, but when working with a coarse flour such as spent grain flour, I like to hedge my bets.
- Once the milk is hot and steaming, remove from heat and stir in the butter so it melts.
- Stir in the malt syrup.
- Cool to no hotter than 120 F.
- Stir in the two flours.
- Once the flours are incorporated, stir in the yeast.
- Cover the bowl with plastic wrap and let hang out on the counter for 4 hours. The sponge will rise up and then collapse.
To Make the Muffins
- Add all the sponge to the bowl of your stand mixer.
- Add the additional bread flour, the egg, and the salt.
- Mix on low speed with the dough hook until all the flour is incorporated, about 2 minutes.
- Increase the speed to medium and knead for 8-10 minutes until you get a soft and stretchy dough.
- Gather the dough into a smooth ball and plop it back in the mixer bowl.
- Spray the top generously with pan spray or brush with some neutral oil.
- Cover the bowl and let rise until doubled. This should only take about 1 1/2 hours.
- Line a half sheet pan with parchment, spray lightly with pan spray, and then dust liberally with fine cornmeal or semolina.
- Once the dough is well-risen, scrape the dough out onto an oiled surface and press out all the gases.
- Divide dough into 10 equal pieces of about 3 oz each.
- Shape each piece of dough into a ball, round each ball between your palms and the counter to stretch the dough fairly taught across the top, then flatten each disc with your palm until each is about 1/2" thick.
- Place each proto English muffin onto your prepared pan and sprinkle each with a bit more cornmeal or semolina.
- Cover with plastic wrap and let rise until somewhat puffy, about 45 minutes.
- Place a large cast-iron skillet over medium-low heat. Place as many muffins as will fit in the pan (I could do 5 at a time) and put the rest of the tray in the fridge.
- Cook the muffins until browned on one side and the dough is feeling somewhat stiff around the sides. Keep rotating the muffins in the pan to promote even cooking.
- Turn the muffins when nicely golden brown on the bottoms and continue cooking, rotating each muffin in turn, until they are golden brown.
- These muffins are fairly thick, so to make sure they were completely baked through, I finished them off in my toaster oven for 5 minutes at 350F.
- Repeat the with second half of the muffins.
- TIMINGFor my first 5 muffins, it took 17 minutes on the first side, moderating the heat from medium-low to low, and about 12 minutes on the second side, plus the 5 minutes in the toaster oven. You want the internal temperature of the muffins to reach 195F-200F. The second batch in my now well-heated pan took 12 minutes on the first side, about 10 minutes on the second, and 5 minutes in the toaster oven.
- Remove the muffins to cool down completely.
- Split each muffin around its equator by sticking the tines of a fork into the muffin all the way around. Then pull each muffin apart.
- These English muffins really shine when toasted, bringing out all the malty notes in the spent grains.
- Serve with either sweet toppings (butter and jam) or use for the base of a breakfast sandwich.
Did You Make Any Changes?
Notes
Storing
Allow the muffins to cool completely. Then freeze in a heavy-duty zip-top freezer bag, pressing out as much air as you can before sealing. Muffins will stay fresh-tasting for up to 3 months.Nutrition
Would you like to save this post?

Hi, y’all! I hope you’ve enjoyed this post and hopefully also learned a thing or two.
If you like my style, I invite you to sign up for my occasional newsletter, The Inbox Pastry Chef.
Expect updates on new and tasty recipes as well as a bit of behind-the-scenes action. I hope to see you there!

If you’re a home brewer, you now have another way to use your spent grains! Enjoy the muffins.
Take care, y’all.


Join in Today!
I do not see the measurements of the ingredients anywhere. Really excited to make these. Thanks for sharing your expertise
Oh, wow, Amanda, I’m so sorry! Something obviously went awry with my recipe card. I will update it so you will be good to go! Okay–done! Here’s a direct link so you won’t have to search: https://pastrychefonline.com/spent-grain-english-muffins-recipe/#Spent_Grain_English_Muffins