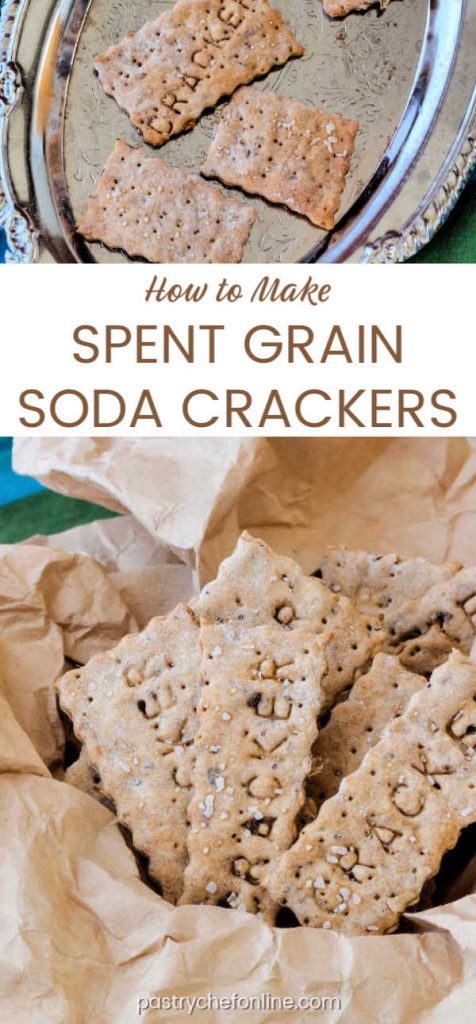
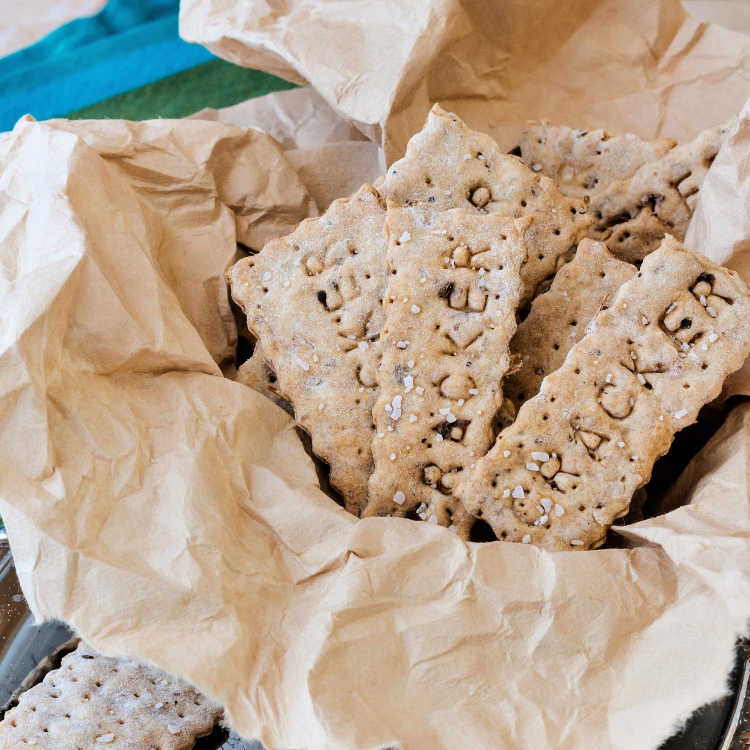
I’m excited to share this recipe for spent grain crackers. These are wonderful little soda crackers with something extra: both spent grain flour and whole spent grains making these the perfect cracker for home brewers.
If you are a home brewer or just enjoy working with spent grains, you may also enjoy my spent grain sandwich bread, this super crunchy spent grain granola, or these no-bake spent grain granola bars.
For another fun recipe for homemade crackers, you might like my caraway rye crackers.
For ease of browsing, my other crackers can be found with all my appetizer recipes. Thanks for visiting!
What Are Spent Grains?
Spent grains are the grains leftover from brewing beer.
Spent is not necessarily the best term for them, because they still contain some flavor, nutrients, and fiber. You just can’t use them for brewing anymore.
Many people throw away their spent grains. Some people compost them, some have relationships with farmers who use it to supplement their animal feed, and others bake with them.
Pastry Chef Online Participates in Affiliate Programs. If you make a purchase through one of my links, I may earn a small commission. For more information click to read my disclosure policy
You can use spent grains wet, or you can dry them first. Either way, they bring added flavor, color, and texture to whatever you use them for.
What Are They Good For?
Spent grains are the the grains that are leftover from the brewing process.
After the grains are boiled and they have given up all their malty goodness and many of their carbs, what is left or “spent” is called spent grains.
Since spent grains give up virtually all of their carbs and sugar in the brewing process, what is left is fiber and protein. Yay!
Using these spent grains whole or ground into flour increases the protein content and fiber content of whatever you use them in, and it doesn’t appreciably increase the carb count. Pretty sweet!
If you are a home brewer, you can use your grains wet, or you can dry them in a low oven.
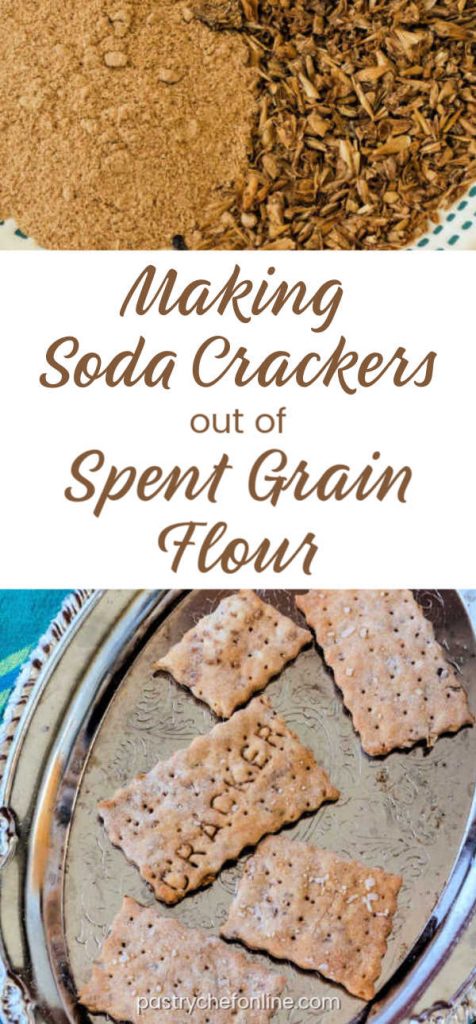
And then when completely dried, you can process them into your own flour. You can also leave some whole, to add texture to your baked goods.
Where to Find Spent Grains
If you are, or know, a homebrewer, you can just use the spent grains from your brewing sessions.
If not, worry not. There are a few ways to get your hands on spent grains.
- Join your local homebrewing group and ask for spent grains there.
- Join a local Facebook group dedicated to homebrewing. Most of those folks will be happy to give you some of their spent grains.
- Ask at a local microbrewery or craft brewery. If they don’t already have a way of using their grains, they should be thrilled someone wants to use at least some of them.
- Ask at your local homebrew store that sells ingredients and equipment for brewing, or check with the folks at your local bottle shop. Most of these people will know folks who’ll be happy to share.
Spent grains are generally waste, so many people would otherwise just throw them away. It never hurts to ask around.
How to Make These Crackers
Crackers are actually pretty easy to make. Almost any type of dough can be turned into crackers by rolling it really thin and baking until crisp.
In this case, I have added spent grains to a pretty basic soda cracker recipe, resulting in a flavor that is both familiar and a little elevated.
The grains do not lend a hugely pronounced flavor, but they do add a bit of “maltiness” to the dough, which I quite like.
I used both spent grain flour and whole spent grains to add some texture to the crackers, and I think they turned out beautifully.
Here’s the rundown of the ingredients.
Ingredients
- all purpose flour: provides the “bulk” for the crackers. You can use bread flour if you like for a bit heartier cracker.
- spent grain flour: Adds fiber and protein and a rustic color. If you can’t find ready-made spent grain flour, you can make your own. In short, blend up dried spent grains in your blender until they turn to flour. You can read about the process in this section of my post on making spent grain English muffins.
- whole spent grains: Adds some nice texture to what would otherwise be a “smooth” cracker once you start chewing. Here’s how to dry your spent grains.
- salt: brings out the flavor in the flour and the grains
- baking soda: provides a touch of lift
- butter: Adds a bit of fat to carry flavor
- whole milk: helps to form the dough. You can substitute 2% milk or even a plant-based milk
- finishing salt, for sprinkling on top of crackers: you can also top with seeds of your choice (poppy seeds would be nice)
Procedure
The hardest part of making these crackers is letting the dough rest in the fridge for an hour. Other than that, it’s a very straightforward process:
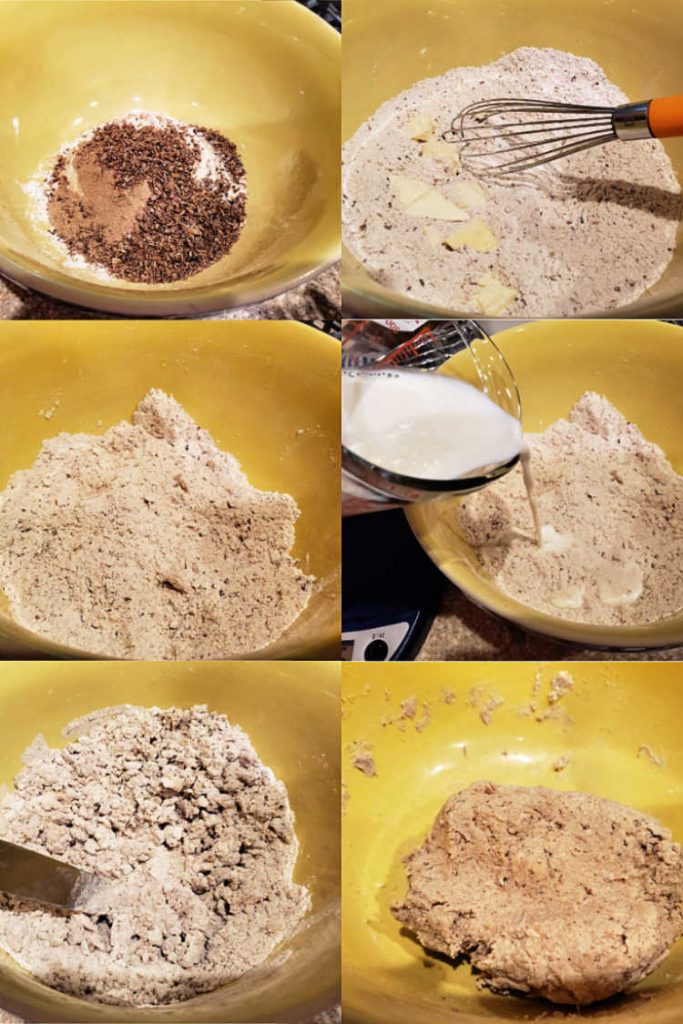
- Whisk flour, spent grain flour, whole spent grains, salt, and baking soda together in a bowl.
- Rub in the butter until the mixture looks like coarse meal. You shouldn’t have any “pebbles” of butter.
- Use a dough whisk, the handle of a wooden spoon, or a regular dinner knife to slowly mix in the milk until dough comes together.
- Finish mixing by hand and knead a few times right in the bowl.
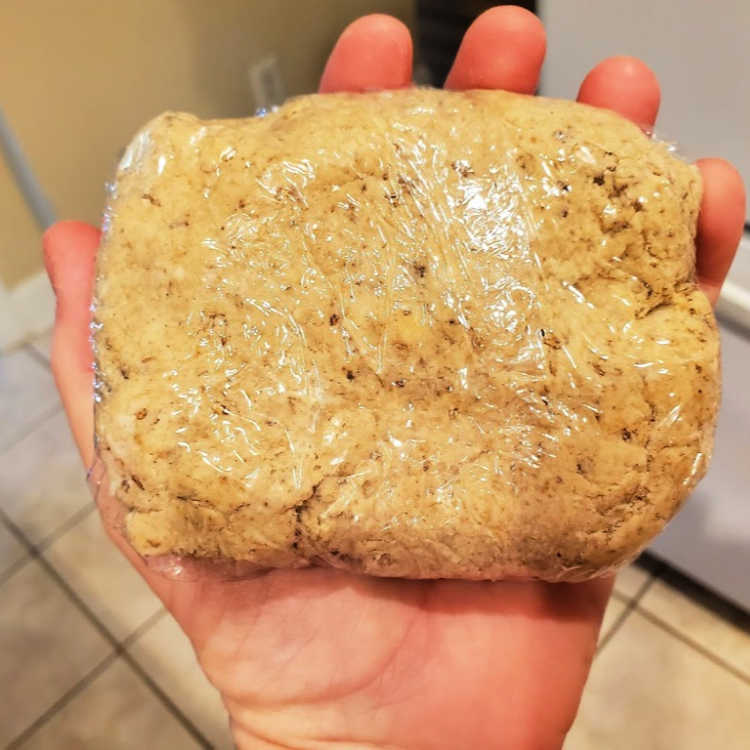
- Wrap the dough in plastic wrap and refrigerate for an hour.
- Roll out dough very thin.
- Prick all over with a fork and cut into desired shapes with cutters or with a pizza wheel or pastry wheel.
- Bake, cool, and enjoy.
Pro Tip for Mixing Sticky Dough
Many people tell you to buy a dough whisk to mix sticky dough, but
PRO TIP: You can get good results using either the handle end of a wooden spoon or a dinner knife to mix sticky dough.
Because neither of these implements has as much surface area as the bowl end of a spoon, your hands, or a regular whisk, clean up is much easier.
You won’t end up having to scrape a ton of sticky dough off a spoon, your hands or out of the tines of a whisk.
Rolling Out and Cutting Crackers
This dough is really pretty dreamy to work with.
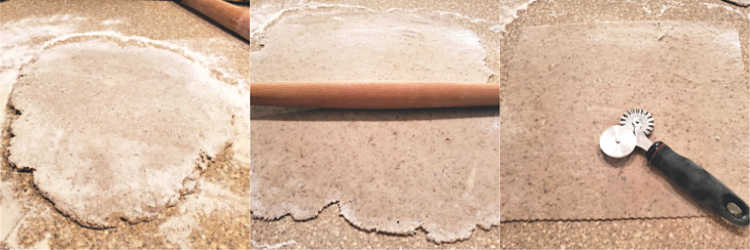
It rolls out easily. If it does try to spring back a little when rolling, just cover the partially-rolled dough with a towel and let it sit for 5-10 minutes to allow the gluten to relax.
Then just roll it as thinly as you can into a more or less regular square that’s less than 1/8″ thick. Using a tapered pin gives me lots more control over the final shape of the dough.
Then cut off the ragged edges with either the “wavy” or straight wheel of a pastry wheel.
From there, prick the dough all over with a fork.
Would you like to save this post?
This allows steam to escape, keeping the crackers from puffing too much so they bake up nice and flat.
Simply cut the crackers into whatever shapes you like:
PRO TIP: making straight-sided shapes such as squares, rectangles, diamonds, or triangles ensures you won’t have any waste like you would if you make round shapes.
Transfer the crackers to parchment-lined cookie sheets.
You will need four to make a whole recipe. Or just recycle what you have.
To cool off your sheets between rounds of baking, run under cold water for a few seconds. Dry off the sheet and you’re ready to go.
You can also use the parchment squares again–no need to throw them away after only one use.
How to Change Up the Flavors in Your Fancy Soda Crackers
Even though I really love using the spent grain flour in these crackers, you can leave it out and use 100% all purpose flour instead. Once you decide how to make your base dough–with or without spent grains–there are tons of ways to switch up your flavors.
- Italian Cheese Crackers: Add 1/2 cup of finely grated Parmesan or Romano cheese (or a combination of the two) to your dough along with 1/2 teaspoon of Italian seasoning.
- Cracked Black Pepper Crackers: Add 1 teaspoon coarsely ground black pepper and 1/4 teaspoon white pepper to the dough. Top the finished crackers with more cracked pepper and coarse salt.
- Dill crackers: Add 3/4 teaspoon dried dill and 1/2 teaspoon garlic powder to the dough. Brush baked crackers with melted butter as soon as they come out of the oven.
- Sesame crackers: Add 1 Tablespoon toasted sesame seeds to the dough and sprinkle the tops of the crackers with salt and sesame seeds before baking.
Aside from these specific ideas, you can add pretty much any sort of spice or herb to your crackers to customize them.
You can also play with what you top them with before baking. No reason to limit yourself to just salt.
Use this cracker recipe as a good starting point and then switch up the flavors however you like.
What To Do if Your Crackers Get Soft
There’s nothing sadder–or not much, anyway–than a soft cracker. Homemade crackers are much more prone to getting soft than their store-bought counterparts, even when stored airtight.
Store crackers in heavy-duty sealed zip-top bags or in airtight storage containers for up to 3 days.
If they get soft, and they probably will, place them on a cookie sheet in a single layer and refresh them in a 350F oven for 2-3 minutes.
They will re-crisp as they cool. Make sure they cool completely before storing them.
Embossing Crackers and Cookies
Since I generally make loaves of bread for Nadine’s communion services and I knew this would be a small retreat, I decided on making crackers.
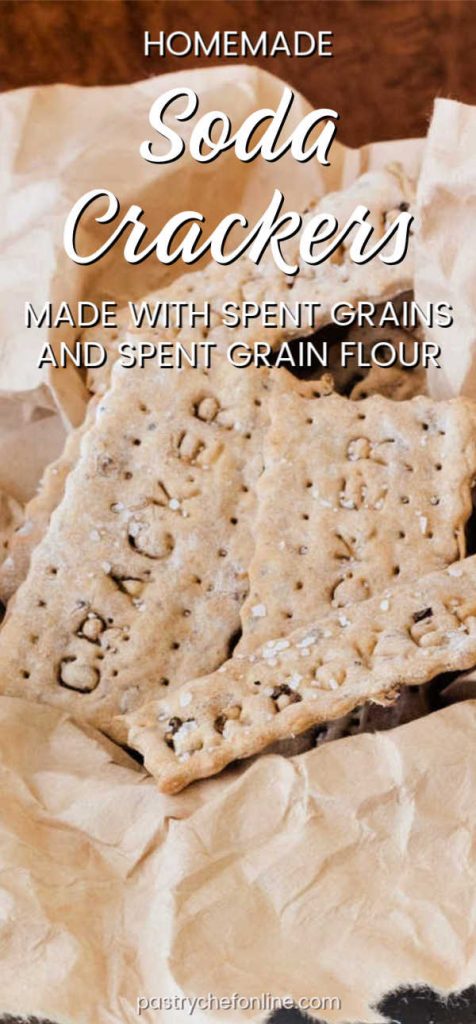
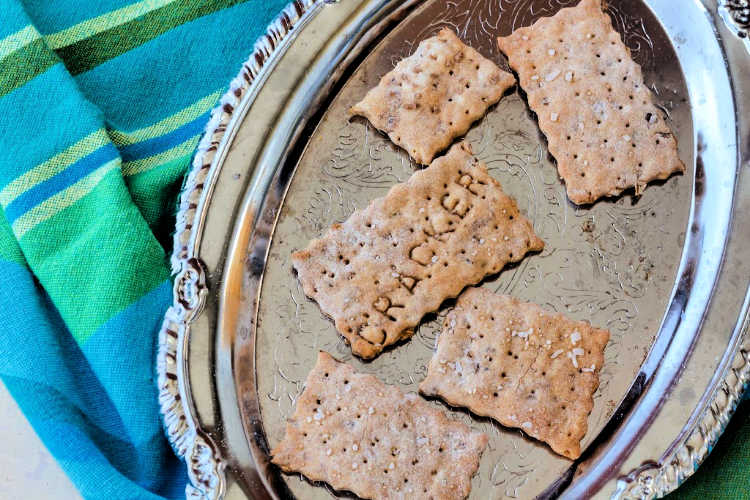
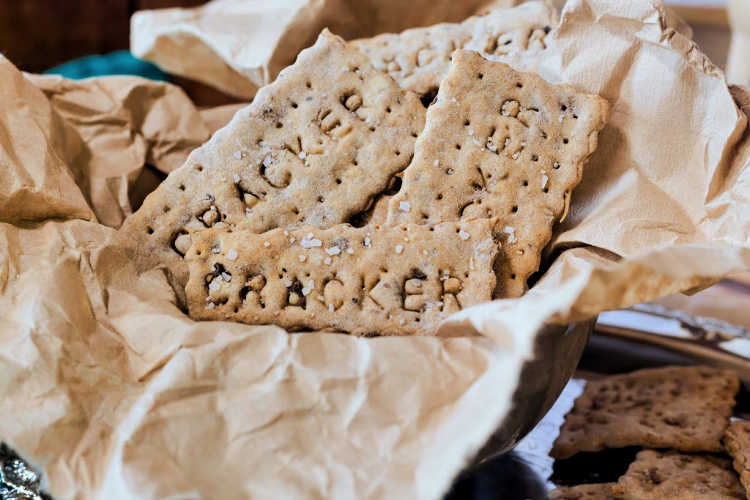
I thought the crackers would be even more meaningful if they had words embossed on them, and when Nadine told me the theme was connection, it was a short jump to pressing one letter into a “sheet” of crackers that would spell one word and then breaking them to serve them.
I immediately hied myself to Amazon to search for cookie letter stamps, and this was the set I settled on.
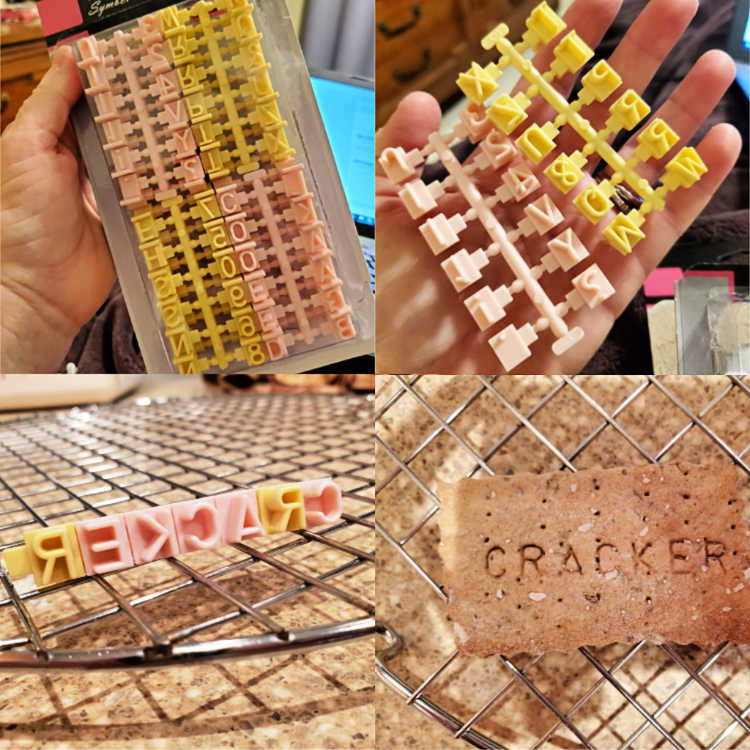
Aren’t they just so cute? And they work so well!
The letters are only about 3/8″ tall, so you can press even a relatively long word or message on a cracker or cookie and not need for it to be as big as your head!
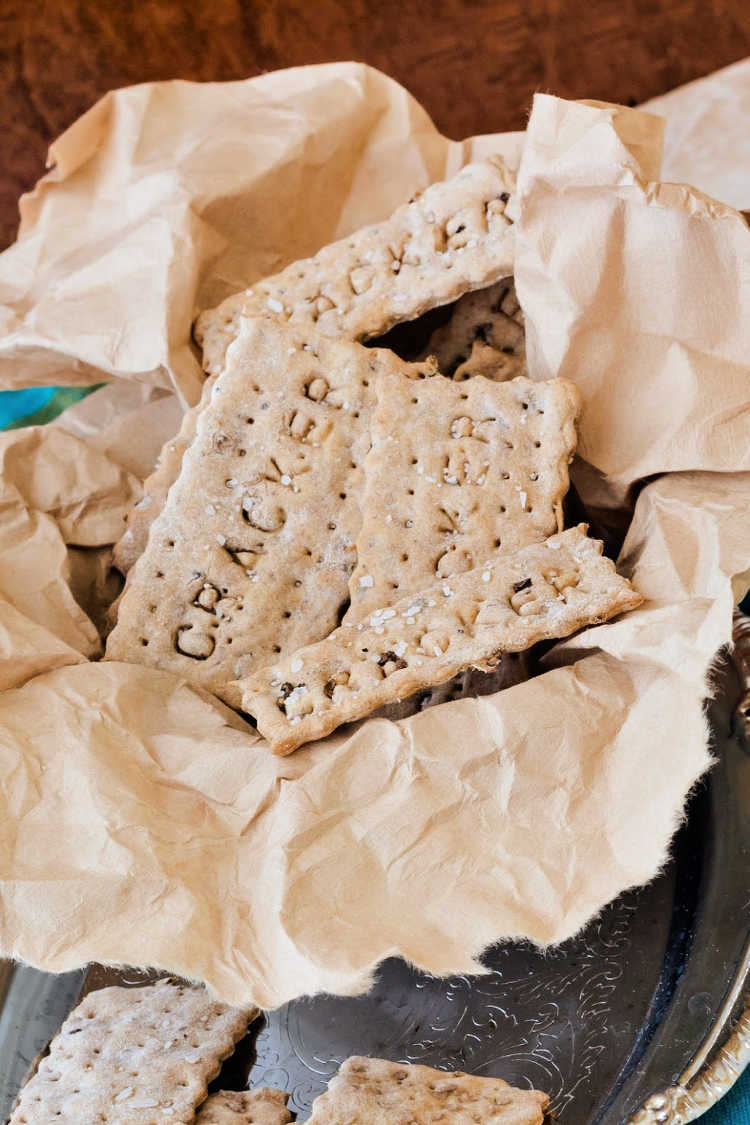
For reference, the crackers that say “cracker” on them are roughly 1″ x 2″.
Dips and Spreads to Serve with Your Homemade Crackers
Aside from munching on them plain, add them to a cheese plate for entertaining. Homemade crackers always impress people, and you don’t have to tell them how easy they are to make!
Serve them as a dipper for homemade pimento cheese, a tasty retro port wine cheese ball, labneh with pesto and roasted tomatoes, or even muhammara.
Some earthy white bean hummus or creamy roasted eggplant dip would go really nicely with the earthy spent grains in the crackers as would southwestern hot cream cheese dip or garlic spinach dip.
And for your seafood lovers, I think you’d really like this shrimp and crab dip.
Last, but certainly not least, consider serving these crackers as a base for the best sauce to pour over a block of cream cheese, tangy, sweet-sour “red sauce.” It is seriously one of my favorite retro appetizers!
Want to try a different kind of cracker? Try some homemade Ritz crackers. You can always add some spent grains for extra flavor and texture.
A Note About Measurements
I really hope you love these little soda crackers, you guys! I think they’re so cute with the little embossed letters on them.
It helps me and other readers so much if you take a moment to rate and review this recipe.
Your star rating and comments help others decide whether the recipe is worth making, and your feedback helps me continue improving recipes here at Pastry Chef Online.
Other lovely ways to share include pinning or posting on your favorite social media platform.
Thank you so much for taking the time!


Spent Grain Crackers
Equipment
Ingredients
- 2 cups all purpose flour whisked, spooned into a cup, and leveled off
- ¼ cup spent grain flour light or dark
- ¼ cup whole spent grains dried
- ½ teaspoon baking soda
- ½ + 1/8 teaspoon kosher salt
- 1 ½ oz cold unsalted butter cut into small bits
- 1 cup cold milk I used whole milk
- kosher salt or your favorite finishing salt/s to sprinkling on top
Instructions
- Whisk the flour, spent grain flour, and whole spent grains together in a medium bowl.
- Add the baking soda and salt and whisk again to make sure everything is evenly combined.
- Rub the butter in with the tips of your fingers until it looks like coarse meal. You don’t want any larger bits of butter.
- Use a knife to evenly stir half the milk into the flour mixture.
- Add the remainder of the milk, and stir in with a knife. The mixture will look very dry.
- Mix and knead the dough a few times, right in the bowl, until it comes together. The dough will be slightly sticky but shouldn’t stick to your hands.
- Wrap the dough in plastic wrap and refrigerate for an hour. This will allow the flour and the dried spent grains to fully and evenly hydrate.
- Preheat your oven to 375F.
- Work with 1/2 of the dough at a time, so cut the dough in half, wrapping one half up and returning to the fridge while you work with the other half.
- Sprinkle a clean, dry work surface with some all purpose flour.
- Roll the dough out into a square about 13-14" on a side. Dough should be fairly thin. 1/8" is a bit too thick, so take your time and roll the dough pretty thin.
- Use a pastry wheel or pizza cutter to clean up the rough edges of your dough, leaving you with about a 12" square of dough. You can bake the scraps as well, but they will be irregular in shape.
- Cut the dough into 2" squares for a total of 36 crackers.
- Place the crackers on a parchment-lined baking sheet. Leave roughly 1/2" between the crackers. It’s okay if they’re close together. You just don’t want them touching.
- Sprinkle the tops of the crackers evenly with your favorite finishing salt and press down slightly so the salt adheres to the crackers.
- Bake in the center of the oven for 12-15 minutes, rotating the pan halfway through the baking time to ensure the crackers bake evenly. There should be some light browning on the tops of the crackers with a slightly darker browning on the bottoms.
- Use a spatula to transfer the crackers to a cooling rack.
- Allow the crackers to cool completely before storing in an airtight container for up to 4 days.
- See Notes for what to do if the crackers soften up a bit over time.
Did You Make Any Changes?
Notes
Flavor Variations
- Italian Cheese Crackers: Add 1/2 cup of finely grated Parmesan or Romano cheese (or a combination of the two) to your dough along with 1/2 teaspoon of Italian seasoning.
- Cracked Black Pepper Crackers: Add 1 teaspoon coarsely ground black pepper and 1/4 teaspoon white pepper to the dough. Top the finished crackers with more cracked pepper and coarse salt.
- Dill crackers: Add 3/4 teaspoon dried dill and 1/2 teaspoon garlic powder to the dough. Brush baked crackers with melted butter as soon as they come out of the oven.
- Sesame crackers: Add 1 Tablespoon toasted sesame seeds to the dough and sprinkle the tops of the crackers with salt and sesame seeds before baking.
Nutrition
Would you like to save this post?

Hi, y’all! I hope you’ve enjoyed this post and hopefully also learned a thing or two.
If you like my style, I invite you to sign up for my occasional newsletter, The Inbox Pastry Chef.
Expect updates on new and tasty recipes as well as a bit of behind-the-scenes action. I hope to see you there!

And there you have it, friends. Crispy little brewers crackers made with both spent grain flour and whole spent grains.
I hope you enjoy them. Thanks for spending some time with me today. Take care, and have a lovely day.


Join in Today!
Just curious what the shelf life of these are. I made a bunch (They are delicious! I had some spent grain left over from making dog biscuits and so I made these crackers, adding worcestershire and Everything Seasoning to your recipe). YUM! Anyway, I packaged them in food grade plastic bags and sealed with heat sealer. A week later they seem fine, but I don’t want to take risks…
Thank you!
Hi, Holli! I love your additions! Since they are a low moisture product, I expect they’ll be fine for at least a couple of weeks, especially sealed. If you’re concerned, tossing them in the oven for a minute or 2 at around 200F should get rid of anything that might be lurking without overborowning them. Glad you like them!
Did I miss the oven temp on these?
Oh, man, I’m sorry. Good catch! 375F. I will update the recipe asap. Enjoy the crackers, Jamie!
Well now that we are hunkered down inside under a stay-at-home order here in Oregon, I figured what a perfect time to dry and grind some bags of spent grains I had in the freezer. Wow! The house smelled amazing as the grains got dry and toasty. I whizzed it all up in the food processor first and then half a cup at a time in a coffee grinder. Ready to make some crackers!
Oh, great! I feel like using some spent grains ups the nutrition. You guys stay well and safe, and enjoy the crackers Jenny!
What a great way to use this unique flour. I love the writing and the detailed directions you give to make these clever crackers. I can’t wait to serve these for holiday gatherings!
Thank you, Beth! I’m glad you found the instructions helpful. 🙂 I really hope you and your family and guests enjoy them!