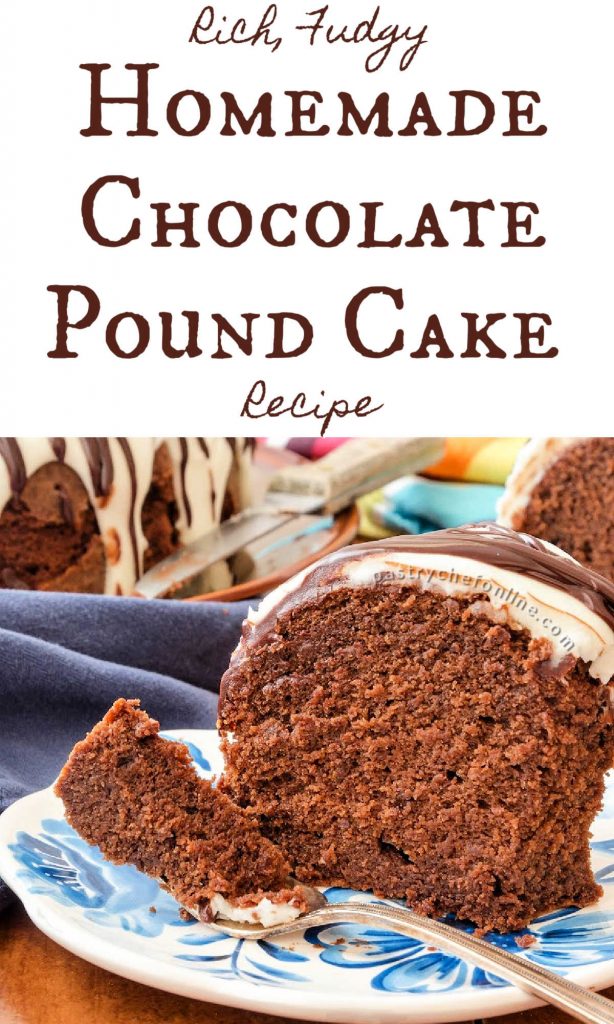
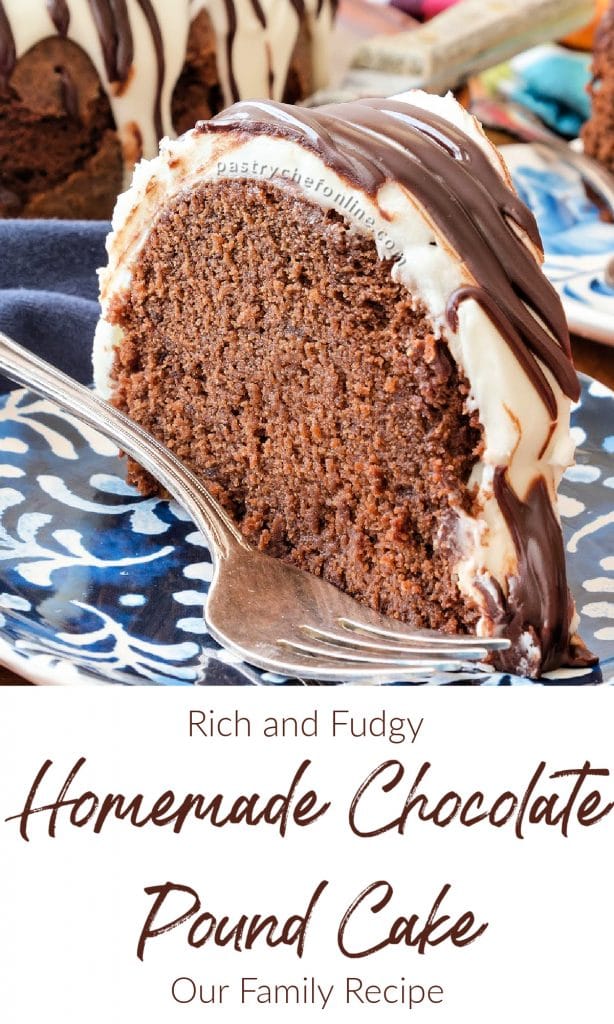
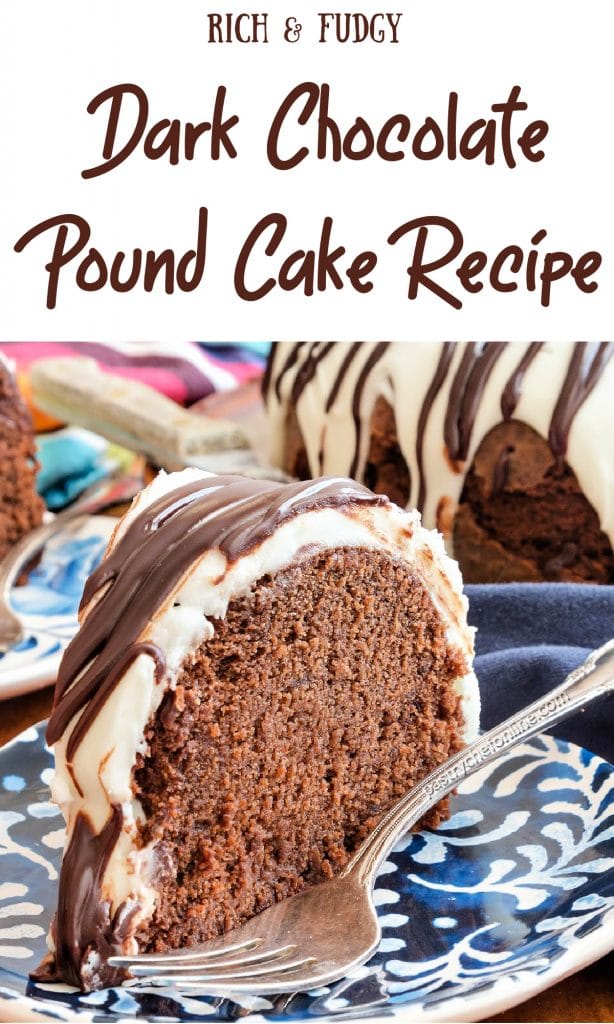
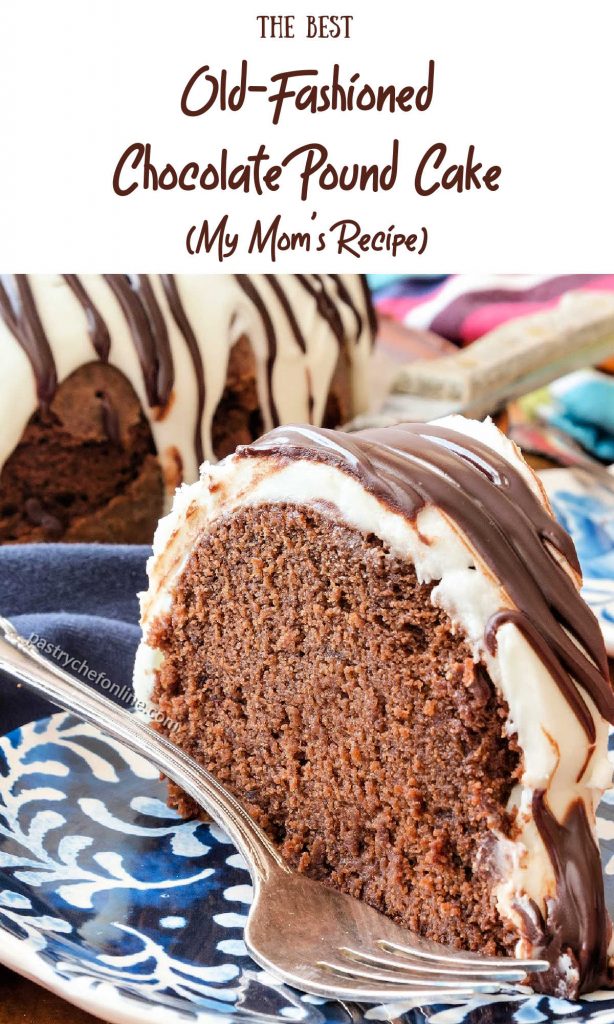
This is the cake that started my love affair with pound cake. My mom’s chocolate pound cake was the dessert my brother and I grew up fighting over. And with good reason.
It’s a rich and easy cake to make. Long before I perfected my master pound cake recipe, I loved this chocolate version.
For ease of browsing, you can find all my pound cake recipes in one place. Thanks so much for visiting!
Pastry Chef Online Participates in Affiliate Programs. If you make a purchase through one of my links, I may earn a small commission. For more information click to read my disclosure policy

So far I’ve made Jenni’s chocolate pound cake twice. What a great recipe! I followed Jenni’s instructions all the way through and now I have a recipe I am proud to serve.
Reader and Pound Cake Lover Susan
Chocolate Pound Cake, At a Glance
✔️Skill Level: Beginner
✔️Skills (some linked): The Creaming Method, preparing a cake pan, baking
✔️Type: Pound Cake
✔️Number of Ingredients: 12
✔️Prep Time: 20 minutes
✔️Cook Time: 70 minutes
✔️Yield: 1 large chocolate Bundt cake, 16-24 servings
Jump Straight to the Recipe
What Makes This Recipe So Great
This was my Aunt Charlotte’s favorite cake. Mom used to make her one every year, and every year, this sainted woman hoarded it, only sharing see-through thin pieces with special friends and only when asked.
That alone should be enough of an endorsement, but since you didn’t know my sainted Aunt Charlotte, here are some more reasons:
- Using brown sugar deepens the flavor and also makes this cake moister so that it gets fudgy after a few days on the counter. If it lasts that long
- It has just enough instant coffee in it to bolster the chocolate without being mocha. (If you want a more coffee-forward pound cake, try my chocolate espresso pound cake)
- Adding acidic dairy (in the form of sour cream or buttermilk) makes the crumb nice and tender
- Using enough salt to bring all the flavors into focus and counteract any bitterness that might be lurking from the cocoa powder
- Taking the time to whip all the eggs together to add them a bit at a time makes for a very stable, thick, and billowy batter that bakes up with a lovely, tight, velvety crumb
If this cake sounds like your cup of tea, you can jump straight to the recipe.
If you decide to make this cake, I have a favor to ask:
When you do make this recipe, it will help me and other readers if you:
✅Rate the recipes using the stars in the recipe card
✅Leave a review when prompted in the recipe card (If it’s a positive review, and I hope it is, I’ll use it in the post as social proof)
✅Leave a comment on the post
Thank you so much!
How To Make Chocolate Pound Cake
This cake is made using The Creaming Method and is pretty standard as far as the procedure. There are a few choices you can make regarding the liquid you use, the type of cocoa powder, and what sort of leavening you want to use.
Read on for all that information. If you want to get straight to baking, feel free to skip to the recipe.
Ingredients (and Substitutions)
Here’s a rundown of everything you’ll need so you can make your shopping list. You probably own a lot of ingredients already, especially if you do a lot of baking.
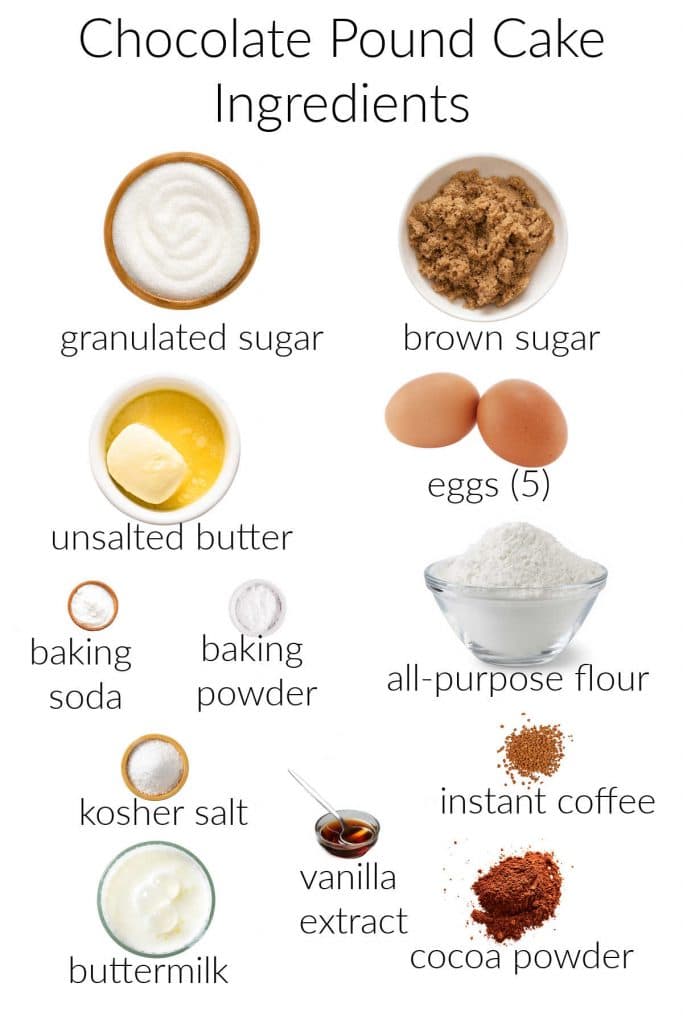
- unsalted butter: Carries the flavor and helps with browning, tenderness, and leavening (the creaming process). I prefer unsalted because I can better control the amount of salt in the recipe by simply adding my own measured amount
- salt: brings out the flavor. Counteracts any bitterness from the cocoa powder or instant coffee
- brown sugar: provides sweetness, tenderness, and the molasses in the brown sugar adds to the depth of flavor
- granulated sugar: provides the sweetness and assists with leavening (the creaming process). My mom originally made this cake with all white sugar, and you can too if you don’t have any brown sugar
- vanilla: rounds out the flavors. You could sub with chocolate extract or coffee extract if you’d rather
- eggs: helps with leavening, structure, tenderness. I use large eggs
- espresso powder: substitute instant coffee if you don’t have espresso powder. If your instant coffee is in big crystals (like mine) powder it using a mortar and pestle so it will easily incorporate with the batter
- all purpose flour: flour provides bulk and structure. If you prefer, you may use the same amount of cake flour rather than all-purpose. Your cake will be slightly more tender if you use cake flour. Mom always used all purpose, so either will work beautifully. Substitute cake flour for a finer texture (I usually use cake flour)
- cocoa powder: substitutes for part of the flour to bring dark chocolate flavor. Use “standard” un-alkalized cocoa powder, not Dutch process. I use regular, “grocery store cocoa powder.” When I have some, I use Ghirardelli.
- baking powder: emits gases to assist with leavening, once when it gets wet and again when it heats up in the oven (hence “double acting”)
- baking soda: neutralizes the acidic buttermilk and molasses so the batter has a balanced pH and bakes correctly. (Too acidic and your batter bakes up too quickly, too basic, and it may never actually set)
- buttermilk: acidic buttermilk tenderizes the crumb and provides liquid to make the batter light enough to rise well in the oven. You can use whole buttermilk, low-fat, or non-fat here. You may also choose to swap out up to half of the buttermilk for some plain yogurt or sour cream
How to Make It: Basic Rules for The Creaming Method
- Beat butter until smooth and creamy.
- Add the sugar and beat until light and fluffy, about 8 minutes.
- Beat the eggs together in a bowl and drizzle them slowly into the batter over about five minutes or so. This results in the most stable emulsion possible.
- Alternate adding the dry ingredients with the wet ingredients dry->wet->dry->wet->dry.
- Pan and bake.
Jenni Says: Whisking the eggs together and drizzling them in over time yields a more stable batter than one made where you plunk in 1 whole egg at a time. Building the emulsion slowly is the key to a stable and billowy batter
For the moistest cake, after unmolding, wrap the cake in plastic wrap while it is still very warm. All the moisture will stay inside the cake rather than evaporating out.
Liquids, Cocoa Powder, and Leavenings

Cake batter needs to have a more-or-less neutral pH for an ideal bake. Having too many alkaline ingredients can make a cake take too long to bake and possibly not set at all.
Having too many acidic ingredients makes the outside set and brown too quickly.
To keep the batter balanced when using acidic ingredients, use baking soda to offset the acid in American cocoa powder and acidic dairy such as buttermilk or yogurt.
If using Dutch process cocoa (neutral pH), or whole milk (ditto), you can leave out the baking soda altogether.
When starting to get your ingredients together for this recipe, you may be able to leave out the baking soda IF:
- you use whole milk or half and half as the liquid
- you use Dutch process cocoa powder
You will need the baking soda if:
Would you like to save this post?
- you use acidic dairy such as yogurt, sour cream, or buttermilk
- you use American cocoa powder
So it really is your choice.
Equipment Recommendations
This cake is scaled to fit in a 12-cup Bundt pan. You can also bake in 2 loaf pans or 2 9″ round pans.
Check out my brown sugar cinnamon pound cake recipe. That recipe has the same proportions as this cake, and I baked some of the batter in a loaf pan, some in an 8″ round pan, and I also made 11 cupcakes.
Baking in a Cold Oven (No Pre-Heat)
I usually bake this cake in a preheated 325F-350F oven, but this time, I decided to go with a cold oven bake.
That means that I put the cake in a cold oven, and then set the temperature. The preheating time becomes a part of the baking time.
Is this method better? For pound cake, I think so. The cake ends up with an even finer texture than in a preheated oven, and it almost melts in your mouth.
To read more about starting in a cold oven versus baking in a preheated oven, read this helpful post from PJ Hamel over on the King Arthur site.
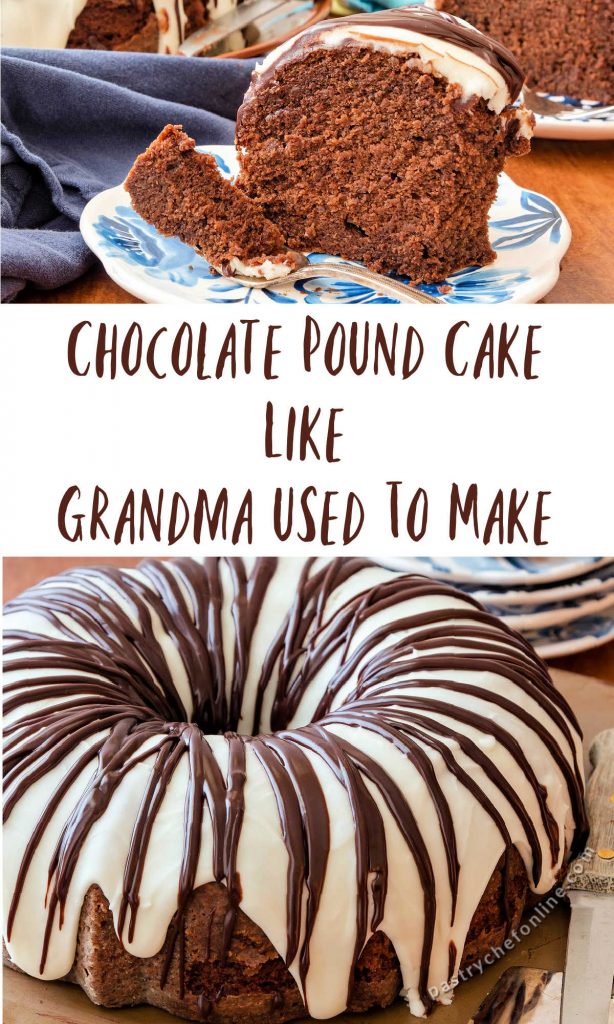
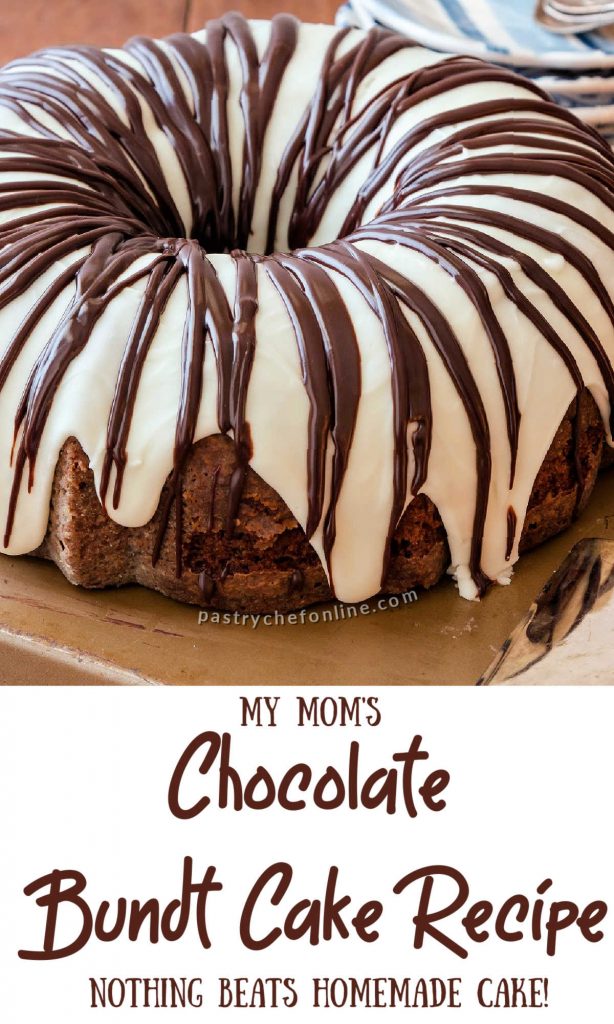
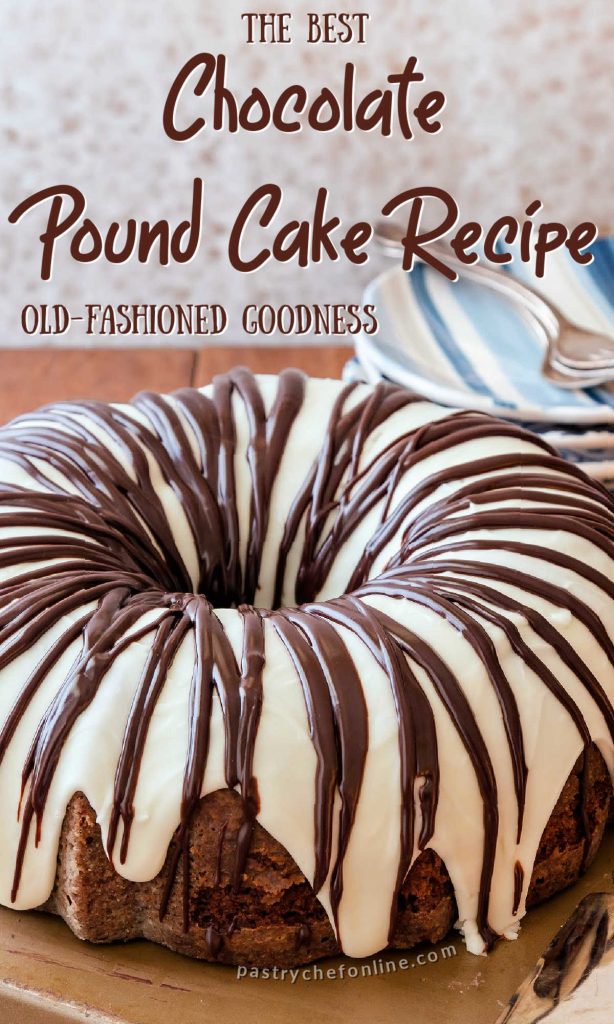
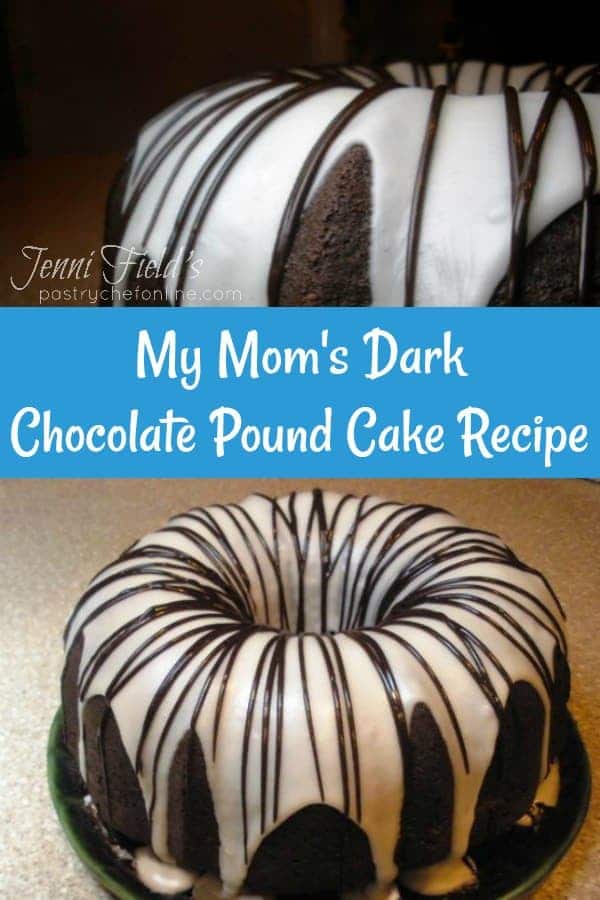
How to Make the Two-Tone Glaze

I think the glaze is so pretty! It’s also really easy to achieve.
The white layer is just my regular old cream cheese glaze (measurements in the recipe card):
- cream cheese
- butter
- powdered sugar
- a pinch of salt
- a splash of vanilla and
- just enough half and half to make a thick, barely pourable glaze
The chocolate glaze is 1/2 cup chocolate chips, 1/2 cup heavy cream. In other words, a simple ganache.
Pipe it on with a pastry bag and a reusable #2 tip or just snip off a tiny corner of a zip top bag and use that.
See the video for the full tutorial.
Chocolate Pound Cake Q & A

Yes. Pound cake freezes really well for a good 3-4 months. Make sure it is well wrapped in both plastic wrap and then heavy-duty foil. For ease of serving, I suggest slicing it before freezing. That way when you want a piece of cake, you can just take out what you need. If you are planning to freeze the whole cake, wait until you thaw it out to glaze it. Then let the glaze set up for 2-3 hours before slicing and serving.
At room temperature in a covered container, you can easily get a week out of this cake. One of my favorite things about this guy is that the longer it sits out, the fudgier it gets, so don’t eat it all on the first day or two!
Questions?
If you have any questions about this post or recipe, I am happy to help.
Simply leave a comment here and I will get back to you soon. I also invite you to ask questions in my Facebook group, Fearless Kitchen Fun.
If your question is more pressing, please feel free to email me. I should be back in touch ASAP, as long as I’m not asleep.
A Note About Measurements
My recipes are almost all written by weight, including liquids, unless otherwise specified.
For accuracy and consistency of results, I encourage you to buy–and use–a kitchen scale.
I promise that baking and cleanup will be so much quicker and easier.
This is the scale that I recommend for home use. I have owned and used one for years.
Love This Chocolate Pound Cake? Please Rate and Review. Thanks!
It helps me and other readers so much if you take a moment to rate and review this recipe.
Your star rating and comments help others decide whether the recipe is worth making, and your feedback helps me continue improving recipes here at Pastry Chef Online.
Other lovely ways to share include pinning or posting on your favorite social media platform.
Thank you so much for taking the time!


Mom’s Chocolate Pound Cake
Video
Equipment
Ingredients
- 12 oz butter 340 grams or 3 sticks at cool room temperature
- 6 oz brown sugar 170 grams about a scant packed cup
- 13 oz sugar 369 grams about 2 cups
- 2 teaspoons instant coffee or espresso powder
- 1 ¼ teaspoon fine sea salt 10 grams, so if using Morton's kosher, use 2 teaspoons. If using Diamond Crystal, you'll need a slightly generous tablespoon
- ⅛ teaspoon cayenne pepper (optional–I generally leave it out)
- 2 teaspoons vanilla extract
- 5 large eggs
- 10.5 oz cake flour 298 grams or about 2 1/2 cups, whisked, spooned into a cup lightly, and swept off level You can also use all-purpose–either will work
- 2.5 oz cocoa powder 71 grams or about 3/4 cup
- ¼ teaspoon baking soda See NOTES–you may be able to leave it out depending on the type of dairy you use
- 1 teaspoon baking powder
- 10 oz full fat buttermilk (or milk, sour cream, etc. See NOTES about leavening) 284 grams or 1 1/4 cups
For the Two Glazes
- 2 oz cream cheese 57 grams or 1/4 block
- 1 oz butter 29 grams or 2 Tablespoons
- pinch salt
- ½ teaspoon vanilla extract
- 12 oz powdered sugar 340 grams 3 cups
- 2 oz milk, half and half, or heavy cream or as needed to make a thick glaze
- 3 oz heavy cream 85 grams or about 1/3 cup
- 3 oz semi-sweet or bittersweet chocolate chips 85 grams or about 1/2 cup
Instructions
- Prepare a 12-cup Bundt pan with oil and flour or with a flour spray such as Baker’s Joy. Set aside.
- Preheat the oven to 325F and set a rack in lower third of the oven. Alternatively, you can start the cake in a cold oven.
- In the bowl of your stand mixer fitted with the paddle attachment, beat the butter until smooth. Add the sugars, salt, espresso powder, cayenne (if using), and vanilla, increase speed to medium-high and beat until lightened in color and fluffy, about 7-10 minutes. Scrape the bowl as necessary.
- Beat the eggs together in a small bowl, and with the mixer on medium low, drizzle them into the creamed butter and sugar mixture a bit at a time over about 5 minutes. Scrape the bowl as necessary.
- Whisk together the flour, cocoa, baking powder, and baking soda. If your cocoa powder is lumpy, sift all dry ingredients together. Set aside.
- Measure out the buttermilk (or your preferred liquid) and set aside.
- Add the dry ingredients to the batter in three additions alternating with the buttermilk, beginning and ending with dry. Mix for only a few seconds between additions.
- Once the last amount of dry ingredients are in the bowl, mix until barely combined and then finish by hand, scraping the sides and bottom of the bowl to fully incorporate all the ingredients.
- The batter will be thick and billowy.
- Scrape the batter evenly into your prepared pan and bake in the center of the oven until done, about 1 hour to 1 hour and ten minutes. The internal temperature you're looking for is between 195-200F. If starting with a cold oven, set the oven to 325F now. Baking time will be maybe 5 minutes longer. Be sure to check with an instant-read, just to be sure.
- Let cool on a rack for 30 minutes before turning out. For the moistest cake, wrap it in plastic wrap while it is still hot and let it cool wrapped up. This will keep liquid from evaporating out of the cake during the cooling process. Let the cake cool completely before glazing.
For the Glazes
- In a medium, microwave-safe bowl, add the cream cheese and butter. Microwave until partially melted.
- Add a pinch of salt and the vanilla, and whisk until the mixture is smooth.
- Add the powdered sugar and whisk it in as well as you can.
- Add your liquid, a bit at a time, whisking between additions, until you have a very thick glaze.
- For the ganache, heat the cream in a microwave-safe bowl for about 45 seconds. That should bring it to a boil.
- Dump in your chocolate chips and whisk slowly until you have a rich, glossy, emulsified ganache. Allow to cool before putting it in a piping bag.
Did You Make Any Changes?
Notes
A Note About Leavening
If using an acidic dairy such as buttermilk, sour cream, or yogurt, use the baking soda called for in the recipe. If using whole milk, leave it out.Other Glaze Suggestions:
- “Plain White Glaze:” mix 3 cups powdered sugar with a pinch of salt, 1/4 teaspoon vanilla and enough milk or half and half to make a drizzling consistency.
- Hot Fudge Sauce: Not necessarily for glazing but for serving with. Use the pound cake as a base for a “brownie sundae,” and top a warmed slice with a scoop of ice cream and then drench the whole thing in my best hot fudge sauce.
Nutrition
Would you like to save this post?

Hi, y’all! I hope you’ve enjoyed this post and hopefully also learned a thing or two.
If you like my style, I invite you to sign up for my occasional newsletter, The Inbox Pastry Chef.
Expect updates on new and tasty recipes as well as a bit of behind-the-scenes action. I hope to see you there!

And that’s it for today, friends!
I hope you make and enjoy the chocolate pound cake. And once you make it, feel free to be as selfish with it as Aunt Charlotte was.
Take care, y’all.


Join in Today!
Excellent cake!!!!
So pleased you like it, Charlotte!
This is NOT a chocolate cake – it’s a cocoa cake. And don’t tell me it’s the same thing. It’s NOT. and it doesn’t taste like chocolate cake. If you’re going to call it chocolate cake then USE CHOCOLATE and NOT cocoa!.
Okay, then. Mom called it chocolate pound cake. Good enough for her? Good enough for me. Not good enough for you? Find another recipe and enjoy that. Take care.
Amen! this is a wonderful chocolate cake! I’ll call if that till the end of time! Cocoa, chocolate on the outside, I also throw in some milk chocolate and it is the most delicious chocolate cake that has everybody asking me to make it over and over again! Delectable!
I am thrilled you love it, Andrea! And throwing even more chocolate at it seems like the best plan ever!
Very Yummy cake. I look forward to making some more of your cakes!!!
Marianne, hi! I’m so pleased you loved the cake, and I hope you enjoy the others you make as well. Thanks for being here!
Hi Jenny – i just made this for our Christmas Day dinner. Wanted a change from our usual pies. It looks pretty setting on my mom’s cake stand (: Can’t wait to have a piece tomorrow! Thanks for you recipes!
Oh, thank you so much for letting me know! Have a wonderful Christmas, and enjoy the cake!
My 12yo son wanted to bake a pound cake. Specifically, a chocolate pound cake. So what did I do? Well of course, I went straight to Jenni’s site! I even watched the whole 40+ minute video she did on making this cake, and the part of the creaming method that was new to me. My son did almost all the work himself, weighing out ingredients, learning how to use the mixer, scraping down the sides of the bowl, etc. My 31yo son came over for dinner, and Arthur was so excited about serving the cake to his brother. He asked me to hide it, and when we were ready for dessert, he put on music and came marching into the dining room with the cake, and “presented” it to us in a very formal way. It was so cute. The cake was fantastic. Moist (thanks for the tip about wrapping it in plastic wrap while it cooled to retain moisture!), Deeply chocolatey, a beautiful crumb, and the best pound cake I’ve had since my grandmother used to make them for me when I was a little girl. Thank you Jenni Field’s Pastry Chef Online !!
My 12yo son wanted to bake a pound cake. Specifically, a chocolate pound cake. So what did I do? Well of course, I went straight to Jenni’s site! I even watched the whole 40+ minute video she did on making this cake, and the part of the creaming method that was new to me. My son did almost all the work himself, weighing out ingredients, learning how to use the mixer, scraping down the sides of the bowl, etc. My 31yo son came over for dinner, and Arthur was so excited about serving the cake to his brother. He asked me to hide it, and when we were ready for dessert, he put on music and came marching into the dining room with the cake, and “presented” it to us in a very formal way. It was so cute. The cake was fantastic. Moist (thanks for the tip about wrapping it in plastic wrap while it cooled to retain moisture!), Deeply chocolatey, a beautiful crumb, and the best pound cake I’ve had since my grandmother used to make them for me when I was a little girl. Thank you Jenni!!!
Jenny, thank you so much for sharing this story! I love that Arthur wanted to make a cake and that you chose my mom’s pound cake! Thrilled it turned out so beautifully!
Well balanced ingredients, resulting in a perfectly textured cake
Can you use all purpose flour
Hi, Harris. Yes, you can substitute all purpose flour for the cake flour. The cake won’t be quite as tender, but it will still be delicious. Enjoy!
I’m not a fan of mocha, or anything coffe flavored…can I leave out the espresso?
You can absolutely leave it out, Becky. This is one of my additions to mom’s original recipe, and the cake is lovely without it. Enjoy!
Hi
Could I somehow substitute liquid coffee in this recipe?
Hey, Joyce. Yes. I think the best way to incorporate liquid coffee is to use strong brewed coffee as half the liquid. So instead of 10 oz (1 1/4 cups) buttermilk, I’d go with 5 oz each, buttermilk and strong coffee. Unless you’re looking for a mocha cake, you may have to adjust up or down so the coffee flavor isn’t too prominent. Hope this helps. Enjoy the cake!
I usually add water or hot chocolate to anything that calls for coffee
That’s a great sub! In this case, there is so little instant coffee that leaving it out entirely is also a valid choice. If you make it, I hope you enjoy it!
I am so making this fabulous cake. Your recipes are always spot-on and so I know this will be a terrific addition to our dessert time. Thanks for sharing the recipe. I did enjoy watching you make this on Facebook Live, too!
Oh, BA, I’d be thrilled and honored if you make this! I hope you guys enjoy every bite, my friend!
Our friends came over yesterday. So, I baked one.
I didn’t have half and half or sour cream, so I used light cooking cream and Greek yogurt. I don’t know how they’ll make it different in taste, but we’re loving it. We’re having a big slice each for dinner tonight. 😀
Love the addition of cayenne pepper. I didn’t realize I had pepper dust on my finger until I rubbed my eye. Lol!
It’s a shame I didn’t make the glaze. (I prefer plain cake, DH loves glaze. I’ll make with glaze next time, just to be fair. ;))
Thank you for this wonderful cakey, Chef Jenni. xox
Oh hooray! Your subs were perfect too, Sianli!
Makes me so happy to know that you made and are enjoying this cake! (Sorry about your eye). :/
I really appreciate this website. Thanks for teaching me different mixing methods and offering your wealth of knowledge on your website. I have made two of your recipes. I made the blueberry muffins and this chocolate pound cake. I followed directions to the tee (as much I am able, that is), and both products had great flavor, rose well, and looked fantastic, however they were both dry inside. What causes a baked good to end up this way…could it be oven temp, or the brand of ingredients I used, or am I just an ungifted baker? Please help…
Thanks for writing, Kym, and I’m glad that you enjoy the site and find it useful. I doubt that it’s because you’re an “ungifted” baker, but it could be just that you’re inexperienced. And sometimes it takes experience to know when to pull something from the oven or if something is baking too quickly. Since the two recipes you made are made w/different mixing methods, I would bet that the issue is oven temperature. Check your oven w/an oven thermometer just to make sure that it’s accurate. Make sure your measurements are correct. If you’re not using a scale, or if the recipe is written in cups and tablespoons, etc, make sure you’re using dry measures (flat top) for dry ingredients and spouted measures for wet ingredients. I hope these tips help, and please let me know if you have any more questions. Happy baking:)
I am wondering how you got your white glaze so white and thick? Mine came out thinner and not as pretty. Thanks
It’s really all about consistency. Start with a bunch of powdered sugar and add less liquid (milk, 1/1&1/2, whatever) that you think you’ll need. Whisk and whisk. If it’s too thick and not all the sugar is incorporated, add literally just a 1/2 teaspoon (a wee dribble) of extra liquid at a time, whisking thoroughly between.
Believe me, I’ve made some thin, kinda ugly glazes in my time. It’s all about the amount of liquid you use. If your glaze seems too thin, whisk in more sugar until it thickens up. For me, a perfect glaze oozes very slowly off the whisk and once it’s on the cake, it should stop running before it hits the plate. By that standard, this particular glaze was just a shade too thin. Hope that helps, and I hope that you at least enjoyed the cake. 🙂
Butter is key, try 1 stick to the glaze recipe.
Never mind, I just saw your Creaming Method directions!
molly
No problem, Molly! Hope the birthday party is a rousing success!
Hi, I was just wondering if there is any trick in how to put this cake together. You give all of the ingredients, but no directions on the order. I’m hoping to make this for our b-day celebration tomorrow. Thanks!
I’m dizzy ms. lizzy with the thoughts of fudgier fudgier fudgier spinning in my head!
Come live next door to me, I will do all the other cooking 🙂
That looks great! And I’m not really a chocolate person…hehe, I would have added a lot more salt and some spice, too. I can’t have chocolate without salt and/or spice!
A gorgeous cake!