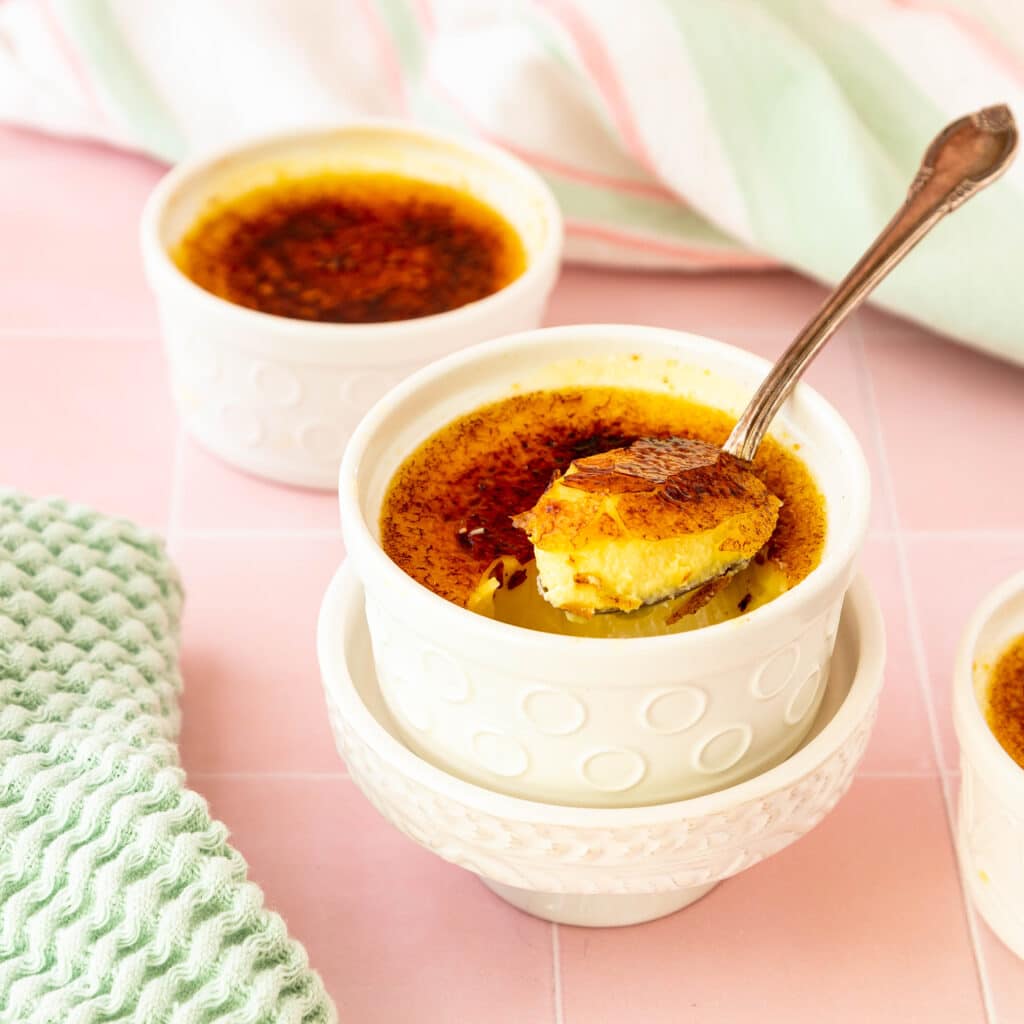
Hey, friends! In this post, I’ll show you how to make two different desserts with the same batter. One, a cheesecake with a bruleed sugar decoration (creme brulee cheesecake), and the other, an almost-classic creme brulee baked in ramekins with bruleed sugar on top (cheesecake creme brulee).
If you are a fan of rich, silky-smooth desserts, you will love this cheesecake-y custard. Or custard-y cheesecake.
Would you like to save this post?
If you’re a fan of cheesecake but prefer not to turn on the oven, give my no-bake coffee cheesecake bars a try. For ease of browsing, you can find all my cheesecake recipes in one place. Thanks so much for being here. Let’s get to it!
Pastry Chef Online Participates in Affiliate Programs. If you make a purchase through one of my links, I may earn a small commission. For more information click to read my disclosure policy
See my creme brulee cheesecake recipe web story here.
Why Make This Recipe?
When I decided to make this dessert, I started by looking up other folks’ versions of these cheesecakes, and every single one was a “plain” cheesecake with a layer of torched sugar on top.
That’s all well and good if you are looking for a “sturdy” cheesecake that won’t smoosh too much when you slice through hard sugar.
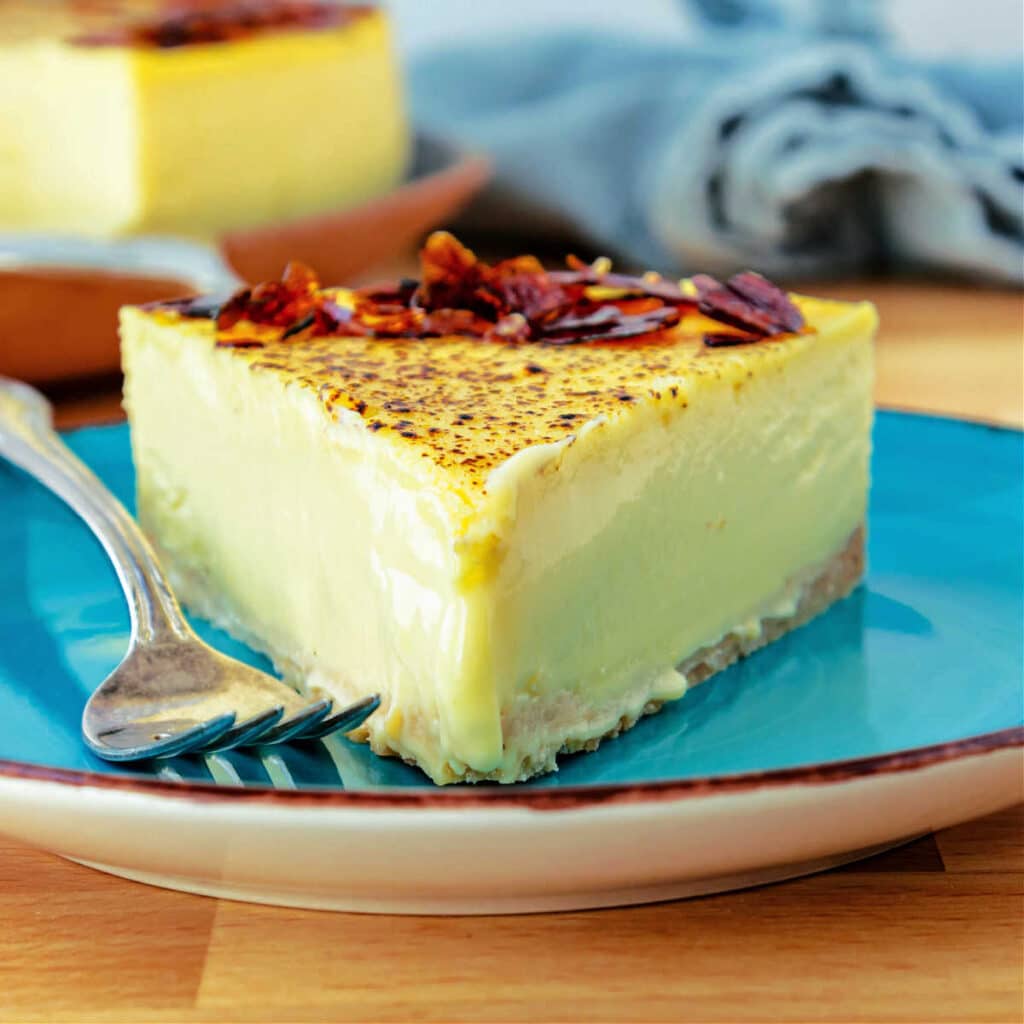
But as creme brulee is every bit as much about the custard itself as it is about the hard sugar “top,” so should creme brulee cheesecake be just as much about what’s under the sugar.
For this recipe, I took my basic creme brulee batter (more or less, anyway) and added cheesecake elements, namely cream cheese and Greek yogurt (or sour cream).
The resulting batter is just firm enough to slice in cheesecake form and is a slightly tangy and richer version of a traditional creme brulee in that form.
Another selling point is that you don’t need a mixer of any kind. I made all my test batches and the final batch using a spatula, whisk, and a large bowl. That’s it!
Everyone who has tried it has loved it. A friend texted me that it was “luxurious,” and I think that’s an apt description.
I think you will love it too.
If you’re sold, you can skip on down to the recipe. When you do make it, I have a favor to ask:
When you do make this recipe, it will help me and other readers if you:
✅Rate the recipes using the stars in the recipe card
✅Leave a review when prompted in the recipe card (If it’s a positive review, and I hope it is, I’ll use it in the post as social proof)
✅Leave a comment on the post
Thank you so much!
How to Make It
First things first. You have to follow the ratio.
Respect the Ratio
Here are the basic proportions to make this recipe:
For each 4 oz of cream cheese (1/2 “block” or 114 grams), you need:
- 3 oz sugar
- 1 egg
- 3 yolks
- 1/4 teaspoon salt
- 2.25 oz Greek yogurt or sour cream (1/4 cup)
- 4 oz heavy cream
- 1 Tablespoon vanilla
Knowing these ratios, you can easily scale up.
A 1x batch will make 2 cups of batter, so you can make 2 8 oz ramekins (or 4 4 oz ramekins) of creme brulee, or a 4″ cheesecake.
Simply scale up as you need or want.
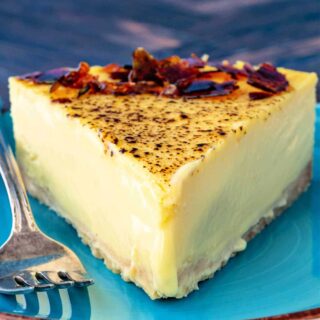
For reference, the cheesecake you see in the photos is made in a 9″ springform pan and is a 3x the base recipe.
The creme brulee is a 2x of the base recipe and made 8 4 oz ramekins of deliciousness.
Ingredients and Substitutions
Here is what you’ll need to make this recipe.
You only need the crust ingredients if you’re making the cheesecake. You can add a crust to your ramekins and bake them before filling with batter. It’s your call.
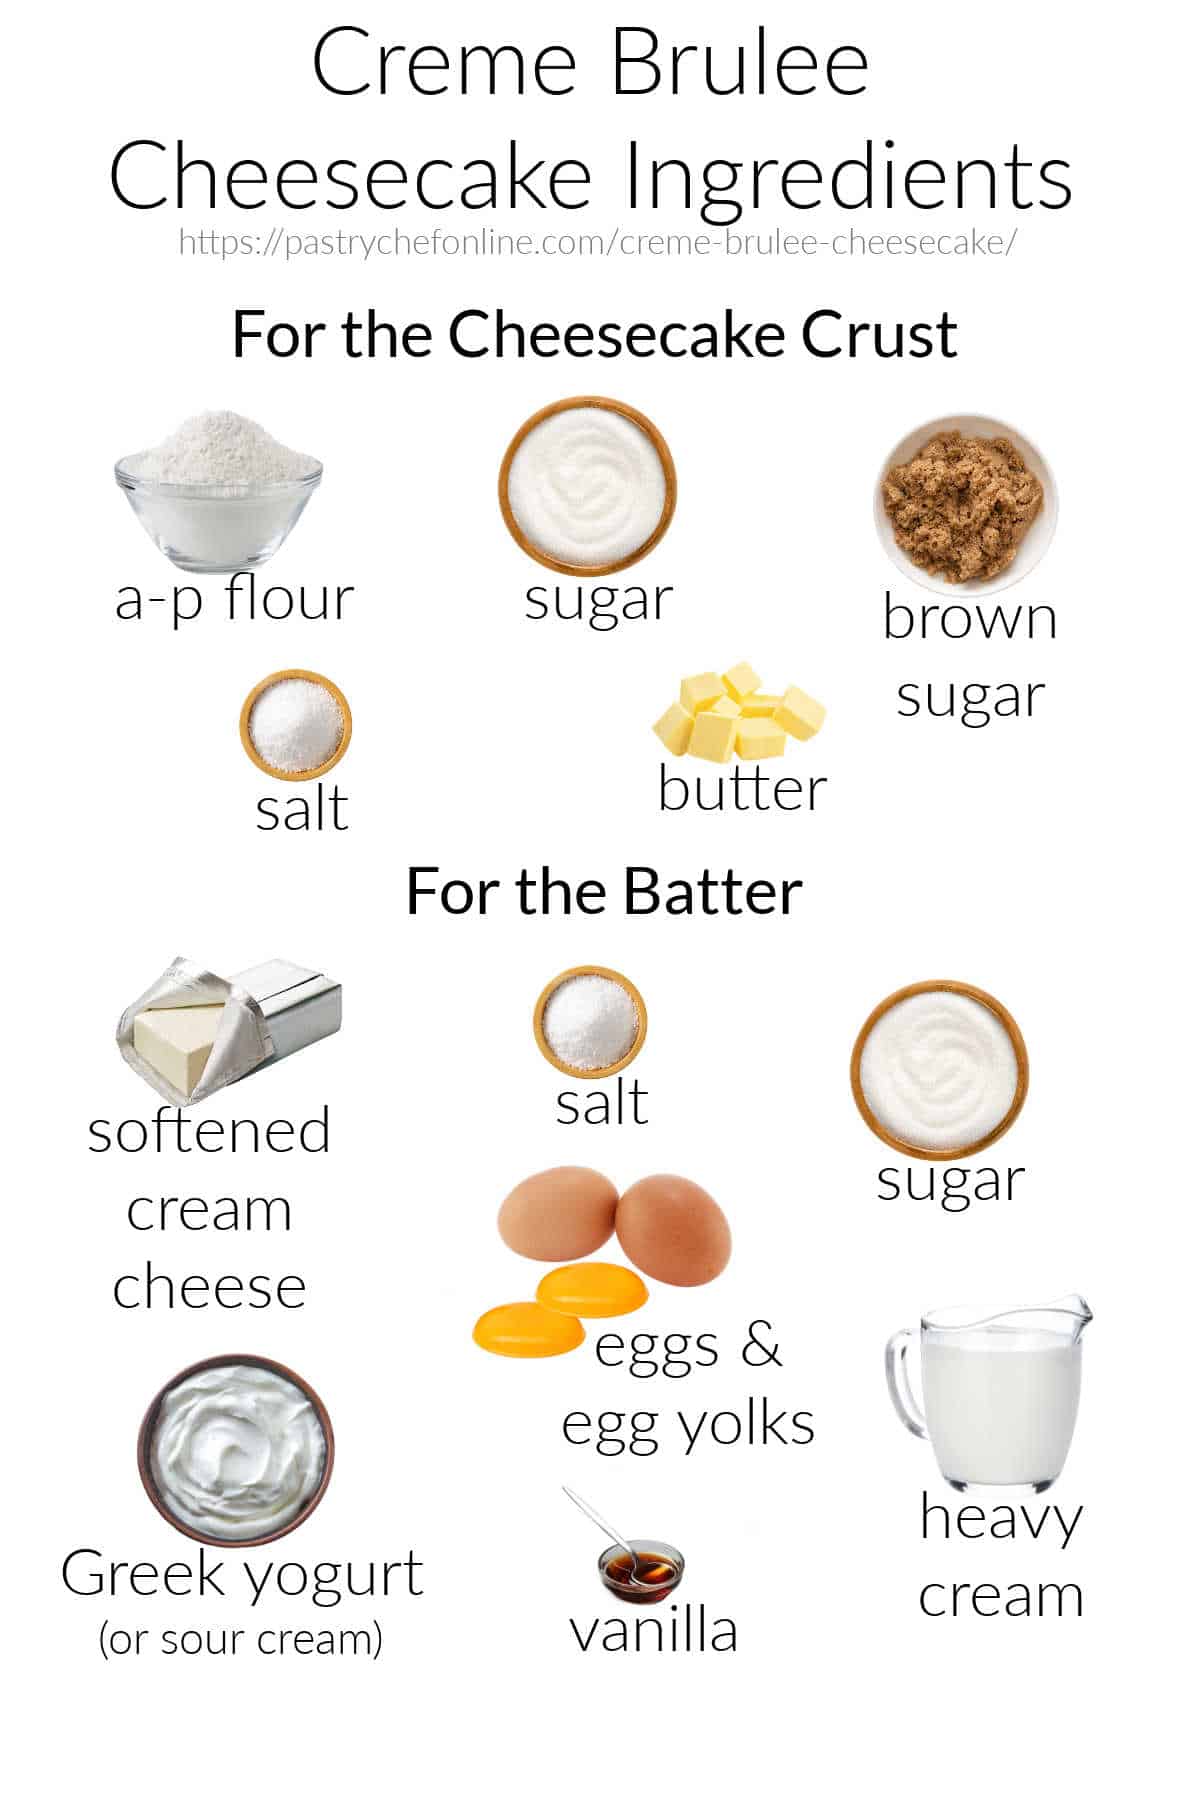
The crust is actually my streusel recipe, just all packed down and pre-baked rather than crumbled.
- flour: All-purpose flour works great here. No need to worry about excess gluten-formation making a tough crust since there is barely any water in the crust
- sugar: For sweetness, texture, and browning
- brown sugar: I use half white and half brown sugar for a bit more complex flavor. You may use all of one or the other if you prefer
- salt: Brings out the flavor of the butter in the crust. Don’t leave it out, or the crust will be barely worth eating. That’s how important salt is
- butter: I use unsalted. You can use salted if you have some on hand, and then you may not need to add extra salt
Jenni Says: You can also make a standard crumb crust by using Graham crackers or your favorite cookie, butter, a tiny bit of sugar, and a pinch or two of salt
For the batter for either the cheesecake or the individual servings, you’ll need
- cream cheese: I use Philadelphia brand, full-fat. Provides tang, the cheesecake element, as well as gives the batter a bit more body than it would otherwise have
- salt: Again, don’t leave the salt out. It brings all the flavors into focus and keeps the batter from reading as flat and bland
- sugar: I use regular granulated/caster sugar to provide neutral sweetness so the cream cheese flavor shines. You may use brown sugar if you prefer. Note, because of the molasses in brown sugar, your batter will be a darker color
- Greek yogurt: Provides tang, body, and another cheesecake element not found in regular creme brulee batter. You may substitute sour cream if you prefer
- eggs: Traditional creme brulee uses all yolks, so introducing whole eggs is a nod to cheesecake. The whole eggs also provide a bit more setting power than yolks alone, allowing you to cleanly slice it.
- egg yolks: The traditional thickener for creme brulee, egg yolks provide richness. The fat in the yolks helps to carry flavor, and yolks impart their own subtle eggy deliciousness and sunny yellow color to the batter
- heavy cream: Lends volume to the batter as well as fat and milk solids. Without cream, the set of the custard would be too firm and a bit rubbery. The clean dairy flavor is an integral part of the subtle flavor
- vanilla: Vanilla is present in a pretty hefty portion to add floral and woody notes. It really rounds out the flavor. If you happen to have vanilla beans take the additional step of adding 1 1/2 split and scraped vanilla beans to the cream the night before and let it all steep together in the fridge. You can even experiment with using different types of vanilla extract or even homemade. This is my favorite kind of vanilla
Procedure for the Crust
For the cheesecake, you’ll make the crust first. If making the creme brulee version, you may choose to make crust or not. It’s totally up to you.
Jenni Says: During my testing, the crust mixture browned better in individual ramekins. Still, the crust baked through and was easy to slice for serving. Again, this is literally my streusel dough used as the crust.
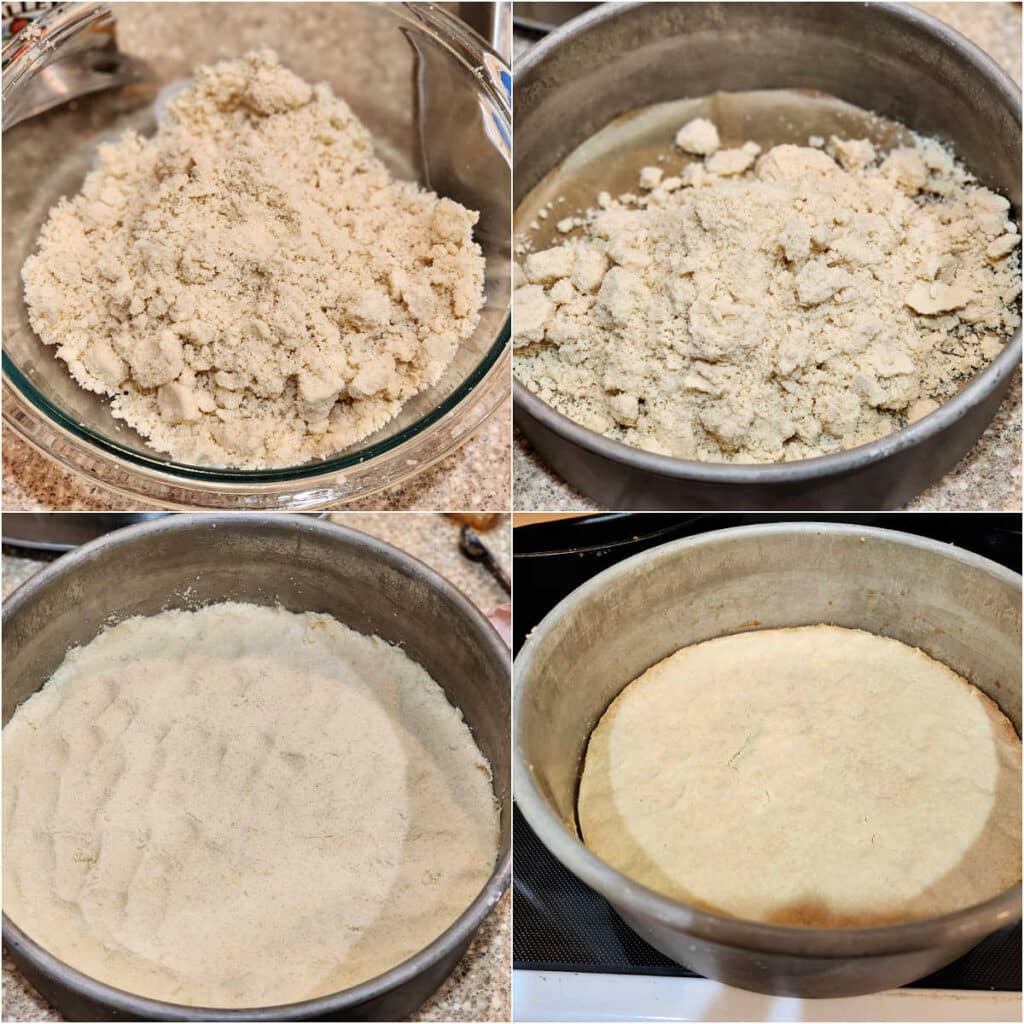
- Mix all the crust ingredients evenly together with your fingers, smooshing in the butter until there are no little bits at all. You can also do this in a food processor.
- Dump the crumb mixture into a parchment-lined 9″ springform pan or pushpan.
- Press the crust evenly into the pan. Use the bottom of a glass to make it completely level if that is important to you.
- Bake at 350F until lightly browned, about 20 minutes.
How to Make the Batter
I am so glad I tested this recipe without a mixer, because it means anyone can make it as long as you have a bowl, a whisk, and a spatula.
Jenni Says: There are two tricks to making this batter nice and smooth. 1)Heat the cream cheese in the microwave until it is very soft, about 20 seconds, and 2)Strain the mixture after making it and before pouring it into your pan or ramekins.
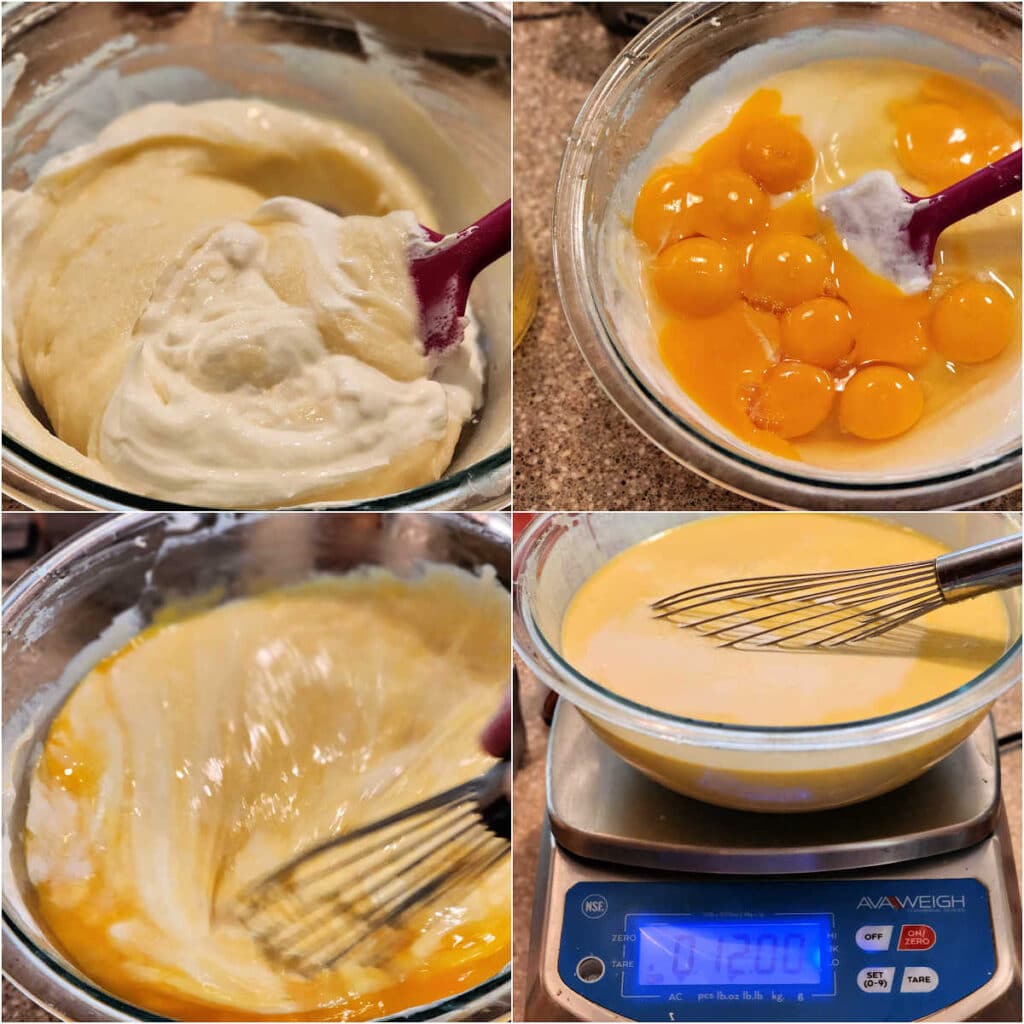
- Soften the cream cheese in the microwave and then thoroughly blend together with the sugar and salt. Once those ingredients are combined, stir in the yogurt.
- Add the whole eggs and egg yolks. The image shows a 3x of the base recipe, so 3 eggs and 9 yolks.
- Switch to a whisk and whisk until the eggs are completely incorporated.
- Pour in the heavy cream and vanilla and stir until well mixed.
Extra Step Alert: If you choose, you can refrigerate the batter overnight. The batter becomes even richer and creamier. If you don’t have the time, worry not. Your batter will still be rich and creamy.
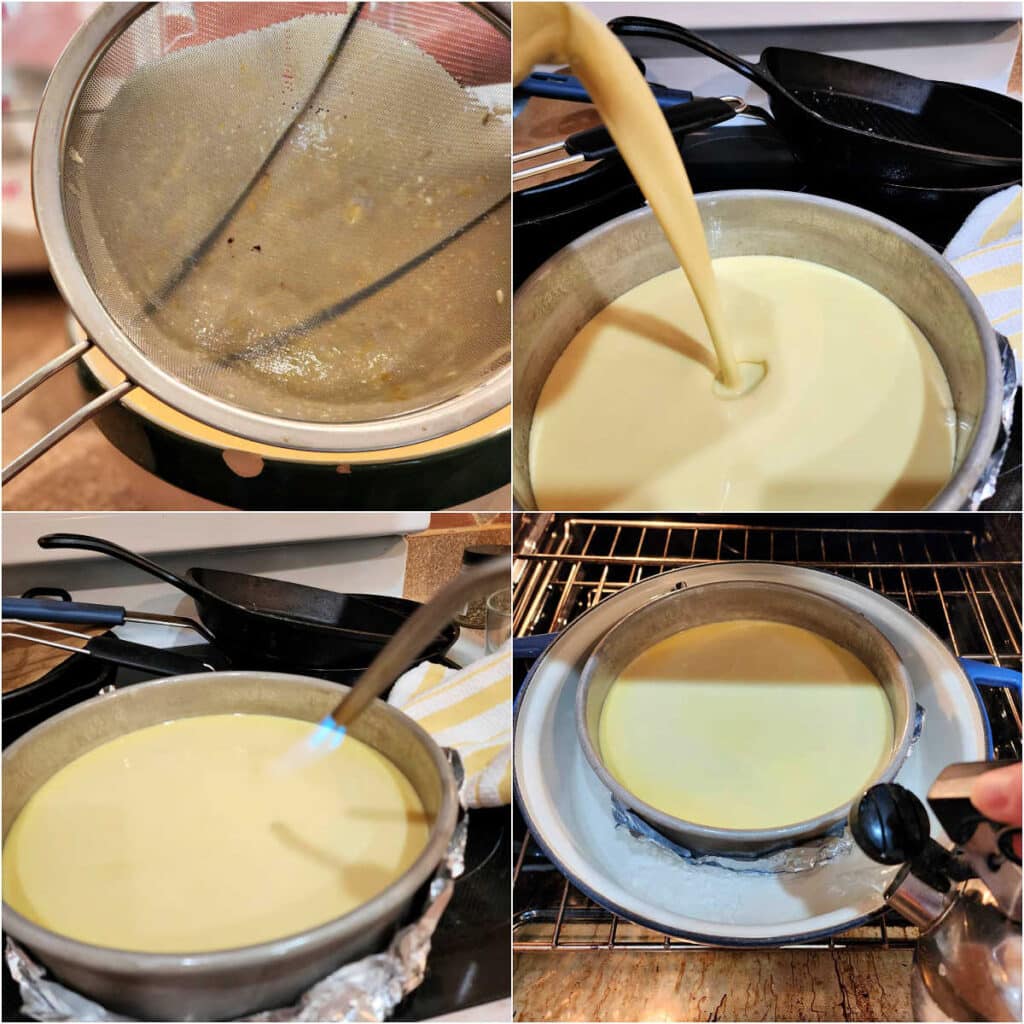
Now it’s time to fill your pan or ramekins.
- Before filling your pan, please strain your batter. Look what a fine mesh strainer catches: any blood spots in your eggs, weird bits of egg, tiny bits of cream cheese. Strain for maximum silkiness.
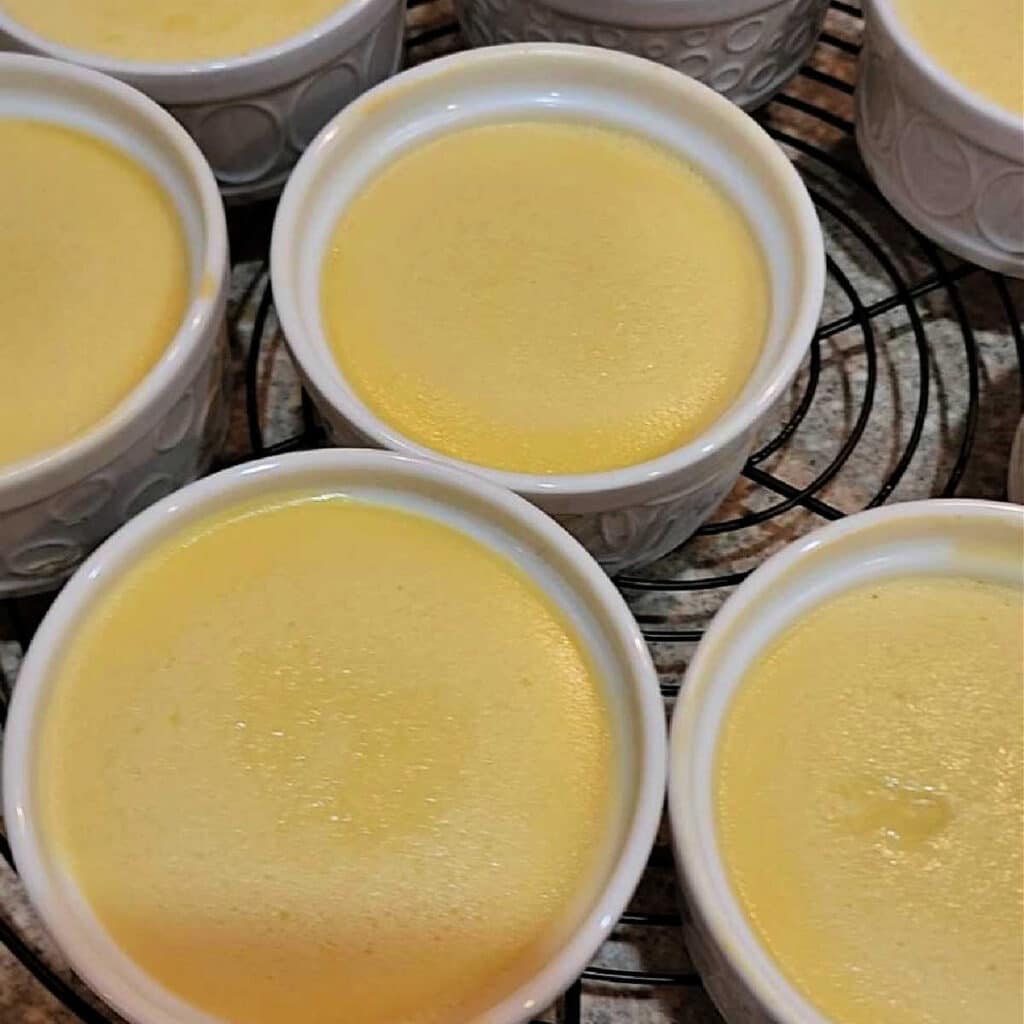
- If baking in a 2-piece pan, either a springform or a pushpan, wrap a couple of layers of heavy-duty foil around the base of your pan and about halfway up the sides. Pour the batter into your pans/ramekins. If baking in ramekins, fill to right below the point that the ramekin widens out a little. If your ramekins don’t have that detail, fill to 1/4″ of the top.
- Use your blowtorch to pop any bubbles on the surface of the batter.
- Place your pan or ramekins in a larger pan and place this on your center oven rack. Then carefully pour in boiling water to come about halfway up the pans. Make sure the water doesn’t come up higher than the foil, or you’ll just end up with water spilling inside the foil and soaking into your crust.
Here’s what I mean by “filling to the point where the ramekins widen out.” Think of it as the “fill line.”
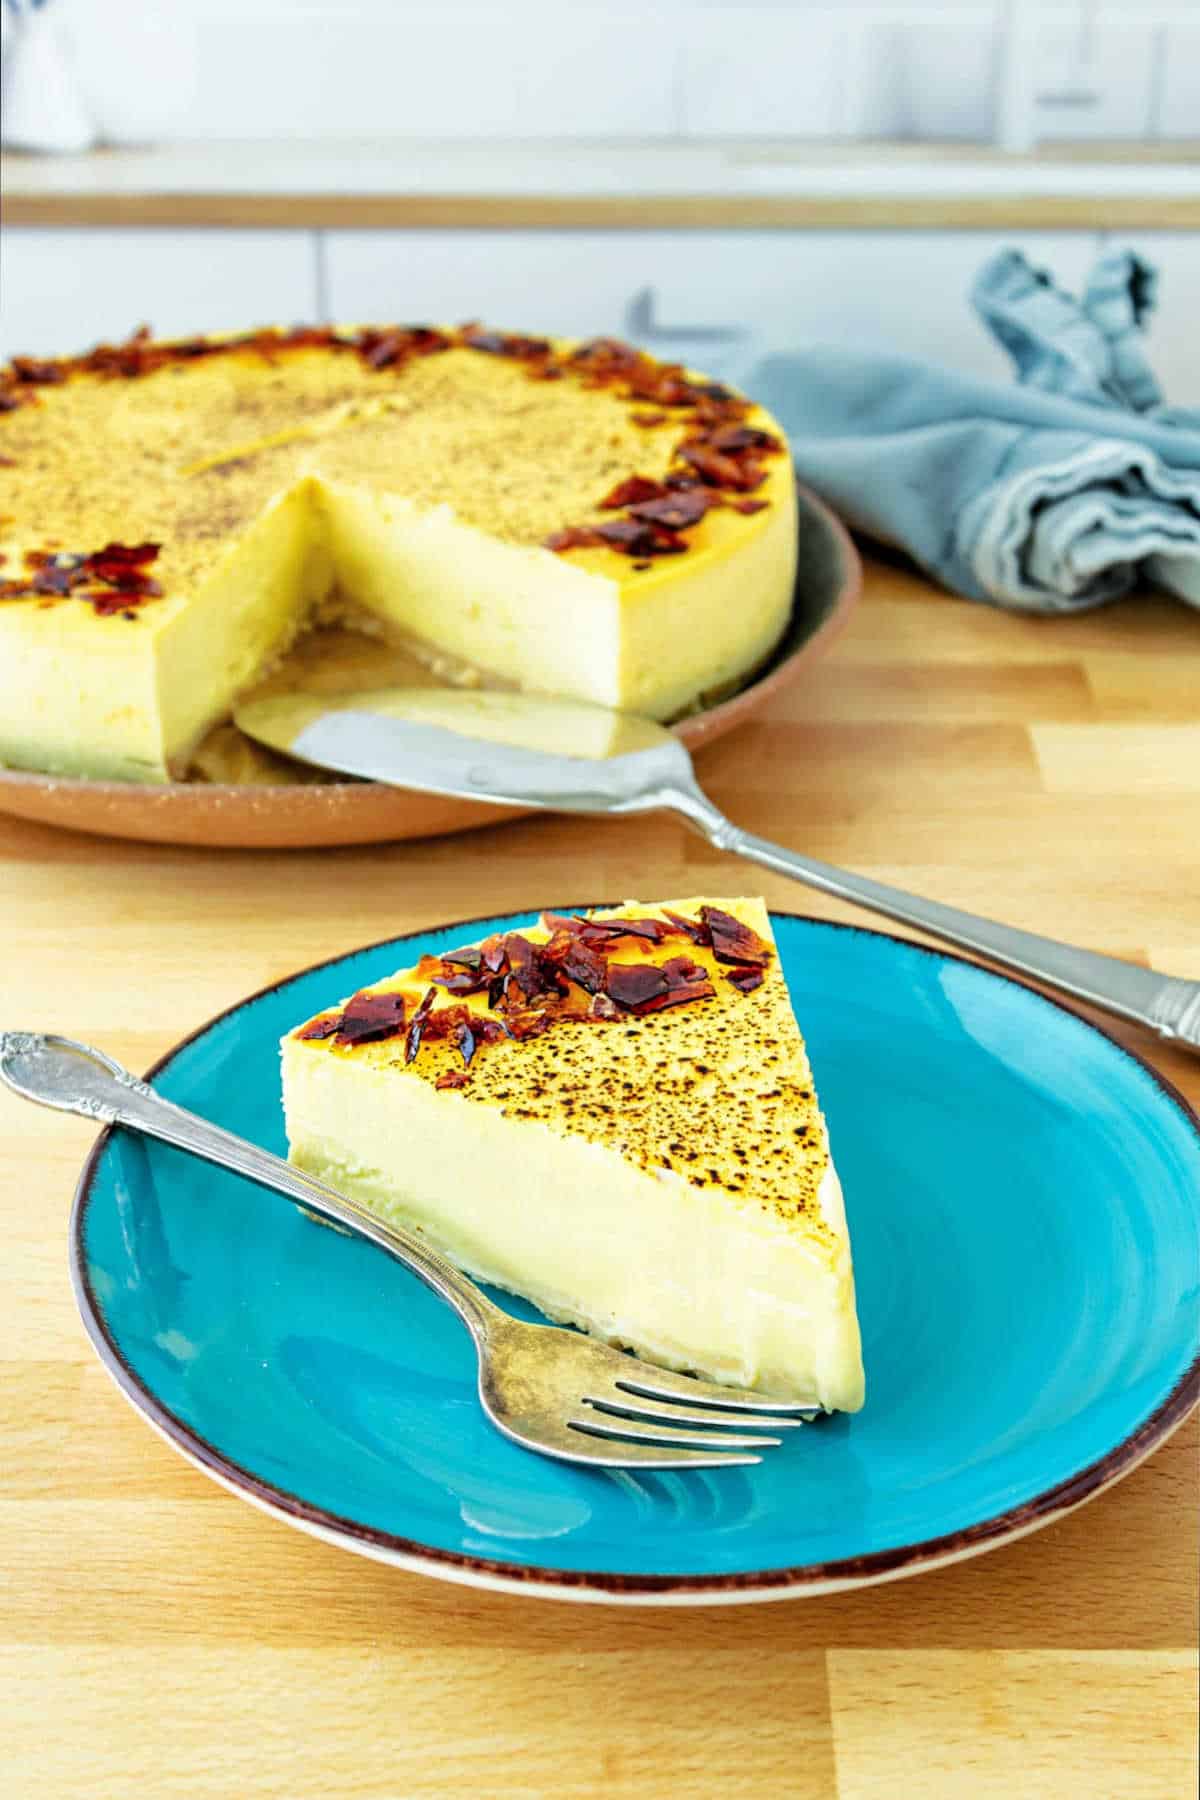
Creme Brulee Cheesecake or Cheesecake Creme Brulee
The beauty of combining two recipes into one is that you can present the final dessert as either one: creme brulee cheesecake, or the other: cheesecake creme brulee.
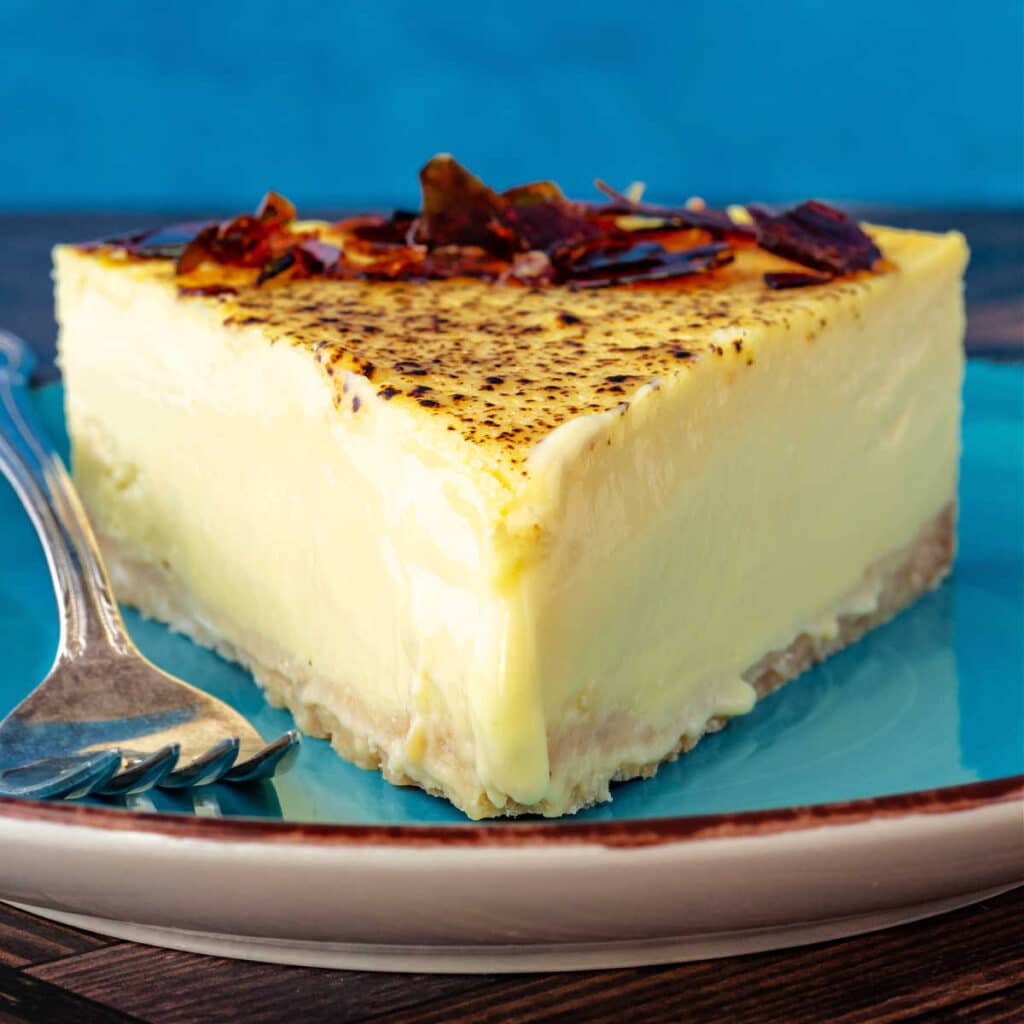
The difference? The cheesecake has a crust and is baked in a springform pan and presented sliced just like you would a cheesecake. Because it is a cheesecake, just with a bit less cream cheese than you’d usually find.
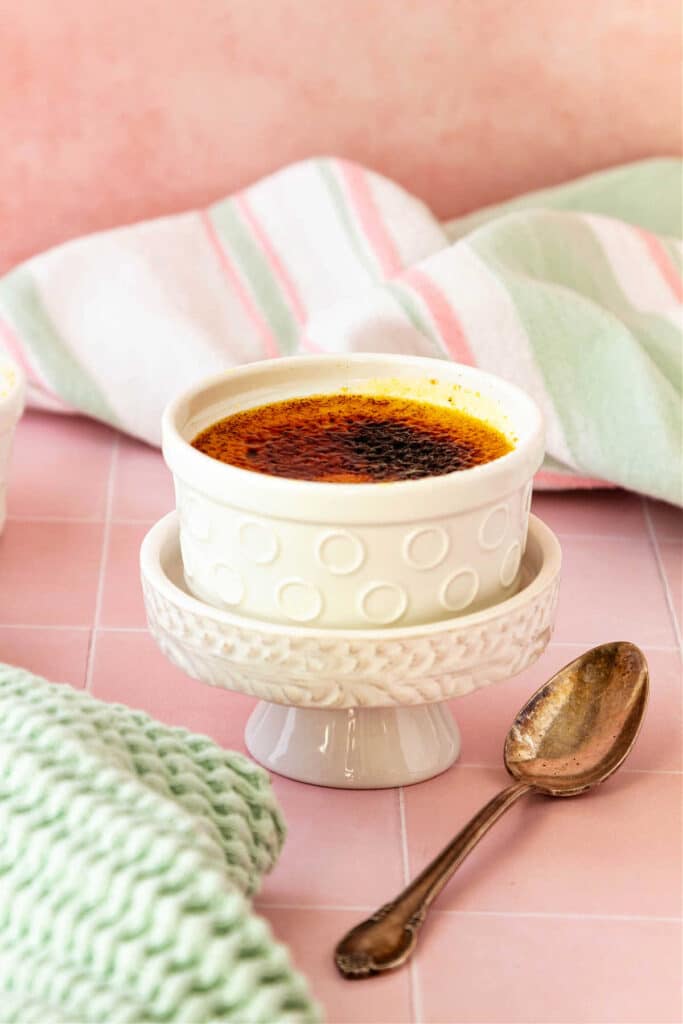
The creme brulee is baked in ramekins with sugar bruleed on the top, because it is creme brulee. But with cream cheese added.
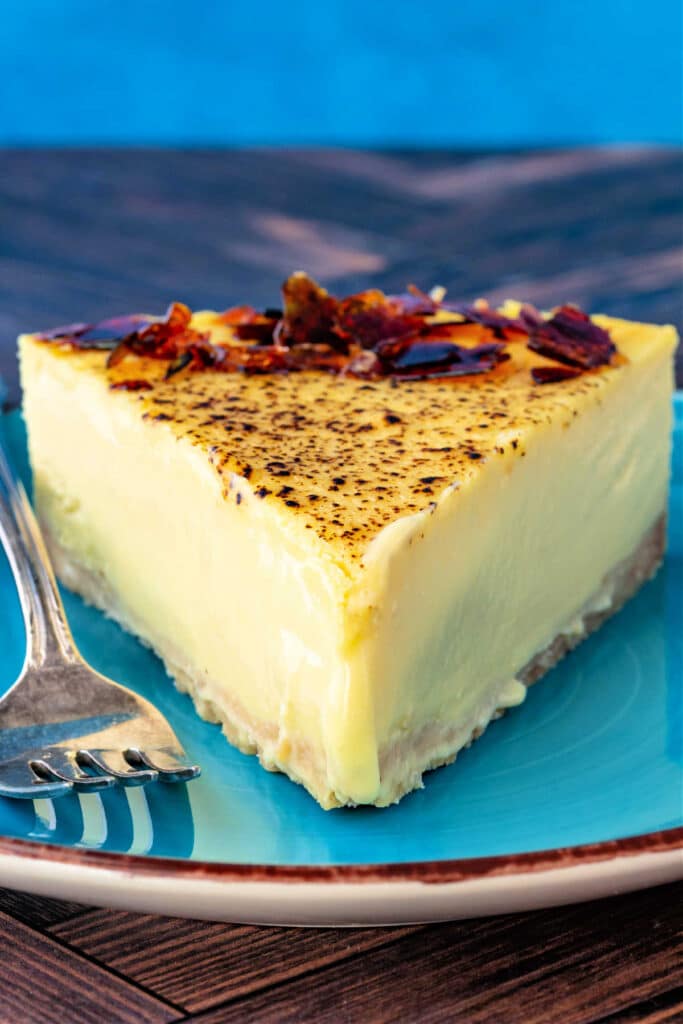
Why Isn’t the Whole Top of the Cheesecake Bruleed?
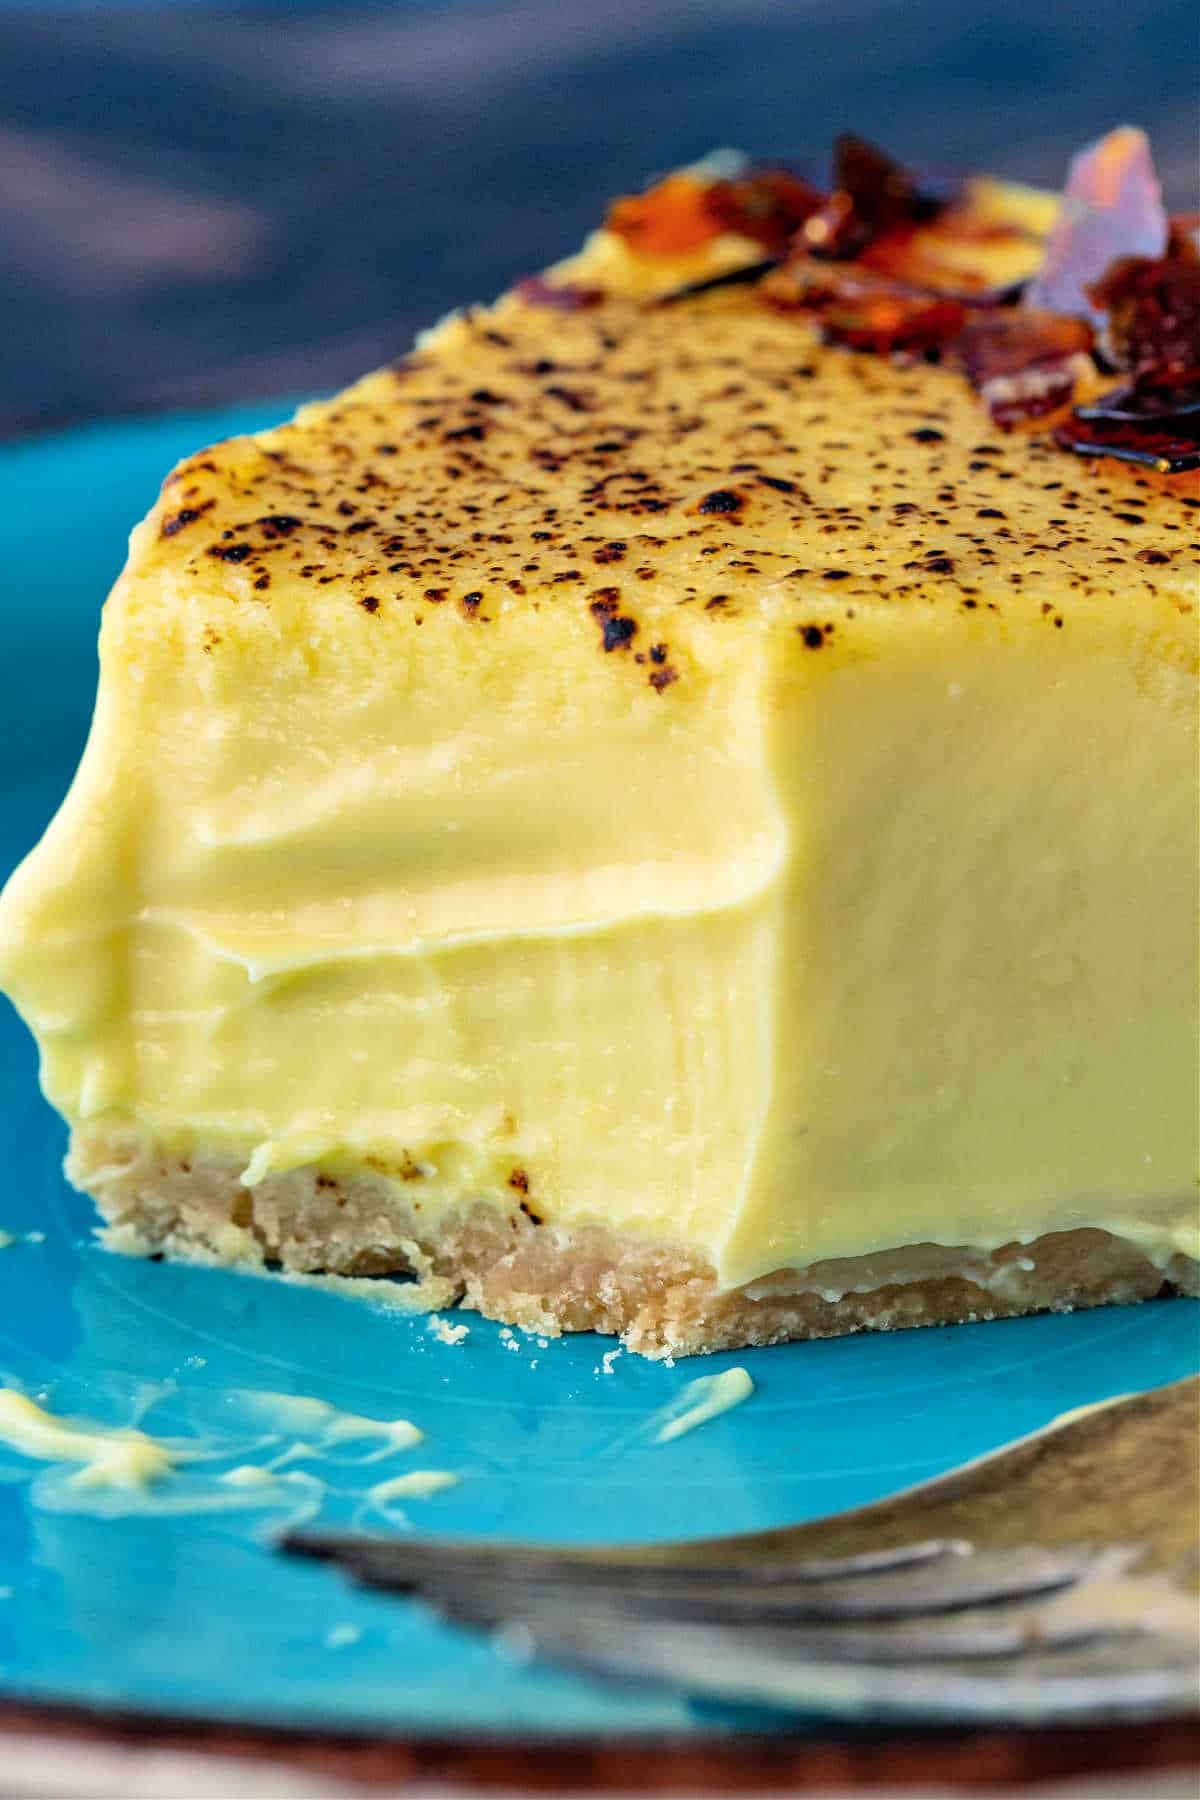
I had initially considered bruleeing the whole top of the cake, but then I realized that hard sheet of sugar on top of creamy custard would make it difficult if not impossible to cut cleanly.
I chose to brulee the custard without sugar and then brulee sugar on a piece of aluminum foil, break it up, and use those small shards to decorate the edges.
If you want your cheesecake to have a continuous sheet of caramelized sugar on the top, you can slice the cheesecake and then add sugar to the individual slices, bruleeing them one at a time before serving.
As I said above, this is a really easy batter to put together. No mixer of any kind needed.
This next section will go over all the ingredients and the method for making either the creme brulee cheesecake or cheesecake creme brulee as well as offer some tips for success and equipment recommendations.
If you would like to skip this section, you can head straight to the recipe.
How to Make the Bruleed Decoration for the Cheesecake
Before torching, make sure your dessert is thoroughly chilled. For ramekins, give them a good four hours, and for the cheesecake, an overnight chill is best.
Next, and this is important, if the tops of your cheesecake or custards are damp or have any condensation on them, carefully blot off as much as you can with a flat paper towel.
Store the filled biscuits back in the wrapper the rolls came in. They’ll be fine in the fridge for up to a week.
Any moisture on your custard will just make your sugar dissolve and it’ll be harder to get a nice, even layer of caramelized sugar on top.
Brulee the top of the cheesecake without adding sugar. This will give you some browning and caramelized flavor without being hard to slice through for serving.
For the “shards” around the edge, sprinkle a thin layer of sugar onto foil and brulee that. Allow it to cool and then peel the bits of sugar off the foil. You probably won’t be able to get all of it off the foil–I wasn’t able to, anyway–but you’ll have enough to sprinkle a good bit around the edges for that classic bruleed sugar flavor.
If making creme brulee, just sprinkle on a thin layer of sugar, tilt the ramekin to distribute it evenly, and then dump out the extra onto the next ramekin.
Move your torch evenly in small circles, never staying in one place. This helps the sugar to melt evenly before it begins to caramelize.
Alternatively, you could caramelize sugar on the stove and then pour it out onto Silpat, tilting the pan (wearing oven mitts!) to get it to spread evenly. When cool, break into shards.
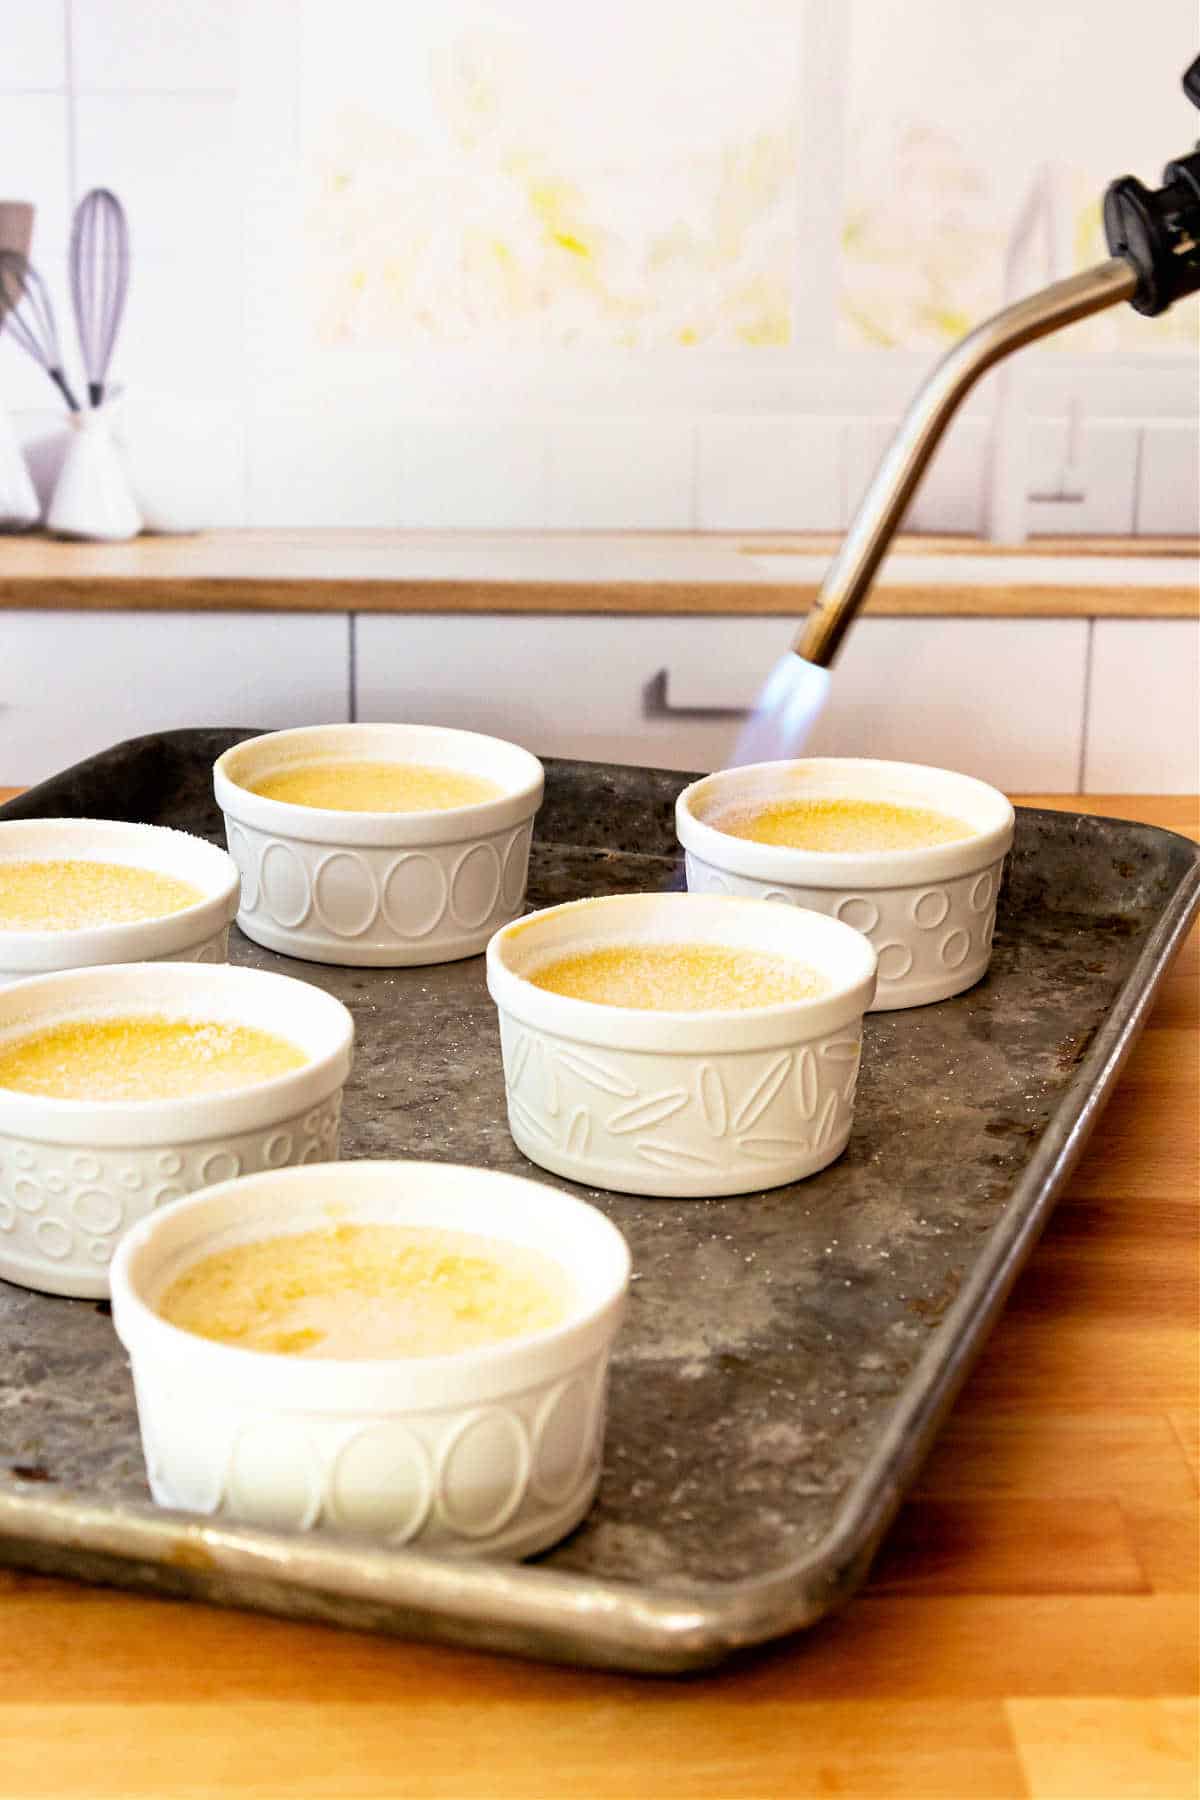
For ramekins, once you have your first layer of sugar caramelized, for maximum CRACK when you bust into it with your spoon, you may repeat with another thin layer of sugar. Better two thin layers than one thick layer.
Equipment You May Need
You’ll need either an 8″ or 9″ springform pan or push pan to make the cheesecake.
These 4 oz ramekins are adorable, and I bought them specifically for this recipe even though I know I’ll use them all the time for prepping ingredients or portioning out snacks.
If you’re going to be making a lot of creme brulee (or if you make a lot of meringue), it’s worth it to pick up a full-sized propane torch.
One canister will last for a really long time, unlike the small, “pocket” versions sold in fancy kitchen specialty shops.
Even though you’ll spend more initially, you’ll save because you won’t be buying ridiculously tiny propane canisters all the time.
And while you can use pretty much any large braiser or roasting pan to make the water bath for the creme brulee cheesecake, I like using a half-sheet pan to bake the ramekins of creme brulee.
They’re deep enough for the water to come about halfway up the sides, and that’s what’s needed.
Tips and Tricks for Success
For best results, after they cool, refrigerate the custard uncovered. This will discourage condensation. If they do end up a bit wet, be sure to carefully blot them with a sheet of paper towel held flat against the tops before adding sugar and torching.
If making individual creme brulees, only torch them as you need them. The hard, crackly sugar shell will quickly dissolve into softness in the fridge. It will still taste good, but you won’t get either the textural or temperature contrast unless you torch them “a la minute” (at the last minute)
Creme Brulee Cheesecake Q&A
The custard is gluten-free. You can substitute a gluten-free Graham cracker crust for the cheesecake version.
Yes, you can. Once completely cool, wrap well in plastic and foil and freeze for up to a month. Thaw overnight in the fridge and make sure you blot up any moisture on top of the custard before bruleeing.
Keep the custard, covered, in the coldest part of your fridge for up to 5 days.
Other Custard and Cheesecake Recipes
If you love custard like I do, you will want it in all the forms.
I have a great butterscotch cheesecake recipe. As a bonus, you can use your torch on the meringue topping.
Craving another creme brulee? Try my butterscotch creme brulee. It’s a brown sugary, buttery-rich version of a classic.
For a decadent, chocolate cheesecake, my double chocolate cheesecake gets its chocolate goodness from cocoa powder and melted chocolate.
Looking for a no-bake cheesecake with the dreamy texture of a baked one? Check out this no-bake chocolate cheesecake that rivals a baked one, all with deep, chocolatey flavor.
Questions?
If you have any questions about this post or recipe, I am happy to help.
Simply leave a comment here and I will get back to you soon. I also invite you to ask questions in my Facebook group, Fearless Kitchen Fun.
If your question is more pressing, please feel free to email me. I should be back in touch ASAP, as long as I’m not asleep.
A Note About Measurements
Love This? Please Share It and Review It!
It helps me and other readers so much if you take a moment to rate and review this recipe.
Your star rating and comments help others decide whether the recipe is worth making, and your feedback helps me continue improving recipes here at Pastry Chef Online.
Other lovely ways to share include pinning or posting on your favorite social media platform.
Thank you so much for taking the time!

Creme Brulee Cheesecake Recipe
Ingredients
For the Crust
- 170 grams all-purpose flour 6 oz or about 1 1/2 cups
- 42 grams sugar 1.5 oz or about 3 Tablespoons
- 42 grams brown sugar 1.5 oz or about 3 Tablespoons
- pinch of salt
- 85 grams unsalted butter 3 oz or 3/4 stick
For the Cheesecake
- 340 grams cream cheese 12 oz or 1 1/2 "blocks"
- 255 grams granulated sugar 9 oz or about 1 1/4 cup
- 1 teaspoon kosher salt I use Morton’s
- 190 grams Greek yogurt 6.75 oz or 3/4 cup
- 3 large eggs
- 9 egg yolks
- 340 grams cups heavy cream 12 oz or about 1 1/2
- 3 Tablespoons excellent-quality vanilla extract
Instructions
Prep
- Place a rack in the center of your oven and preheat to 350F/180C to bake the crust. If not using crust (or after it bakes), turn oven to 300F/150C.
- Put a kettle on to boil water for your water bath.
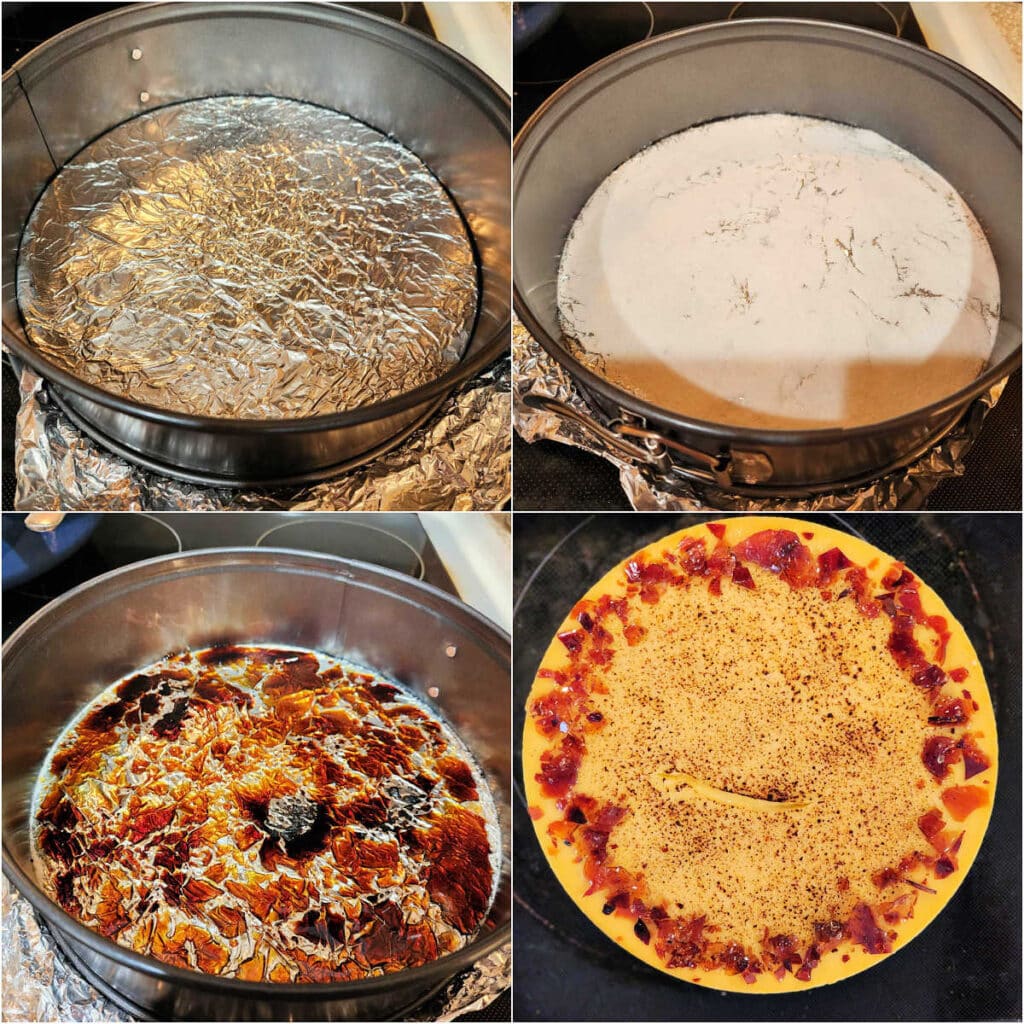
- If baking a full cheesecake, wrap a double layer of aluminum foil around the bottom and halfway up the sides of your pan.
For the Crust
- In a large bowl, mix all ingredients together evenly until there are no little bits of butter remaining. You should be able to tightly squeeze the mixture together and have it hold. You can also do this step in a food processor.
- Dump all the crust mixture into the bottom of your springform pan–I like to line mine with parchment first–and press evenly into the bottom of the pan. You can even it out with the bottom of a glass. If making crusts for your creme brulee, use about 2-3 Tablespoons crumbs per ramekin, and then pack them down well.
- Bake the full-sized crust for about 20 minutes and ramekin crusts for about 15, until they are lightly golden brown and firm.
- Allow to cool on a cooling rack while you make the batter. Be sure to turn your oven down to 300F/150C.
For the Batter
- Place the cream cheese in a large, microwave-safe bowl and microwave for about 20 seconds until very soft.
- Use a silicone spatula to stir it really well and press out any potential lumps.
- Add the sugar and salt and blend well with the spatula, scraping the bowl as necessary, until evenly mixed.
- Blend in the Greek yogurt very well.
- Plop in the eggs and yolks. Switch to a whisk, and thoroughly whisk in the eggs. Scrape the bowl as necessary.
- Pour in the heavy cream and vanilla, and stir until thoroughly combined.
- Strain the mixture through a fine mesh strainer into a large pitcher (you'll have about 6 cups of batter, so plan accordingly).
- Pour the cheesecake mixture into your prepared pan.
- Lightly go over the top of the custard with your blowtorch. This will pop any bubbles on the surface.
- Put your water bath pan on the rack of your oven. Place the cheesecake into the pan, and then carefully pour the boiling water into the pan to come halfway up the sides.
- Bake for about 55 minutes, or until the temperature in the center is about 168F. When you wiggle the pan, there should be a bit of a jiggle in the center of the cheesecake.
- Crack the oven door open, turn off the oven, and allow to cool for about 30 minutes.
- Using oven mitts, carefully lift the cheesecake out of the water bath. Let the water bath cool in the oven. You can deal with it once it has cooled off.
- Place the cheesecake on a cooling rack, and run a thin spatula around the inside of the pan to make sure the cake isn't sticking. Let the cake come to room temperature before chilling in the fridge for a good 8-10 hours or overnight.
To Brulee on Foil as Shown
- Once the cake is thoroughly chilled, remove it from the pan by either unlocking the springform or pushing up from the bottom if you used a pushpan.
- Place the cake on a heat-proof surface and brulee all but the outer 1" or so of the top of the cake. Don't use sugar or it will be too hard to slice once the sugar has cooled.
- Remove pieces of the bruleed sugar from the foil, breaking them up as necessary, and place them around the outer edge of your cake. Tada!

- NOTE: Ingredient amounts and directions for torching if you bake in ramekins are in the NOTES section below.
Did You Make Any Changes?
Notes
To Make 8 4-oz Ramekins of Cheesecake Creme Brulee
- 8 oz cream cheese, very soft
- 6 oz sugar
- 1/2-3/4 teaspoon kosher salt (to taste)
- 4.5 oz Greek yogurt or sour cream
- 2 eggs
- 6 egg yolks
- 8 oz heavy cream
- 2 Tablespoons vanilla extract
Creme Brulee Cheesecake Q & A
Tips for Success
- For best results, after they cool, refrigerate the custard uncovered. This will discourage condensation. If they do end up a bit wet, be sure to carefully blot them with a sheet of paper towel held flat against the tops before adding sugar and torching.
- If making individual creme brulees, only torch them as you need them. The hard, crackly sugar shell will quickly dissolve into softness in the fridge. It will still taste good, but you won’t get either the textural or temperature contrast unless you torch them “a la minute” (at the last minute)
Nutrition
Would you like to save this post?

Hi, y’all! I hope you’ve enjoyed this post and hopefully also learned a thing or two.
If you like my style, I invite you to sign up for my occasional newsletter, The Inbox Pastry Chef.
Expect updates on new and tasty recipes as well as a bit of behind-the-scenes action. I hope to see you there!

Thanks so much for spending some time with me today.
I hope you enjoy the creme brulee cheesecake. Don’t forget to go for a walk after you eat some. It’s pretty decadent!
Take care.


Join in Today!
This is a great recipe, and I so appreciate the detailed instructions and information. Jenni is a great teacher!