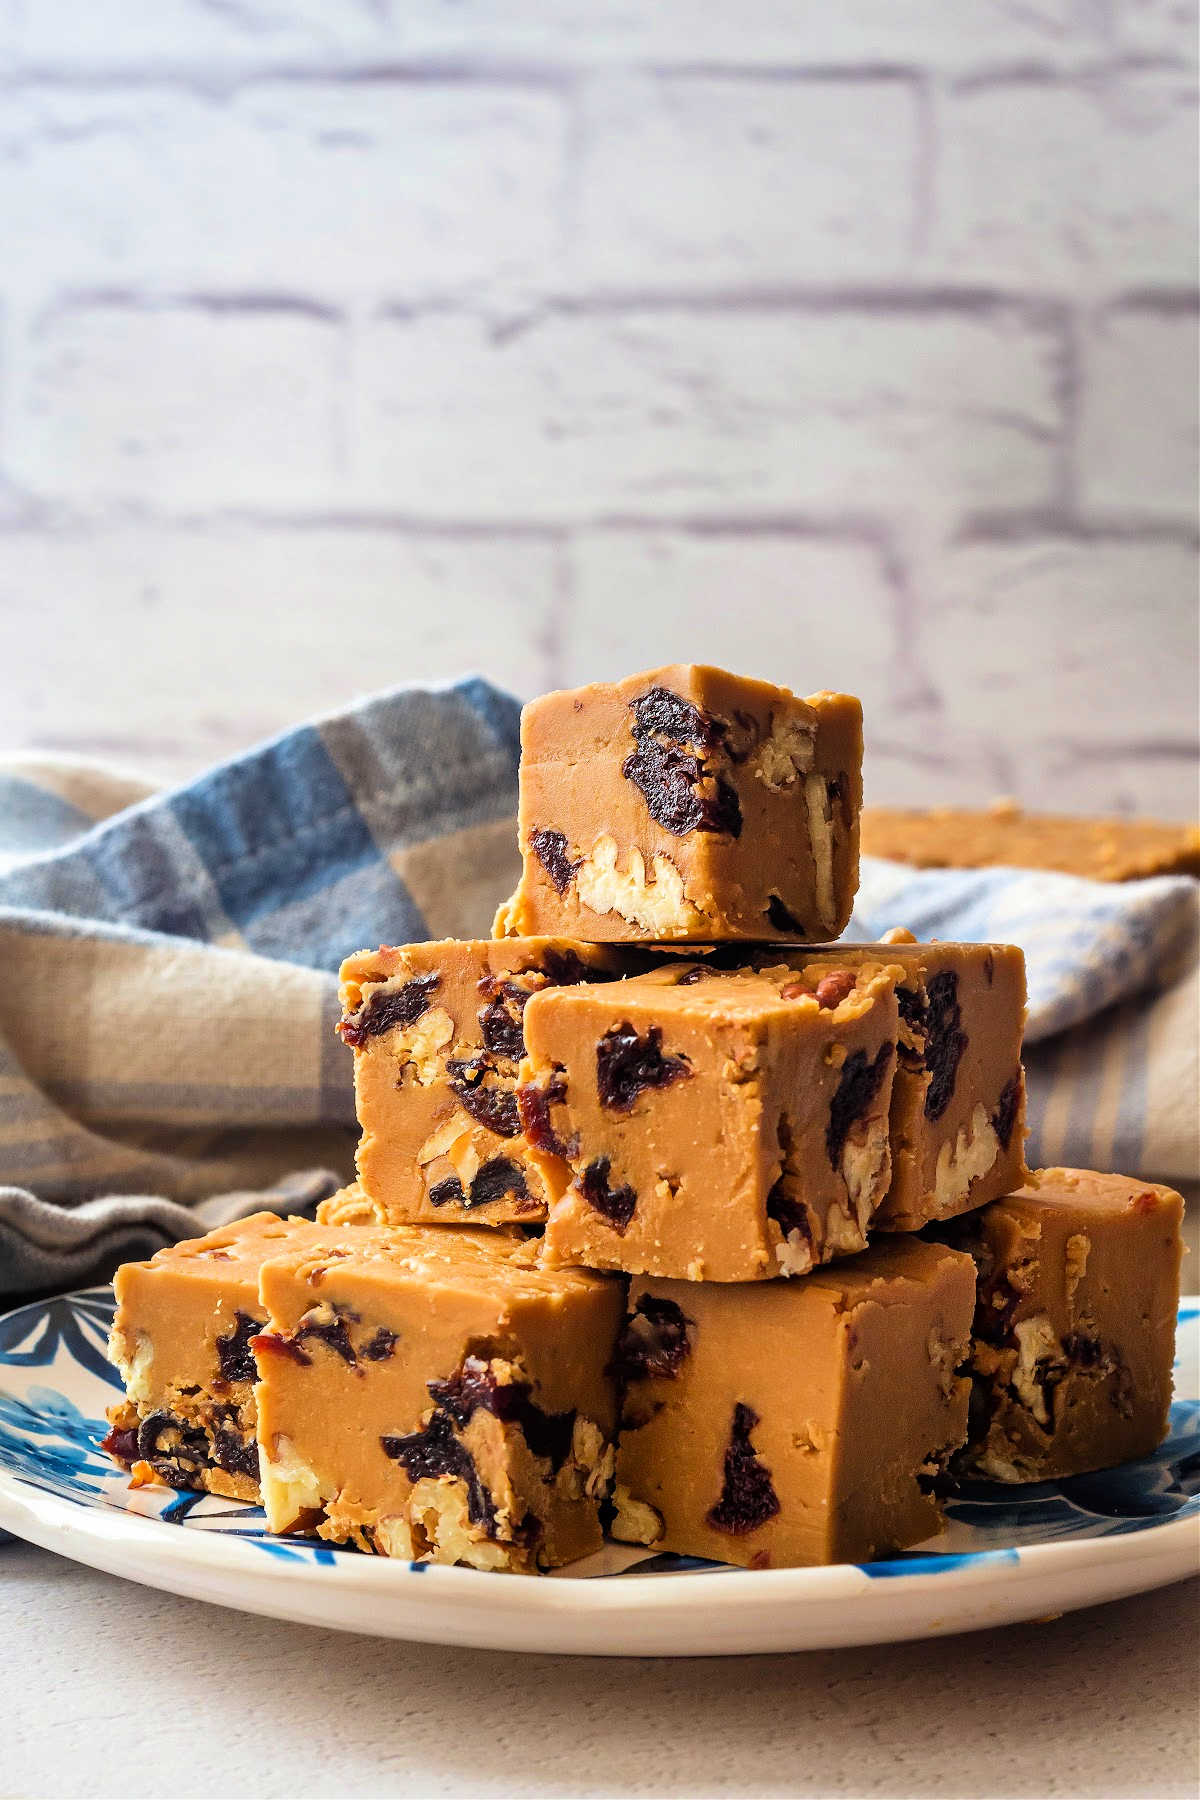
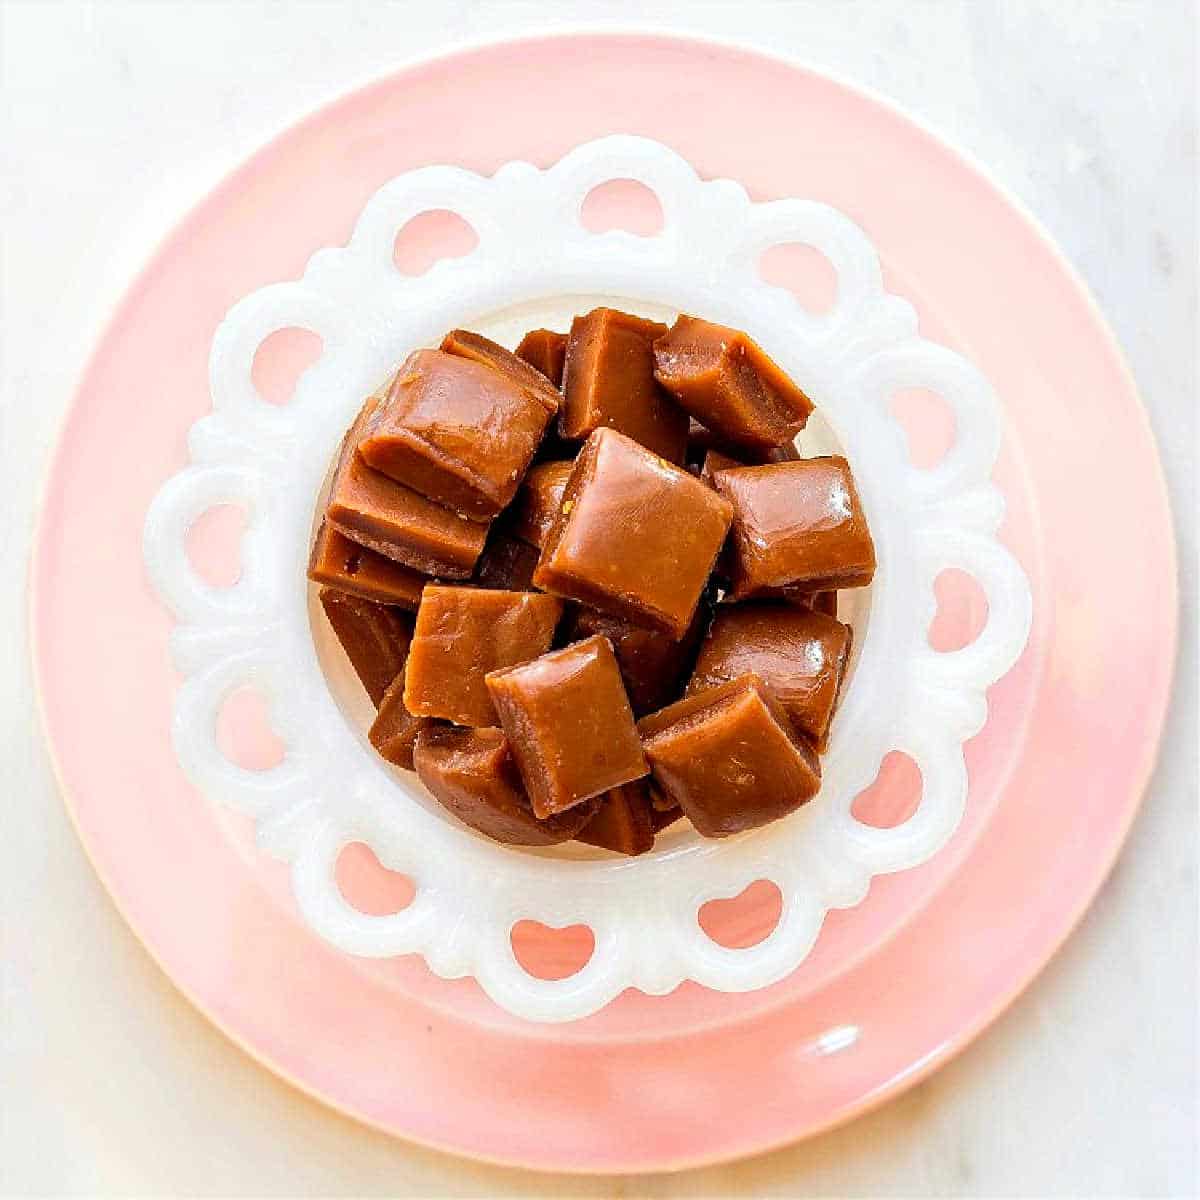
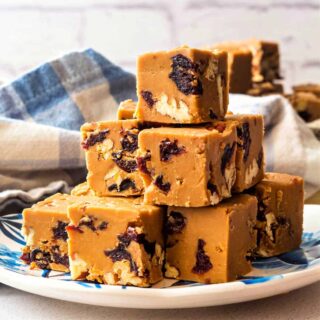
If you’ve never heard of this brown sugar fudge candy before, let me introduce you to penuche. Penuche is fudge made with a brown sugar base for a delicious non-chocolate fudgy candy.
You can make penuche plain, but I have jazzed up this version with both toasted pecans and dried tart cherries, and I think you are going to love it.
I will be sure to tell you how to make it, what temperatures to cook it to and to cool it down to before stirring, and offer some variations as well. For ease of browsing, you can find all my candy recipes in one place. Thank you for visiting!
Pastry Chef Online Participates in Affiliate Programs. If you make a purchase through one of my links, I may earn a small commission. For more information click to read my disclosure policy
You can watch my brown sugar fudge/penuche web story here,
I’ve made this once (update 12/3/2022: TWICE!) and frozen it for Christmas already but it’s so good I am going back and making another batch, yes it’s that good, I decided to give some as gifts, thank you so much!
Reader Sherrie
Brown Sugar Fudge, At a Glance
✅Skill Level: Intermediate
✅Skills: Cooking sugar and controlling crystallization
✅Type: Candy
✅Number of Ingredients: 6, and 3 additional optional “mix-ins”
✅Prep Time: 5 minutes
✅Cook Time: 15 minutes
✅Yield: 64 1” squares of candy
Jump Straight to the Recipe
Why You Need to Make This Penuche Recipe
I tested this recipe three times.
The first time, I cooked it to 238F/114C, the second, to 245F/118C, and the last, to 242F/116C.
So I can tell you exactly what to expect. A degree or two either way will not make or break your fudge, as long as you don’t get over about 247F/119C.
This penuche is:
- deeply flavored: it has a deep, mellow sweetness from the brown sugar, creamy/nuttiness from the toasted pecans, and chewy bright fruitiness from the dried cherries
- not difficult to make: I promise if you follow my instructions, you will end up with 64 beautiful pieces of penuche. Unless you choose to cut them larger!
- well-seasoned: I remember my mom made penuche one time, and she said it was TOO TOO sweet. Welp, it needs seasoning. Do not be afraid to add salt to your candy recipes. My version has 1 1/2 teaspoons of kosher salt in it as well as finishing salt sprinkled on top. The salt brings out all the flavors, adds dimension, and definitely cuts the sweetness.
Sound good? If you do make some, I have a favor to ask:
When you do make this recipe, it will help me and other readers if you:
✅Rate the recipes using the stars in the recipe card
✅Leave a review when prompted in the recipe card (If it’s a positive review, and I hope it is, I’ll use it in the post as social proof)
✅Leave a comment on the post
Thank you so much!
Is Penuche the Same as Fudge?
Fudge is a type of candy that originated in the United States in the late 1800s.
You make it by cooking sugar, milk/cream, and butter to the soft ball stage and then stirring it once it cools down sufficiently so that it crystallizes.
The recrystallization is what gives fudge its irresistible creamy/firm texture.
Penuche is a type of fudge, so all penuche is fudge, but all fudge is not penuche.
What makes penuche its own “thing” is that it uses brown sugar instead of white sugar for the sweetener.
Using brown sugar introduces a bit of molasses which lends it complex flavor to the candy.
You can make plain brown sugar fudge, or you can add your favorite mix-ins. Purists will tell you that penuche is plain, but it’s yours, so you can add mixins if you want.
Adding a lot of toasted pecans turns it into a sort of praline-type fudge.
And trust me, the flavor of pecans goes perfectly with the complex flavor of the penuche!
Credit Where Credit Is Due
I started my Penuche recipe testing with this vanilla fudge recipe from Caroline Artiss.
You’ll see similar amounts of ingredients if you go over and check out her recipe.
The main difference between vanilla fudge and brown sugar fudge is, well, brown sugar.
A played a little bit with ratios and temperatures and the mix-ins, obviously, until I arrived at what I consider to be a pretty perfect, fudgy candy.
I really hope you enjoy it. And thanks Caroline for being my springboard!
How To Make It
If you’re new to candy-making, and even if you have a few batches under your belt, you may want to review this section for ingredient substitutions and to learn the whys behind some of the steps.
I think if you have a solid understanding of what you’re trying to do, the steps will make more sense and you will be able to approach your penuche with positivity and confidence.
Ingredients and Substitutions
Here is what you’ll need to make your brown sugar fudge.
Listed under the photo is each ingredient along with an explanation of how it functions in the recipe as well as substitutions.
If you are ready to get started, you can certainly jump on down to the recipe.
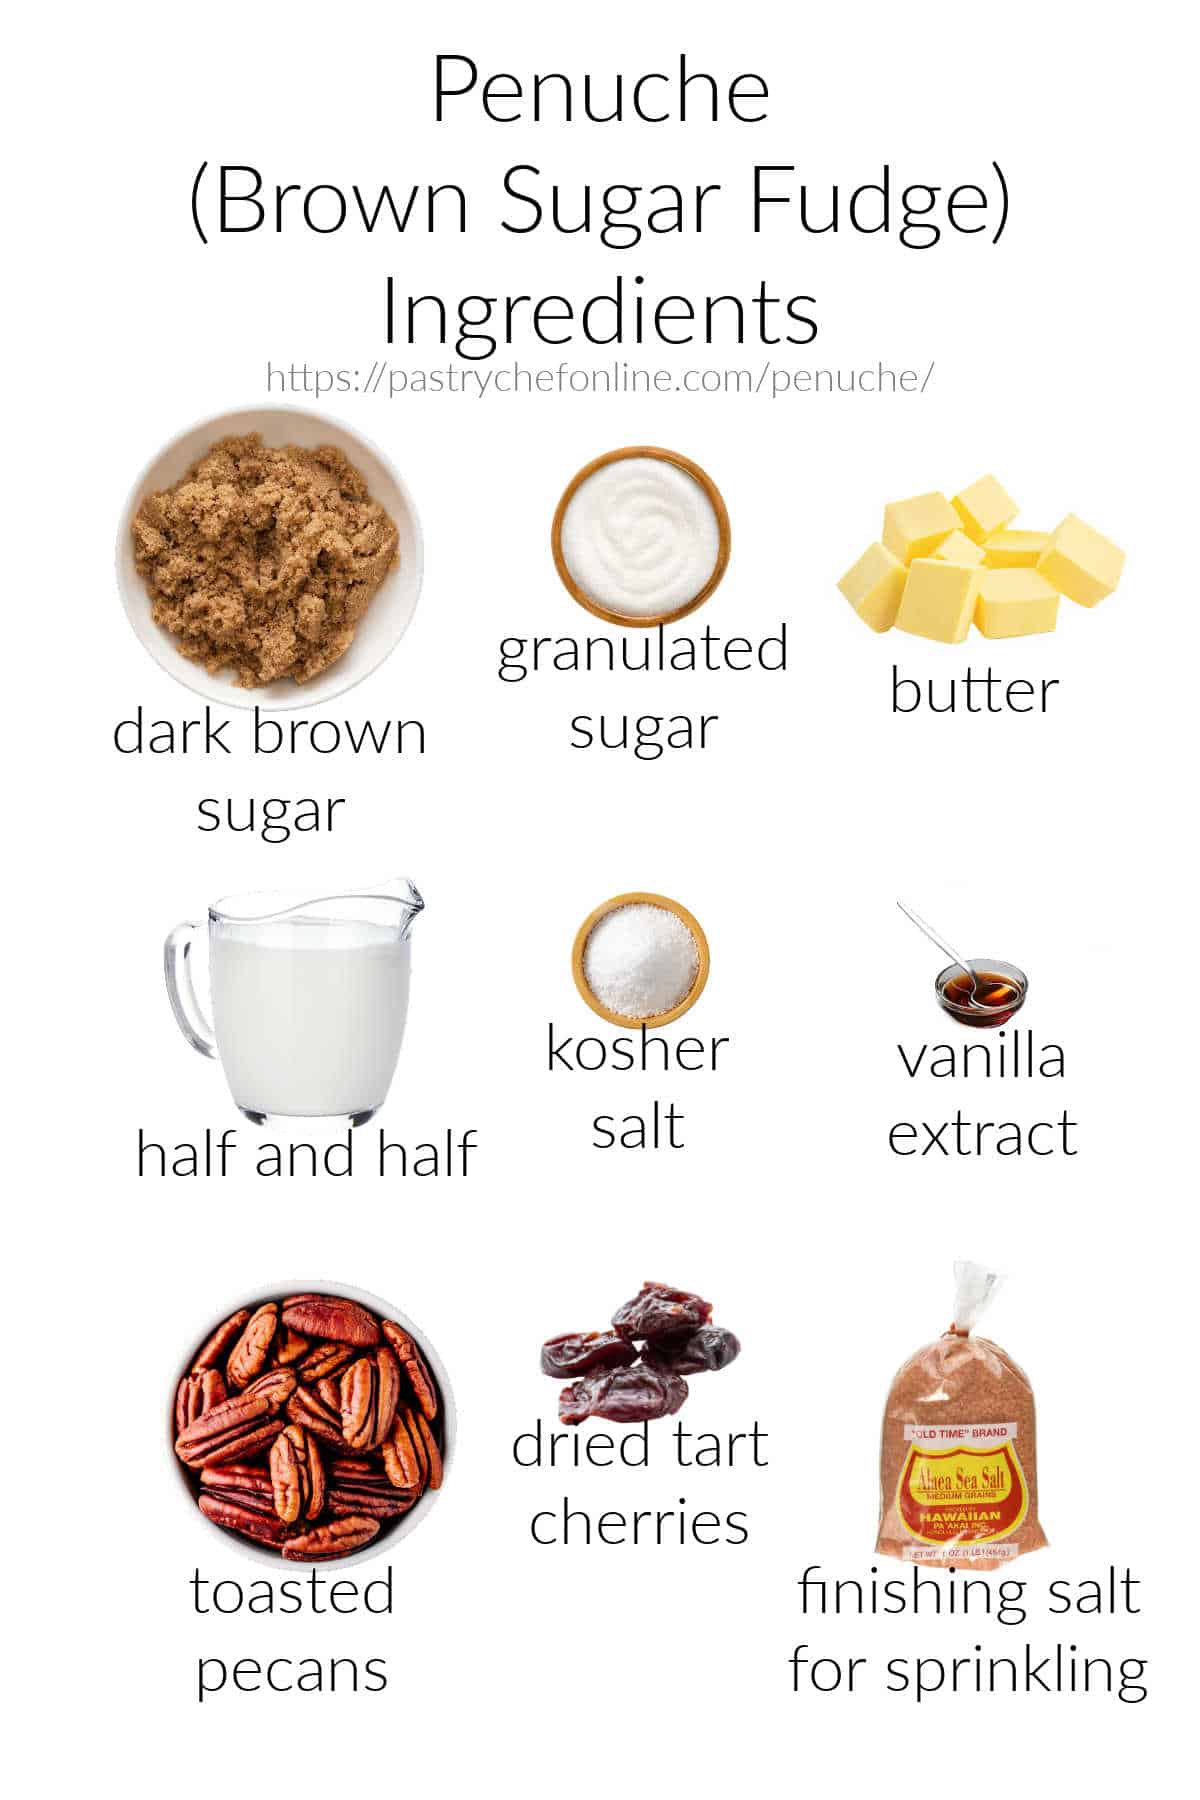
- dark brown sugar: Provides the main flavor agent (molasses) plus the magical crystals that will dissolve and then reform once cooked to the correct temperature, cooled, and then stirred. If all you have is light brown sugar, use all light brown sugar rather than using part white sugar.
- granulated sugar: Provides more crystals to make sure we end up with a “super-saturated solution.” Saturated with sugar crystals, that is.
- butter: Provides creaminess, helps to control the crystallization so the crystals don’t get too big, and carries flavor. You can use slightly less or slightly more than called for. Less fat=firmer fudge but also more chance for grainy fudge, so use at least 2 Tablespoons (1 oz or about 28 grams)
- half and half: You need 600 grams of dairy. The fattier the dairy, the creamier the fudge, and the softer the fudge. So feel free to use 600 grams of heavy cream on the fattier end to 600 grams of whole milk on the less-fatty end. Or a combination. I split the difference and went with half and half. If you don’t have half and half, use half cream and half milk. I wouldn’t recommend anything less fatty than whole milk, because crystallization could be an issue.
- kosher salt: Salt is really necessary in this candy. It cuts the sweetness and brings out all the complex flavors you’re working hard to create. I call for 1 1/2 teaspoons kosher salt. If that seems like a lot to you, remember you’re only eating a piece at a time, which is 1/64th of the recipe. If it still seems like a lot, you can cut back to 1 teaspoon, but please don’t cut back any more than that
- vanilla extract: Adds lovely floral and woody flavor notes and rounds out all the other flavors. I call for 2 full tablespoons. You do not have to use the most expensive vanilla out there, either.
- toasted pecans: You can leave them out or substitute any nut of your choosing. Or a mix of nuts. Do toast all the nuts before using unless you’re using something already roasted, like peanuts. If you’re not a dried fruit fan, go with all nuts. If you use a good 2 cups of toasted pecans, you can call this “praline fudge,” and your southern friends will understand what you’re talking about
- dried tart cherries: I like dried tart cherries here, but dried sweet cherries will work also. You can also use nothing but dried cherries or use a mix of your favorite dried fruits. It’s your penuche, so use what you like. And note you can leave out all mix-ins entirely and have a perfectly pleasing plain penuche
- finishing salt: You don’t need much, maybe 1/4-1/2 teaspoon of your favorite finishing salt lightly sprinkled over the top of your still-warm fudge. Lightly press it in with your (clean) hand or a spatula to make sure it sticks. For my batches, I used pink Hawaiian salt. Maldon flaky salt would also work well. And if you don’t like assertive saltiness, you can leave it out entirely since there is plenty of salt in the candy itself.
Procedure
Here are the basic steps for making your fudge along with explanations of what happens during each step:
- Bring sugars, dairy (butter and milk/cream), and salt to a boil. This dissolves the sugar and puts everything into solution with all the different ingredients evenly distributed throughout.
- Cook until it reaches 242F/116C. This controlled cooking increases the sugar concentration while decreasing the water content. The end result is a super-saturated sugar solution whose sugar is just waiting to return to its crystalline form. Think of making rock candy. The sugar crystals reform around the string hanging in the super-saturated sugar solution. In the case of brown sugar fudge (or any fudge), crystallization is inhibited by the fat content of the butter and the fat in the dairy.
- Cool to no higher than 130F/54C, and then stir and stir vigorously. Once you start stirring, the crystals will want to re-form, so beating quickly is similar to making ice cream where the dasher keeps stirring as the ice cream gets colder, resulting in tiny ice crystals that feel creamy in the mouth as opposed to a really icy consistency. Think of fudge as the ice cream of the candy world. Stirring aerates and controls the size of the sugar crystals. Once the candy starts looking more matte as opposed to shiny, you know your crystals are forming. Keep stirring until the mixture is uniformly matte and thick. NOTE: You can start stirring as low as about 110F, but that doesn’t give you a whole lot of stirring time before it thickens up. I don’t know for sure, but I think your fudge will be creamier if you stir it longer, so start stirring at somewhere between 130F and 120F.
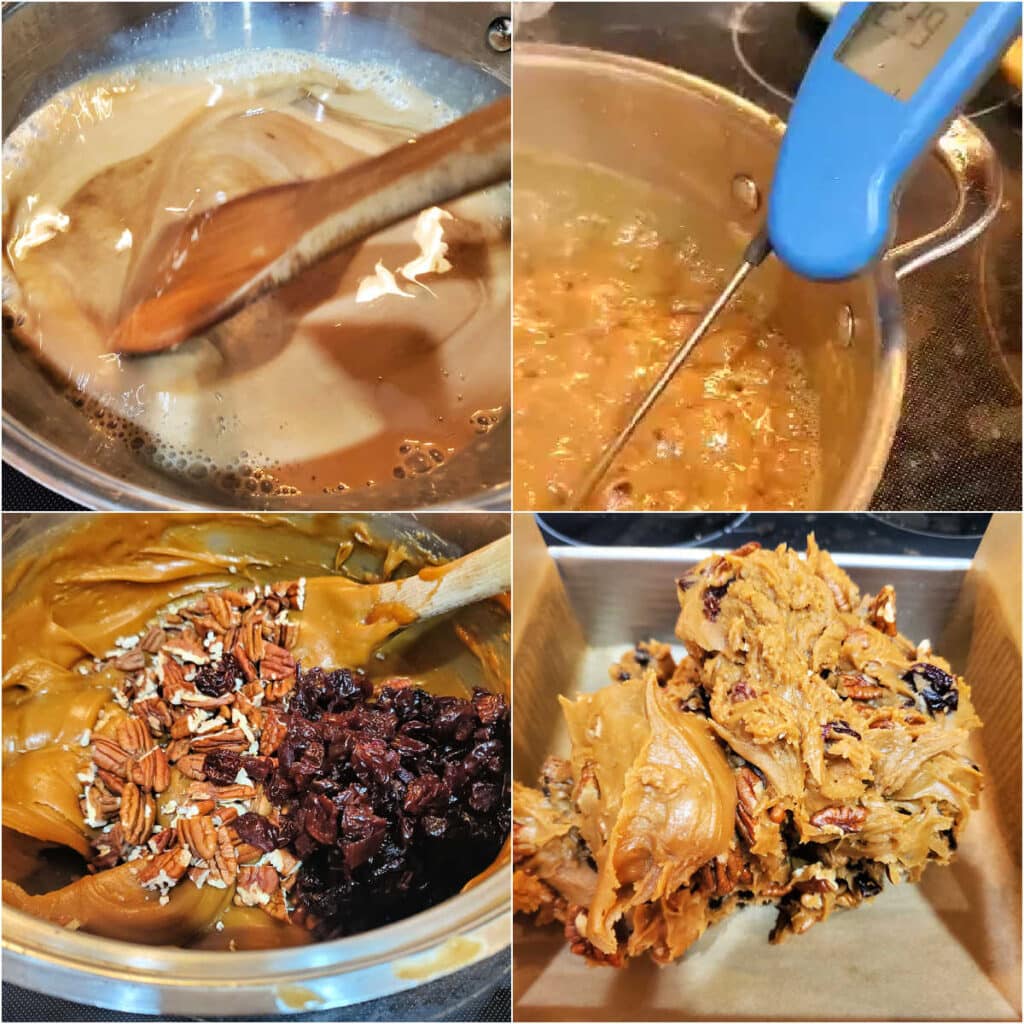
- Once the candy loses its sheen and thickens, stir in the mix-ins. Once you get the mix-ins into the fudge, it will thicken very quickly. That’s because the mix-ins are at room temperature. You can buy yourself a little more mixing time by microwaving the nuts and fruit for a few seconds. They don’t need to be super hot, just gently warmed to make them easier to mix in. Stir them in with your wooden spoon, and even if you do heat them, you’ll have to stir hard and fast to get them mixed in evenly.
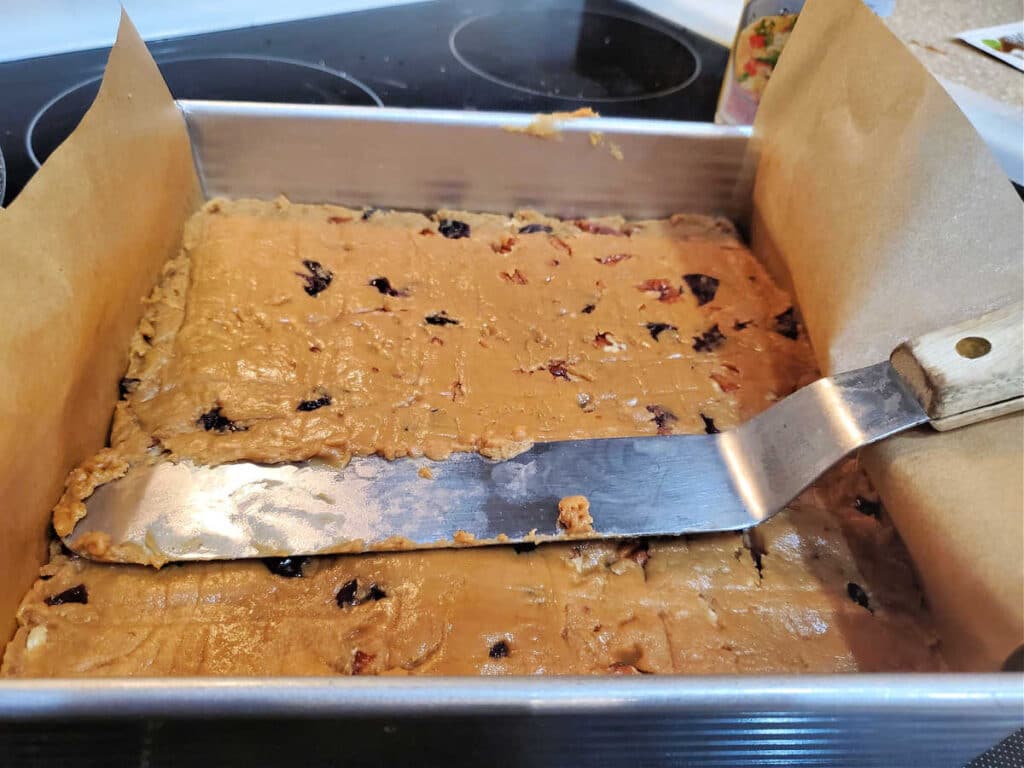
- Pour/scrape into prepared pan, level it out, and let it cool before cutting. Scraping is okay here because you’ve already crystallized your fudge, so scrape out all the goodness.
I’m sure you noticed in the collage above that the candy looks really messy in the pan.
This is where your pan-sprayed offset spatula comes in handy in pressing it into the pan and smoothing out the top.
Would you like to save this post?
See?
I also really want you to see how the texture changes as the candy cools. In this collage, you’ll see the candy in its liquid form as I’m stirring and pulling some up out of the pan.
And in the second photo is the penuche once it has started to crystallize. You can see how much thicker it is and how it is more opaque and less shiny.
Equipment You May Need
If making a full batch, I recommend using a large Dutch oven. This 4.6 quart Lodge will not break the bank and will also help you make a mean pot of chili.
You can make a half-batch in a 3-quart saucepan.
A full batch needs to set up in an 8″ or 9″ square pan. You can make a 1/2 batch in a bread pan.
No matter what size batch you make, you will want an accurate thermometer. I much prefer an instant-read thermometer to a clip-on because it’s much more versatile.
I use mine for everything from testing doneness in chicken and beef to breads and cakes.
And last but by no means least, please, please, please weigh your ingredients.
If you don’t have a kitchen scale, please get one. It will last for years, and you can get a good, accurate, and reliable scale for less money than you might think.
Tips for Success
Once the temperature of your fudge gets above 230F, it will start rising more quickly, so pay attention and remove it from the heat as soon as it hits 242F. If you have a flat-top stove, move the pot to a cooling rack to limit carry-over cooking.
Gently warm the mix-ins a bit so your candy doesn’t harden as soon as you pour them in. Adding barely warm mix-ins buys you enough time to get them distributed evenly before the candy gets too firm to stir.
Spray the back of an offset spatula with some pan spray and use that to smooth and level the candy in the pan. Respray if the penuche starts to stick to the spatula.
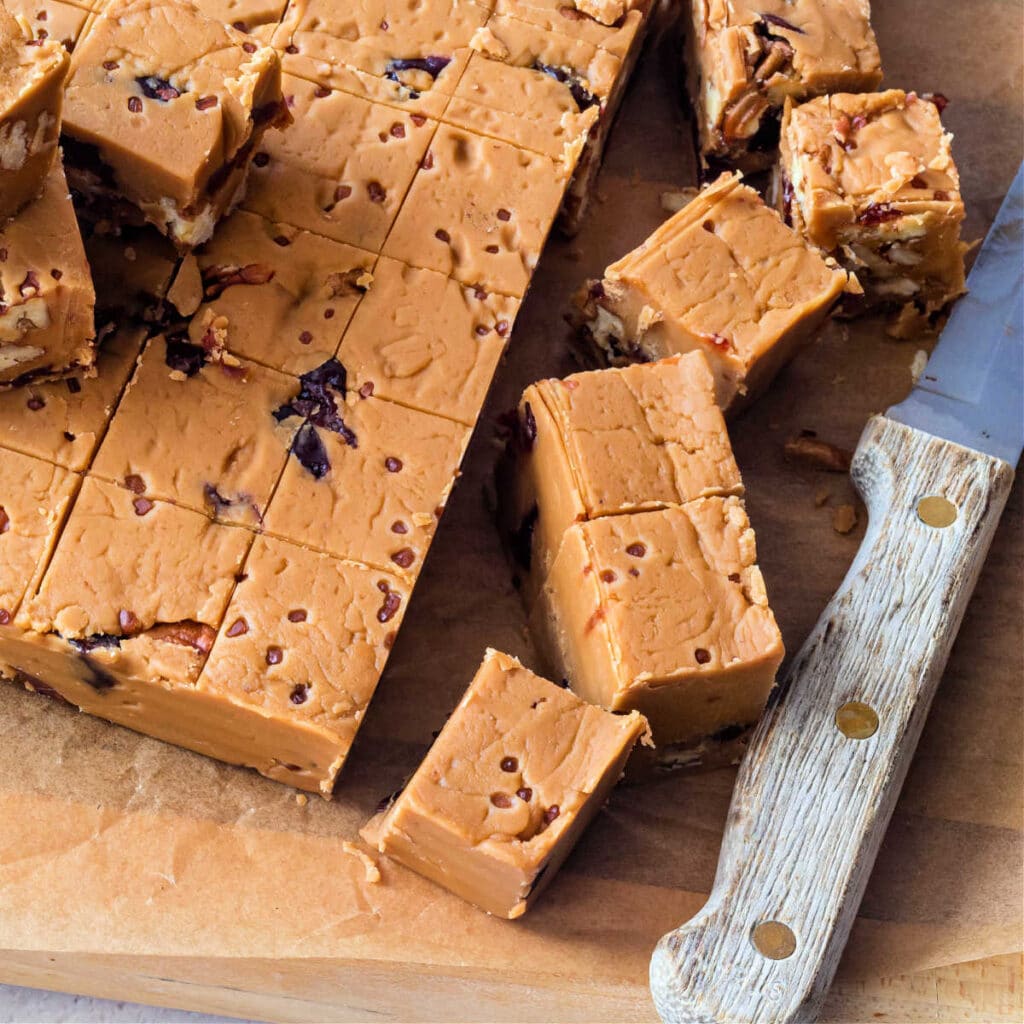
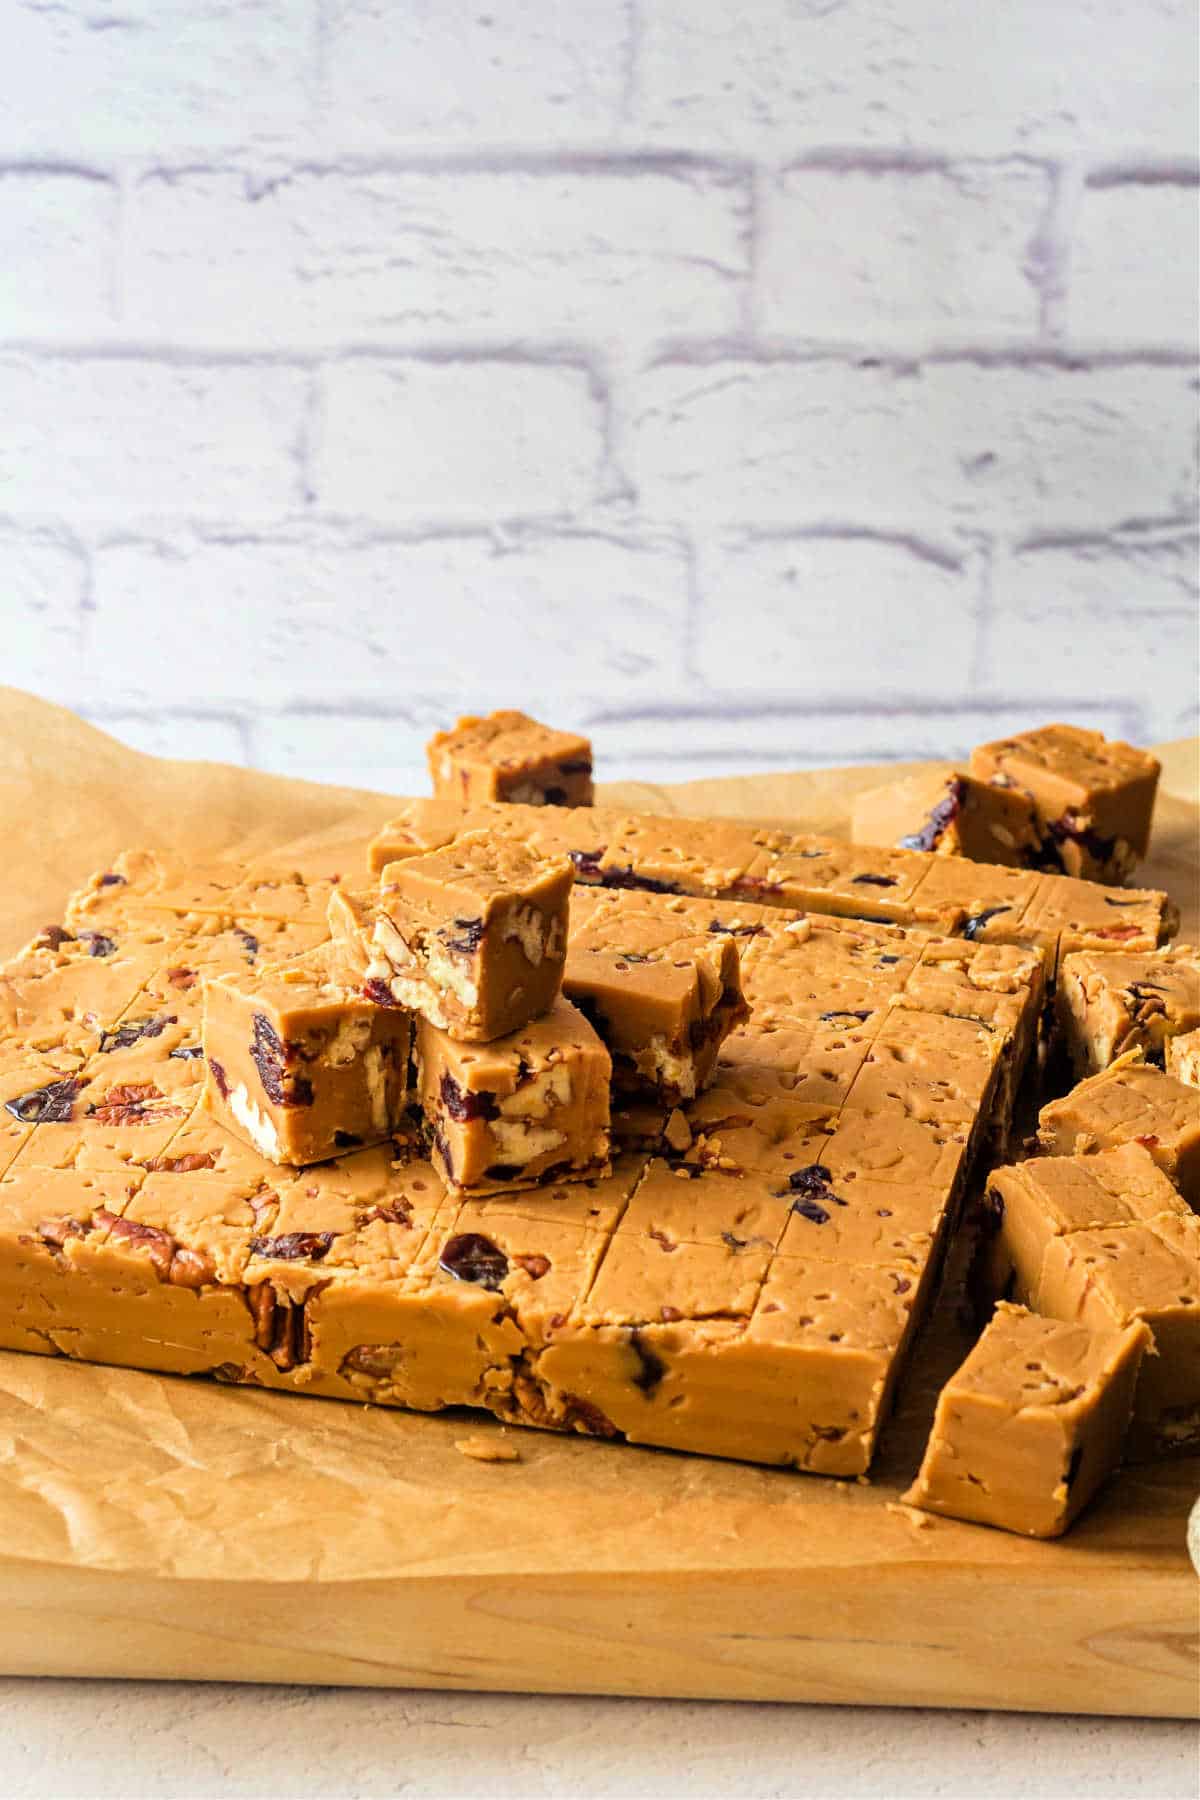
Do not try to cut your fudge in the pan. Use the parchment lining to lift the slab of candy up and out of the pan, and then put it on a cutting board to cut.
For the cleanest, most even cuts, score your penuche with a sharp knife, then go back and complete the cuts.
Penuche Deep-Dive So You Get the Texture You Want

You have to cook your ingredients to a minimum of 234F (112C) in order to end up with fudge.
You can cook it to as high as about 245F (118C) to get a firm fudge, but it is sticky and hard to stir at that temperature, especially when it starts to crystallize.
Shoot for a sweet spot of between 236F-242F (113C-116C) for the perfect penuche.
Cooked to 236F/113C, the fudge will be soft and creamy to begin with. It will also be a bit sticky and hard to cut cleanly. Note it will firm up after a couple of days, but straight out of the gate, it will be fairly soft.
Cooked to 242F/116C, the fudge will be a bit firmer and have a bit deeper, more complex flavor. Once cooled, it shouldn’t be sticky and will be easy to slice.
For reference, I took my brown sugar fudge in my photos to 242F/116C.
If you need one, I have a Stages of Sugar chart for you.
Adjusting Temperature for High Altitude Candy Making
A reader recently commented saying that his candy tasted great but had the wrong texture. It was too hard. He did his own research and realized that it was because the temperature called for was too hot at his altitude (5000 ft above sea level).
This information will help a lot of you, so thank you so much, dear reader. And I know your next batch of candy will be Perfection!
Here’s the rule: reduce the temperature by 1 degree for every degree below sea level boiling temperature of 212F.
Make Adjustments for your Elevation Like This:
- Take the temperature of your boiling water.
- Subtract 1 degree from the target temperature for every degree below 212F your water boils.
If your water boils at 208F, then you will have to stop cooking your sugar at 230F (4 degrees below 234F since your water boils at 4F below 212F).
For reference, I found this Altitude Conversion Chart in a booklet titled “The Art of Candy Making” from the USU Extension/Utah County in Provo, Utah.
Brown Sugar Fudge Q & A
If you accidentally overshoot 242F by a degree or two, you will still end up with a successful candy, I promise. Start stirring the fudge when it has cooled to about 130F–very warm but not burning–to give you enough time to develop those tiny sugar crystals before it firms up.
As written, it is gluten-free. Check your mix-ins to make sure they are not processed or packaged on shared equipment.
Keep your candy in a tightly-sealed container at room temperature for up to 10 days. If you live in a humid climate, you can store it in the fridge. For longer storage, freeze it in a zip-top freezer bag for up to 3 months.
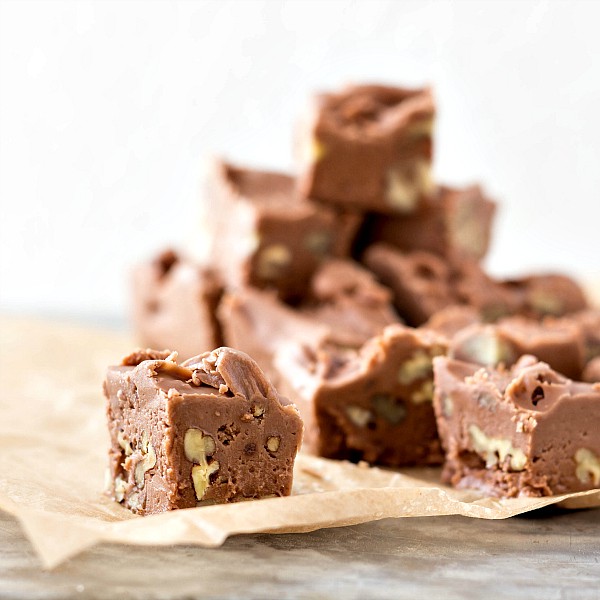
Other Favorite Candy Recipes on PCO
If you’re a fan of penuche and are looking for some more old-fashioned candies to make for gifting or gathering, take a look at these favorites: butterscotch hard candy, old-fashioned cocoa fudge, and copycat Butterfinger bars.
Click on an image to go to the post.
Questions?
If you have questions about this penuche recipe (or anything, really), don’t hesitate to get in touch. You can leave a comment on the post and I will get back to you within about 24 hours.
If your question is more urgent, please shoot me an email, and I will respond within 4 hours, unless I’m asleep.
Love This Recipe? Please Rate and Review. Thank You!
It helps me and other readers so much if you take a moment to rate and review this recipe.
Your star rating and comments help others decide whether the recipe is worth making, and your feedback helps me continue improving recipes here at Pastry Chef Online.
Other lovely ways to share include pinning or posting on your favorite social media platform.
Thank you so much for taking the time!

Penuche Recipe | Brown Sugar Fudge
Ingredients
- 400 grams dark brown sugar 14.25 oz or about 2 cups
- 275 grams granulated sugar 9.8 oz or about 1 1/4 cups
- 600 grams half and half (or a mix of 300g each heavy cream and whole milk) 21.4 oz or about 2 2/3 cups
- 10 grams kosher salt (I use Morton's) 1 1/2 teaspoons
- 70 grams unsalted butter 2.5 oz or 1/2 stick plus 1 Tablespoon
- 30 grams vanilla extract 1 oz or 2 Tablespoons
- 135 grams pecans, toasted and coarsely chopped 4.8 oz or a heaping cup, optional
- 170 grams dried tart cherries, coarsely chopped 6 oz or a heaping cup, optional
- heavy pinch of finishing salt of your choice for sprinkling on top of the finished candy
Instructions
- Spray an 8" or 9" baking pan with pan spray. Fit a strip of parchment into the pan so that it covers the entire bottom of the pan without any wrinkling or bunching up. The strip should extend over the edges of 2 sides of the pan. Set aside.
- Measure, toast, and coarsely chop the pecans.
- Measure and coarsely chop the dried cherries. Set both aside.
- In a large, heavy-bottomed saucepan, combine dark brown sugar, sugar, half & half, salt, and butter. Stir well.
- Bring to a boil over medium to medium-high heat, stirring frequently.
- Once the candy comes to a full rolling boil, stop stirring, and turn the heat down to medium.
- If you have a clip-on candy thermometer, clip it to the side of the pot. If using an instant-read, check the temperature near the center of the pan every 2-3 minutes. NOTE: Rinse your thermometer completely between each reading so you don't accidentally introduce sugar crystals too early.
- Cook the penuche until the temperature reaches 242F/116C.
- Remove from the heat, pour in the vanilla, but don't stir it in. NOTE: If you happen to have a flat-top stove, place the pot on a cooling rack to speed cooling.
- Allow the candy to cool for 45 minutes to an hour, until the temperature is no higher than 130F/54C.
Begin stirring with a wooden spoon or a sturdy silicone spatula. Beat the candy vigorously to incorporate a bit of air. Every once in awhile, pick up a bunch of the candy high out of the pan and let it stream back in. Do this for two reasons. 1) It's fun, and 2) it helps to cool the candy down. - The candy will be fairly easy to stir at first.
- After a few minutes, candy will begin to thicken and lose its sheen.
- Beat for a few seconds more and add in your pecans and cherries. NOTE: To guard against the candy immediately getting too hard to work with once you pour in room-temperature mix-ins, zap them for a few seconds in the microwave.
- Stir in the nuts and fruit as evenly as you can. At this point, your candy will be very thick and matte.
- Scoop the warm fudge out into your prepared pan. Once the fudge has crystalized, nothing bad will happen if you scrape out the pan, so scrape as much of the penuche out as you can.
- Spray an offset spatula with pan spray and use it to press the fudge into an even layer in the pan. This will take a little patience, but you can do it. Add more pan spray as necessary.
- Evenly sprinkle just a bit of your favorite finishing salt over the top of your candy. Press it in lightly with your clean hand or with the spatula.
- Cover the fudge with plastic wrap and refrigerate for about an hour to harden up. You can also put it in the freezer for about 20-30 minutes.
- Once nice and firm, use the edges of the parchment paper to ease the slab of candy out of the pan, and place it on a cutting board.
- Score with a sharp knife into 8 sections each way. I start in the middle, then score into fourths and finally into 8ths. Then I do the same thing the other way.
- Once scored, go back and complete cutting the pieces all the way through.
- Store, tightly covered, at room temperature for a week to 10 days. If you live in a particularly humid area, you can store the fudge in the fridge. You can also freeze it for longer storage.
Did You Make Any Changes?
Notes
Ways to Make Softer Fudge
- Cook to a lower temperature (236F/113C).
- Use a little more butter and use all heavy cream in the recipe.
Ways to Make Firmer Fudge
- Cook to a higher temperature (244 or 244F/117-118C).
- Use a bit less butter and use all whole milk.
- Guard against early crystallization by adding 2 Tablespoons corn syrup when you add the sugar, milk, salt, and butter.
Alternate Mix-Ins
Consider any of your favorite nuts or a mixture. Peanuts would be unexpected and really tasty. You could also use freeze-dried fruit rather than regular chewy dried fruit. Use freeze-dried strawberries or raspberries and peanuts for peanut butter and jelly penuche! If you prefer a straight-up creamy candy, you can also leave the penuche plain with no mix-ins at all.Storing
Store in a tightly-sealed container at room temperature for a week to 10 days. Store in the fridge if you live in a really humid area. You can also freeze it for up to 3 months. Place it in a heavy-duty zip-top freezer bag and use a straw to suck out as much air as possible before sealing. Allow it to come to room temperature before taking it out of the freezer bag.Nutrition
Would you like to save this post?
Thanks for spending some time with me today.
I hope you love this penuche recipe. It makes a great food gift!
Take care, y’all.

Hi, y’all! I hope you’ve enjoyed this post and hopefully also learned a thing or two.
If you like my style, I invite you to sign up for my occasional newsletter, The Inbox Pastry Chef.
Expect updates on new and tasty recipes as well as a bit of behind-the-scenes action. I hope to see you there!


Join in Today!
Tried with 200g eggnog (the stuff I use in Canada is mostly cream and milk with very little egg) and 400g half and half, added 3G extra salt to offset the extra sugar, used rum (didn’t have extract on hand), and added 1/2 tsp each of nutmeg and vanilla when stirring. Texture still turned out well, but the eggnog flavour didn’t really come through as much as I hoped. Was still delicious and worth a try though! Thank you for the feedback 🙂
It sounds line an excellent first step to creating the eggnog fudge you are looking for! Since you’re not dealing with a lot of egg, double your eggnog, and do math using the nutrition panel on the carton to see how much sugar is in it. Then reduce the “free sugar” by the same amount. Then you can leave the salt alone. I would get rum extract bexaise it’s much more concentrated than rum-rum. Maybe try a round 2? I appreciate your taking the time to let me know how it went. Really glad the texture held, too. That’s one of the most important things to get right!
I found this recipe for you for a more “non-traditional” fudge with marshmallow cream in it. This may get you the Eggnog-forward flavor you’re looking for: https://www.troprockin.com/eggnog-fudge/
Any thoughts about using 50% half and half and 50% eggnog in this recipe? And adding eggnog spices at the same time as you would add the pecans or other mix ins.
I would be concerned about the extra sugar plus eggs. It could get curdled and weird. I would try adding nutmeg and some rum extract to give it an eggnog flavor profile without dealing with the egg. If you give it a shot, let me know how it goes!
I made this recipe twice – the first time the fudge came out overcooked and hard. After some reading, I tried lowering the goal temperature to 232 and it worked exactly as you described. I’m in Denver, apparently its an altitude thing? Thank you for writing a precise, well explained recipe. It really helped to know your details and processes.
Doug, hi! I’m so glad you didn’t abandon hope and gave it another go after some research. I think the rule is decrease the temp by 1 degree F for every 1000ft above sea level or something like that. Hope you loved the end result, and thanks so much for commenting. I appreciate the feedback.
WOW! This is fantastic! I love all sorts of fudge and fudge-like confectionaries and this is DA BOMB!! Thank you!
Yay! I’m so glad you love it! ❤️