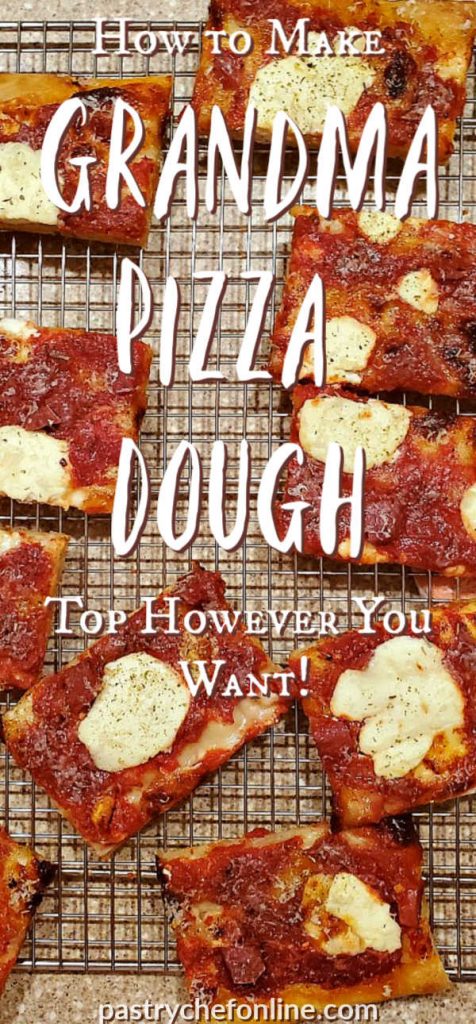
Today, I’m excited to bring you my recipe for grandma pizza dough as well as my hearty homemade pizza sauce to go with it.
Inspired by Peter Reinhart’s book, Perfect Pan Pizza, I’ve been tinkering with my own formulas for pizza dough, like my easy pizza dough for thin crust pizza.
But grandma pizza is maybe my favorite kind, so I am happy to report that this pan pizza dough is fantastic! For another thick-crust pizza, check out my Cuban sandwich pizza, too. For ease of browsing, you can find all my pizza recipes in one place. Now let’s get to it!
Pastry Chef Online Participates in Affiliate Programs. If you make a purchase through one of my links, I may earn a small commission. For more information click to read my disclosure policy
What Is Grandma Pizza?
Grandma pizza originated in Long Island and probably has never been heard of in Italy, the home of pizza.
That’s just fine with me–hooray for Italian American inventions!
Grandma pizza gets baked up in a parchment-lined half sheet pan that you coat liberally with olive oil.
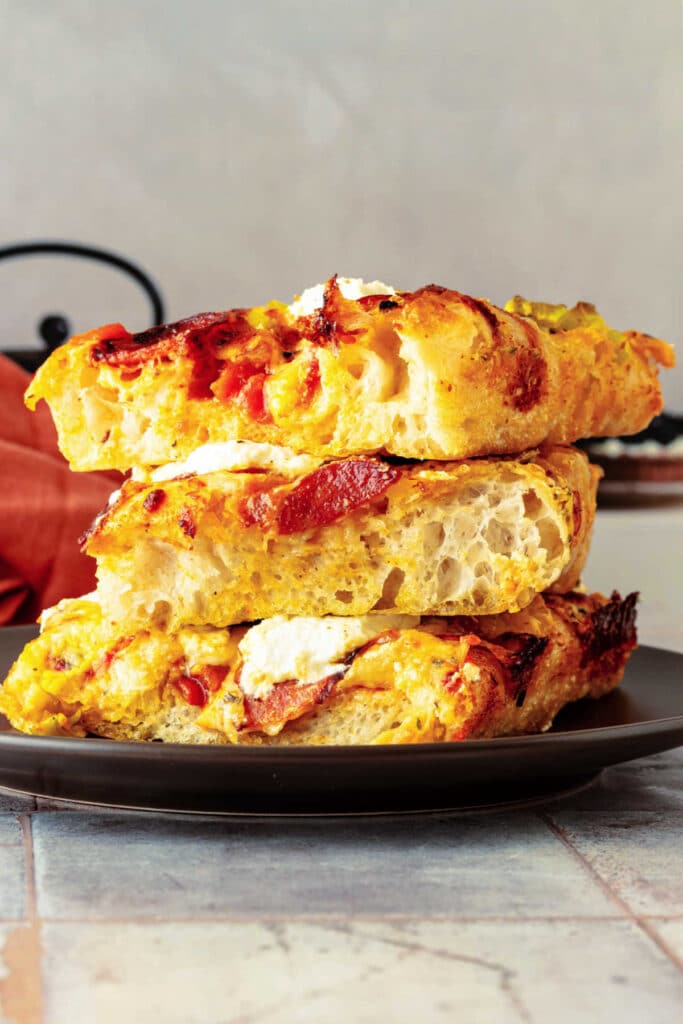
The bottom of the crust basically fries to a crisp, golden brown in the oil while the interior is puffy but light.
Go easy on the toppings because
- you don’t want to weigh down the airy crust and
- with a crust this delicious, you want to be able to taste it
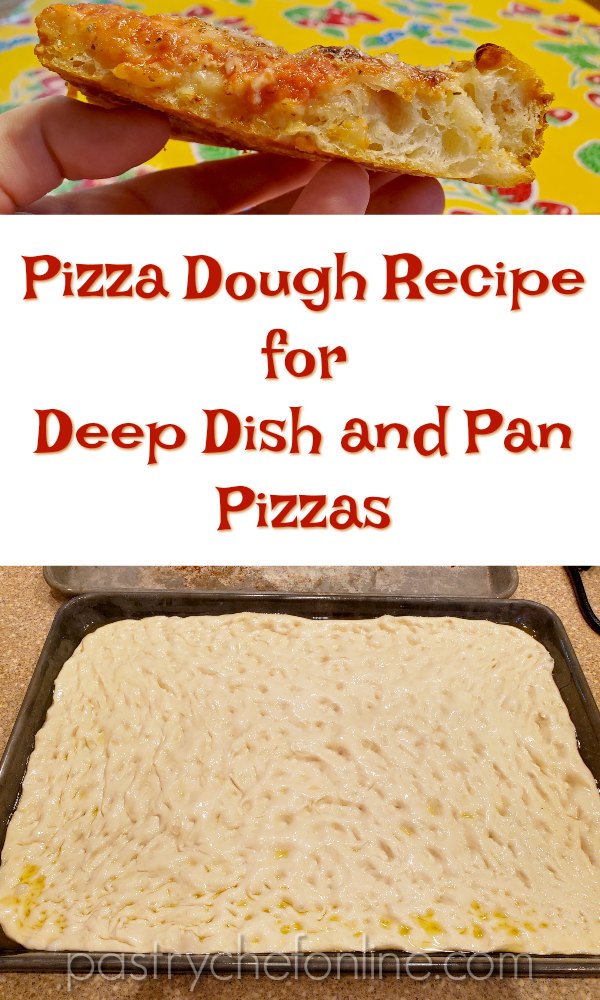
What Is So Great About This Recipe?
While you can technically use any pizza crust recipe for grandma pizza, this easy, 4-ingredient recipe requires no fancy equipment to make.
It bakes up crisp and chewy and pillowy and airy. So, so good!
Here’s what I like about it so much:
- You don’t need a mixer to make the dough
- It requires no kneading, just a few folds
- It’s a very wet dough, which means it develops a beautiful, open, airy crumb
- The flavor is excellent
- There’s almost no way to mess it up. I promise.
Sound good? If you make and love grandma pizza dough, I have a favor to ask you:
When you do make this recipe, it will help me and other readers if you:
✅Rate the recipes using the stars in the recipe card
✅Leave a review when prompted in the recipe card (If it’s a positive review, and I hope it is, I’ll use it in the post as social proof)
✅Leave a comment on the post
Thank you so much!
How To Make Grandma Pizza Dough
Ingredients
As with most breads and flatbreads, the ingredient list for pan pizza dough is very basic:
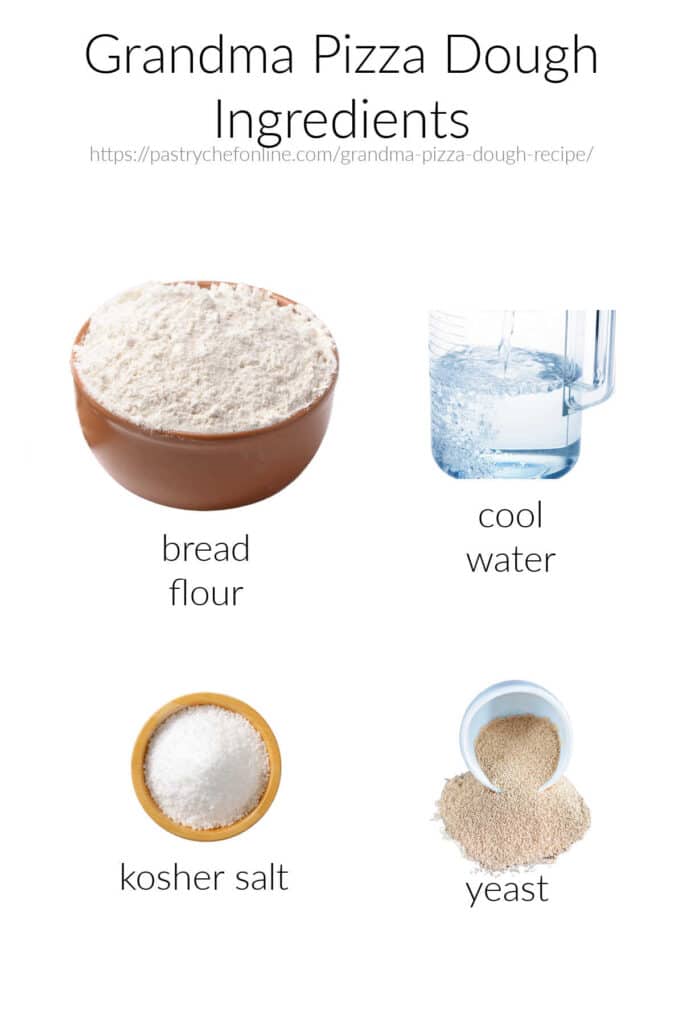
- bread flour: you can substitute all purpose flour with a high protein content (such as King Arthur), but you may need to cut back on the amount of water you use by just a smidge
- water: allows the gluten to develop. This is a very wet dough and can almost better be described as a very thick batter
- salt: keeps the yeast from running wild so you don’t end up with flabby dough and adds flavor
- instant yeast: provides the rise. You can substitute active dry yeast 1:1. Just proof it in a portion of the water (warm the water first) for a few minutes to make sure it’s alive). Then add it in with the rest of the ingredients
Why no oil in this dough?
You can absolutely add some olive oil to your dough if you’d like. With some experimentation, I’ve found that the dough bakes up simultaneously lighter and chewier without oil.
Since the dough basically fries in oil, sometimes too much of a good thing is too much.
A Note About Hydration
As written, this dough is 83% hydration. What this means is the weight of the water in the recipe is 83% of the weight of the flour.
This makes for a fairly loose batter, but it is “handle-able,” if you approach it in the right manner.
Since this is a very slack (wet) dough, be sure to oil your hands or wet them well with cold water when working with it. Don’t add flour–just oil or wet your hands.
Wet your hands really well with cold water before handling the dough. It’s almost magic how the dough doesn’t stick to wet hands. You can also rub your hands with some oil instead of getting them wet. Your choice. Just don’t add extra flour.
Procedure
Making the dough is a straightforward process. First, here’s a collage of step-by-step photos:
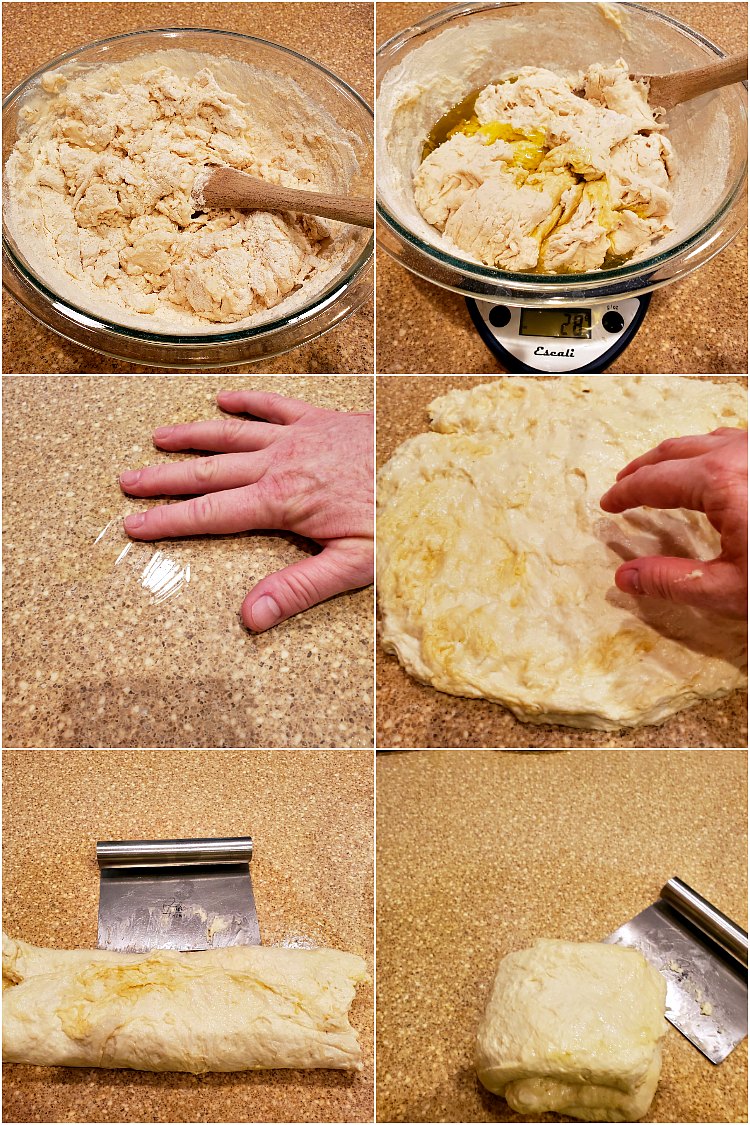
- Mix flour, instant yeast, salt, and water together until shaggy.
- Spread a thin layer of olive oil over your work surface.
- Plop the dough out onto the oiled counter and, with oiled hands, press the dough out into about a 15″ square-ish shape
- Using your bench knife to help you, stretch and fold the dough in thirds, like a letter
- Fold the dough into thirds the other way.
From there, put the bowl you made the dough in over the dough like a little dough cave, and let it rest about 20 minutes.
Repeat the pressing out and stretch-folds 3 more times at 20 minute intervals.
After the last fold, oil the dough, and put it in a lightly-oiled bowl. Cover with a lid or with plastic wrap and refrigerate at least overnight or up to 3-4 days.
If it’s cool in your kitchen (say 65-67F), you can give it a long, slow rise on the counter and then shape your pizza the following day.
Alternate Technique: Coil Folds
If you are comfortable working with a very slack (wet, loose) dough, you can perform coil folds on the dough right in the bowl.
In that case, you will wet your hands very well, and you won’t need to use any olive oil until after completing all the folds.
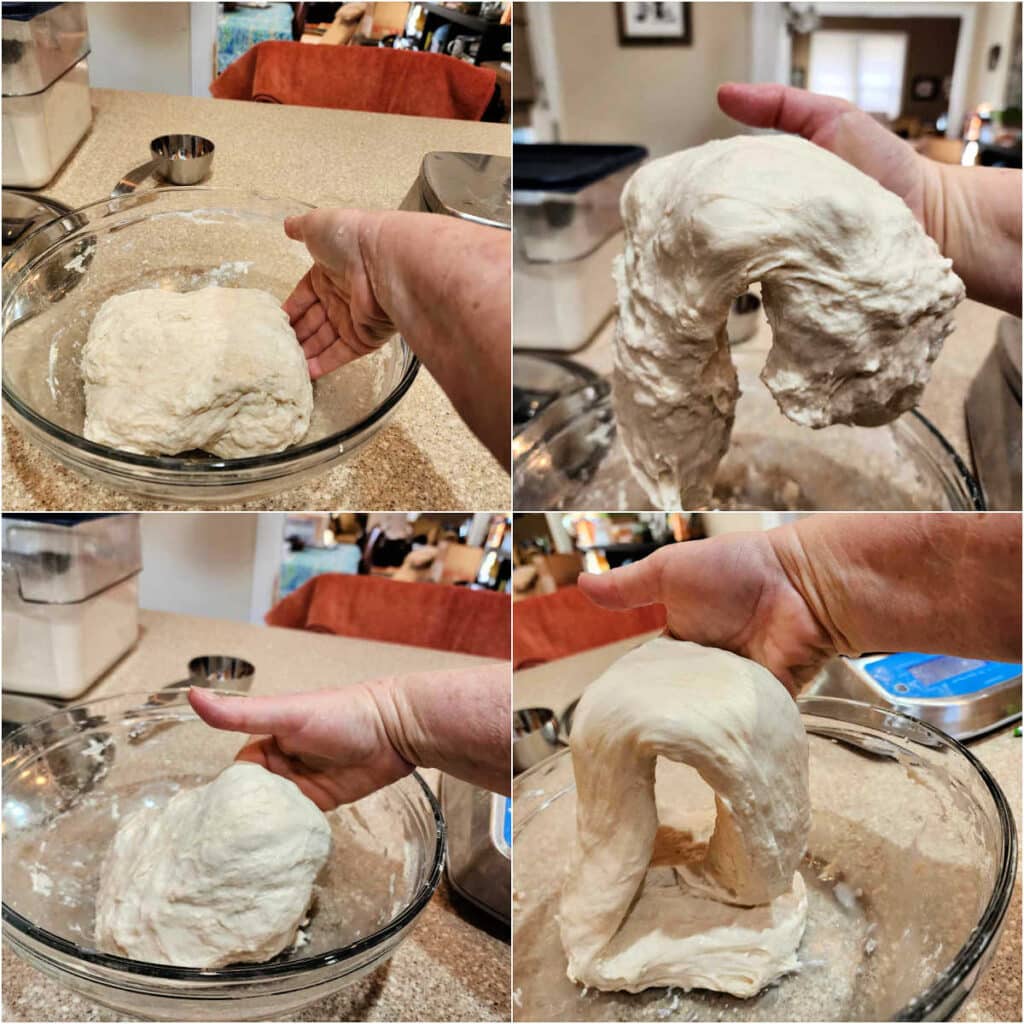
NOTE: Always use two hands to do coil folds. I used one this time so I could take photos. The bottom right photo shows how to make that actual fold is clearly as possible. See how, when I let the dough go, it will basically be folded into thirds?
Would you like to save this post?
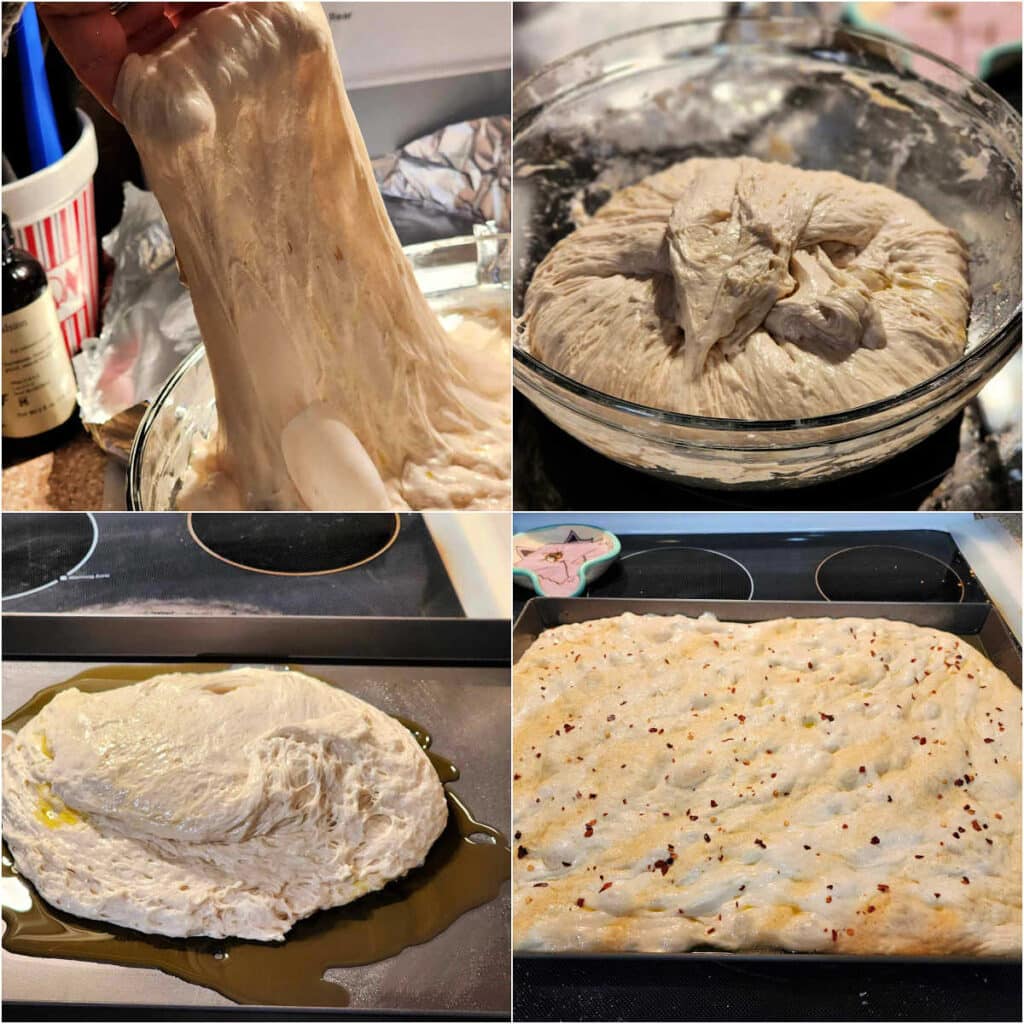
With wet hands, wiggle your hands underneath the dough in the bowl from either side until your fingers meet under the dough.
Pull the dough straight up. It may break on the first coil fold, but as the gluten strengthens, it will stretch out beautifully and pick up cleanly.
Once you have the dough lifted out of the bowl, allow the part hanging down the back of your hands to hit the front-bottom of the bowl.
Drag that along the bottom, and allow the dough hanging in front of your hands to hit at the back-bottom of the bowl before gently releasing the dough.
What you have just done, essentially, is to fold the dough in thirds. Repeat that same process at a 90 degree angle to the current direction of the dough, again wetting your hands and pulling straight up, allowing the dough to collapse into thirds.
That completes one coil fold.
Use hands dripping wet with cold water to perform your folds. The dough will barely stick, if at all. It’s like magic.
Do that 3 more times, allowing the dough to rest in the bowl, covered, between each coil fold.
After completing four folds, drizzle a little olive oil over the dough to keep it moist, cover, and refrigerate.
Shaping the Dough
This is easy to do, too.
You do have to be a little bit patient, because gluten naturally likes to spring back when you press it out, but aside from a little patience, this step takes very little skill. Approach your dough with confidence!
- Note how incredibly stretchy the dough is after a rest in the fridge.
- Deflate the dough just a bit by pulling the outsides of the dough into the center all the way around.
- Liberally oil your Lloyd’s Pan with about 1/4 cup olive oil. Plop the dough in the center of the pan and then use your fingertips to dimple the dough and press it out as far as you can get it to go.
- It may take 2 or 3 rounds of dimpling, allowing the dough to rest for 20 minutes or so between rounds, to get the dough to spread out completely in the pan. Once fully stretched, sprinkle on minced garlic or shake a liberal amount of granulated garlic over the dough. I also added pepper flake. That’s optional, but I like a bit of heat.
Cover the dough and allow it to rest and rise on the counter for about 3 more hours.
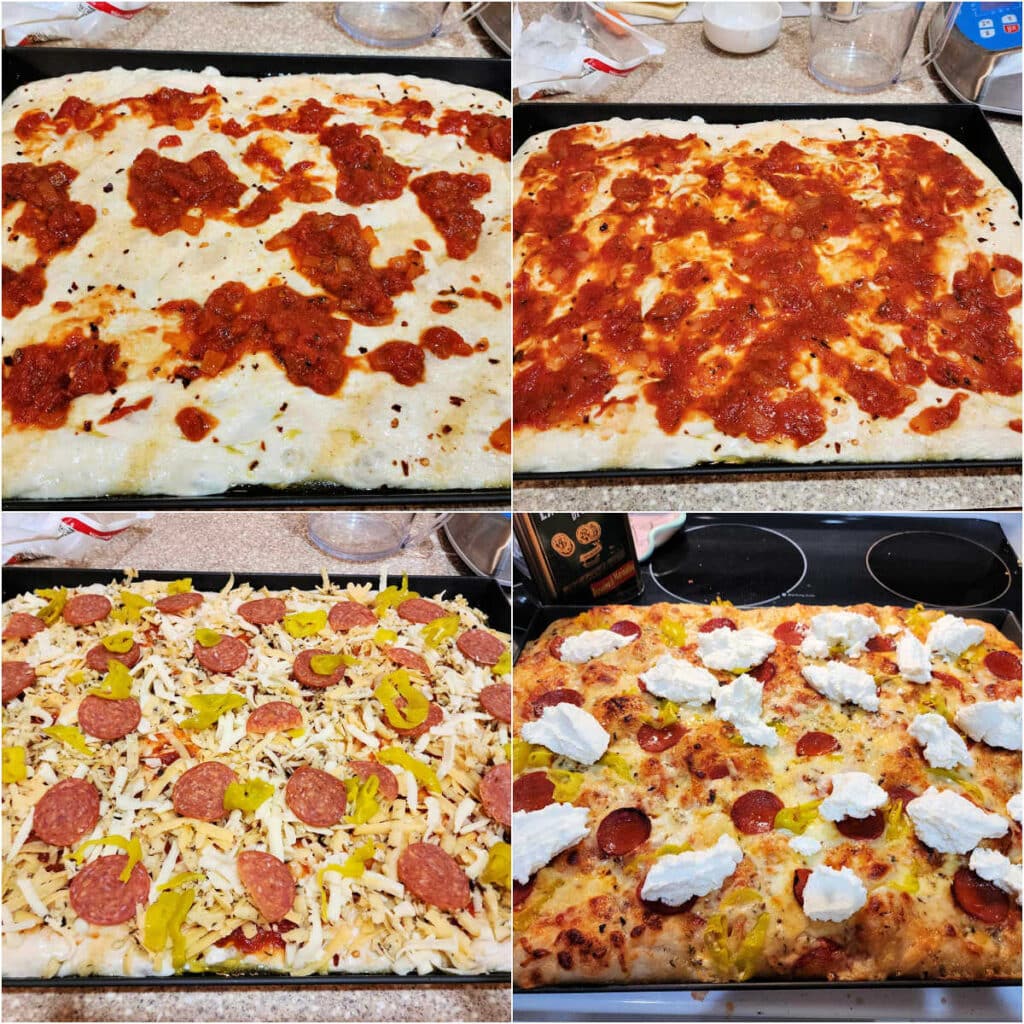
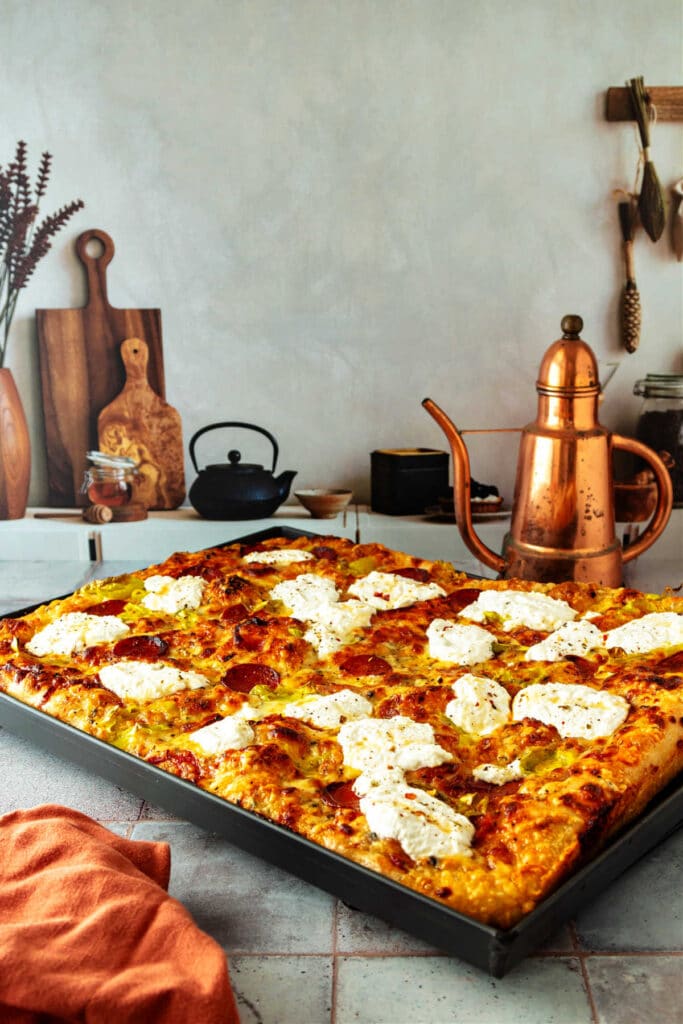
I love fresh ricotta on a pizza, so I parbake the pie for 10 minutes and then top with the ricotta, letting it melt on during the last 5-7 minutes of baking.
You may top the pizza however you like, using your favorite homemade or jarred sauce, or give my favorite of the 3 types of grandma pizza I’ve made in the past week, lasagna pizza. Lord it was good!
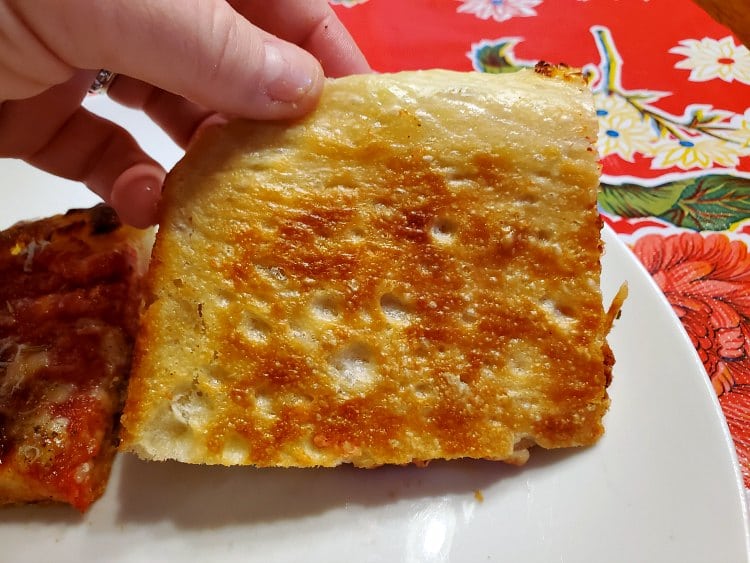
The Bottom Crust Basically Fries in Olive Oil!
This is one of the things that is so magical about this grandma pizza dough.
Since you’re not baking it on a super hot stone, it doesn’t end up with little bits of char. Rather, since you pan it up in olive oil, the crust fries to a beautiful, burnished, crispy golden brown!
Specialty Equipment
I just bought a Lloyd pan and I am never going back. This thing is magic.
The dark color really directs the heat to the crust, and there is minimal if any sticking.
I no longer have to bake with parchment under the dough.
If you’re serious about your grandma pizzas, invest in one of these bad boys!
More Pizza Topping Ideas
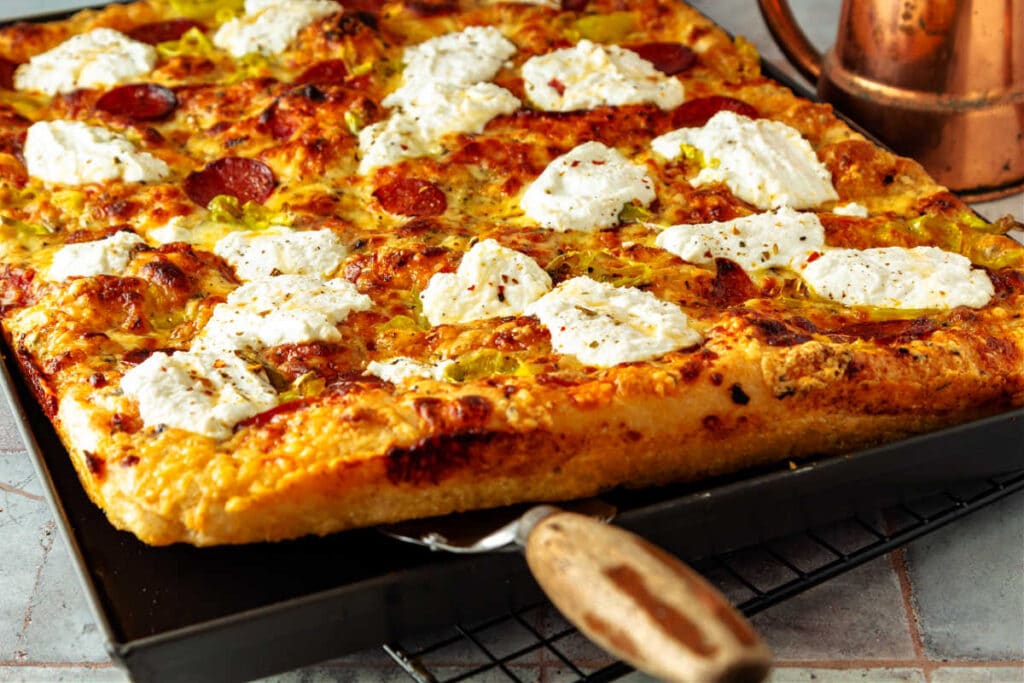
Honestly, I think you’re going to want to stick with this crust recipe once you’ve made it. But that doesn’t mean you won’t want to top it in all different ways.
I topped this one with a mixture of brick cheese, mozzarella, and mushroom gouda, which was an impulse buy at Lidl.
The other toppings were Boar’s Head pepperoni, pepperoncini, and little spoonfuls of ricotta cheese.
Here are some other ideas for you:
- Sausage Gravy Pizza with Peppers and Onions
- Pizza with Ground Beef and Peppers
- Bacon and Pickled Pepper Pizza
- Pulled Pork Pizza
Regardless, remember the secret really is in the crust and not to pile on the toppings too thick so the whole thing will bake through.
Questions?
If you have any questions about this post or recipe, I am happy to help.
Simply leave a comment here and I will get back to you soon. I also invite you to ask questions in my Facebook group, Fearless Kitchen Fun.
If your question is more pressing, please feel free to email me. I should be back in touch ASAP, as long as I’m not asleep.
A Note About Measurements
My recipes are almost all written by weight, including liquids, unless otherwise specified.
For accuracy and consistency of results, I encourage you to buy–and use–a kitchen scale.
I promise that baking and cleanup will be so much quicker and easier.
This is the scale that I recommend for home use. I have owned and used one for years.
Love This Thick Crust Pizza Dough? Please Rate and Review. Thanks!
It helps me and other readers so much if you take a moment to rate and review this recipe.
Your star rating and comments help others decide whether the recipe is worth making, and your feedback helps me continue improving recipes here at Pastry Chef Online.
Other lovely ways to share include pinning or posting on your favorite social media platform.
Thank you so much for taking the time!


Grandma Pizza Dough Recipe
Video
Equipment
Ingredients
- 500 g bread flour 17.65 ounces or about 4 cups
- 10 g kosher salt 2 teaspoons of Morton's or 2 teaspoons of Diamond Crystal
- 5 g instant yeast 1 teaspoon
- 415 g cool water 14.65 oz or a very slightly generous 1 3/4 cups
- 2 teaspoons olive oil for the stretching and folding I usually use a lot more than this. It will not adversely affect the dough if you use more than 2 teaspoons. Omit if doing coil folds (See Post section on coil folds.)
- ¼ cup olive oil for panning
- 2 teaspoons minced garlic for panning You can also use garlic powder if that's what you have on hand.
Instructions
- In a large bowl, stir together the flour, instant yeast, and salt.
- Add the water and stir in until you have a shaggy dough, about 1 minute.
- Use your hand to rub a couple of teaspoons of oil out on a clean counter into about a 15" circle-ish.
- Plop the dough out onto the oiled counter.
- Oil your fingers and press, dimple out the dough to about a 15" square-ish shape.
- Use your bench knife to help you fold the dough into thirds like a letter and then in thirds again the other other way. Cover with a bowl and let rest 20 minutes.
- Repeat steps 6-7 3 more times for a total of 4 rounds of folding, waiting about 20 minutes between each fold.
- After the final fold, place the dough into a lightly oiled bowl, and oil the top of the dough. Cover with a lid or with plastic wrap and refrigerate for up to 3 days.
Alternate Method: Coil Folds
- Rather than folding the dough on your counter with a bench knife, you can also choose to do coil folds. You do these right in the bowl with dripping wet hands.
- With very wet hands, shimmy your hands under the dough from either side until your fingers meet in the middle under the dough. Pull straight up until the dough releases from the bowl. The dough may break during the first fold, but it will gain strength and suppleness on subsequent folds.
- Now you basically have a "rope" of dough with some hanging in front of your hands and some hanging in back. Lower the dough back into the bowl so the two ends overlap each other and release the dough so it roughly is now in thirds. Turn the bowl 1/4 turn, wet your hands again, and repeat this lifting and folding. This is one coil fold.

- Allow the dough to rest for 20 minutes, covered, and repeat the coil folds 3 additional times, resting in between each fold. You will notice the dough getting smoother and stretchier with each fold. After the 4th fold, drizzle on some olive oil and spread it out with your hand. Cover the dough and refrigerate for up to 3 days.
To Pan the Dough
- FOUR HOURS before baking, line a half-sheet pan with parchment paper and pour on 1/4 cup olive oil. Spread it out with your hands or a brush. If you have a LloydPans grandma pizza dough, you will not need the parchment.
- Scrape the dough into the middle of the pan in the pool of oil.
- Use your fingertips to dimple out the dough as far as it will go. Cover the dough with an upside down half-sheet pan and let rest at room temperature for 3 hours.
- With wet or oiled hands, gently lift the edges of the dough and pull them out towards the corners. Then use your fingers to dimple the dough in the center, pressing some of the bulk of the dough towards the edges.
- Once the dough fills the pan, sprinkle the garlic or garlic powder evenly over the crust and let rest, covered, for an hour. Top as desired and let rest for an additional hour.
- Place a rack on the lowest level of your oven and put a baking stone or pizza steel on the rack. Heat the oven to 500F for the last hour of the rise. You want the stone to be as hot as possible.
- Bake for 10 minutes. Rotate the pizza, adding any particularly delicate toppings at this point. Bake an additional 5-8 minutes, or until the crust is golden brown around the edges, and the bottom of the crust is nicely browned from the olive oil.
- Remove from the oven and let sit 5 minutes. Loosen any stuck, bits with a thin, flexible spatula, and slide out onto a cutting board. Use a pizza wheel to slice into 12-16 servings.
Did You Make Any Changes?
Notes
Nutrition
Would you like to save this post?

Hi, y’all! I hope you’ve enjoyed this post and hopefully also learned a thing or two.
If you like my style, I invite you to sign up for my occasional newsletter, The Inbox Pastry Chef.
Expect updates on new and tasty recipes as well as a bit of behind-the-scenes action. I hope to see you there!

And there you have it, friends. A perfect (honestly!) grandma pizza dough recipe.
Thanks for spending some time with me today.
Take care, y’all.


Join in Today!
Do you place the Loyd pan directly on the pizza stone or on the rack just above the stone?
Hey, Chris! I place it directly on the stone. Enjoy!
I don’t know how I missed this comment last fall, but for future reference, you can put it directly on the stone.
I don’t have a pizza stone or pizza steel. Can I still make this?
Absolutely, Catherine! It may be a bit less crisp. If you have a flat bottomed stove, bake on the floor of the oven. If not, bake on the lowest rack. Preheat your oven for at least 30 minutes past when your oven signals it is at temperature. Enjoy!
Hi Jennifer
When I read Peter Reinharts and Tony Gemignani dough receipe its about 4 or 5 minutes of mixing before the stretch and folds.
With your receipt you only mix for 1 minute then the folds. Whether it’s 1 min or 5 min does it really matter?
Do your 20 min between folds make up the difference in mixing time?
Thank you
Michael
Canadian Pizza Lover
Hi, Michael! Great questions. And yes, the extended rest between folds, especially with a high hydration dough, ensures adequate gluten formation with a minimum of mixing. Honestly, you can’t really go wrong, whether you use my formula or Peter’s. I personally prefer my higher hydration and leaving the oil out until panning, and that came with experimenting. Once you’ve done it Peter’s way and my way, you can tinker further to make your perfect pizza dough. Enjoy the tests–they will all be delicious!
Can I skip the fridge part? And leave it out until dinner time. It was 2:30pm when I finished the dough. We want pizza by 6 or 630. It’s a pretty cool kitchen this time of year.
Yes, you can skip it. But know that next time it will develop more/better flavor and texture if you give it that extra time. Still, if you need pizza, it’ll still be delicious!
I have the LloysPans 16×12 inch grandma pizza pan. Do I still need to use the parchment papper?
Nice pan! I’ve not used one before, so check Lloyd’s instructions for using. I have always had a terrible time with the crust sticking, even with all that oil, so that’s why I’ve learned to err on the side of caution. Enjoy your grandma pie!
Thisis an amazing crust. It turned out golden and cripsy as promissed. The crust was fuill of glorious bubbles. The instructions are on point. I topped my creation with Confit Garlic, Sauteed Mushrooms topped with mozzarella and parmesan.
I am so pleased that you love it! I make this dough a lot for focaccia, and it even stretches out to make a pretty dang good thin crust, too!
I made this pizza last night. The dough came out perfectly. However, in order for the dough to come out crunchy, the toppings browned a little too much. Although, still delicious, do you have any ideas? I was wondering if I put the pan in the oven on my pizza steel would that help bake the bottom faster? I did use the convection setting. Thanks so much for the recipe.
So glad you enjoyed the crust! I generally bake pizzas on the lowest rack so the toppings cook more slowly. You cam also par-bake the crust for a few minutes before adding toppings. But if you have a pizza steel, that’s definitely going to be your best option. Make sure it preheats in the oven for a good 45 minutes so it’s screaming hot!
I love this recipe!
For a crunchier version, I highly recommend to try using a cast iron pan. It comes out great!
I’m so pleased you love the dough–I think Peter’s formulas are magic. I sometimes go even heavier with the water, up to 100% hydration, just for fun. So, are you making a grandma pie in cast iron? Or some other? Just curious. Enjoy!
Holy smokes, this is the holy grail of pizza dough!! With the leftover, I made a few rolls and baked on a pizza stone. Unbelievable!! My carb avoidant daughter ate both! My question is if I wanted to make an entire batch of rolls, how would I approach the day 2 pan stretching process? Do I need to stretch the dough, then roll them into balls and let them rise. Many thanks for any info!! 🙂
Hey, Adrienne! I’m thrilled that you’re a convert to this dough! Is there *nothing* it can’t do?! I love the idea of turning the whole shebang into rolls. I wouldn’t worry about all the stretching, though. I’d take the bulk dough out of the fridge after a day or two, let it rest at room temp for maybe an hour. Maybe plop it out onto a greased countertop so it has room to spread and thin out a bit so it warms up more quickly. Scale your rolls at 3 oz each for a good dinner roll size, at 1.5 oz for mini dinner rolls, or at 4 oz for hamburger buns. Once scaled, shape each piece into rounds by spreading the dough out a bit, deciding which is the “top side,” and tucking all the edges in and underneath to form balls. Tighten the balls up by rolling them between your palms on the counter. Spray the tops with pan spray, cover, and let rise on your baking sheet/baking pan until pretty nicely risen–maybe an additional hour or so. Just make sure they’re nice and puffy. Bake at 425, brushing the tops with egg wash and adding seeds (if you want), or brushing them with butter and/or olive oil before and/or after baking. I imagine they’ll be done in about 15-ish minutes, depending on your oven and the dough temp when you put them in the oven. Look for an internal temperature of 195F-200F. Let cool to warm before digging in! And of course, you can mix anything into your dough by kneading it in a bit before scaling and then again making sure everything is incorporated as you shape each roll. Shredded cheese, bacon bits, sausage bits, herbs, etc. Have at it!
You mention leaving the dough out 4 hours before baking. Does the 4 hours include letting dough come to room temp before stretching?
THANK YOU
Michael
4 hours total, pretty much, depending on how cool your kitchen is. You don’t have to take I to account letting it come to room temp. This is a great dough, and I really hope you enjoy it!
Where can I find the actual recipe for the Grandma Pizza?
This post is the recipe for the dough, and the dough is really what makes the pizza. Top however you like it, but if you’d like to try my recipe for lasagna pizza, here it is: https://pastrychefonline.com/lasagna-pizza/ The grandma pie pictured in the dough recipe is just a simple sauce of crushed tomatoes, garlic, Italian seasoning, pepper flake, red wine vinegar and a splash of olive oil (uncooked. It bakes along with the pizza, so you just stir all the ingredients together to taste) and topped with slices of fresh mozzarella cheese, diced sopressata, and some grated fontina cheese. I hope that helps, Abby. Enjoy!
This looks amazing and I’m eager to give this recipe a go. Would you please post standard measurements as well or email them to me as I don’t own a scale. I understand it’s not as exact but I don’t mind winging it. Thanks Glyn
Hey, Glyn! I have added the Imperial measurements in the recipe. I hope you really enjoy the dough, and I do encourage you to buy a scale at some point. You won’t be sorry! Take care and be safe. 🙂
Thanks Jennifer, much appreciated!
You’re welcome! Enjoy every bite!
I’ve been making pizza at home for years,I can’t wait to try this no knead and the layer of oil on the bottom. Thank you Jenni!
That crispy fried bottom is just so good and even though it’s a thicker crust, it isn’t at all heavy. I hope you and your family enjoy it, Terri!