This easy pizza dough recipe is perfect for making homemade pizzas. The recipe makes enough dough to make 2 12″ thin-crust pizzas, or you can use the entire amount of dough to make one really big pizza. I consider this a New York pizza dough recipe, because you can fold the resulting slices in half to eat on the go.
The dough is very easy to work with, so it’s a great dough to make if you’re not really comfortable working with yeast. It’s a restaurant pizza dough recipe, too, so you know you can scale it up to make a lot if you need to.
For those of you who prefer a more rustic and chewy thick-crust pizza, you can’t go wrong with grandma pizza dough. And for ease of browsing, you can find all my bread recipes in one place. Thanks so much for visiting!
Pastry Chef Online Participates in Affiliate Programs. If you make a purchase through one of my links, I may earn a small commission. For more information click to read my disclosure policy
Easy Pizza Dough, at a Glance
✅Skill Level: Beginner
✅Skills: Making Dough, Kneading, Rising, Stretching, Baking
✅Type: Flatbread
✅Number of Ingredients: 6
✅Prep Time: 15 minutes
✅Cook Time: 10-15 minutes
✅Rise Time: 2 1/2 hours
✅Yield: enough dough for 2 12-13″ pizzas
Jump Straight to the Recipe
The Importance of Pizza
One of the first things The Beloved and I do when we move to a new place is to find the best local pizza place we can and Buy From Them.
We’d rather support a local, stand-alone than a Crazy Big Chain operation. The place we have found in NC is a little place called Papa’s Pizza and Subs.
We order from Papa about twice a month, and we have been Very Pleased–even their delivery guys are really good. Yay.
There was a time though–a Sad and Dark time–when we didn’t have a good local pizza place near us.
The only thing to do was make our own.
Even now, with Papa’s down the road, we might have a hankering for pizza brushed with truffle oil sometimes, and then we’ll just make some.
Why You Should Make This Pizza Dough
This the recipe we used at one of the restaurants I worked at, scaled down so you don’t have to make a billion pizzas.
Since it’s a restaurant recipe, it has an easy-to-remember formula. Memorize it, and you can make your own pizza dough no matter where you are.
This dough is made to be baked into thin-crust pizza, but you can also use it to make a thicker crust.
All you have to do to make a thicker crust is to cover the topped pizza and let it rest for maybe 30-45 minutes before baking. Easy!
The crust that bakes up from this recipe is nice and chewy, but not so chewy that it gets in the way of enjoying your pizza.
This is a relatively lean dough with only a Tablespoon of oil in it. It’s also a relatively low-hydration dough with a hydration of about 50%.
This makes it very easy to work with.
If you make this dough and love it, I have a favor to ask:
When you do make this recipe, it will help me and other readers if you:
✅Rate the recipes using the stars in the recipe card
✅Leave a review when prompted in the recipe card (If it’s a positive review, and I hope it is, I’ll use it in the post as social proof)
✅Leave a comment on the post
Thank you so much!
How to Make Homemade Pizza Dough
This is a user-friendly dough, and it is not hard to make. In fact, if you don’t need anymore instructions, you can skip straight to the recipe card.
If you have a
If you don’t, it’s still a straightforward process that you can make in a bowl and then knead by hand.
Ingredients and Substitutions
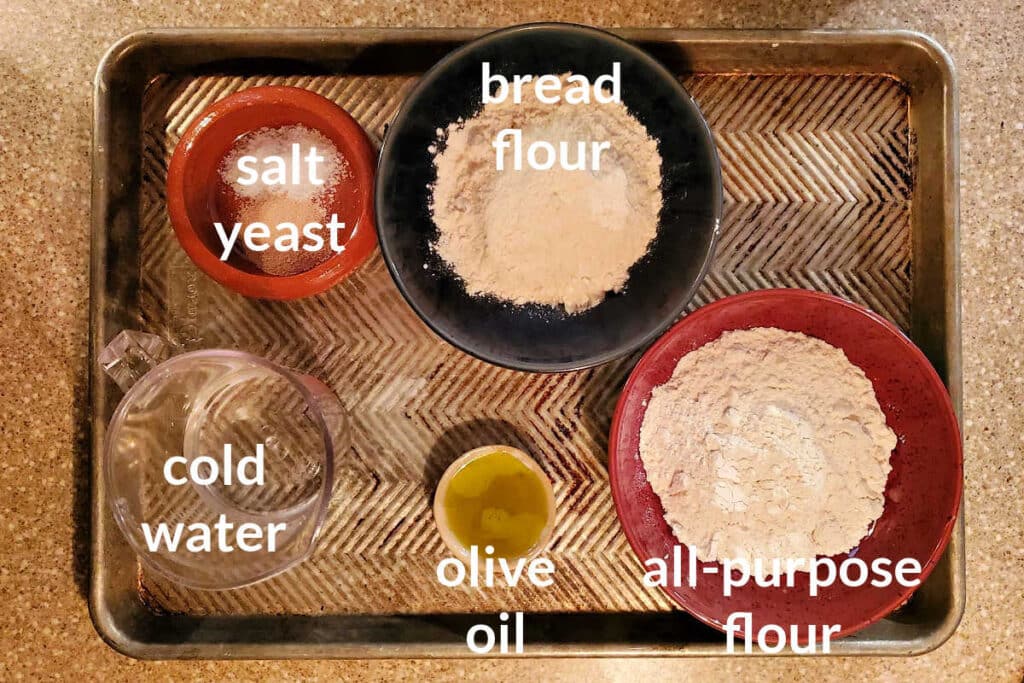
- Bread flour: Together, the two flours make up the bulk of the dough and provide the gluten for strength and stretch. You can substitute all bread flour or all all-purpose flour if you don’t have both on hand, but you will probably need to adjust the amount of water. See the QZ&A for more information
- All-purpose flour:
- Salt: Adds flavor and controls yeast growth
- Yeast: Provides the rise, and a long, slow rise also contributes to flavor
- Water: You can use cold water here, and filtered water if you have it
- Olive oil: Just a touch to add a bit of richness and fat to tenderize the gluten and provide a hint of fruity, olive oil flavor
Procedure
If you have a
- Get out your
stand mixer and fit it with the dough hook. - Put all the ingredients into the mixer bowl.
- Mix on medium-low speed for 8 minutes and medium speed for an additional 4 minutes.
- That’s it. Dough: made!
If you don’t have a mixer, start with all your ingredients in a large bowl.
Bring it all together by stirring with a wooden spoon until you have a pretty shaggy dough.
Scrape the dough out onto a clean work surface–no need for flour–and work the dough until it is smooth, soft, and stretchy.
Once you have your dough made, there’s a bit of a process to turn it into the pizza of your dreams.
Nothing about it is hard, and you’ll be able to do it without thinking about it after a while.
For now, especially if this is your first time making and shaping dough, here are all the steps so you know what to expect.
How to Know When It’s is Ready
I understand that, even with times for kneading, you may still be unsure if your dough is ready.
Here’s what to look for:
- You dough will start out “bumpy” and kind of rough. As you knead (or your mixer kneads) the dough will become smooth and stretchy.
- It will be soft and barely sticky at all.
- If you grab a piece of it and stretch it out, it will stretch out easily.
- If you take a piece of the dough and work it into a small disc, and then stretch it out, it should be translucent when you hold it up to the light, and it shouldn’t tear (at least not until it is very, very thin).
Shaping Your Pizza Dough into a Ball for the First Rise
Once you make your dough, and especially if you weigh all your ingredients, you’ll have right around 13.2 oz dough.
Split the dough in two so you have two pieces that each way about 6.6 oz.
Take each piece of dough, pat it out a little bit so it’s in a rough disc shape.
Then, tuck all the edges of the disc under and into the center, gathering the whole piece of dough into a ball.
Tighten the ball up by placing it on the counter and rolling it between your palms.
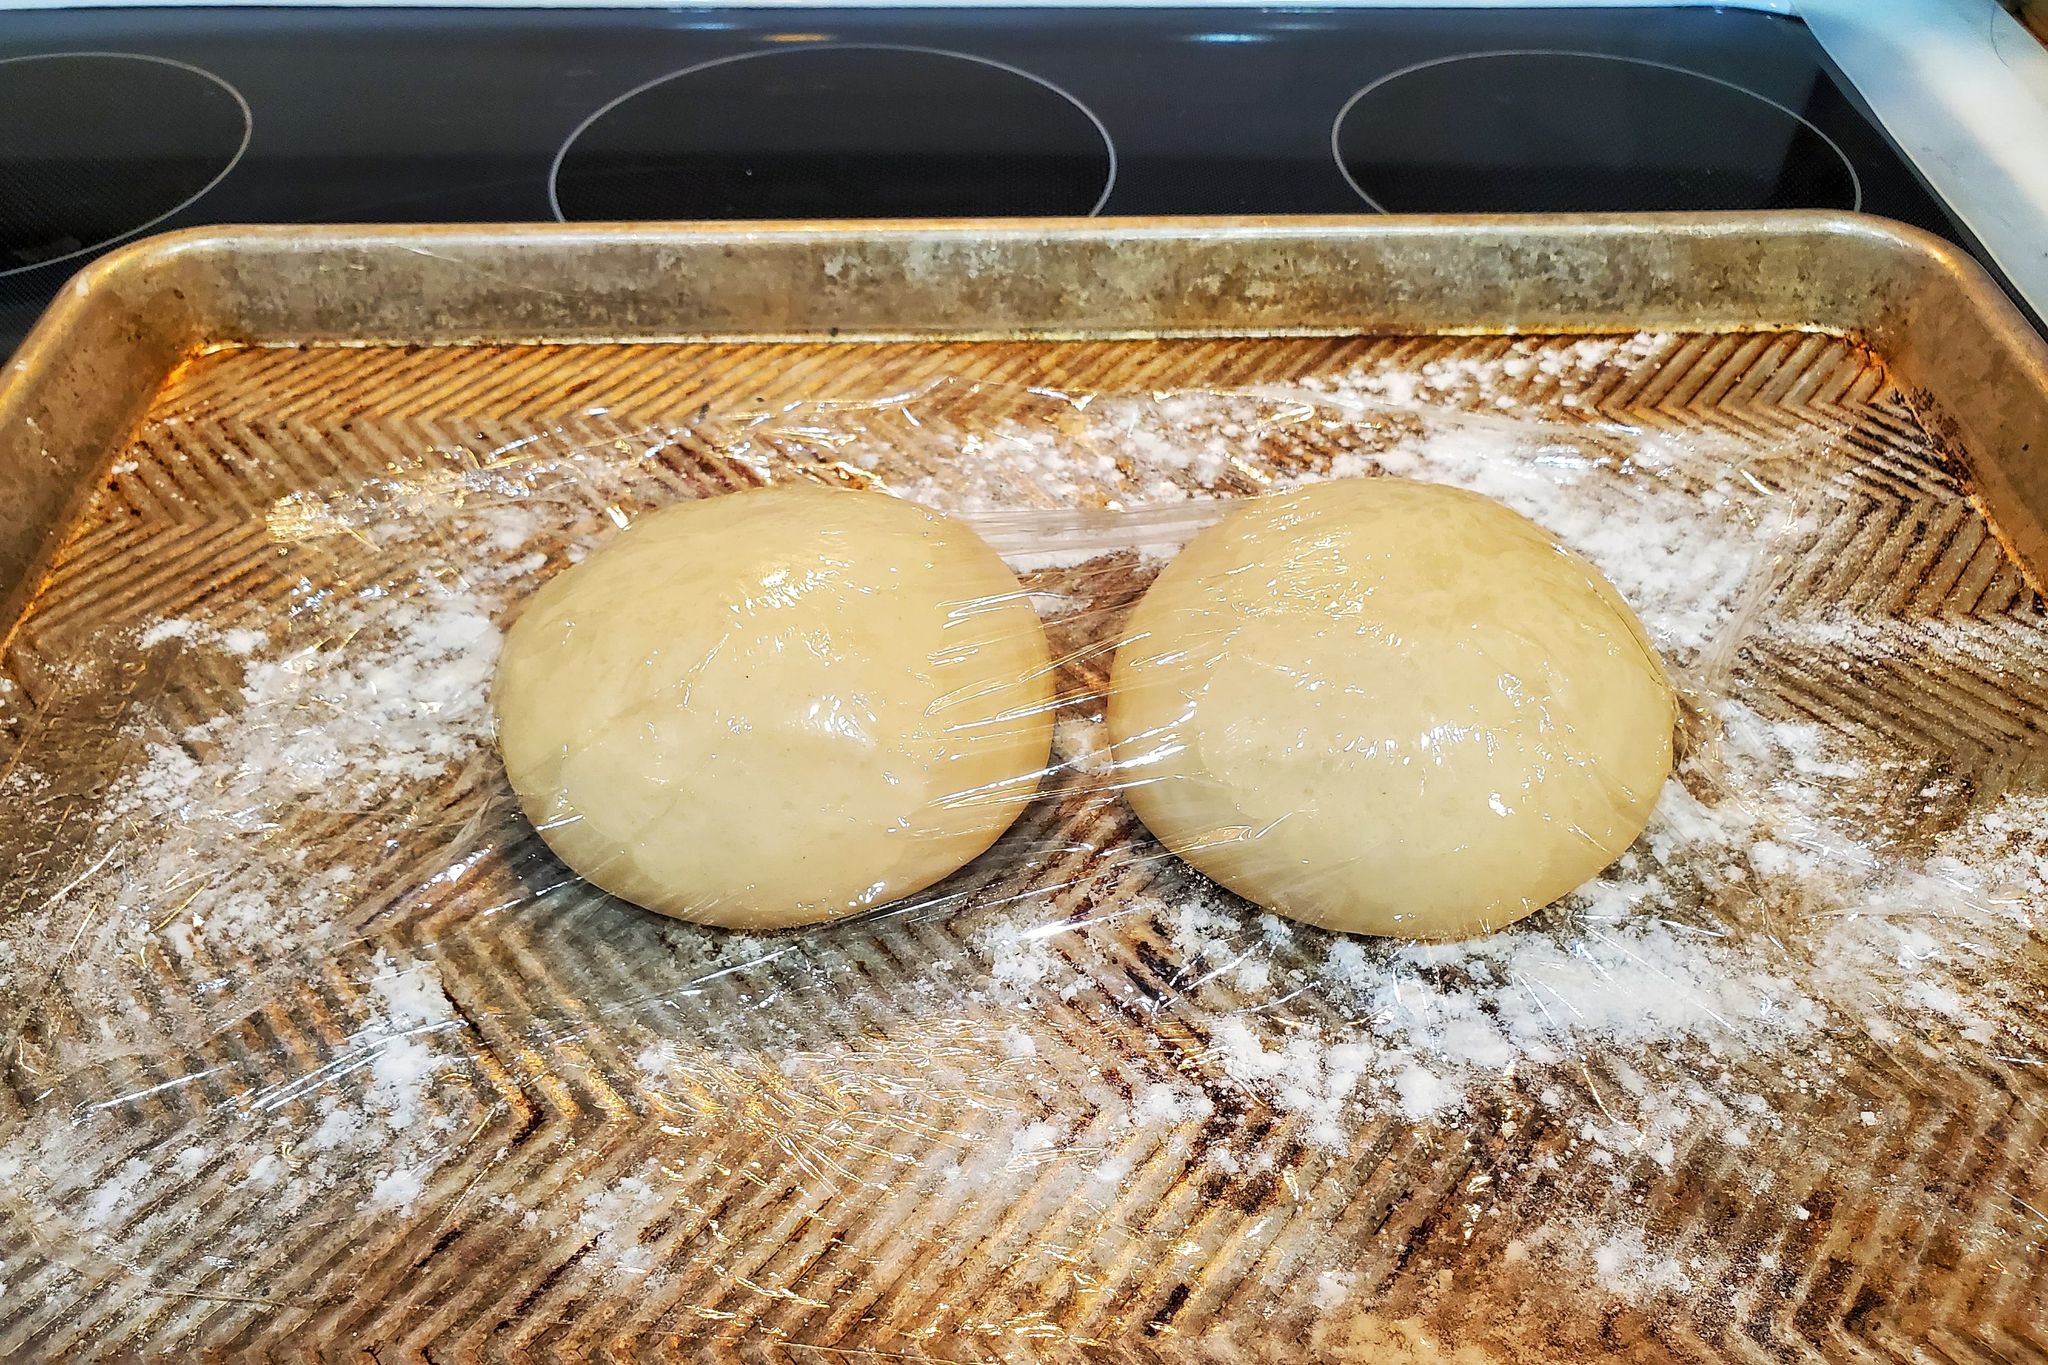
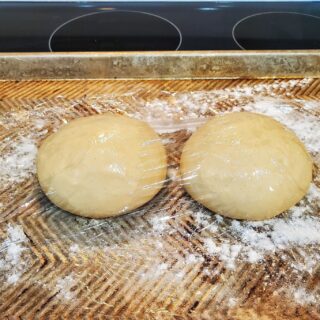
Place your dough on a lightly floured sheet pan, spray the top with pan spray or brush it with a little oil, cover with plastic wrap, and repeat with the other round of dough.
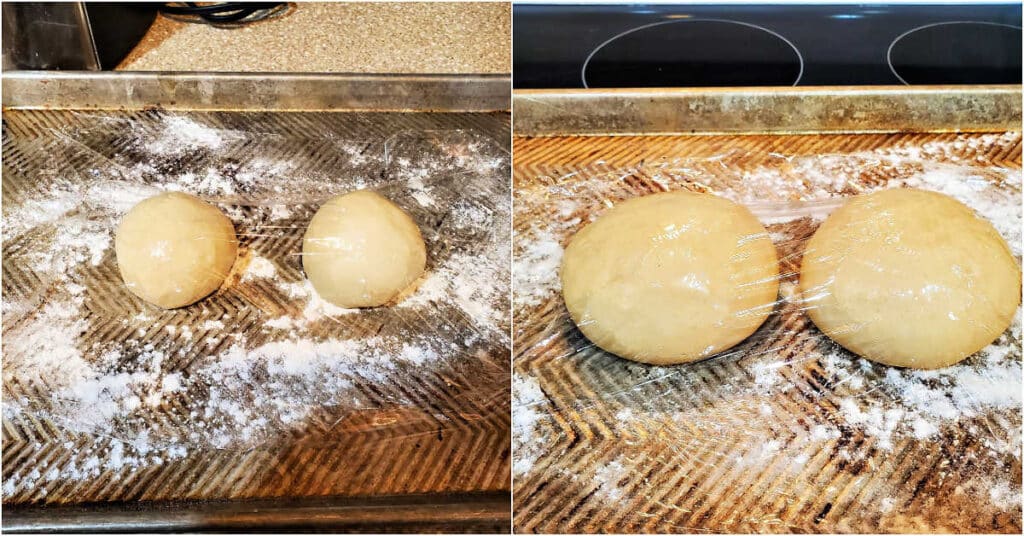
If using the same day, allow the dough to rise until about doubled, which, depending on how cool it is in your kitchen, could take anywhere from 1 1/2 hours to about 2 1/2 hours. (See image below)
Would you like to save this post?
Shaping the Dough
Once your dough has risen, it’s time to shape your pizza.
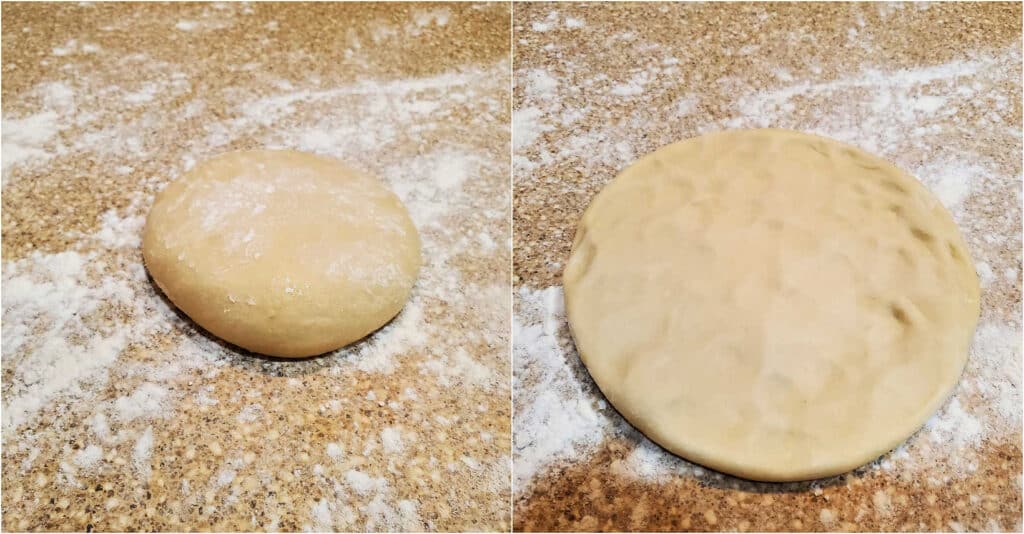
Lightly flour your work surface, and plop one of the risen dough balls in the middle.
Begin by using your fingertips to “dimple” out the dough into a fairly thick disc about 6″ in diameter. (See photo collage below)
Once you have your dough thinned out into a disc, you can start stretching it.
It’s a pretty sturdy dough, so you should not have any issue with it tearing as long as you don’t jam your finger or fingernail through it.
Since I only make pizza occasionally, I do not have the technique down pat, but it doesn’t prevent me from making a tasty homemade pizza!
Here are some of my better moves. You do what works best for you:
- Hold the disc of dough by one edge and gently pull down on the opposite edge. Shift the dough to the next section, and repeat.
- Hold the center of the dough down on the work surface while gently stretching the dough by pulling on the edge with one hand. Repeat all the way around once or twice.
- Hold the dough down on the work surface and use your hands to stretch the dough in opposite directions all the way around.
- Once the dough is stretched to about 8-9″, hold the dough up by one edge and let gravity pull the dough down. Assist by stretching gently.
No matter which combination of stretching you do, keep doing it until you have a round-ish shape that’s about 12″ in diameter and slightly thicker around the edges than at the center.
Jenni Says: You can roll out the dough with a rolling pin if you like, but do try to keep the dough a bit thicker around the edges.
Topping Your Pizza and Getting It Into the Oven
Now, lightly dust your pizza peel (I don’t have one so I use the back of a pizza pan. It works fine) with flour, cornmeal, or a mixture of the two.
Do this to keep the dough from sticking to the pan so you can transfer it to your preheated stone.
Put your stretched dough on your peel, ladle on about 1/2 cup of homemade pizza sauce (or store-bought) and spread it out, leaving about 1/2″ clear around the edges.
Top your pizza judiciously. Remember what we said about less is more. It’s important.
Every once in a while when you’re topping your pizza, stop and shake the peel back and forth to make sure your pizza isn’t sticking.
Once you’re ready to bake, open the oven, line up the pizza peel with the back edge of your pizza stone, and use a back-and-forth jerking motion to slide the pizza out onto the hot stone.
Tips for Success
To bake, put a heavy baking stone on the lowest rack in your oven and preheat to as high as your oven will go. Mine will heat to 550F. Turn on your oven at least an hour before you plan to bake.
If you get frustrated with stretching the dough, cover it with plastic wrap and let it rest for 10 minutes. Then come back and stretch some more.
You can spread making the dough over two or even three days. Once you make and shape the dough into rounds, spray it, cover it with plastic wrap, and refrigerate for up to 3 days. On baking day, remove the dough from the fridge, let it come to room temperature for about an hour or so, then shape and bake.
For a chewier, slightly thicker crust, after topping your pizza, cover it and allow it to rest for 30-45 minutes before transferring it to the oven to bake.
Equipment You May Need
First and foremost, if you’re going to be making a lot of pizza, you may want to have a
If not and you don’t mind a good arm workout, you can certainly make it in a bowl with a wooden spoon and then knead it on the counter.
You may also want to invest in a pizza stone or a as well as a pizza peel for transferring your topped pizza to the oven and then removing it to a cutting board for serving.
For serving pizza, do get a pizza wheel if you don’t already have one. I have one with a 2″ disc, but sometimes that isn’t deep enough to slice a nice, thick grandma pizza, so I recommend you get one with a 4″ cutting disc.
Tips for Making Great Pizza Every Time
- Less is more–don’t overload the dough–you want to taste the bread once it’s baked.
- Use some restraint with the sauce, too, or you will have a soggy pizza. Use no more than 1/2 cup of sauce per 12″ pizza.
- Bake the pizza on a pizza stone, pizza steel, or quarry tile close to the bottom of the oven.
- Bake at the highest temperature your oven will go. Mine goes to 525F.
- If you have a pizza peel, lightly sprinkle it with flour, cornmeal, or a mixture of the two before building the pizza on it. Shake it often to make sure it’s not sticking. When you’re ready to bake, transfer the pizza from the peel to the baking stone by placing the end of the peel at the far end of the stone and shaking/jerking the peel back towards you.
How to Top Your Dough
As I said above, less really is more, so go easy on all your toppings.
By the time you add 1-2 cheeses and 2-4 toppings, if you are generous with all of them, they will overpower your dough and keep it from baking quickly and evenly.
You’ll likely end up with a soggy pizza that is underdone in the center.
This is especially true with a thin-crust pizza that you bake at high heat.
Here are some photos to give you an idea of how heavily (or not) you should top your pizza dough.
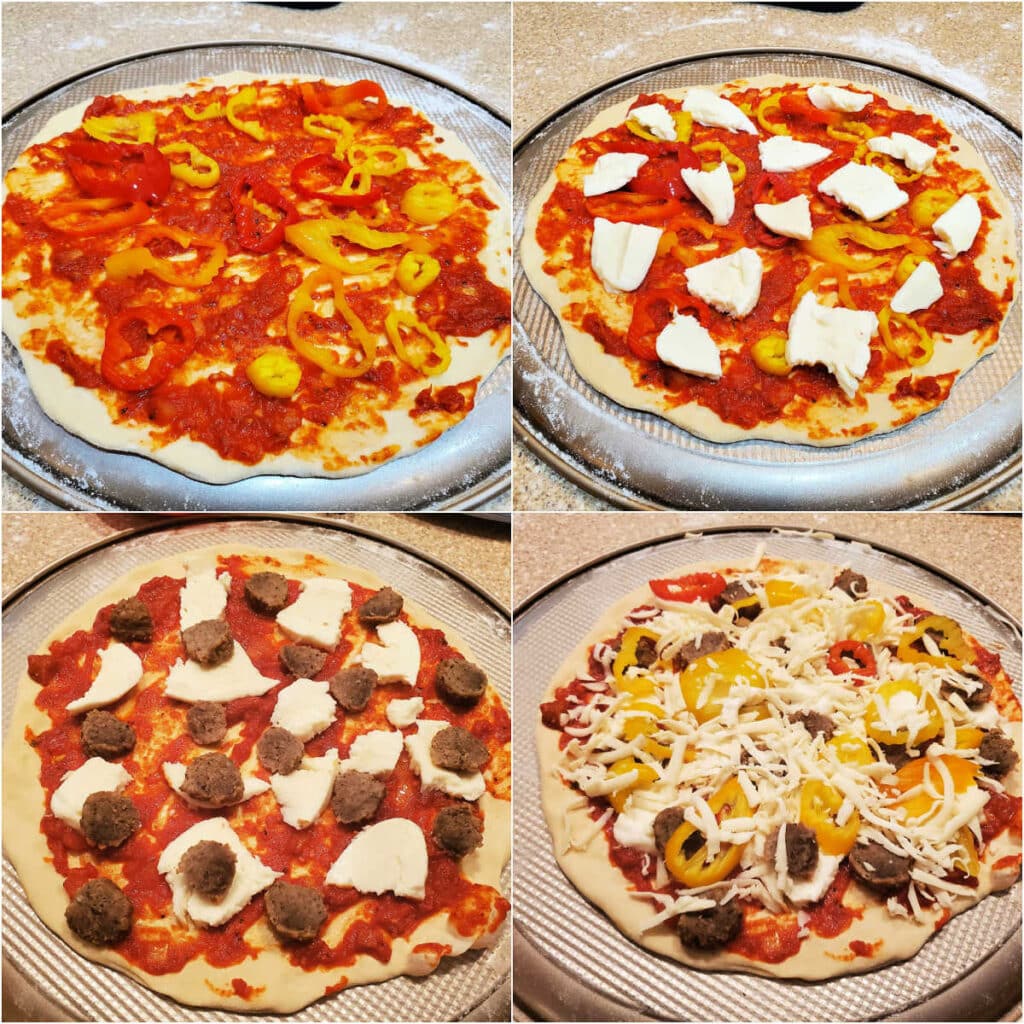
That’s about 1/2 cup of sauce, maybe 18-20 slices of pickled peppers, 6 small cooked meatballs sliced into 3 slices each, and a total of about 6 oz cheese between the two types: 3 oz fresh mozzarella and 3 oz whole milk mozzarella that I shredded with a box grater.
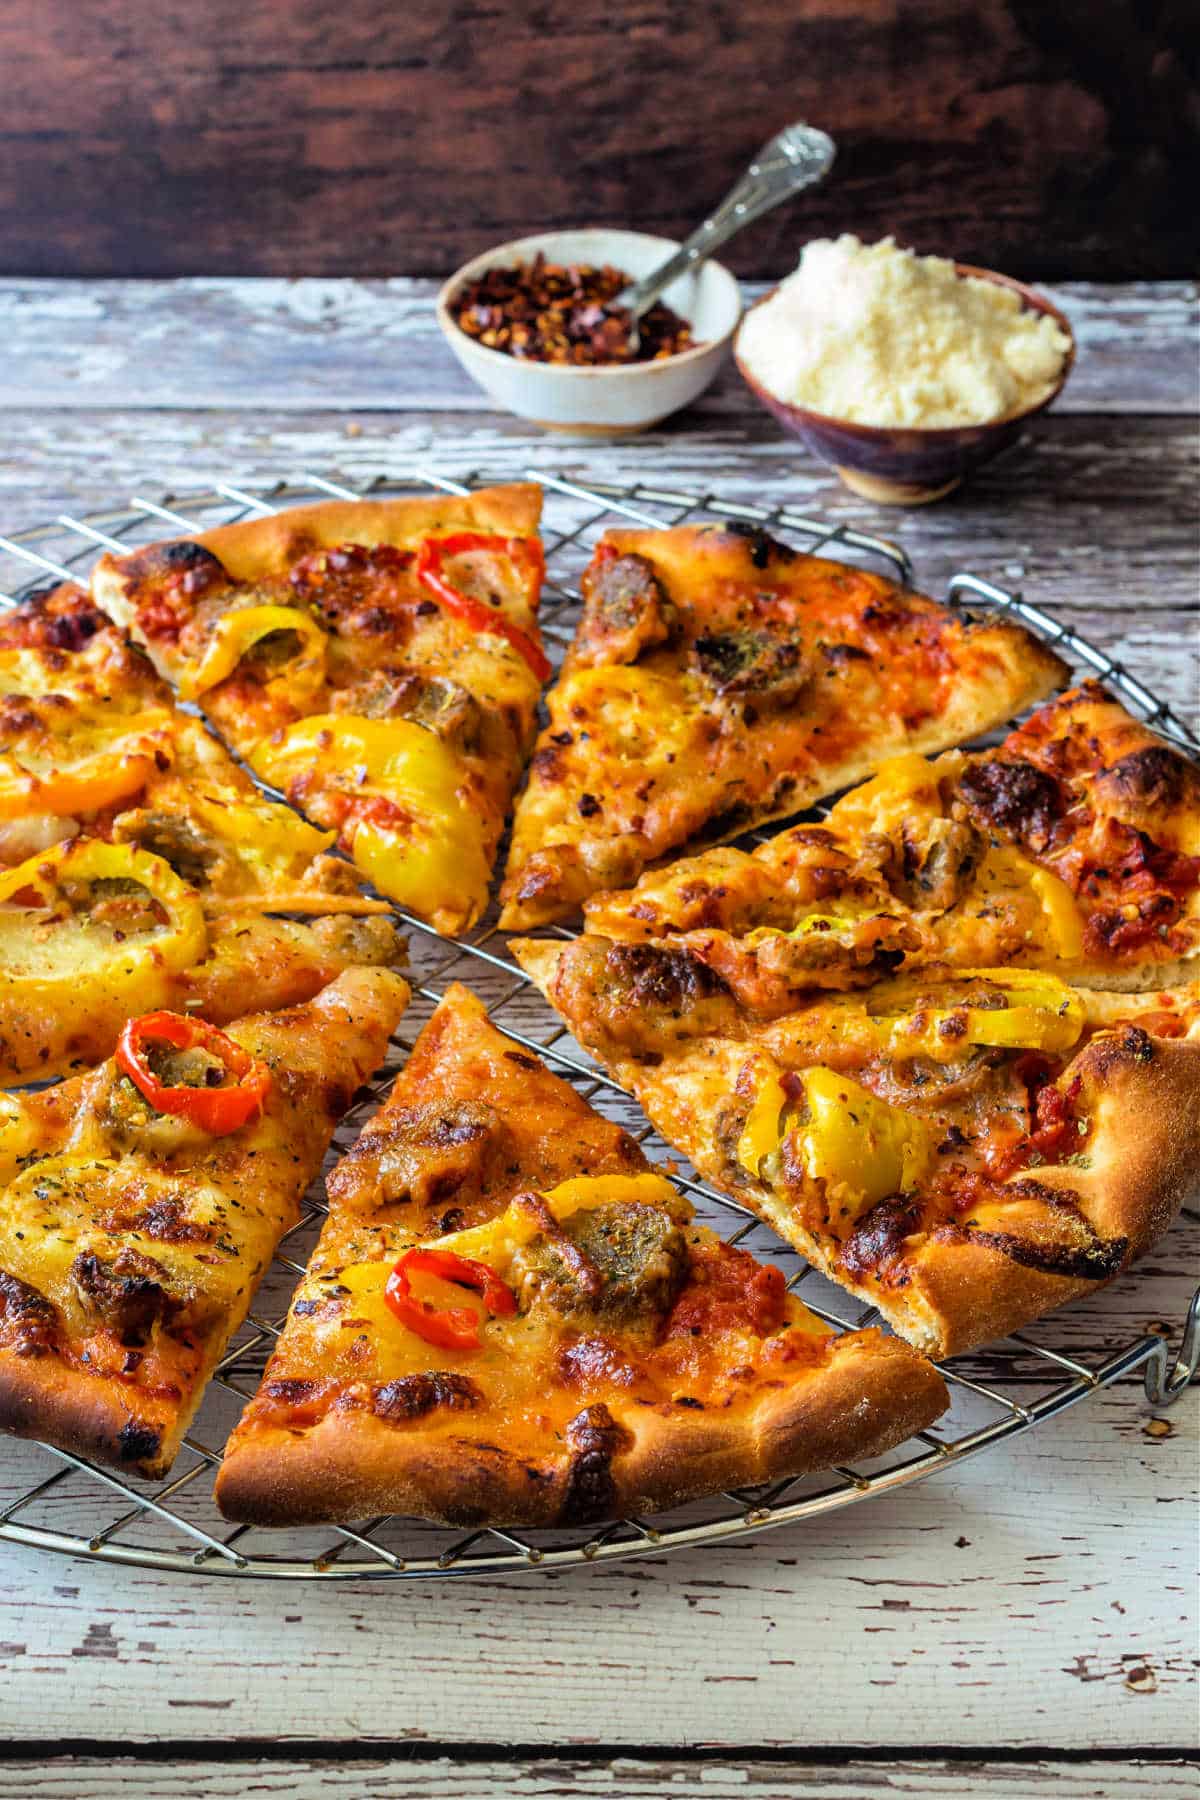
Altogether, we are not talking about a lot of toppings. Still, you get a bit of everything in almost every bite. See?
Whatever you choose for your toppings, finish off the pizza with a generous sprinkle of pizza seasoning when it comes out of the oven. Perfection!

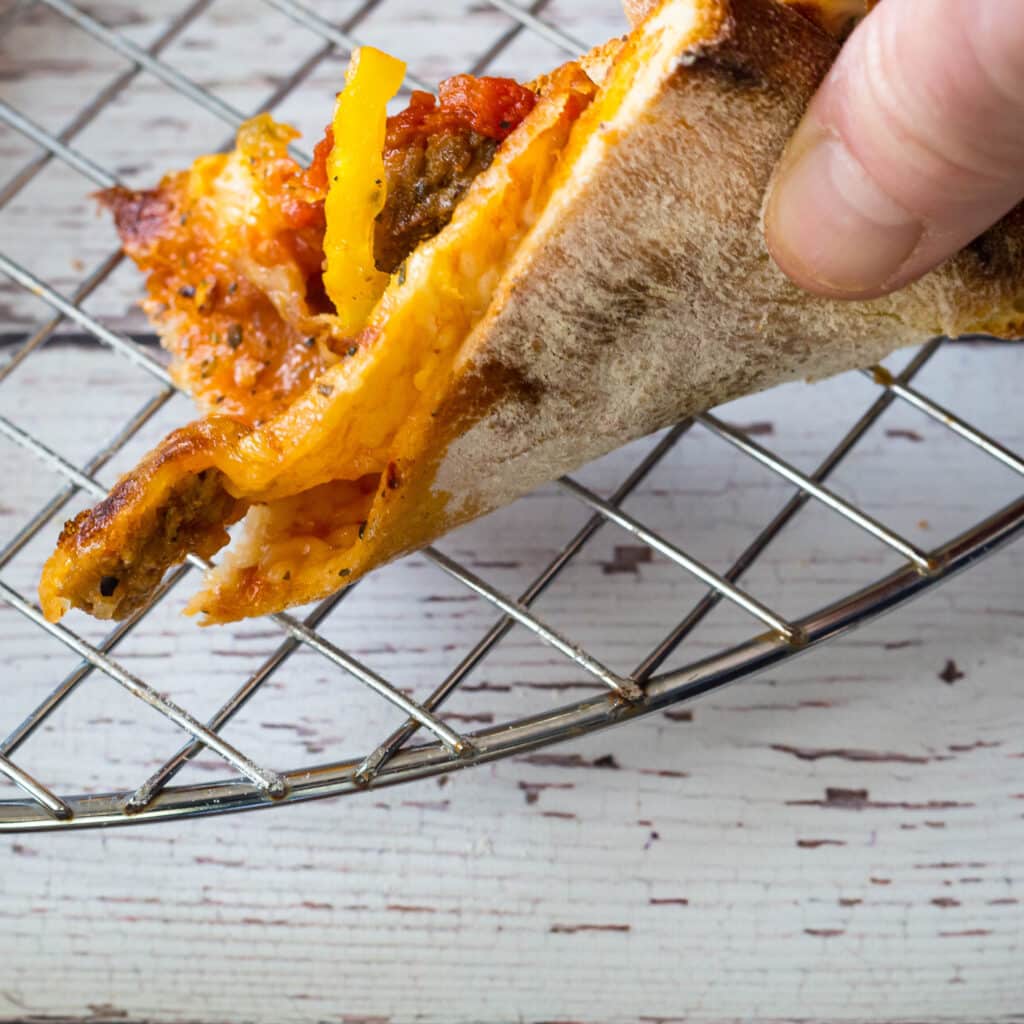
New York Pizza Dough
A proper, New York-style pizza slice should fold over so you can eat it as God intended.
I definitely think this counts as a New York pizza dough recipe. I mean, I have evidence. Look:
Questions?
If you have any questions about this post or recipe, I am happy to help.
Simply leave a comment here and I will get back to you soon. I also invite you to ask questions in my Facebook group, Fearless Kitchen Fun.
If your question is more pressing, please feel free to email me. I should be back in touch ASAP, as long as I’m not asleep.
A Note About Measurements
My recipes are almost all written by weight, including liquids, unless otherwise specified.
For accuracy and consistency of results, I encourage you to buy–and use–a kitchen scale.
I promise that baking and cleanup will be so much quicker and easier.
This is the scale that I recommend for home use. I have owned and used one for years.
If You Made This Recipe, Please Rate and Review. Thanks!
It helps me and other readers so much if you take a moment to rate and review this recipe.
Your star rating and comments help others decide whether the recipe is worth making, and your feedback helps me continue improving recipes here at Pastry Chef Online.
Other lovely ways to share include pinning or posting on your favorite social media platform.
Thank you so much for taking the time!

Easy Pizza Dough Recipe
Ingredients
- 4 oz bread flour 112 grams or about 1 scant cup
- 4 oz all-purpose flour 112 grams or about 1 cup
- 4.25 oz water 120 grams or 1/2 cup + 1 1/2 teaspoons
- 3 grams dry yeast about 1 teaspoon, active or instant
- ½ oz. extra virgin olive oil 14 grams or 1 Tablespoon
- ¼ oz salt 7 g or 1 1/4 teaspoons Morton’s kosher salt
Instructions
- Put all ingredients in the bowl of your stand mixer fitted with the dough hook.
- Miix/knead on medium-low speed for 8 minutes.
- Turn the mixer up to medium speed, and knead for an additional 4 minutes.
- Scrape dough out onto a clean work surface.
- Divide dough in half (about 6.6 oz each, give or take), and shape each piece into a tight round.
- Place on a lightly floured pan, and spray each round with some pan spray. Cover with plastic wrap.
- Let rise until doubled in volume, about 2 hours. (See Notes)
- At least 45 minutes before baking, place a pizza stone or pizza steel on the lowest rack in your oven and preheat your oven to as high as it will go.
- Grab one of your rounds of dough, leaving the other one under the plastic until you're ready for it.
- Stretch the round of dough into a thin disc about 12" in diameter.
- Scatter some flour, cornmeal, or a mixture of the two onto a pizza peel, then transfer your stretched pizza dough to the peel.
- Top as desired, shaking the peel frequently so the dough doesn't stick.
- Using a quick shaking motion of the peel, transfer your pizza to your preheated baking stone and bake until the edges of your pizza dough are deep golden brown and all your toppings are sizzling, about 6-12 minutes, depending on oven temperature and how many toppings you use. In my oven on a very well-heated pizza stone at 550F, my pizzas were ready in 7-8 minutes.
- Repeat with second round of dough, or wrap it well, refrigerate it, and bake it the next day.
Did You Make Any Changes?
Notes
Nutrition
Would you like to save this post?

Hi, y’all! I hope you’ve enjoyed this post and hopefully also learned a thing or two.
If you like my style, I invite you to sign up for my occasional newsletter, The Inbox Pastry Chef.
Expect updates on new and tasty recipes as well as a bit of behind-the-scenes action. I hope to see you there!

And that’s it, friends. Enjoy the easy pizza dough and all the pizzas you’ll make!
Take care, y’all.


Join in Today!
I have a new pizza stone that I have been wanting to use! Can’t wait to make this yummy pizza dough! Nettie
Oh, hooray for perfect timing! I’m so happy you’re going to try it, Nettie. I hope you guys love it!
When I first saw 550 degrees, my first thought was ,”it’s gunna explode!” I’m excited to try this! As far as toppings go, how do you dry out your mushrooms before adding? They always make a soggy crust for me.
Haha, yeah 500F is HOT, but with a thin-crust pizza, it’s really the way to go. I don’t generally put mushrooms on my pizza, but if I were going to and wanted to make sure they didn’t weep all over everything, I think a 2-3 minute saute in a bit of olive oil or butter with a touch of salt and maybe dried thyme would be enough time to get rid of some of the liquid and concentrate the flavor. Enjoy, Serena, and no exploding!