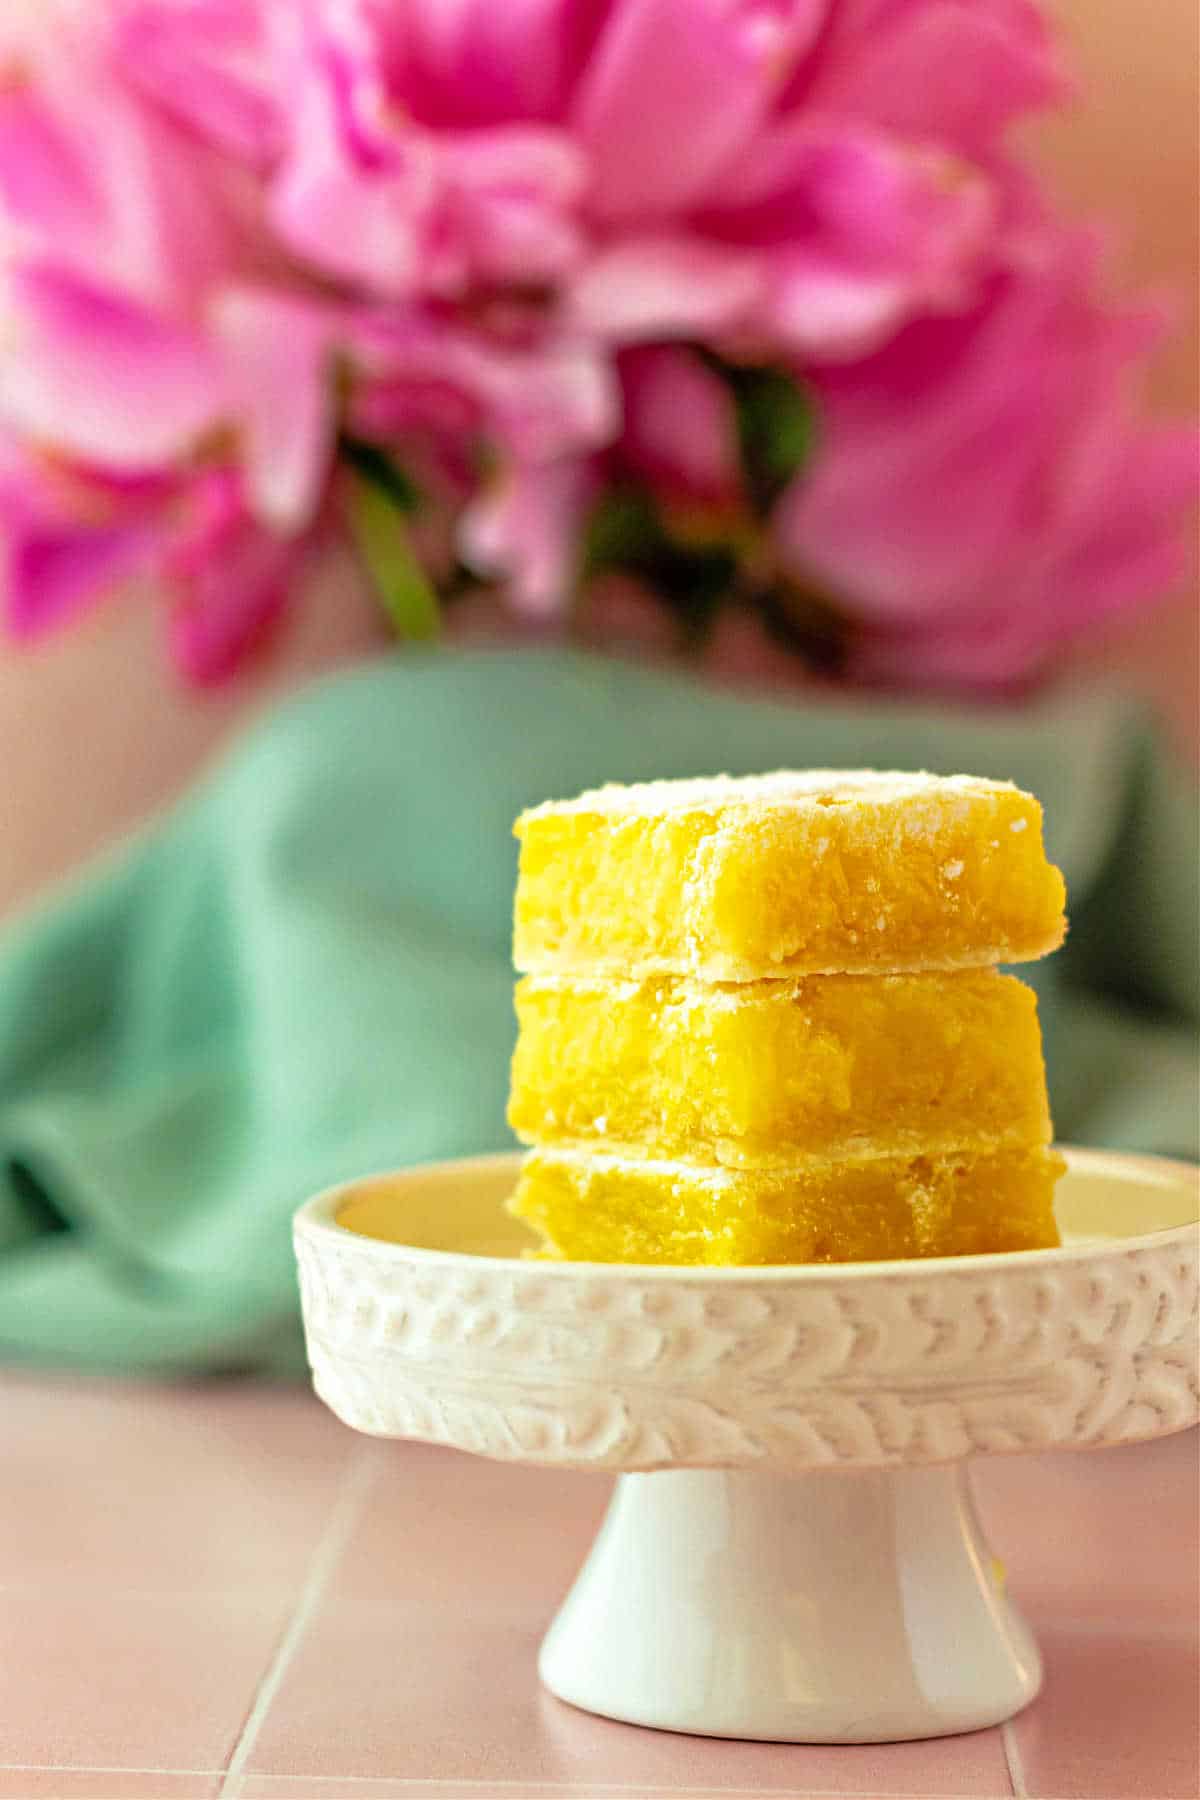
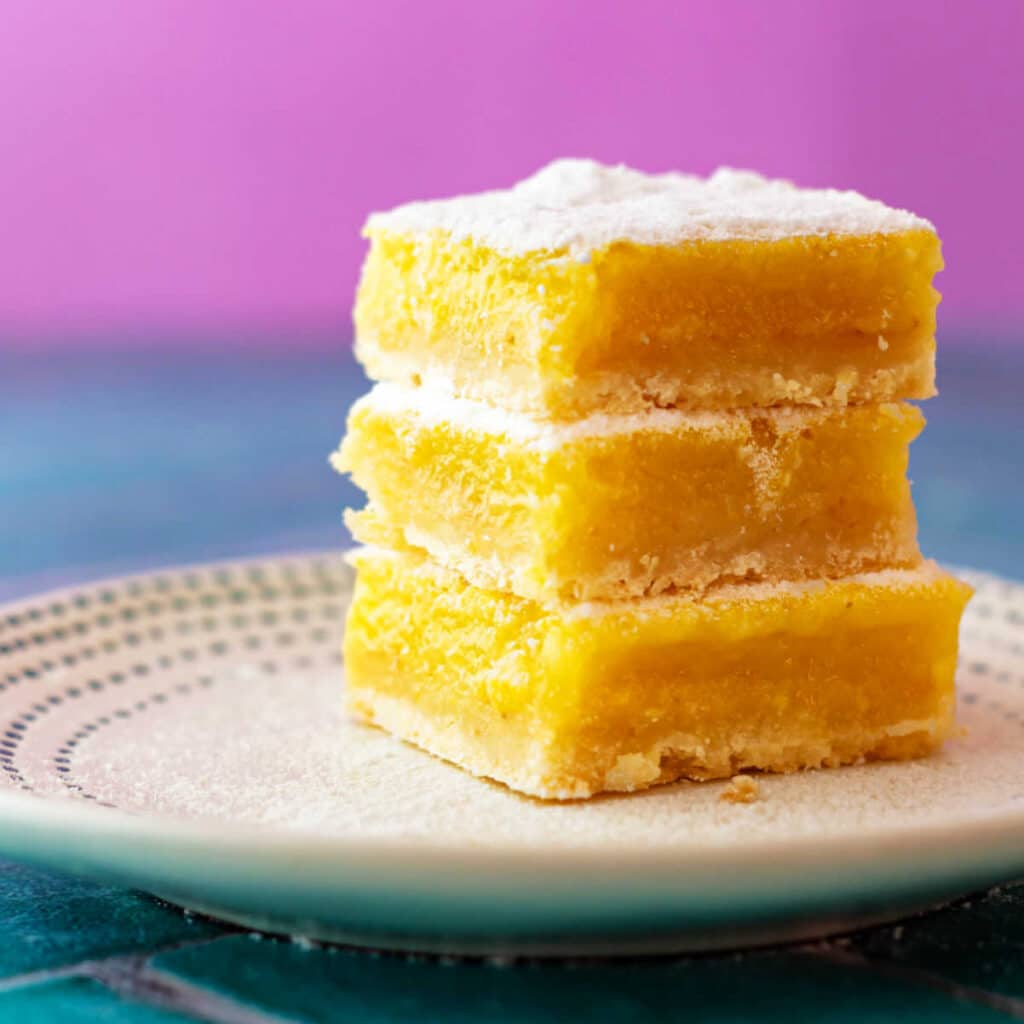
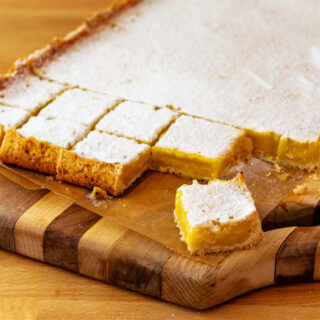
Is it cocky to call these lemon squares “perfect” lemon bars? I’ll let you be the judge, but dang, y’all. These are truly delicious.
With a lemon shortbread base, and a rich lemon curd base that sets up in the oven just firmly enough to stack. And when you take a bite? The filling just melts on your tongue. These truly are next-level squares, friends.
Would you like to save this post?
If lemon is the flavor that really does it for you, you won’t want to miss my lemon pudding and lemon mousse recipes, either. If bar cookies are your thing, for ease of browsing, you can find all of them in my cookies and bars category. Thanks for being here. Let’s get to it!
Pastry Chef Online Participates in Affiliate Programs. If you make a purchase through one of my links, I may earn a small commission. For more information click to read my disclosure policy
Watch my perfect lemon bars recipe web story here.
Lemon Bars, At a Glance
✅Skill Level: Beginner
✅Skills: Making a Press-in crust (Related Reading: Sable Dough), Parbaking
✅Type: Bar Cookie
✅Number of Ingredients: Crust: 5 Filling: 7 Topping: 2
✅Prep Time: 20 minutes
✅Cook Time: 40 minutes
✅Yield: 24-48 bars depending on how large/small you cut them
Jump Straight to the Recipe
These are the best Lemon Bars I have eaten. Tangy, Sweet, A flavor explosion! This recipe has replaced the recipe I have used for years and I will pass it along to my friends who love Lemon Bars as much as I do!
Reader Carol
Why You Need to Make These Lemon Bars
Y’all. I looked at probably 8 different recipes for lemon bars. I noticed a couple of things I thought I could improve upon:
- Plain shortbread base
- Flour-heavy filling
If you’re going to make lemon bars, and they have two components–the crust and the filling–why wouldn’t you make both of those elements lemon?
The answer is there is no reason not to and every reason to do it. Lemon + lemon = extra lemony goodness. Not flavoring the base is just a wasted opportunity.
All the recipes I checked listed flour as a filling ingredient, and mine does too.
However, the more flour in them, the firmer the set. And the firmer the set, the less gooey, which means it takes longer to get that hit of lemony goodness when you take a bite.
I made sure to use the least possible amount of flour so that, while they still slice beautifully, they also melt in your mouth, releasing a burst of lemon flavor as soon as you take a bite.
Use a recipe with more flour if you’d like your lemon squares to stand up as a delicious lunchbox treat.
But for “high tea” type lemon bars that melt in your mouth, you want to use a recipe that’s light on the flour. Like mine.
How to Make
If you’ve made lemon bars before, there isn’t much in this section that you don’t already know.
No weird or fancy techniques. No mixer is required, either.
And in fact, to make these super lemony lemon bars, you only need one bowl, a wooden spoon, your hands, and a whisk.
Plus your pan for baking.
If you don’t need any help with instructions or tips, feel free to jump straight to the recipe.
Ingredients and Substitutions
Here’s what you’ll need to make the lemon bars. I’ll provide substitutions where applicable and also tell you which ingredients are optional.
Some of the ingredients you’ll use in both the crust and the filling.
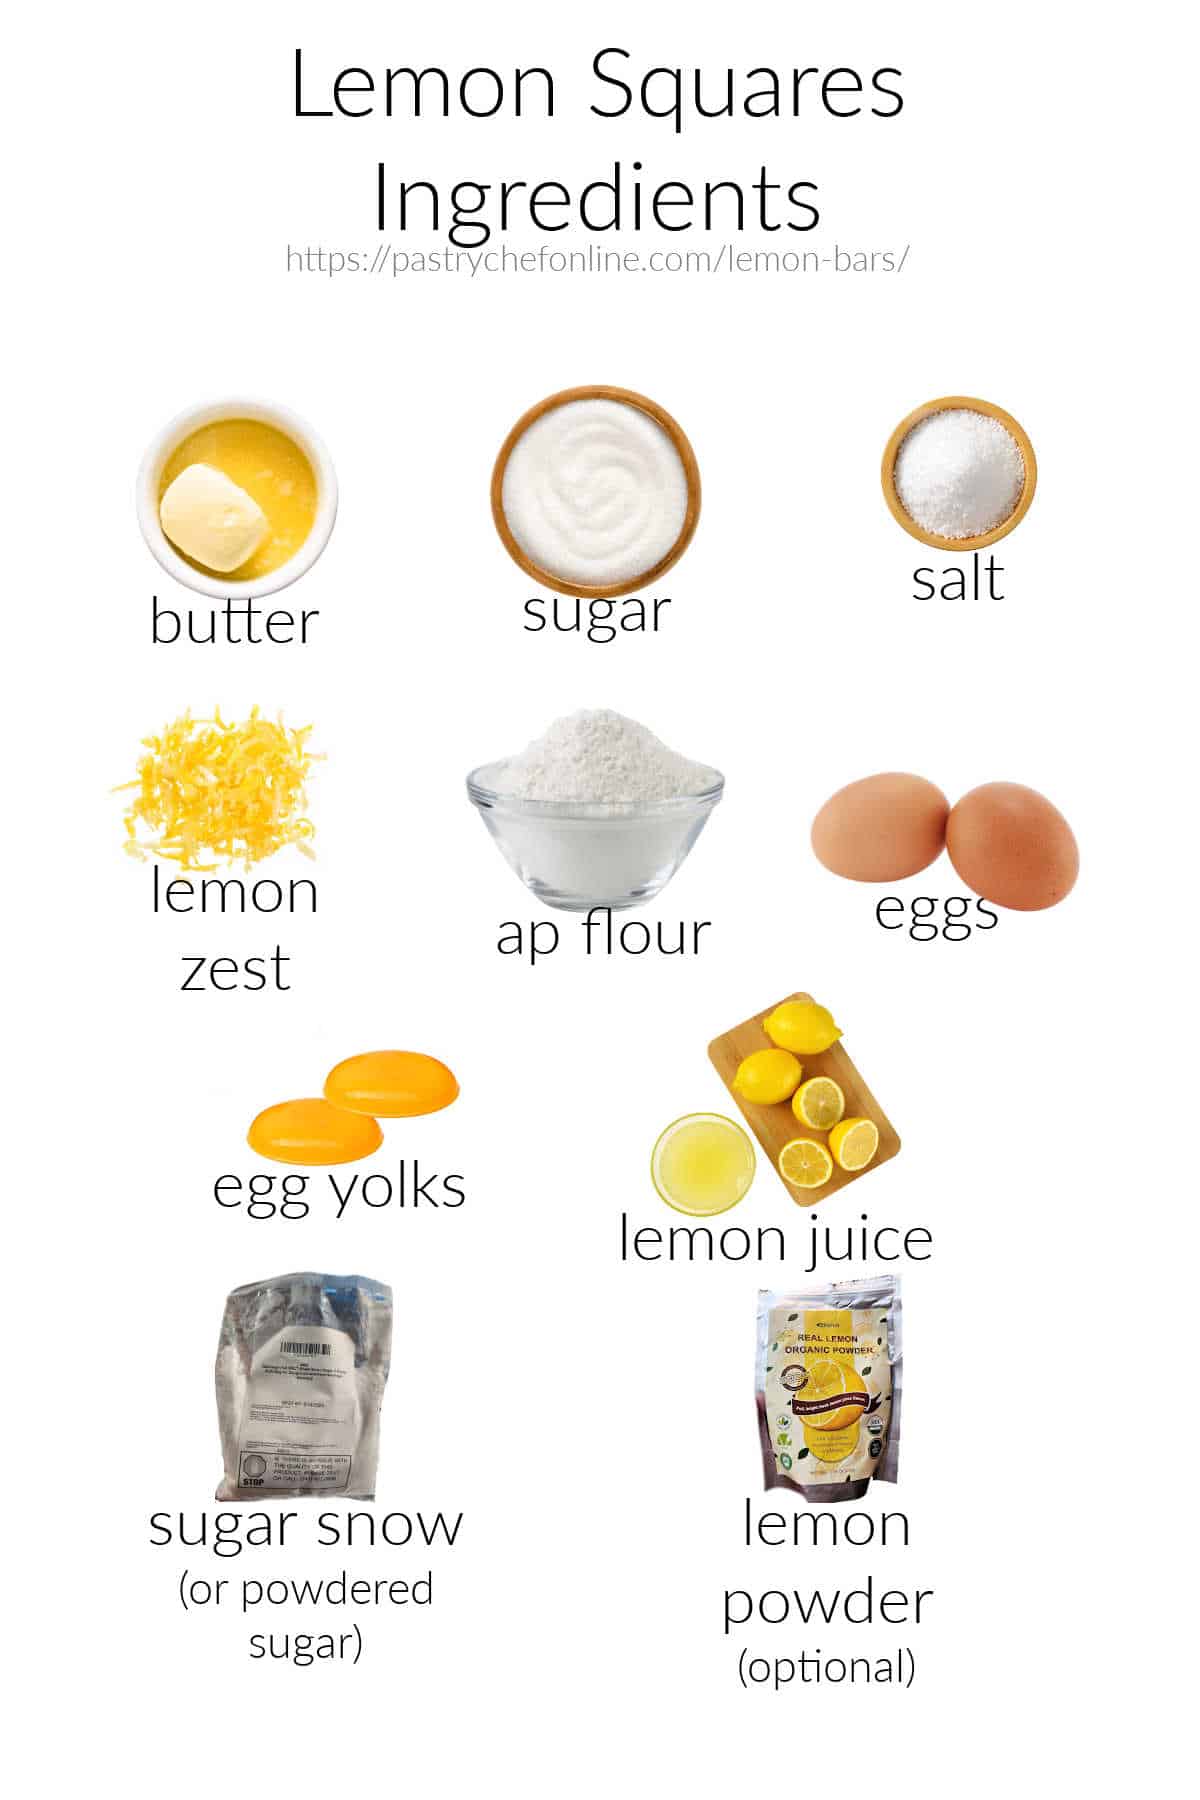
For the crust, you’ll need:
- butter: Very soft or even partially melted butter is fine here. It’s much easier to mix by hand if the butter is very soft. I almost always use unsalted butter, and I recommend it here as well. If all you have is salted butter, you may not need the additional salt in the crust
- sugar: Granulated sugar, both for sweetness and texture. It also assists in browning the crust
- salt: Brings out the flavor in the crust. If using salted butter, you may be able to leave it out, but taste the dough before you decide
- lemon zest: The zest of one large lemon is enough to carry the lemon flavor of the filling into the bars themselves. If you’re low on lemons and need all the zest for the filling, use 1/4-1/2 teaspoon of lemon extract or even whole powdered lemon instead.
- all-purpose flour: For a slightly more delicate texture, you can substitute cake flour, but all-purpose flour makes a crust that is fairly sturdy to pick up but crumbles nicely when you bite into it
For the filling, you’ll need:
- all-purpose flour: All-purpose flour gelatinizes and swells in the oven, so it assists in thickening the texture of the filling
- sugar: “Regular” granulated or caster sugar. The sugar holds onto liquid from the lemon juice and egg whites to keep the filling nice and moist. Reducing the sugar not only makes them less sweet, but it also adversely affects the texture, making the resulting bars feel much drier and stodgy when you bite into them
- salt: Counteracts any bitterness from the lemon and brings out all the flavor
- eggs: Along with the flour, eggs are the other thickener. This recipe uses mostly whole eggs with a couple of yolks added for extra richness and color. Eggs help to emulsify the filling batter while adding volume, protein, fat (which carries flavor) and water
- egg yolks: The filling gets 6 whole eggs and 2 extra yolks. While not strictly necessary, the additional yolks add extra fat and emulsifiers for a velvety-smooth and rich filling
- lemon zest: provides well-rounded lemon flavor. The lemon oil in the zest contains all the sweet and floral notes that make lemon lemon
- lemon juice: Lemon juice not only provides more liquid for the filling, it also provides the “pucker” and tart punch of lemon that is needed in a perfect lemon bar. This recipe calls for a full cup of strained lemon juice.
Jenni Says: Squeeze fresh lemons into a pitcher and then pour the juice through a fine-mesh strainer into another pitcher on your scale to get a full 8 oz of lemon juice with no seeds or pulp.
For the topping you’ll need:
- sugar snow: You can also use powdered sugar, although powdered sugar dissolves over time. Sugar snow, or powdered dextrose, will not melt or dissolve and will stay white and powdery on top of your lemon bars (or on your lemon cooler cookies) for literally days.
- whole lemon powder: While optional, adding a touch of lemon powder to your sugar snow/powdered sugar topping reinforces the lemon flavor, and since it’s in powdered form, it won’t make the sugar clump up like zest or extract would

Procedure
In short, you’ll make the crust by hand, press it into the bottom of your pan and about 3/4″ up the sides.
While it’s baking, make the filling.
First things first, though. Start by making the crust.
Making the Crust:
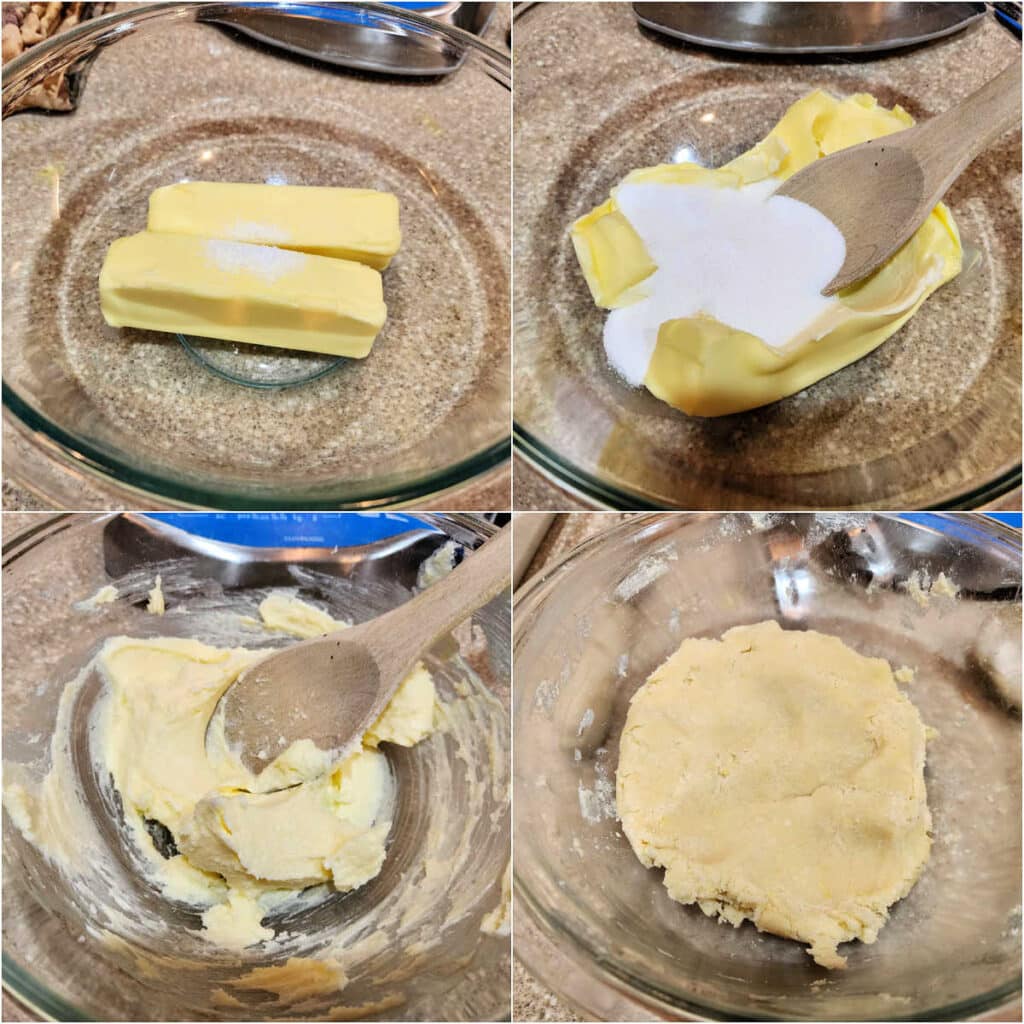
What is not pictured here is adding the zest and flour to the bowl, but the dough really does come together with nothing but a wooden spoon and then your hand.
I found it much easier to knead all the flour into the dough by hand right in the bowl rather than try to be super thorough with just a wooden spoon.
How to Prepare the Pan
I am now going to take the time to address a pet peeve of mine.
People who crinkle up their parchment to try and fit it into a pan.
Stop the madness people.
Whether you buy rolls of parchment or pre-cut sheets, you can simply fold a length of it to snugly fit in the bottom of your pan and extend up the sides.
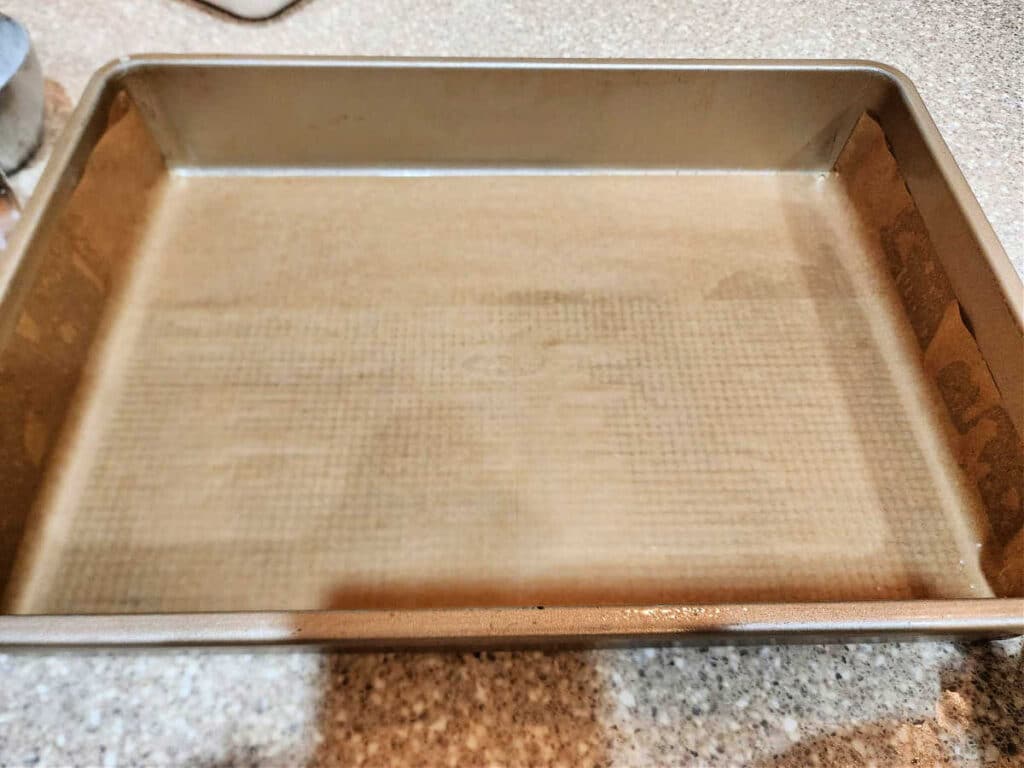
See? No wrinkles in your parchment translates into no wrinkles in your baked goods.
Plus, the ends of the parchment sheet make it easy to lift the whole pan of lemon bars out onto a cutting board so they’re easier to slice.
Lining the Pan with Dough:
Once you’ve lined your pan with parchment, break the dough into pieces and scatter it around in the pan.
Use your fingers to roughly push all the dough together and out into the pan.
Once you have it “roughed in,” smooth everything out and clean up the edges, making sure they extend up the sides of the pan by about 3/4″.
Making “walls” helps keep the filling from seeping under the crust and leaving you with a potential mess.
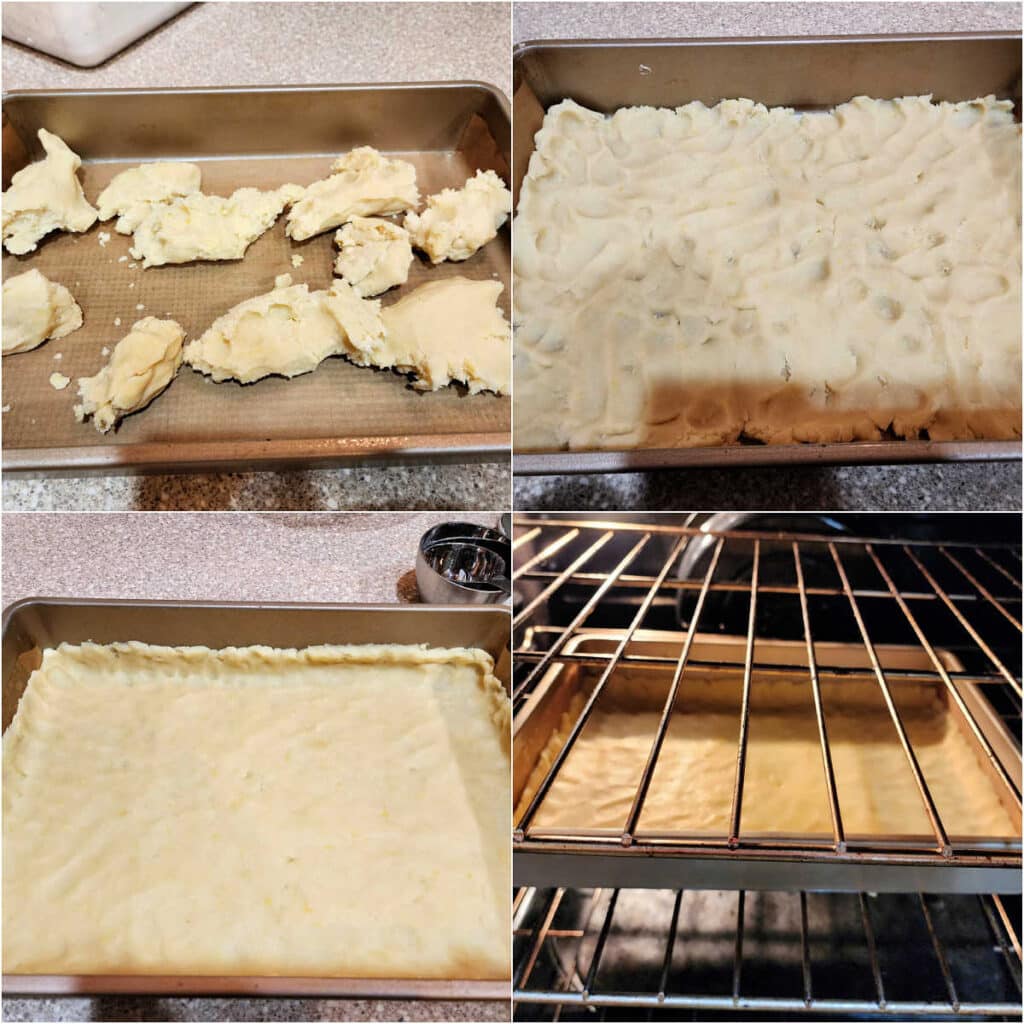
Bake the crust for 20 minutes. This is about the time you’ll need to make the filling and then do a bit of clean up, making the most of your time.
Jenni Says: Make the filling while your crust is baking. You’ll have enough time to make the filling and even do a little cleaning before your timer goes off.
Making the Filling:
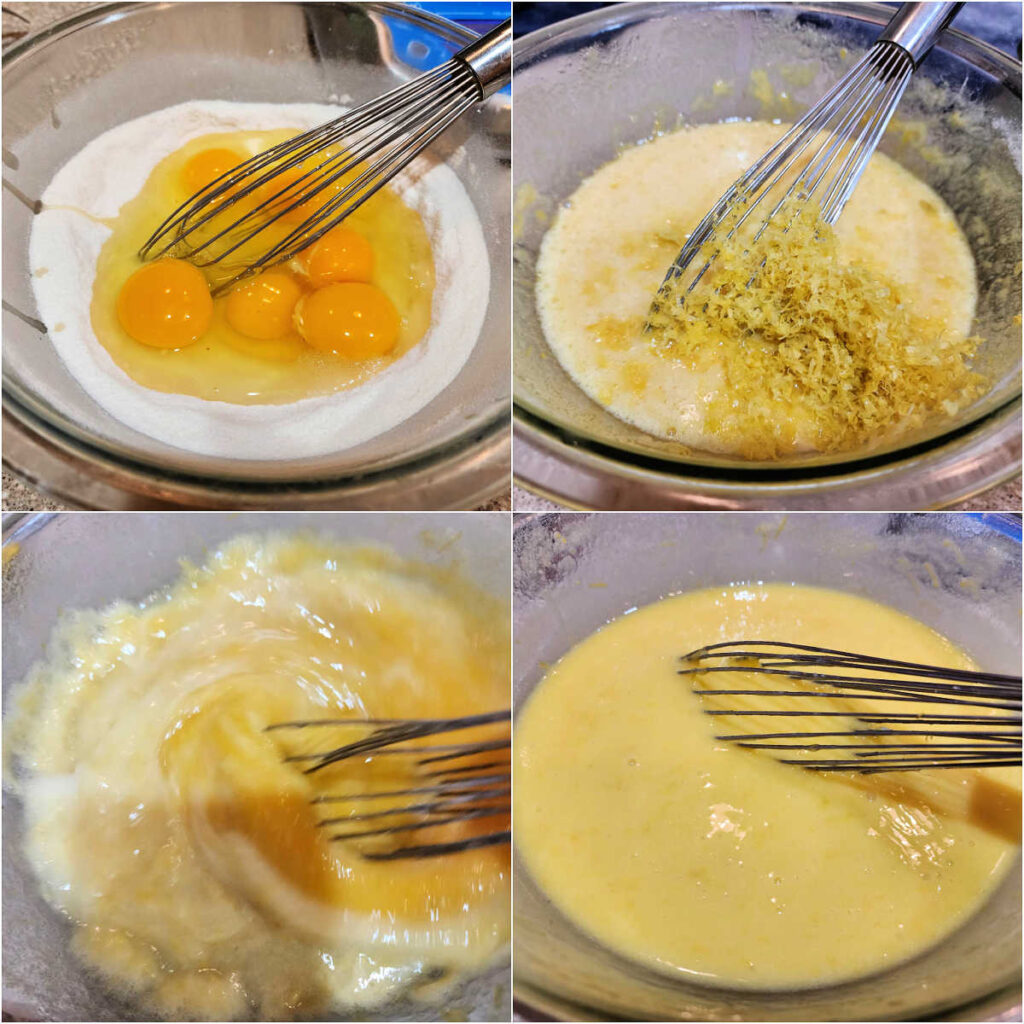
Helpful Tip: Once you make the dough, just wipe out the bowl and make the filling in the same one. No need to wash it–just give it a quick wipe, and you’re good to go.
For the smoothest batter, start by whisking together your flour, sugar, and salt.
Once you have that taken care of, add the eggs and yolks and whisk really well to combine.
Add the zest and lemon juice last and whisk very well to make sure there are no streaks of egg white or egg yolk remaining. It should be a really homogeneous mixture.
Filling the Crust and Baking:
Last up, and this is maybe my best tip, so I will say it a couple of times:
Jenni Says: Leave the baked crust on your oven rack and just pull it out to fill it. That way you don’t have to move a whole pan filled with wet goo into the oven. Much less chance of sloshing this way.
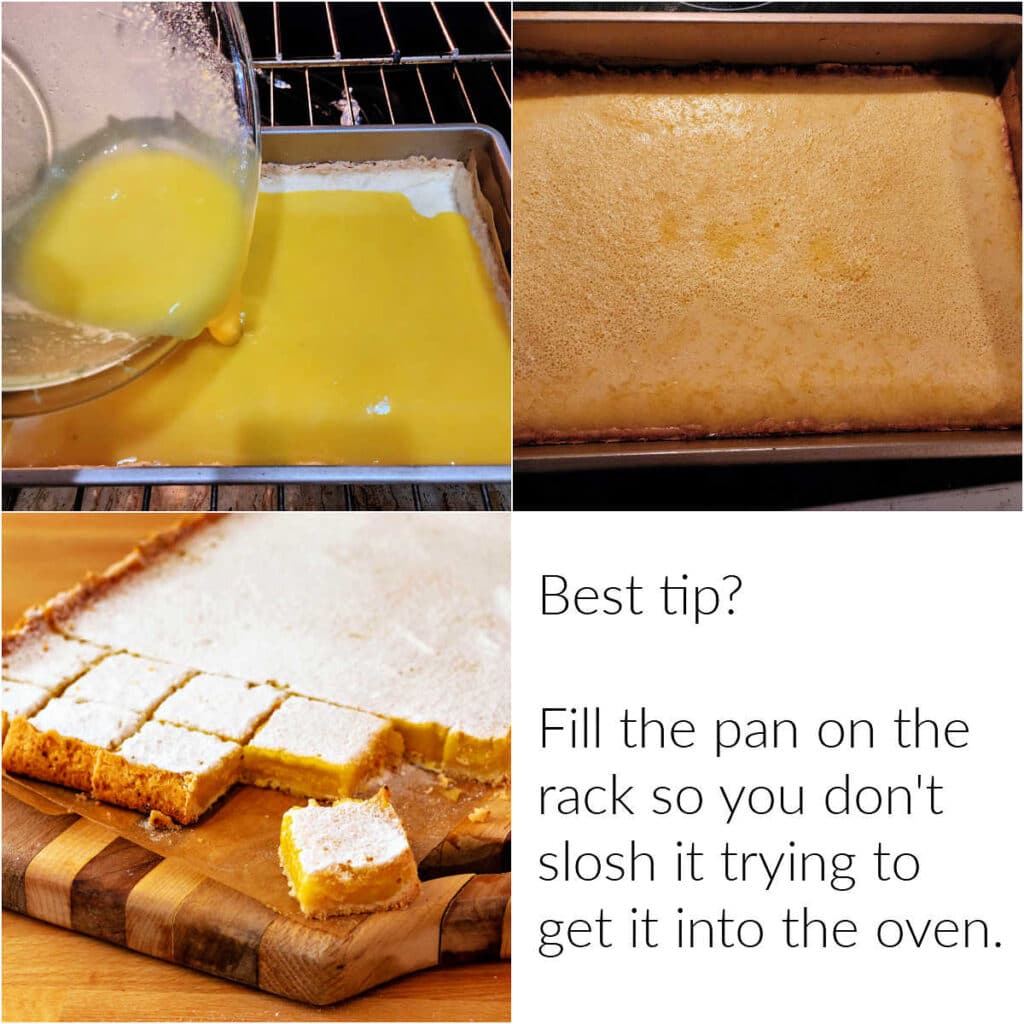
The filling only takes about 20-22 minutes to bake, depending on your oven.
You’ll know they’re done when the filling doesn’t slosh at all when you jiggle the pan.
If you press the top of the filling, it will be slightly sticky but not at all wet.
Tips and Tricks for Success
Fill the crust with filling while it’s on the oven rack. This minimizes the chance you’ll have any filling sloshing over the sides and seeping under the crust.
For easy removal and cutting, line your baking pan with parchment. It will make it easier to lift the bars out to cut on a cutting board.
For topping your bars, I recommend using sugar snow over powdered sugar. Since it’s non-melting, you can sift on a thin layer straight out of the oven and it will last as long as the bars do.
Lemon Squares Q & A
They do. They are very egg-heavy, and even with all the acid in the lemon juice and sugar in the bars, it’s still much safer to keep them in the refrigerator. They’ll keep fine, tightly covered, for up to 5 days.
Yes, you can. I have some frozen right now simply to save me from myself! Wrap them in plastic wrap and then either wrap them well in foil or put them in a zip-top freezer bag, making sure to press out all the air before sealing. They will keep just fine for up to 3 months. Thaw in the freezer overnight.
To make the cleanest cuts, once cooled completely, use the parchment overhang to lift the entire block of lemon bar out of the pan and place it on a cutting board. Use a sharp kitchen knife (I use an 8-inch chef knife) to cut straight down. Wipe the blade between each cut. For the most precise cuts, run the knife blade under hot running water and then wipe it dry before cutting.
Serving Suggestions
These lemon bars really are pretty perfect, as is. You can slice them larger and then top them with a dollop of hand-whipped cream and then eat them with a fork, but part of the fun of a lemon square is to eat them out of hand.
You can also experiment with making a half-recipe in a 9″ tart pan and then serving it sliced like a pie for an easy and irresistible lemon tart.
If you like a deep dish tart, try my lemon meringue tart recipe instead.
For a bar that celebrates multiple citrus at one time, try the 1-2-3 punch of lemon, grapefruit, and orange in these Triple Citrus Bars from Sarcastic Cooking.
Other Lemon Recipes
I have been on quite the lemon kick recently. Lemon is such an excellent flavor for desserts, because they feel light at the end of a heavy meal, and citrus is available year-round in the US.
If you love lemon too, try my lemon curd. You’ll notice the similarities between the curd recipes (there’s an easy one and a “fancy” one) and the filling for these lemon bars. If you’re feeling super fancy, swirl some of that curd into my lemon ice cream for double lemony goodness.
You may also like to give a lemon chess pie a try. If you’re in the mood for cake, lemon pound cake is sunny and delicious.
And for a savory lemon treat, try making some preserved lemons. Perfect stirred into sauteed or roasted vegetables, whipped into a vinaigrette, or used to flavor chicken breast. Good stuff!
Questions?
If you have any questions about this post or recipe, I am happy to help.
Simply leave a comment here and I will get back to you soon. I also invite you to ask questions in my Facebook group, Fearless Kitchen Fun.
If your question is more pressing, please feel free to email me. I should be back in touch ASAP, as long as I’m not asleep.
A Note About Measurements
My recipes are almost all written by weight, including liquids, unless otherwise specified.
For accuracy and consistency of results, I encourage you to buy–and use–a kitchen scale.
I promise that baking and cleanup will be so much quicker and easier.
This is the scale that I recommend for home use. I have owned and used one for years.
Love This? Please Share It and Review It!
It helps me and other readers so much if you take a moment to rate and review this recipe.
Your star rating and comments help others decide whether the recipe is worth making, and your feedback helps me continue improving recipes here at Pastry Chef Online.
Other lovely ways to share include pinning or posting on your favorite social media platform.
Thank you so much for taking the time!

Without a doubt, the best lemon bars on the planet.
Peggy on Pinterest
Perfect Lemon Bars
Ingredients
For the Crust
- 226 grams unsalted butter 8 oz or 2 sticks
- 108 grams granulated sugar 3.8 oz or 1/2 cup
- ½ teaspoon kosher salt I use Morton’s
- 269 grams all-purpose flour 9.5 oz or 2 cups measured by spoon and sweep method
- zest of 1 large lemon
For the Lemon Filling
- 410 grams granulated sugar 14.5 oz or 2 cups
- ¼ teaspoon kosher salt
- 43 grams all-purpose flour 4 Tablespoons
- 4 large eggs
- 2 egg yolks
- zest of 4 large lemons
- 226 grams lemon juice 8 oz or 1 cup, measured after straining out the seeds and pulp
For Topping
- 30 grams sugar snow or powdered sugar about 1/4 cup
- ¼ teaspoon whole lemon powder optional
Instructions
Prep
- Line a 9" x 13" pan with parchment. Set aside.
- Zest 5 large lemons. Zest from 1 will go into the crust and the rest will go into the filling
- Juice as many zested lemons as it takes to get 1 cup/8 oz of juice. Strain the juice to remove pulp and seeds before weighing. For me, it took 4 1/2 large, juicy lemons.
- Whisk the sugar snow or powdered sugar together with the lemon powder, if using.
- Set a rack in the center of your oven and preheat to 350F.
- To Make the Crust
- Heat butter in a large, microwave-safe bowl until very soft. It's fine if it's a little melted too, about 30-45 seconds.
- Add the salt and mash together well with a wooden spoon.
- Add the zest and sugar and mix together until smooth and creamy.
- Add the flour and start mixing everything together with a spoon. When that gets a little hard to do, use your hand to work all the flour in so you have a smooth dough.
To Line the Pan
- Break the dough up into pieces and scatter them into your prepared pan.
- Press the dough into the bottom of the pan and about 3/4" up the sides all around.
- Once you "rough in" the dough with your fingers, use your palms to press it in smoothly. It'll take a bit of finessing, so keep at it.
- Bake for 20 minutes.
To Make the Filling
- Wipe out the bowl you used to make the dough, and add the sugar, flour, and salt.
- Whisk thoroughly to combine.
- Add the whole eggs and egg yolks and whisk well until smooth.
- Add the zest and juice and whisk for a good 30-45 seconds to make sure the juice is completely incorporated and the mixture is smooth.
To Bake and Finish
- Once the crust is done, re-whisk the filling if it has been sitting for a few minutes.
- Pull the rack with the pan on it out, and then carefully pour in the filling.
- Carefully push the rack back into place, close the oven door, and bake for 20-22 minutes.
- You'll know the filling is done when it doesn't slosh or even wiggle much when you jog the pan. The top will fill a little sticky but won't be wet.
- Remove to a cooling rack. If using sugar snow to top your lemon bars, go ahead and sift it over now. Let the bars cool for about an hour on the counter and then a couple more in the fridge.
- If using powdered sugar, sift it over right before slicing to serve.
- Store leftovers in the fridge, well covered, for up to 5 days.
Did You Make Any Changes?
Notes
Tips and Tricks
Fill the crust with filling while it’s on the oven rack. This minimizes the chance you’ll have any filling sloshing over the sides and seeping under the crust. For easy removal and cutting, line your baking pan with parchment. It will make it easier to lift the bars out to cut on a cutting board. For topping your bars, I recommend using sugar snow over powdered sugar. Since it’s non-melting, you can sift on a thin layer straight out of the oven and it will last as long as the bars do.Do lemon bars need to be refrigerated?
They do. They are very egg-heavy, and even with all the acid in the lemon juice and sugar in the bars, it’s still much safer to keep them in the refrigerator. They’ll keep fine, tightly covered, for up to 5 days.Can you freeze lemon bars?
Yes, you can. I have some frozen right now simply to save me from myself! Wrap them in plastic wrap and then either wrap them well in foil or put them in a zip-top freezer bag, making sure to press out all the air before sealing. They will keep just fine for up to 3 months. Thaw in the freezer overnight.What’s the best way to cut them?
To make the cleanest cuts, once cooled completely, use the parchment overhang to lift the entire “block” of lemon bar out of the pan and place it on a cutting board. Use a sharp kitchen knife–I use an 8″ chef knife to cut straight down. Wipe the blade between each cut. For the most precise cuts, run the knife blade under hot running water and then wipe it dry before cutting.Nutrition
Would you like to save this post?

Hi, y’all! I hope you’ve enjoyed this post and hopefully also learned a thing or two.
If you like my style, I invite you to sign up for my occasional newsletter, The Inbox Pastry Chef.
Expect updates on new and tasty recipes as well as a bit of behind-the-scenes action. I hope to see you there!

Thanks so much for spending some time with me today.
I hope you enjoy the lemon bars, and I hope you review them or leave me a comment letting me know what you think.
Take care.


Join in Today!
will these lemon bars be ok sitting out at a benefit for up to 4 hours
They should be fine for that amount of time, but they are more delicate than “standard” lemon bars. You may want to add a little bit more flour in the filling to make them “sturdier” for serving at the benefit.
The recipe name is not just hyperbole—these are indeed perfect. After making them for the first time, I deleted all my other lemon bar recipes. Thank you!
Peggy, I am thrilled that you love the lemon bars! And thank you so much for taking the time to comment both here and on Pinterest. Social proof is so important, and I truly appreciate your taking the time!
These are the best Lemon Bars I have eaten. Tangy, Sweet, A flavor explosion! This recipe has replaced the recipe I have used for years and I will pass it along to my friends who live Lemon Bars as much as I do!