
If you’ve only ever had cinnamon raisin English muffins from a plastic bag, you’re about to discover what you’ve been missing. These bakery-style beauties are taller, softer, and packed with juicy raisins and warm cinnamon in every bite.
A quick trip across the griddle gives them their signature crust, while a short bake in the oven takes out the guesswork, ensuring they’re perfectly cooked all the way through. Split one open with a fork, toast it until the edges are crisp, and watch the butter melt into all those nooks and crannies.
They’re a little more of a project than grabbing a package at the grocery store, but one bite will tell you why they’re worth it. Make a batch for the freezer, and breakfast just got a whole lot more interesting.
Pastry Chef Online Participates in Affiliate Programs. If you make a purchase through one of my links, I may earn a small commission. For more information click to read my disclosure policy
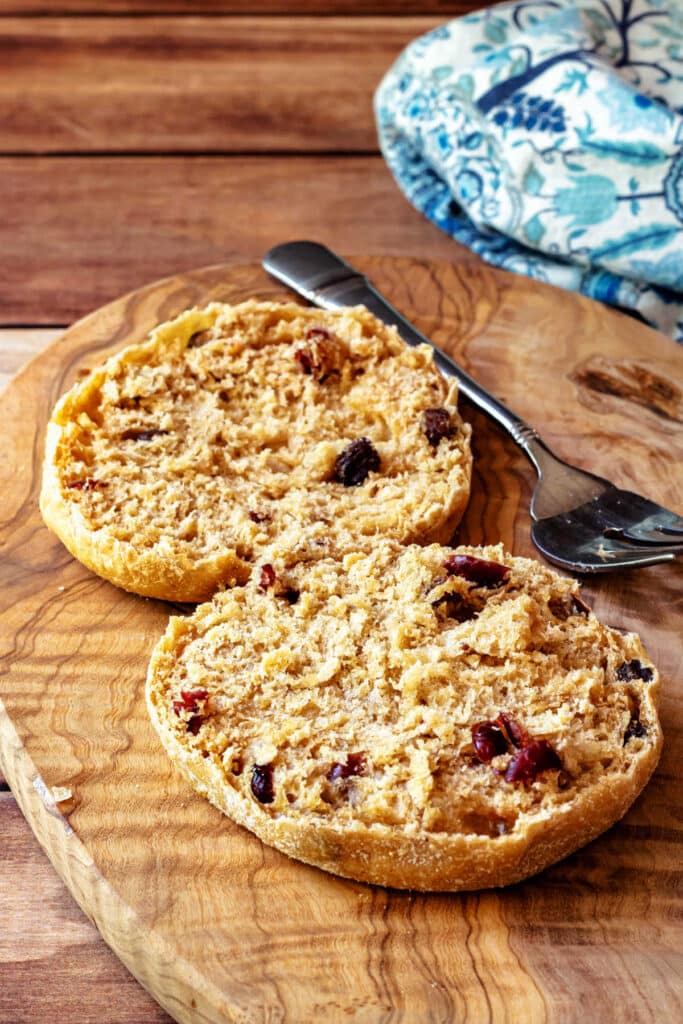
These are truly delicious! They toast up beautifully, have real cinnamon flavor and smell, and honestly are better than Thomas’s or Michael’s (a local artisan brand).
Happy Cinnamon Raisin english Muffin Eater and friend carol
Cinnamon Raisin English Muffins, at a Glance
✅Skill Level: Brave Intermediate
✅Skills: Working with high-hydration dough, shaping slack dough, griddling, baking
✅Type: English muffins
✅Number of Ingredients: 10
✅Prep Time: 40 minutes
✅Cook Time: 45 minutes total
✅Yield: 12 bakery-style English muffins
Jump Straight to the Recipe
Why You Should Make This Recipe for Cinnamon Raisin English Muffins
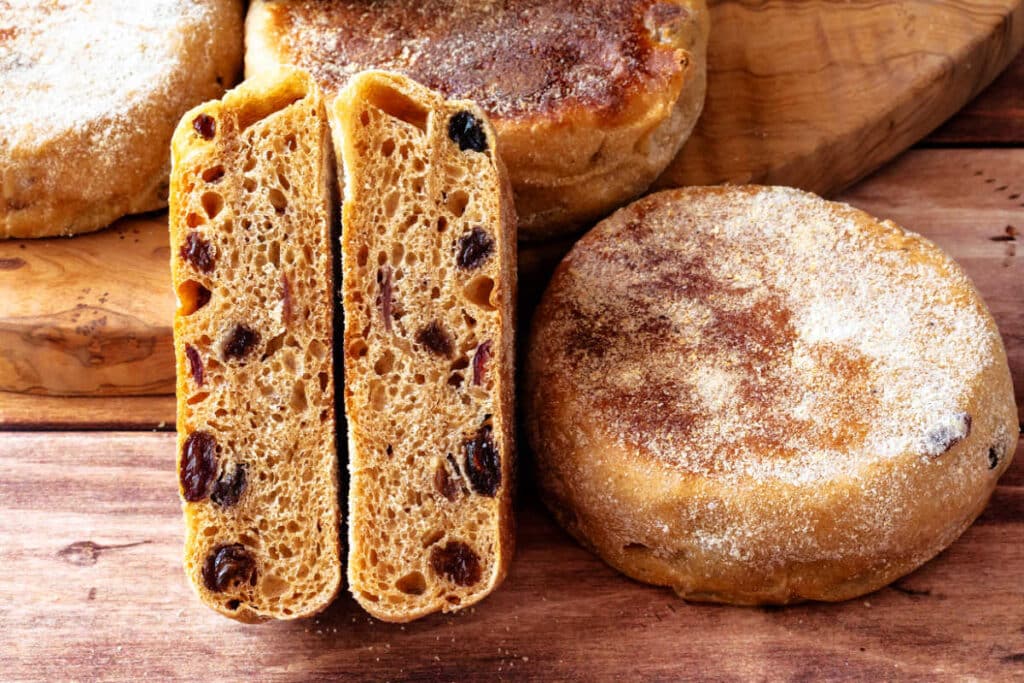
The Internet is full of English muffin recipes, and the grocery store shelves have some options as well. Let me tell you why you should take the time to make this particular recipe:
- They’re tall and bakery-style. These English muffins rise high, stay tender, and have plenty of nooks and crannies for melting butter. Their sides are tall and proud with plush little wrinkles and dips–a hallmark of a well-fermented English muffin.
- The griddle-plus-oven method gives you foolproof results. You get the signature golden English muffin crust without worrying about underdone centers. Just because they are traditionally cooked 100% on the griddle doesn’t mean we can’t take advantage of our modern conveniences!
- Every bite is loaded with cinnamon and juicy raisins. No hunting for the “good” muffin in the package—each one is generously studded with juicy raisins and warm cinnamon. Bonus: As they bake, your kitchen will smell amazing.
- The texture! Straight out of the oven, the muffins seem a little soft. When cooled then split, toasted, and slathered with butter, you will love the crisp exterior shell filled with a light, almost custard-like, buttery interior.
- They’re freezer-friendly. Make a 12-muffin batch once, then split, toast, and enjoy homemade English muffins whenever the craving strikes.
- They’re worth the little bit of extra effort. Yes, they’re more of a project than buying a package, but the first buttery bite makes it very clear why homemade wins.
- Flexible baking schedule: I tested this recipe with two different schedules: 1)making, shaping, and baking all in one day, and 2)making, rising, and shaping in the evening, giving them a cold proof in the fridge overnight and letting them rise and bake the next morning. I don’t think one method has the edge, so making these muffins can fit nicely into your schedule.
How to Make Bakery-Style English Muffins
The hallmarks of a traditional English muffin are a crisp exterior with a light crumb characterized by “nooks and crannies,” and the best way to achieve that contrast is by making a very slack (high hydration) dough.
Working with a very soft and sticky dough can be intimidating, but stick with me, and I will walk you through the whole process.
If you are already comfortable working with high hydration dough and just want to get started, please feel free to jump straight to the recipe. Otherwise, let’s take a close look at the whole process, starting with the ingredients.
Ingredients and Substitutions
Here’s what you’ll need to make these English muffins. I’ll provide substitutions where it makes sense to do so.
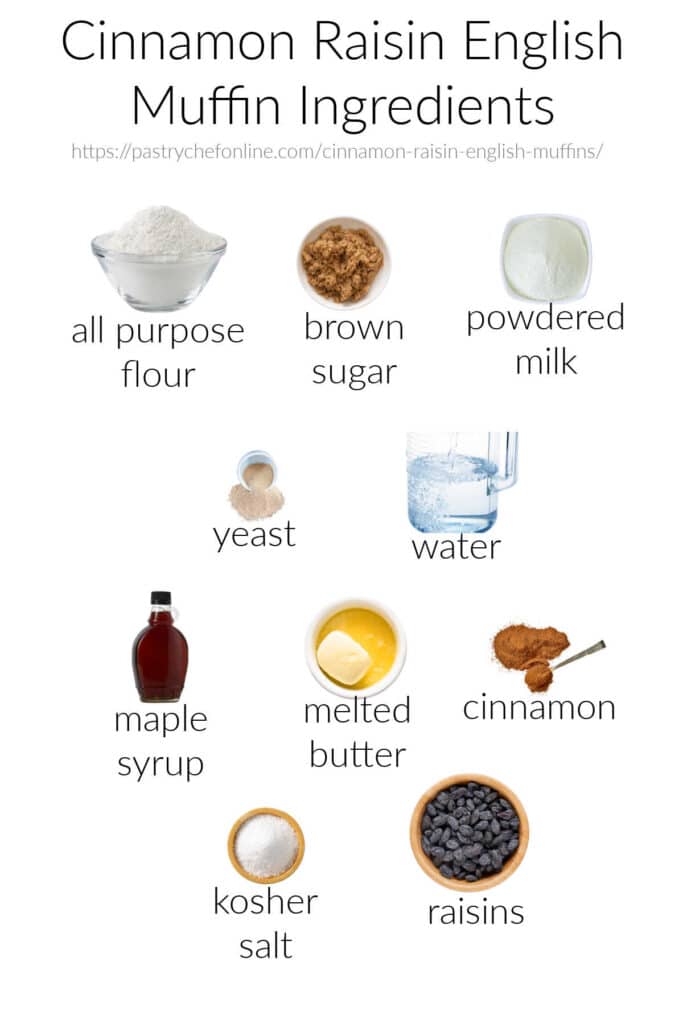
- all-purpose flour: Use a higher-protein all-purpose such as King Arthur or Bob’s Red Mill. The flour provides the bulk and gluten for the recipe
- brown sugar: Provides a bit of background, old-fashioned sweetness as well as assists in browning
- dried milk powder: Adds tons of dairy flavor without using a ton of liquid milk. Dried milk powder softens the crumb and provides a plushness and lovely milky sweetness to the dough. No milk powder at home? Replace both the dry milk powder and the water with 360 grams whole milk. The muffins will be a bit less rich in dairy flavor and may not brown quite as deeply, but they’ll still be tender and delicious.
- yeast: The yeast provides the rise for the muffins. You may use instant or active dry. If you’re unsure of the liveliness of your active dry, you can add it to a small portion of the water along with 5 grams of the brown sugar. Once it becomes bubbly and foamy, you can add it to the dough with the rest of the liquid ingredients
- water: Hydrates the flour and milk powder and provides the needed liquid to activate the gluten in the flour.
- maple syrup: Provides a very gentle, old-fashioned background warmth that plays beautifully with the cinnamon. It also assists a bit with browning
- melted butter: The butter provides the vast majority of the fat for the English muffins, adding tenderness and carrying flavor, especially the cinnamon flavor. Can’t have butter? Substitute 2 1/2 Tablespoons (34 grams) neutral vegetable oil instead
- cinnamon: Adds warmth, color, and a familiar “breakfasty” flavor profile to the muffins
- kosher salt: Focuses all the flavors and keeps the yeast from multiplying out of control
- raisins: Plump them in boiling water, but don’t miss the opportunity to experiment with plumping them in other boiling liquids: black tea, green tea, ginger ale, or coffee all would be excellent and would add another layer of flavor. If you don’t like raisins, or don’t have any, use Craisins, dried cherries, dried snipped apricots, etc.
Making the English Muffins
I will break this part down into sections so the method and flow will make sense. Note the Tip Boxes where I’ll put little cheffy tidbits that I think are Extra Important.
Making the Dough
Making the dough is fairly straightforward. I want to point out some of the important steps that will make the process go smoothly.
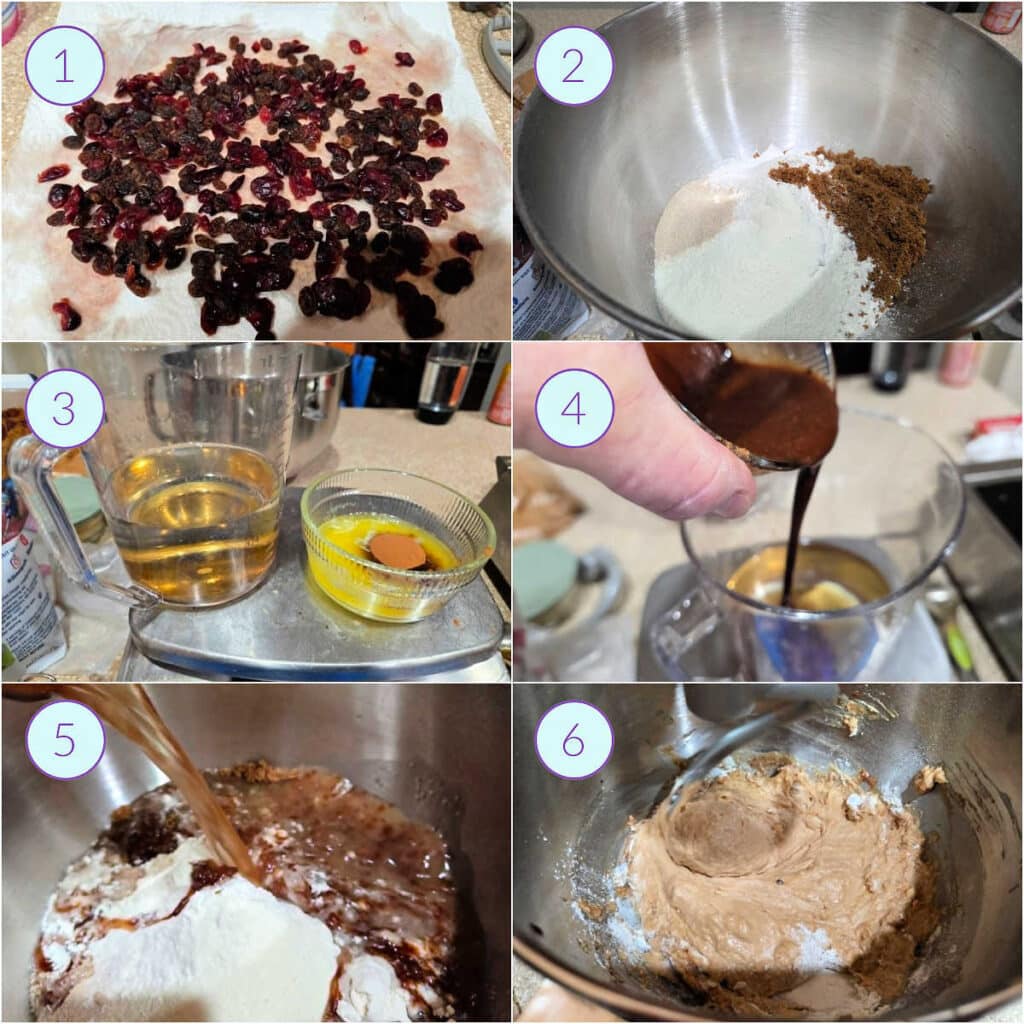
- Soak the raisins (I used a mixture of raisins and Craisins) in boiling liquid for 15 minutes, drain and blot them well. Then spread them out so they will be cool by the time you need to add them to the dough.
- In your mixer bowl, measure the flour, brown sugar, milk powder, and instant yeast. If using active dry yeast, proof it in about 50 grams of the water in the recipe and 5 grams of the brown sugar. Once active and bubbly, you may add it along with the rest of the wet ingredients.
- Add the maple syrup and salt to the water, and mix the cinnamon into the melted butter.
- Scrape the butter/cinnamon into the water and….
- …pour it into the mixing bowl.
- Fit the mixer with the dough hook and mix for a couple of minutes, scraping down to the bottom of the bowl once or twice, until you have a very messy, shaggy dough.
Jenni Says: Cinnamon is hydrophobic meaning it resists mixing with water. Stirring it into the melted butter first lets it disperse evenly throughout the dough and helps its flavor bloom. Extra tip: do this when making French toast, too!
The Long Knead
Aside from my jelly donut recipe, this is one of the slackest doughs I’ve ever worked with, so I’m guessing it will be pretty new for you, too. Here’s how to make this sticky, wet dough behave itself.
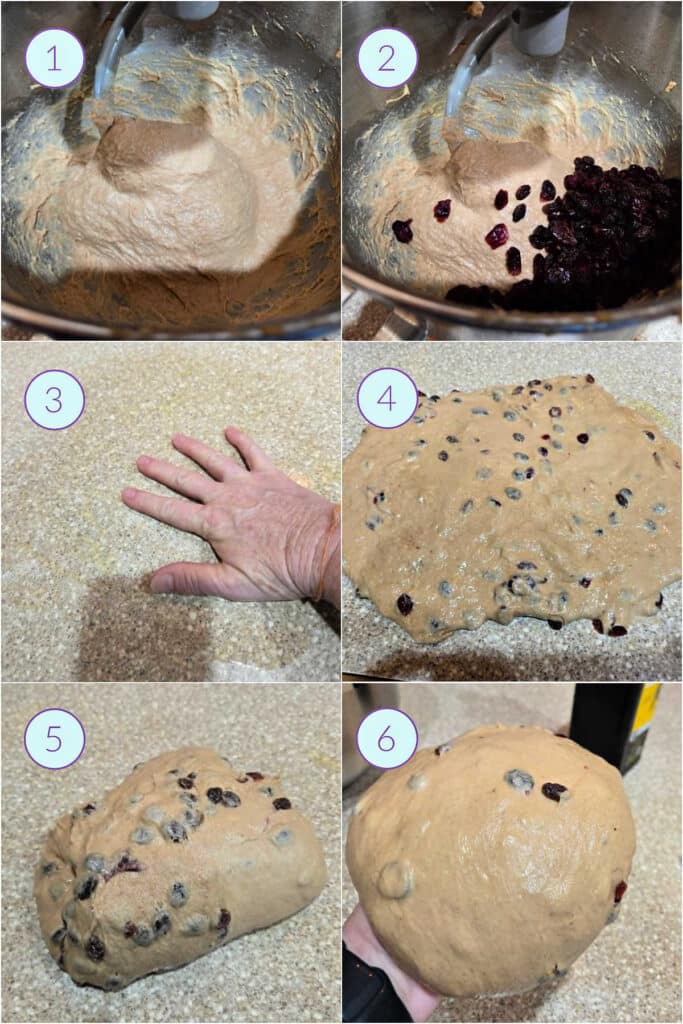
- This is after 17 minutes of kneading. In all my bread baking, I have found that gluten really gets organized and stretchy by about minute 12. I give this dough five additional minutes because it is so soft. Notice that, even though the sides of the bowl aren’t completely clean, the main mass of dough has grabbed onto itself and the dough hook.
- Add the well-blotted and cool dried fruit and knead in on low speed for 3 minutes.
- Rub some neutral vegetable oil onto your work surface.
- Oil your hands lightly, use a dough scraper to scrape the dough out onto the work surface, and with lightly oiled hands, press it out into an irregular rectangle.
- Use a bench knife to help you fold it in thirds one way and then the other. And gather it into a smooth ball.
Plop the dough back into the mixing bowl, lightly brush it with oil (or spray it with pan spray), cover it, and let it proof for about an hour.
Would you like to save this post?
Jenni Says: We’re not looking for the dough to double in size. We just want to give the yeast a head start on lightening it so that shaping is easier. Bonus: during the one-hour rest, the flour and milk powder will completely hydrate and the dough, while still super soft, will be less sticky.
Leave the residual oil on the counter, because you’ll want it for the final shaping.
Shaping and Proofing
Now that you have this incredibly lax, beautiful dough, here’s how to shape it so the muffins rise evenly into (almost) perfectly round, tall, proud discs.
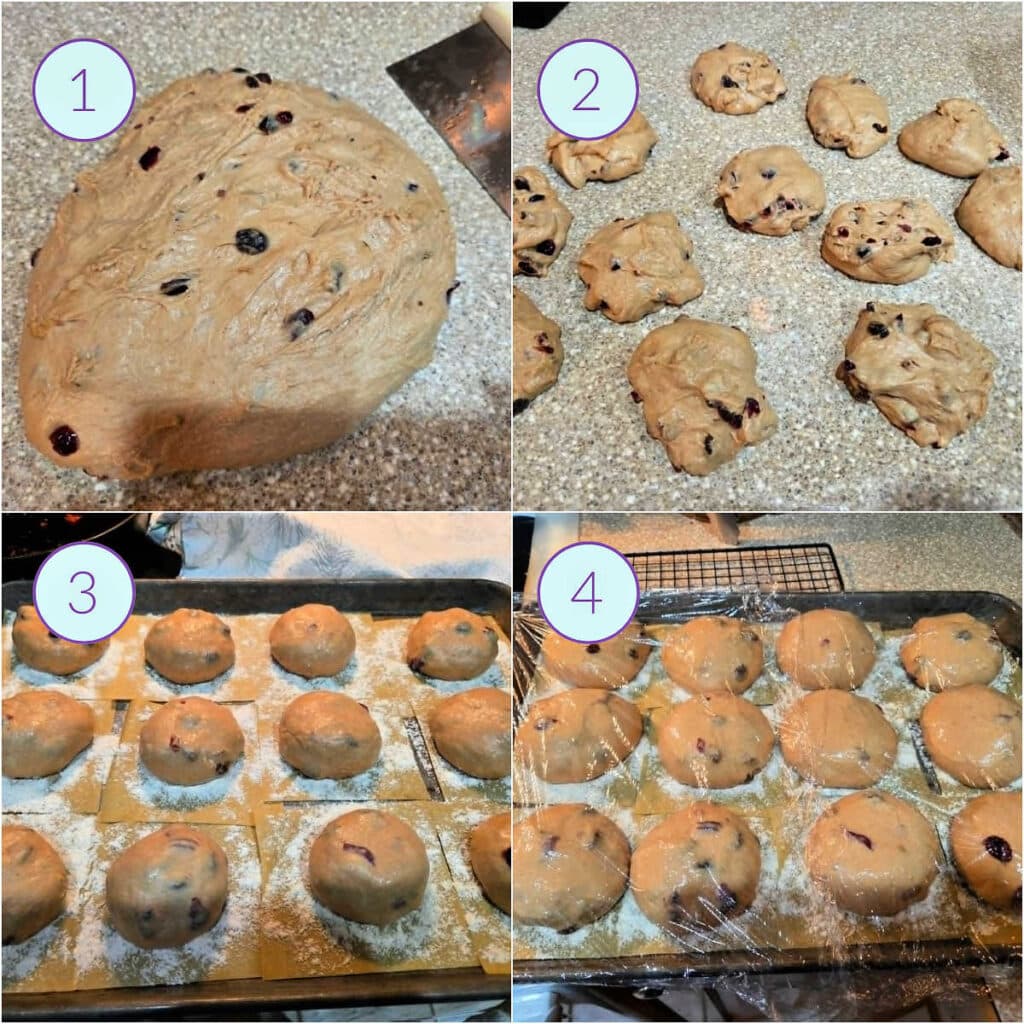
- Use your dough scraper again to scrape the dough onto your lightly-oiled surface.
- Divide the dough into 12 equal pieces.
- Lightly oil your hands. Working with one piece at a time:
- pick the smoothest side to be the top of the muffin
- pull the dough and gather it on the underside, pinching it so it stays together.
- Build some tension in the dough by moving it between your cupped palms to round it so the tops are smooth.
- Place each one on a square of parchment paper liberally dusted with cornmeal or semolina.
- Brush the tops with a little oil, cover, and let rise in a cozy place for about an hour.
- Remove to the counter to finish proofing for an additional 30 minutes.
- After proofing, the dough will have expanded substantially and will jiggle like big marshmallows when you touch them. They’ll increase in diameter from about 2½ inches to about 3¼ to 3½ inches.
Jenni Says Timing Matters: Preheat the oven to 325°F / 163°C once you take the muffins out of the cozy place. After 15 minutes of proofing at room temperature, start heating your cast iron skillet/griddle over medium-low heat. For me that is “3” on the burner dial.
Griddling and Baking
And now, at long last, it is time to griddle and bake these guys.
Go ahead and put a half-sheet pan lined with parchment in the oven when you preheat it.
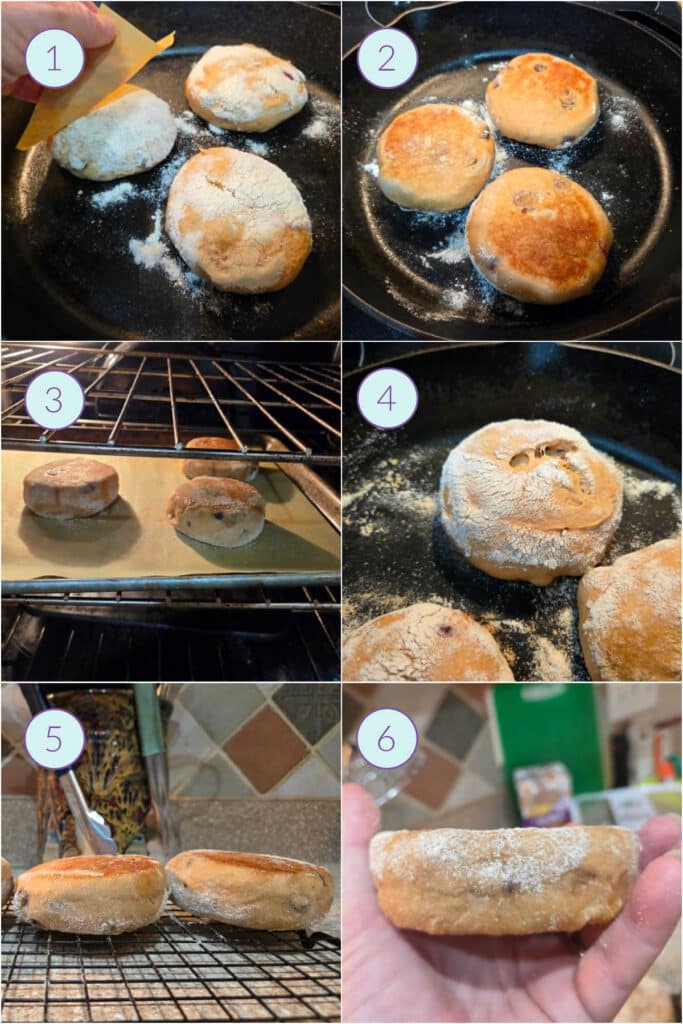
Work with as many muffins as will comfortably fit in your skillet/on your griddle at a time, and if you are feeling spunky, you can use two skillets simultaneously. Be sure to brush the skillet/s with a little oil and wipe out the excess.
- Carefully pick up each muffin on its square of parchment and tip it into the pan/onto the griddle. They will very lightly sizzle, so if you lean in, you’ll hear them. Cook for 5 minutes.
- After five minutes, they should be a lovely golden brown on the first side. That’s why you gave the pan a good 15 minutes to heat up before starting. Carefully flip each with a spatula, and cook for five more minutes.
- Use a spatula to put this first round on the parchment lined baking sheet and bake for 5-10 minutes, until the internal temperature is 195 – 200°F / 90 – 93°C.
- Note that some of your muffins may split a little on top. This happened to about 25% of the ones I made and was probably the result of not pinching the dough together well enough. Worry not, once you flip them that second side will sort itself out and the texture of the muffins won’t be affected at at all.
- Remove the baked English muffins to a cooling rack and….
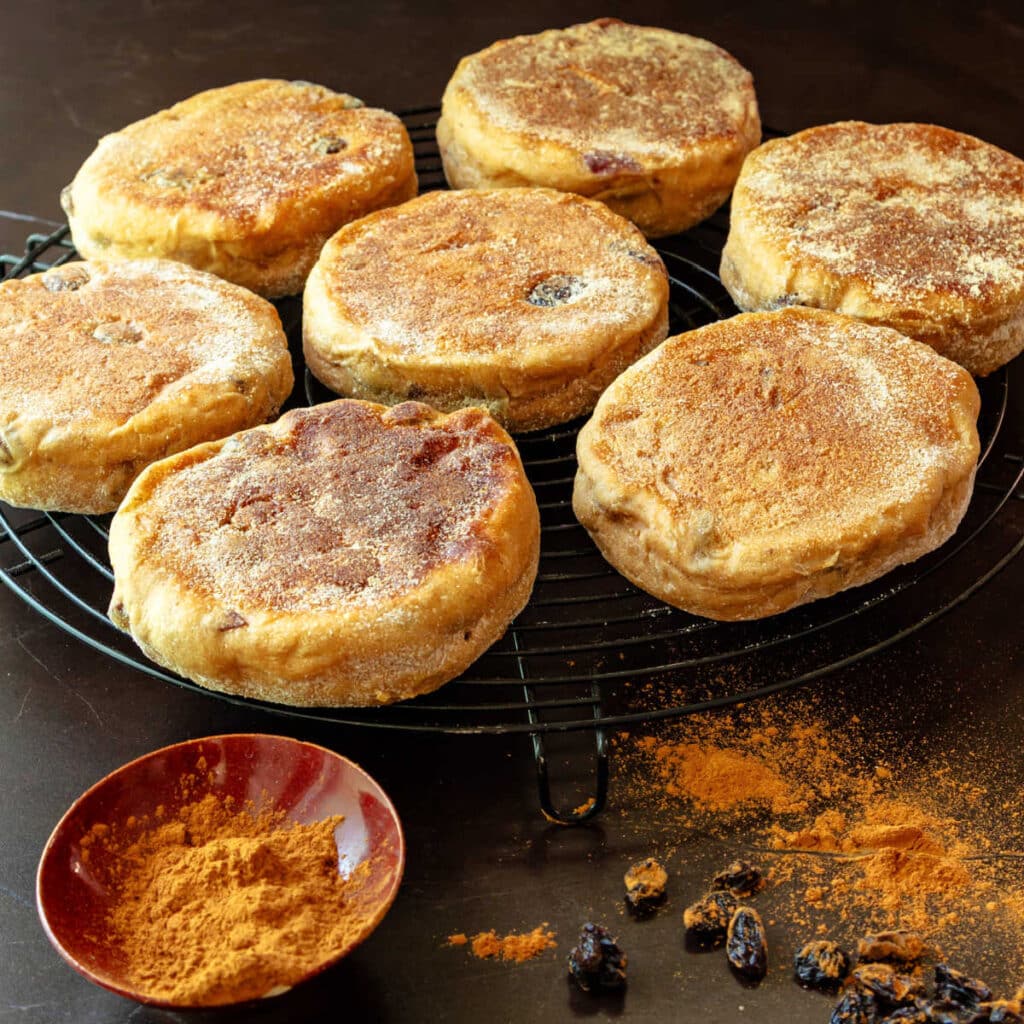
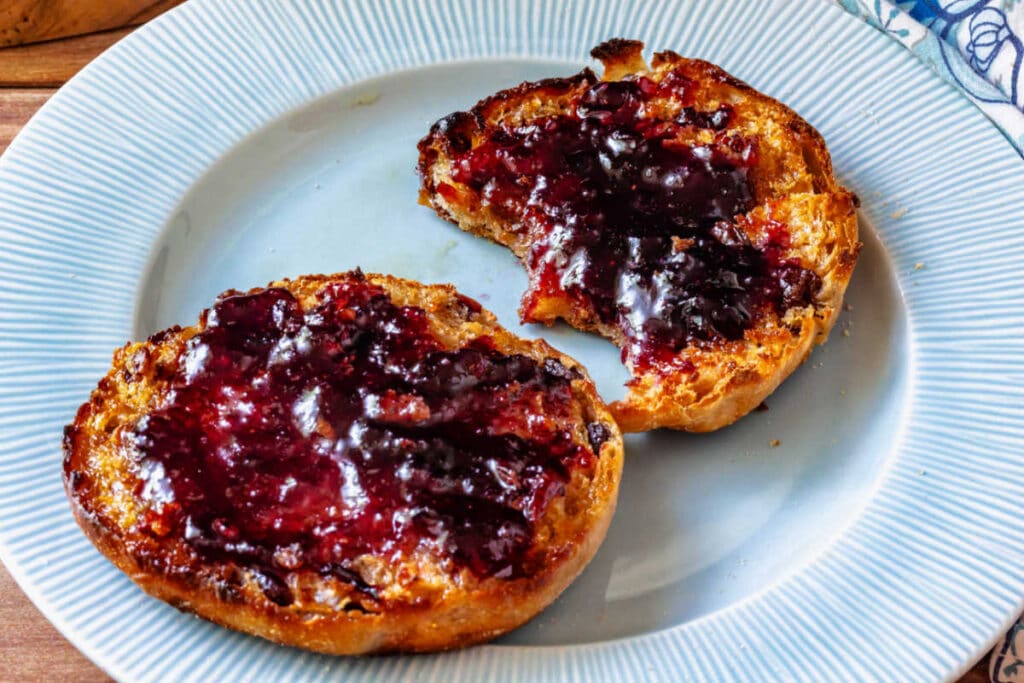
- …admire your work. Note the tall, gently wrinkled, but perfectly cooked sides. Take in the look of a hand-shaped English muffin with the first side spreading more than the second. Anticipate splitting one or two once cool, toasting, and slathering with butter and jam. You did it!
English Muffin Q & A
The challenge with a tall and proud English muffin is to make sure the inside is perfectly baked while also making sure the outsides don’t brown too much. While it is possible to cook English muffins completely on a griddle, it requires a lot of temperature control and flipping, taking internal temperatures constantly, and general worrying if you’re doing it right. Griddling for 5 minutes per side on a properly heated griddle or cast iron pan ensures golden brown crispiness on both sides of the muffin, and the oven finish ensures that the centers reach their target temperature. The two-stage bake also cuts down the total cook time from 30 minutes to closer to 15-20. In my book that’s a win!
The hallmark of a great English muffin is the soft interior built as a sponge for butter and jam with a crisp shell to hold the goodness. The best way to achieve that is using a slack (wet) dough. Slack dough is sticky, and I think people add too much flour to ensure they can easily handle the dough. All that does is make the dough dense and heavy with far fewer nooks and crannies. Resist the urge to add more flour.
No, you don’t have to use rings. Since these English muffins are made from a dough under tension (rolled and tightened on the counter), they will hold their shape while on the griddle. You would only need to use rings if you’re working with a batter or using the rings as cutters. I see no reason to waste dough by cutting out circles. The only reason to use them is if you want each muffin to be perfectly round. Out of the 18 I have made, I think all but one or two were a little misshapen. The rest were round and lovely. My advice? Leave the rings in the drawer.
While some recipes tell you to cut out the dough like biscuits, it is a waste of perfectly good dough and requires at least a second round of rolling and cutting. While it takes a bit longer to shape each one individually, with oiled hands, you can shape this dough into balls that retain their round shape even when you plop them in a hot skillet and gently flip them to flatten each side. Zero waste.
Resist the urge to add extra flour, either to the mixer bowl, your hands, or your work surface. This will ensure a light dough that will rise beautifully, trapping gases that set into delightful nooks and crannies. And once you shape the English muffins, handle them gently after they rise. Gently turn them into the hot pan, let them cook for 5 minutes, and use a thin, flexible spatula to give them a gentle turn. Gentle handling allows the muffins to retain as much gas as possible so that they set up light and airy with all the nooks and crannies.
Using oil on both the work surface and your hands allows you to work with the dough without it getting stuck to your hands. Unlike water, which can also prevent sticking, oil does not affect the hydration of the dough while adding a little extra richness. It’s an insurance policy that keeps you honest–and your hands out of the flour bin.
Yes! This is one of the great things about this recipe. I tested making the dough and griddling/baking the muffins on the same day and putting the shaped muffins in the fridge and baking them the next day. Either method works with no discernable difference in flavor or texture. You can confidently choose whichever method works with your schedule.
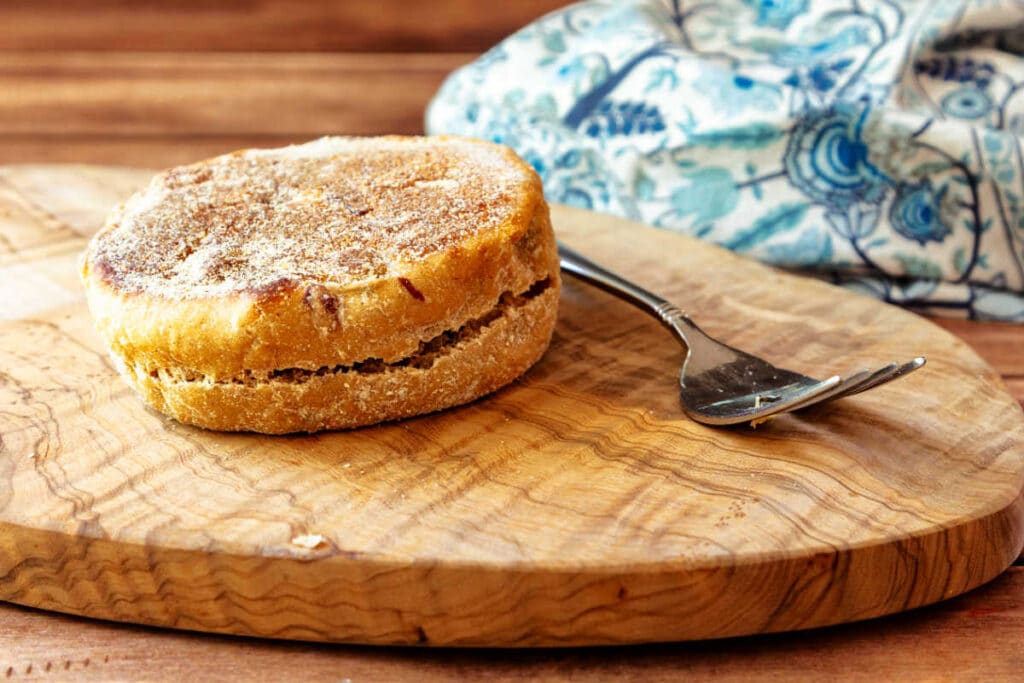
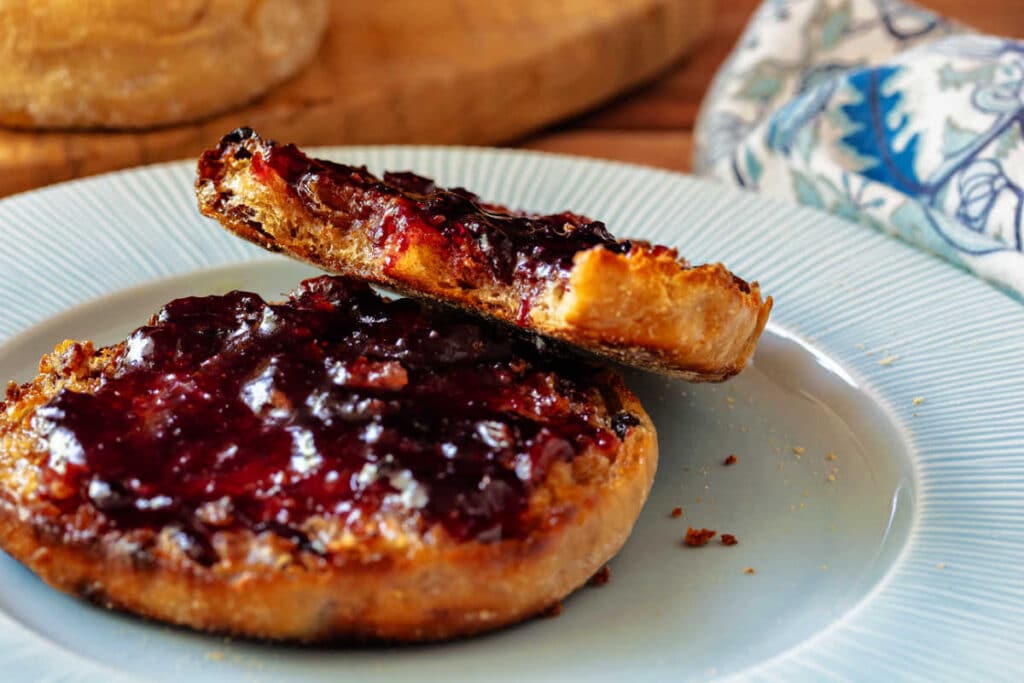
You don’t. The answer is to use a fork (or a “cake breaker”) to split them. A knife slices through all the pocket leaving a flat surface. Using a fork to split the muffins around their centers and then pulling them open allows for a craggy, more open texture that will not only toast beautifully but that acts as a delicious sponge for all that melted butter and jam.
Other Questions?
If you have any questions about this post or recipe, I am happy to help.
Simply leave a comment here and I will get back to you soon. I also invite you to ask questions in my Facebook group, Fearless Kitchen Fun.
If your question is more pressing, please feel free to email me. I should be back in touch ASAP, as long as I’m not asleep.
More Breakfast and Brunch Recipes to Enjoy
If you love niche English muffins, I have two more recipes you might consider.
The spent grain English muffins are a great way to use spent grains from brewing beer. And my sprouted wheat English muffin recipe takes advantage of a specialty flour that’s easier on the digestion than standard American grown and milled flour.
If you like a bit of a project for brunch, you can’t go wrong following along with my how to make crepes post. And once you make them, you wouldn’t be wrong to turn them into Monte Cristo Crepes.
In the mood for more cinnamon? You definitely want to check out my cinnamon raisin bread recipe. It bakes up with tons of swirls yet it is easy to slice and won’t fall apart.
Also consider my brown sugar cinnamon sour cream coffee cake recipe. It’s super tender and hard to stop eating!
A Note About Measurements
My recipes are almost all written by weight, including liquids, unless otherwise specified.
For accuracy and consistency of results, I encourage you to buy–and use–a kitchen scale.
I promise that baking and cleanup will be so much quicker and easier.
This is the scale that I recommend for home use. I have owned and used one for years.
Cinnamon Raisin English Muffins
Ingredients
- 180 grams raisins 6.3 oz or 1 1/4 cups, soaked for 15 minutes in enough boiling water to cover
- 500 grams all-purpose flour 17.6 oz or 4 cups + 2 Tbsp, King Arthur preferred for its higher protein content
- 60 grams dark or light brown sugar 2.1 oz or 1/4 cup + 1 Tbsp, packed
- 30 grams dry milk powder 1.1 oz or a slightly generous 1/4 cup
- 8 grams instant yeast 2 1/2 teaspoons, sub active dry, if you prefer
- 360 grams water 12.7 oz or 1 1/2 cups + 1 Tbsp, room temperature
- 42 grams melted butter 1.4 oz or 3 Tbsp
- 1 Tbsp ground cinnamon
- 20 grams maple syrup 1 Tablespoon
- 10 grams kosher salt 1 3/4 teaspoons of Morton's or 1 Tablespoon Diamond Crystal
For Shaping and Cooking
- fine cornmeal sub semolina if you prefer
- vegetable oil
Instructions
For the Dough
- Drain and blot the soaked raisins and spread them out on 2-3 layers of paper towel or on a lint-free kitchen towel to cool.
- In the bowl of your stand mixer, combine the flour, brown sugar, yeast, and dry milk powder. Set aside.
- Measure the water, and stir in the salt so it dissolves.
- Stir the cinnamon into the melted butter to make a slurry.
- Pour the butter/cinnamon mixture into the water.
- Add the liquid to the dry ingredients and fit the dough hook onto the mixer.
- Mix on low speed for a couple of minutes, scraping down to the bottom of the bowl a couple of times, until you have a shaggy, thick batter.
- Increase speed to medium and knead for 17 minutes. The dough will be very wet and won't clear the sides–and certainly not the bottom–of the bowl, but you will see it become more cohesive and stretchy. It's fine.
- After 17 minutes, turn off the mixer, add the raisins (or other dried fruit), and mix on low-to-medium-low speed for 3 additional minutes.
- During those 3 minutes, use your hand to spread a little neutral vegetable oil out on your work surface.
- While the dough is resting, cut a piece of parchment paper into 12 squares and arrange them 3 x 4 on a half-sheet pan.
- Liberally sprinkle fine cornmeal or semolina onto each square, and set aside.
Shaping the Muffins
- Use a bowl scraper or spatula to scrape the sticky dough out onto the oiled surface.
- Rub a little oil onto your hands and pat the dough out into a rough rectangle.
- To ensure an Even Raisin Distribution, using your bench knife, fold the dough into thirds, first one way and then the other.
- Oil your hands a little more, and shape the dough into a smooth ball. Plop it back into the mixer bowl, brush the exposed surface with vegetable oil, cover, and allow to rise in a cozy place for an hour. The dough will not double, and it may flatten out a little bit. It's fine. This is a very slack dough and doesn't follow the "regular" rules. NOTE: don't clean off the work surface. You want a little oil left for the final shaping.
- After the hour is up, scrape the dough back onto your work surface. Oil your bench knife and divide the dough into 100 gram pieces. NOTE: For the most consistent size, weigh the entire amount of dough and divide by 12 (or 6 if making a half batch).
- Working with lightly oiled hands and with one piece of dough at a time, gather each piece into a ball with a smooth top and then tighten by moving the dough between your hands on the counter. This will provide enough friction to smooth out the balls and allow them to rise evenly. Place each ball on one of the squares of parchment. At this point, the proto-muffins will measure about 2 1/2" / 65mm in diameter.
- Spray the tops of the balls with some oil or pan spray, cover with plastic wrap, and let sit in a cozy place for an hour. Then allow them to sit out at room temperature for about 30 minutes. The diameter should now be between 3 1/4"-3 1/2" / 85 – 90mm. During the 30 minutes at room temp, preheat the oven to 325°F / 163°C. Place a parchment-lined half-sheet pan on the center rack.
To Griddle and Bake
- Preheat a large cast iron skillet (or two, to make the work go faster) over medium low heat for 10-15 minutes.
- Brush about 2 teaspoons vegetable oil in the pan and wipe out any excess.
- Working in batches of 3 and keeping the rest of the muffins covered, gently tip the risen muffins into the skillet, leaving at least 1/2" between them. Let them quietly and gently sizzle in the griddle for 5 minutes. If you'd like, use a pastry brush to brush excess cornmeal off the tops. NOTE: Some of the muffins may split a little bit on the tops while the first side is cooking. It's okay–once you griddle the second side, you won't ever know, and it will not affect the texture of the finished muffins.
- After 5 minutes, use a spatula to carefully flip each muffin. Cook for an additional 5 minutes.
- Use a spatula to transfer the griddled muffins to the baking sheet in the oven and bake for 5-10 minutes, or until the internal temperature of each muffin is 195-200°F / 90 – 93°C. Remove the English muffins to a cooling rack.
- Repeat with the remaining muffins in this manner: griddle 5 minutes → flip and griddle 5 more minutes → bake 5-10 minutes → check internal temperature → cool.
- Allow muffins to cool to room temperature before splitting, toasting, and devouring. For best texture, wrap them in a lint-free towel and let them sit at room temperature overnight before splitting and toasting. Store leftover muffins in a zip-top freezer bag with as much air pressed out as possible. When hunger strikes, thaw for a few seconds in the microwave before splitting with a fork and toasting.
Did You Make Any Changes?
Notes
Ingredient Substitutions
- Substitute 360 grams (12.7 oz or 1 1/2 cups + 1 Tbsp) whole milk for the water. Leave out the dry milk powder.
- Substitute 34 grams vegetable oil for the 42 grams of butter. No other changes needed.
- Substitute any other dried fruit or mixture of dried fruits for the raisins.
- Instead of using water to soak the raisins, don’t discount using apple juice, tea, coffee, ginger ale, etc for the soaking liquid. Just bring it to a boil and proceed as directed.
Two-Day Schedule
Here’s how to split up the work to make English muffins over two days:- Day One: In the early evening to evening, make the dough, let it proof for an hour, shape the muffins, and put them on their cornmeal dusted parchment landing pads. Spray the tops with a little pan spray, cover with plastic wrap, and refrigerate overnight
- Day Two: The next morning, remove from the fridge. They will look like they have barely risen. All is well. Allow them to sit in a cozy place for about an hour, then heat your oven and griddle and proceed with the cooking instructions as written.
To Make 6 English Muffins (1/2 Recipe)
- 90 grams raisins 3.2 oz or scant 2/3 cup, soaked for 15 minutes in enough boiling water or other boiling liquid to cover
- 250 grams all-purpose flour 8.8 oz or 2 cups + 1 Tbsp, King Arthur preferred for its higher protein content
- 30 grams dark or light brown sugar 1.1 oz or 2 Tbsp, packed
- 15 grams dry milk powder 0.5 oz or a slightly generous 2 Tbsp
- 4 grams instant yeast 1 1/4 teaspoons, sub active dry if you prefer
- 180 grams water 6.3 oz or 3/4 cup + 2 teaspoons, room temperature
- 21 grams melted butter 0.7 oz or 1 1/2 Tbsp
- 1 1/2 teaspoons ground cinnamon
- 10 grams maple syrup 2 teaspoons
- 5 grams kosher salt scant 1 teaspoon Morton’s or 1 1/2 teaspoons Diamond Crystal
Recipe Notes
- Don’t add extra flour. This dough is intentionally very soft. Resist the urge to add flour to the mixer or your work surface. A little oil on your hands and counter is all you need.
- Split with a fork, not a knife. For the best nooks and crannies, work the tines of a fork around the outside until the muffin pulls apart naturally.
- Toast before serving. Even if the muffins are fresh, toasting crisps the exterior and brings out their full flavor and texture. They really shine after a trip through the toaster.
- Freeze for later. Once completely cool, freeze the muffins whole in a zip-top freezer bag for up to 1 month for best flavor/texture. Thaw at room temperature or for a few seconds in the microwave. Fork split, and then toast before enjoying with plenty of butter and jam.
- A little misshapen is perfectly homemade. Since these are hand-shaped rather than cut with rings, a muffin or two may be slightly oval or rustic looking. They’ll still rise tall, toast beautifully, and taste exactly as they should.
Nutrition
Would you like to save this post?
Love These Homemade English Muffins? Please Rate and Review!
It helps me and other readers so much if you take a moment to rate and review this recipe.
Your star rating and comments help others decide whether the recipe is worth making, and your feedback helps me continue improving recipes here at Pastry Chef Online.
Other lovely ways to share include pinning or posting on your favorite social media platform.
Thank you so much for taking the time!


Hi, y’all! I hope you’ve enjoyed this post and hopefully also learned a thing or two.
If you like my style, I invite you to sign up for my occasional newsletter, The Inbox Pastry Chef.
Expect updates on new and tasty recipes as well as a bit of behind-the-scenes action. I hope to see you there!



Join in Today!
Love at first bite. I requested this recipe and Jenni came through big time. These muffins are delicious with a tender moist crumb. Even if you don’t toast them they are so good. Don’t let the “wetter dough” intimidate you. Once all the ingredients are mixed the dough pulls together nicely. After the final rise I was amazed at the size of each muffin but after baking they turned out to be the perfect size. I did measure them out at 100 grams each. I used an electric skillet at 350 degrees instead of the stove method however I failed to check them soon enough and 1 side was a little overdone but still delicious and tender. This recipe is definitely a winner. Thanks so much for sharing it with us.
Paula, I’m so happy you love them! It was a really fun recipe to develop, so thank you for the request!
So good! I am not a beginner baker, but had a moment of worry when I was kneading the dough. Do not worry! Yes, it is soft, yes, it becomes perfect. Follow the recipe, all will be well.
I used golden raisins because I had them. I made the whole batch because I love having things ready to go in the freezer.
The hardest thing was waiting to let them cool and I waited until the next morning.
Perfect, a little bit of chew which is very nice. This will not be the last time I make them.
Oh, hooray, Carlin! I’m so happy you like them! And yes, the dough is super soft to begin with. Even I had to remind myself to trust the process when I was testing! 🙂
These are truly delicious! They toast up beautifully, have real cinnamon favor and smell and honestly, are tastier then Thomas’s or Michael’s! The combo mix of dried cranberries and raisins is genius!
I am so, so happy you enjoyed them, Carol!