Crepes have an unearned reputation for being fussy when they’re actually surprisingly easy once you understand two fundamentals: the batter and the pan.
In this post, I’ll show you how to make foolproof French crepes that turn out thin, tender, and flexible every time. I’m also including several different crepe batters and explaining which ones work best for sweet fillings, savory fillings, meal prep, and more.
If you love a deep dive into foundational pastry techniques, you’re in the right place. Let’s make crepes.
Pastry Chef Online Participates in Affiliate Programs. If you make a purchase through one of my links, I may earn a small commission. For more information click to read my disclosure policy
Finally got around to making these! After finally getting my temperature right, these crepes were absolutely perfect! The thinnest crepes I’ve ever made! We had ours with strawberries, lemon marscapone and whipped cream as well as ham, potatoes, and gruyere with a bechamel sauce.
Reader and Crepe Lover jessica
So glad I had the foresight to double the crepe recipe. Now I’ve got dinner for tonight, too!
If you already know how to make crepes and want to get straight to it, you can jump straight to the recipe.
Otherwise, let’s go over some Crepe Tenets you may find helpful to read before tackling the recipe.
Why Crepes are Worth Making
Crepes have an unearned reputation for being fussy, but they’re actually surprisingly simple once you understand the batter and the pan situation. Much like the gorgeous girl in high school who never got asked out because she seemed too perfect when all she really wanted was a date for pizza and skating, crepes often get passed over as too fancy, too French, or too difficult to make.
But crepes have a lot going for them.
Unlike fluffy American pancakes, crepes stay thin, tender, and flexible, which means you can fold, roll, and fill them without tearing. That flexibility is part of what makes them so versatile. Fill them with fruit and whipped cream for dessert, ham and cheese for brunch, roasted vegetables for dinner, or honestly, whatever sounds good to you at the moment.
Crepe batter is also thinner and eggier than pancake batter, and because crepes need structure and flexibility, you actually want to develop a bit of gluten. That means there’s no need to baby the batter the way you would pancake batter. Whisk it enthusiastically or blend it smooth in a blender.
One Crepe Recipe, Tons of Possibilities
Once you get comfortable making crepes, a whole world opens up. Which sounds dramatic, but going from “crepes are too fussy to make” to “it’s crepe night!” really is a journey worth taking.
You can make them small and delicate or big enough to wrap around an entire meal. You can tweak the texture depending on the filling, add herbs and spices directly to the batter, or customize them for sweet or savory recipes without needing a completely different recipe every time.
Want poultry seasoning in crepes for a chicken filling? Go for it.
A little cinnamon in crepes destined for stewed apples and whipped cream? But of course.
And because you’re making them yourself, you are in charge of everything: the size, the flavor, the texture, and the fillings. You are basically the crepe boss now.
Also? You get to cross “make crepes confidently” off your kitchen bucket list, which is deeply satisfying and just a little show offy.
Different Results with Different Ingredients
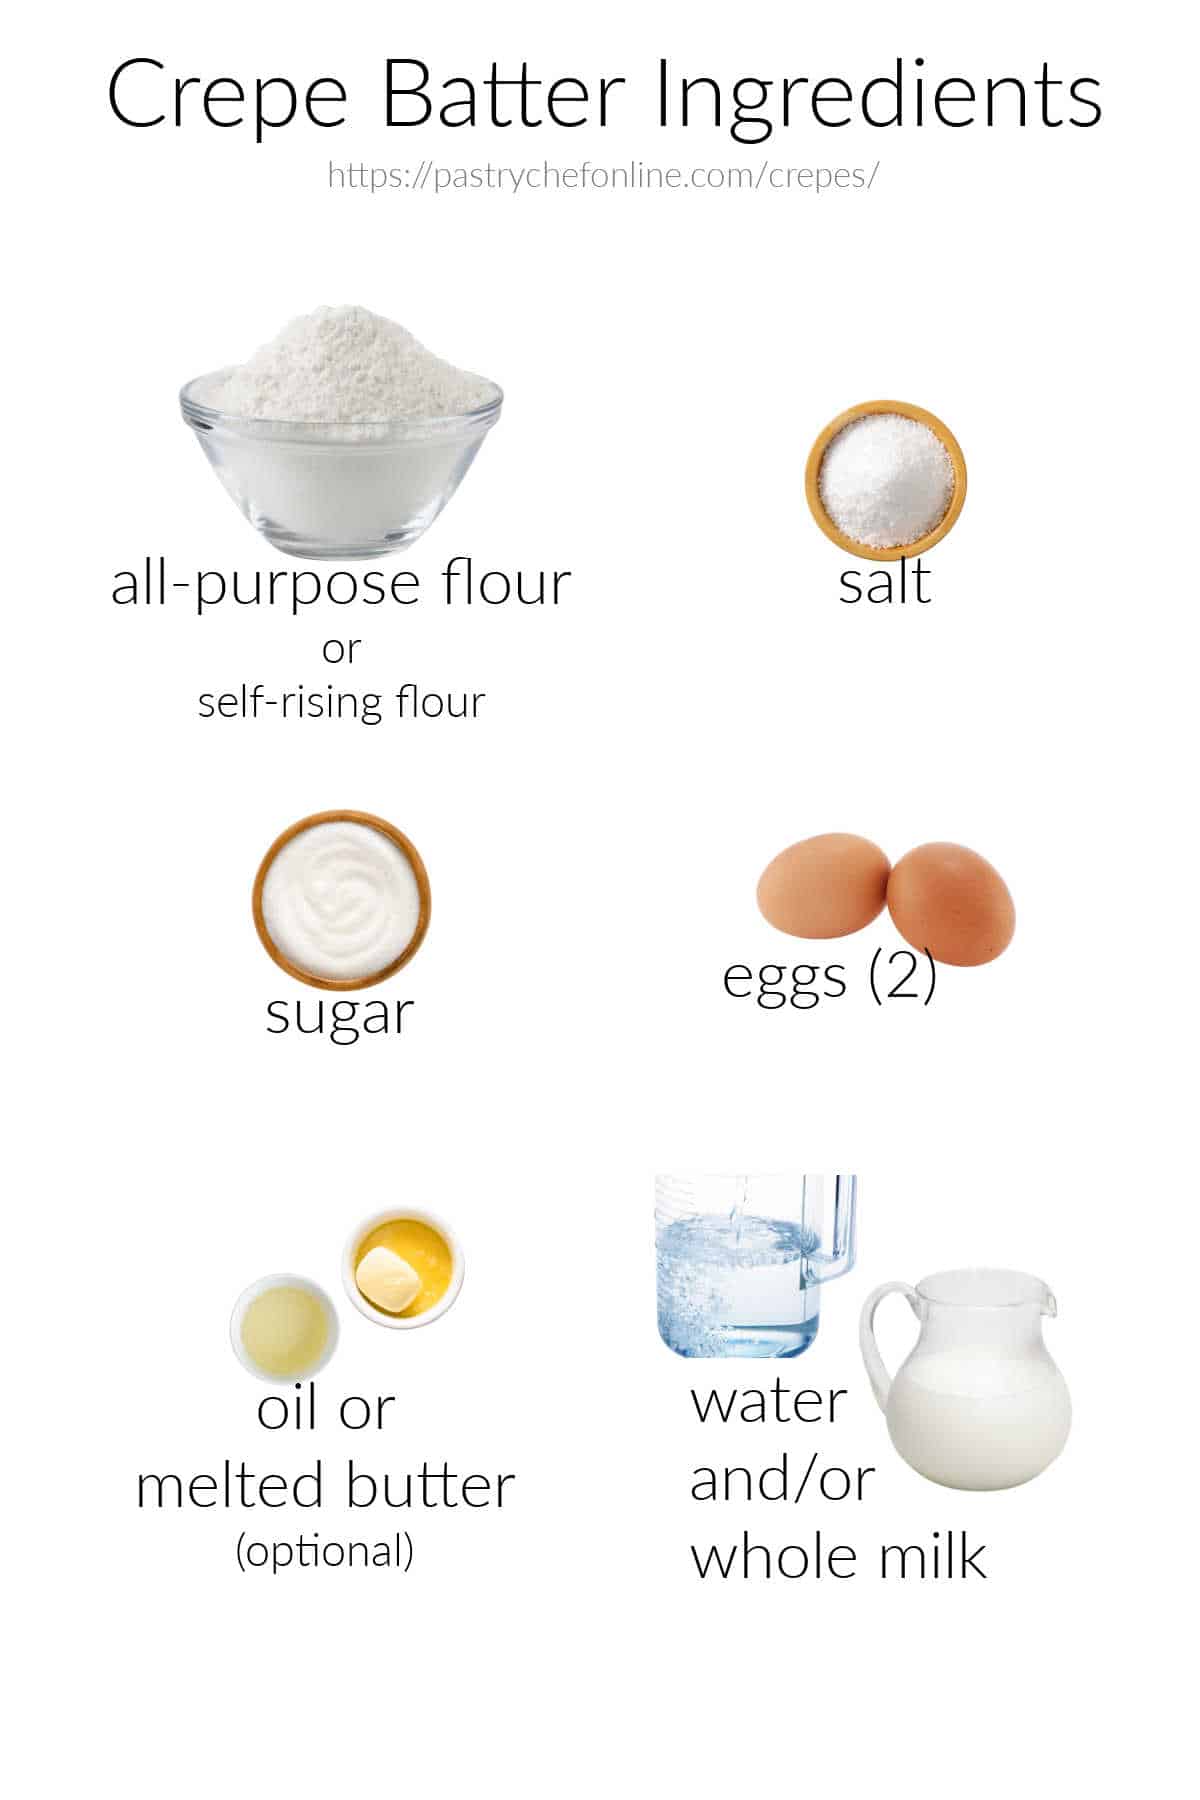
Most crepe recipes rely on the same core ingredients:
- flour
- eggs
- sugar
- butter or oil
- milk or water
- salt
From there, small changes in ingredient ratios can noticeably affect the final texture and flavor of the crepes.
To test just how much flexibility there is in a basic crepe recipe, I made four different versions, including one with self-rising flour because I live to serve.
The differences between the batches were subtle, but they were there. Some crepes turned out softer and more delicate while others were slightly sturdier, eggier, or more flavorful.
And once you understand what each ingredient contributes, you can start customizing your crepes intentionally instead of just crossing your fingers and following a recipe.
Because knowledge is power.
Four Recipes for the Price of One
Most crepe recipes rely on the same handful of ingredients, but small changes can noticeably affect the final texture, flavor, flexibility, and browning of the crepes.
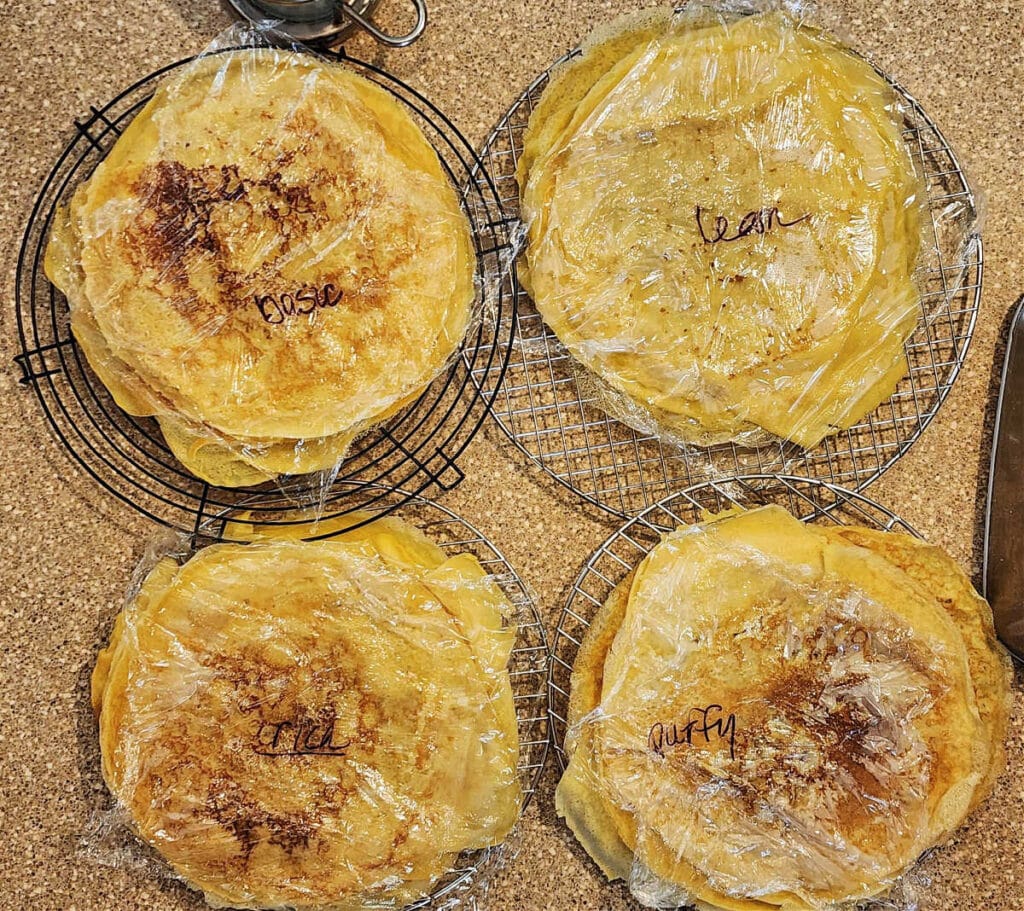
To see just how much flexibility there is in a basic crepe recipe, I tested four different versions: basic, lean, rich, and puffy. Some differences were subtle while others were immediately noticeable, especially in texture and color.
Here is the base recipe I started with:
- 4.5 oz all-purpose flour
- 2 eggs
- 1 Tablespoon sugar
- 1/4 teaspoon Morton’s kosher salt
- 12 oz cold whole milk
For those of you who like a good ratio, think 1 cup flour to 1 1/2 cups liquid plus 2 eggs.
To scale the recipe, for each additional cup (4.5 oz) flour, add:
- 2 more eggs
- another 1 1/2 cups liquid
- another Tablespoon sugar
- another 1/4 teaspoon salt
From there, I made a few strategic changes.
For the lean crepes, I swapped half the milk for 6 oz water and used no butter.
For the rich crepes, I added 1 1/2 Tablespoons melted butter to the basic batter.
For the puffy crepes, I substituted self-rising flour for the all-purpose flour and used 6 oz each milk and water.
And yes, before you ask, I absolutely made stacks of labeled crepes and compared them side by side because that is my calling.
Taste and Texture Comparison
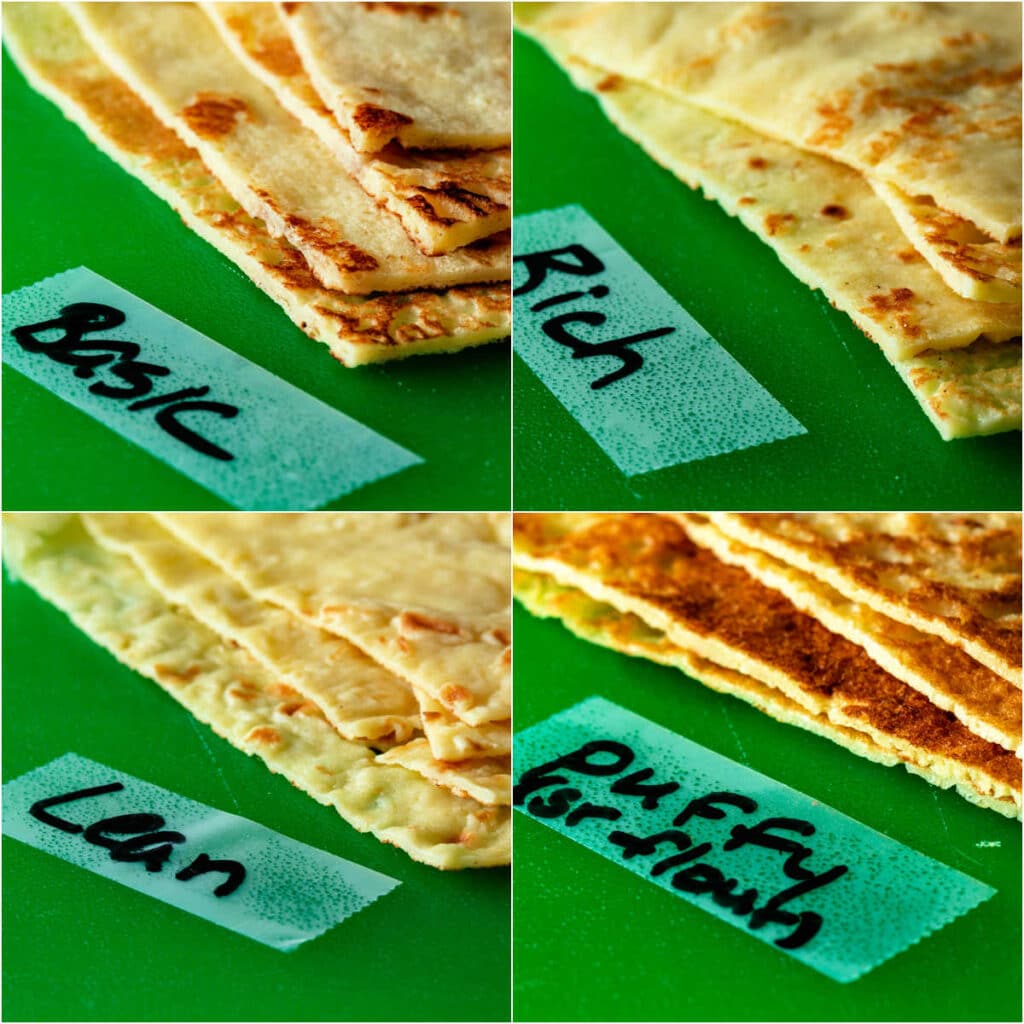
Note how “floppy” and thin the lean recipe is. They were definitely easy to work with, but they had less substance than the other three versions.
It’s hard to see because all four are so thin, but the basic crepes were thickest, followed by a tie between rich and puffy, and of course, the lean guys were the thinnest.
Crepes Made with Self-Rising Flour
When I poured the puffy batter into the pan, it got a lot of holes in it because of the leavening. In order to get a solid surface, I had to keep swirling the pan and then wait for a few seconds for the batter touching the pan to set up before pouring off any excess batter.
The finished crepes were much more akin to American pancakes than the other three versions, so if you are a fan of the texture of an American pancake but you really want to be able to fold one around some filling, the puffies will be your new best friend.
Personally, I want my crepe to be its own thing, so the puffies weren’t my preference. Not bad, and I am 100% eating them, but they won’t be my go-to recipe.
Of the four versions I made, my favorite is the basic recipe. Jeffrey preferred the lean recipe.
Notes from the Crepe Lab
Based on our tasting, here are the Rules of Crepe Making:
- The more dairy, the sweeter, so using half milk/half water yields a less-sweet crepe than using all milk, even with all other ingredient amounts remaining the same.
- The leaner the batter, the thinner the crepe. I would not use any less than 50% whole milk in my batter so the crepes have enough substance to be manhandled a little bit.
- If using self-rising flour, you don’t need to add extra salt. These crepes were the closest to American pancakes since they contained some chemical leavening. They weren’t my favorite, but that doesn’t mean they were bad. None of the four were bad. “Puffy” crepes are most likely to have bubbles (thus holes) because of the leavening.
- There is no need to add fat to the batter. The fat just made the crepes a little bit more tender and richer, which also made them harder to turn. Besides, you cook crepes in butter.
Jenni Says: Sugar assists with browning, so rather than altering the amount of sugar, play with the amount of milk solids to make your crepes less sweet. If you want a sweeter crepe, try using part whole milk and part half and half.
Set Yourself Up for Crepe-Making Success
Okay, friends. This is where I pre-game with you a bit so that once you get to the recipe, you’re set up for crepe success.
If you already make crepes confidently, feel free to head straight to the recipe.
Otherwise, stick around for a few minutes. Understanding a couple of key Crepe Truths makes the whole process way easier.
What Is the Best Technique for Making Crepe Batter?
As far as I’m concerned, making crepes in a blender is definitely the way to go.
Unlike with American pancake batter, you don’t need to be gentle with crepe batter. Because crepes are so thin, the batter has to be smooth.
And the best way to get a smooth batter is to hit it with your blender.
Since crepes are so thin and are made with a liquid-heavy batter, they need something to hold them together.
Those somethings are eggs and gluten.
You want the eggs fully incorporated, and you also want to develop enough gluten to give the crepes strength and flexibility.
This seems counterintuitive, because nobody wants a rubber crepe, but you do want a flexible crepe, one that you can wrap around a hot filling and not have it disintegrate.
What does that? Gluten does.
So, blender it is.
Jenni Says: Put your blender jar on your scale, weigh in each of your ingredients, then blend on medium speed for 30 seconds. Batter: done.
Why Do You Let Crepe Batter Rest Before Using It?
One of the biggest Crepe Truths is that crepe batter benefits from a rest. I’ve read to rest your crepe batter anywhere from 30 minutes to overnight.
There are a few reasons to let your batter rest:
Would you like to save this post?
- To allow the flour to fully hydrate
- To allow the batter to have more body (goes along with 1.)
- To give the gluten a chance to relax a bit so your crepes are sturdy enough to flex, bend, and roll but not so sturdy that they bounce if you throw one on the floor
- To allow the bubbles to rise to the surface of the batter and pop, thus preventing crepes with tiny holes in them
Let your batter rest in the fridge for at least 45 minutes, and if you are planning a crepe-extravaganza for brunch, make the batter the night before so that, in the morning, you’re ready to crepe as soon as your pan is hot.
Jenni Says: Crepe batter should be about the consistency of heavy cream or Creme Anglaise. If it’s a little thick, add a little milk or water and whisk it in.
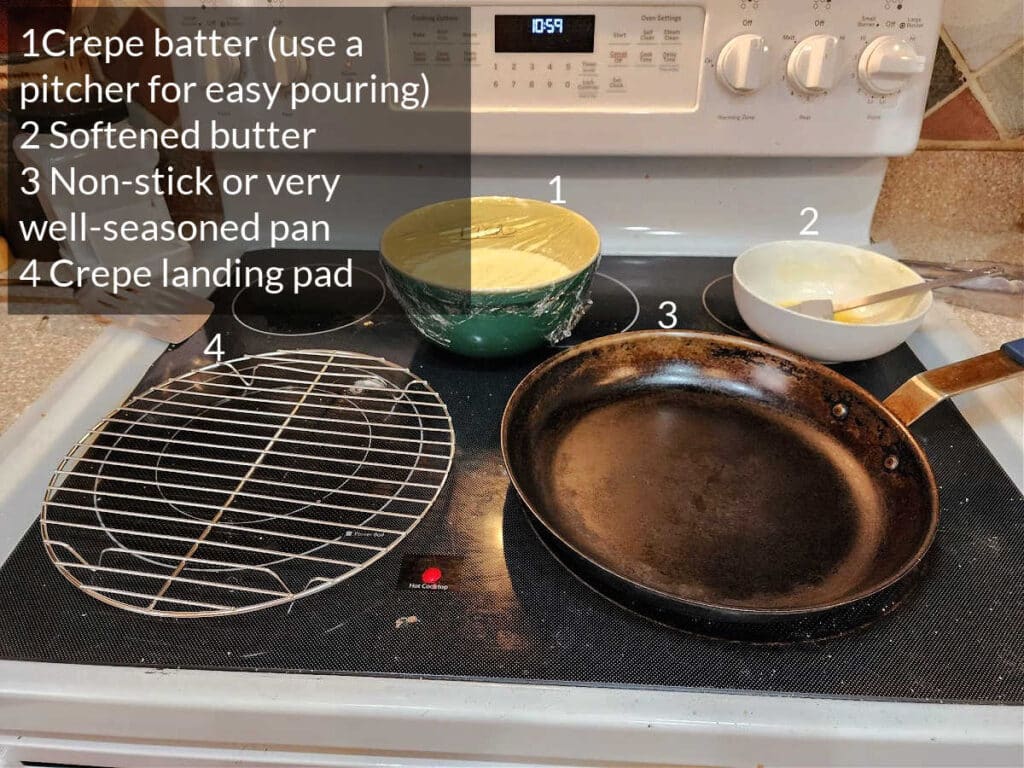
How to Set Up Your Crepe Cooking Station
Can things go wrong when making crepes? Well, sure. You can minimize the opportunity for disaster by having everything set up and ready to go.
The above photo shows my setup for making crepes. Having a flat-top stove makes it really easy to set everything up in easy reach. You could also put a big cutting board over a couple of burners. That are turned off!
If you’re only making one batch of crepes, leave it in the blender jar or pour it into a pitcher. That way you can pour your batter with a minimum of mess.
Also have a bowl of very soft or melted butter and a little brush for application. I have a small silicone brush that works really well for this.
Crepe Workflow Tips
- Always use a nonstick or very well-seasoned pan.
- Heat the pan over medium heat until a little water sizzles when you flick it into the pan
- Butter your pan liberally between each crepe
- Pour in the batter in one go. If you pour and then pour again, you could disrupt the batter that is already setting, and your crepe will be too thick in spots
- Hold the pan up off the burner with your dominant hand and pour with your non-dominant hand.
- Immediately swirl the pan to distribute the batter evenly
- Tip the pan back over your pitcher and let any excess batter run back into the pitcher
- Let the crepe fully set before trying to flip it. The batter will no longer be shiny and the edges should start to curl up off the surface of the pan. This will take anywhere between 1 minute and about 90 seconds.
- Loosen the edges with a thin spatula, then either grab the edges with the fingertips and thumbs of each hand OR slide the spatula under the crepe and flip
- Adjust your heat if crepes are cooking too quickly. It’s also okay to move the pan off the heat to allow it to cool a bit.
Jenni Says: When your crepe is done, tip the pan over your “crepe landing pad,” and grab the near edge of the crepe with your fingers. Then, rather than pulling the crepe out of the pan, slide the pan back out from under the crepe.
How Do You Keep Crepes from Sticking to the Pan?
One of the best general rules for keeping food from sticking is to fully heat the pan before adding butter or batter, and that rule is especially important when making crepes.
Heat your pan over medium heat for a good 5-7 minutes. The butter should sputter and sizzle when you brush it into your pan.
Do this right before adding your batter, not just once but before you cook each crepe.
Even over medium heat, pans will continue to get hotter, so don’t forget to adjust your temperature as you continue to cook your crepes.
For example, I started on medium, which on my stove is about a 6, but by the time I finished cooking all my crepes, I had dialed the heat down to a “3.”
How Do You Flip Crepes without Making a Mess?
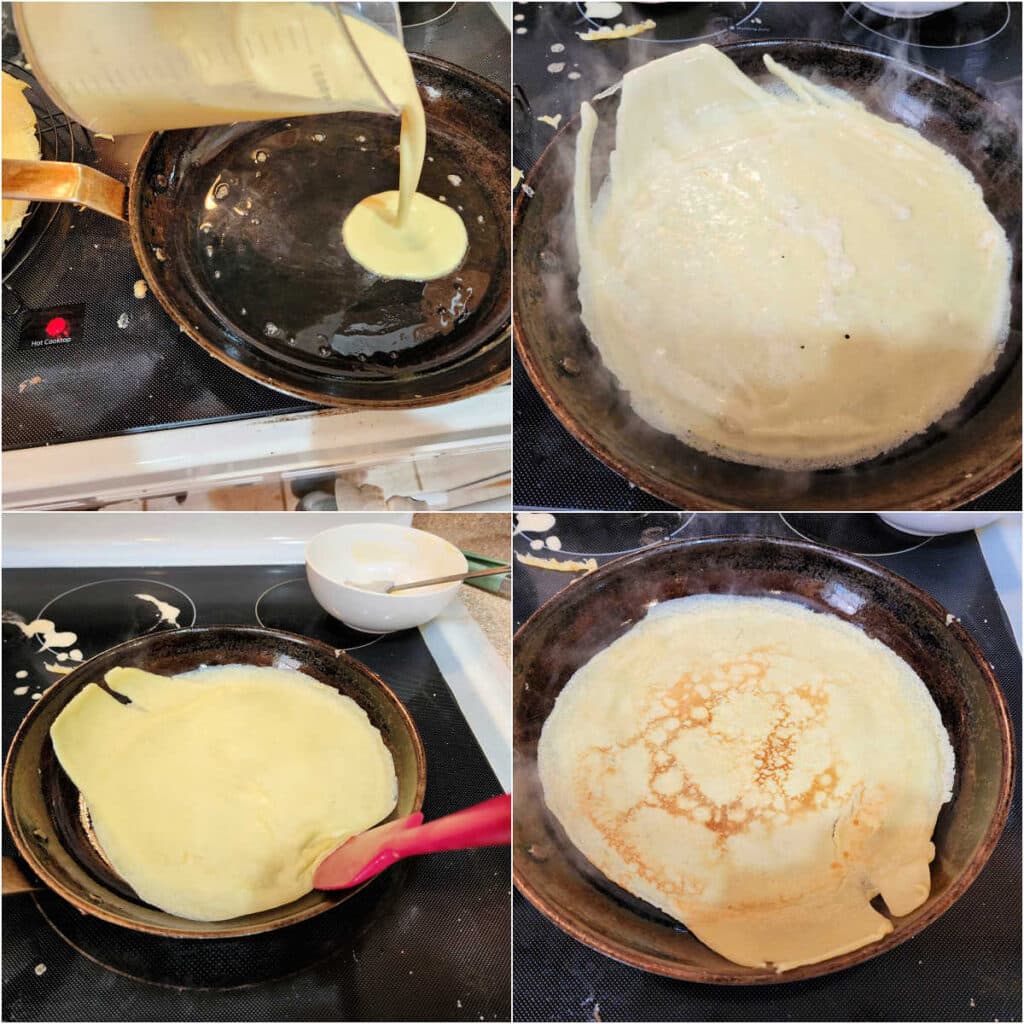
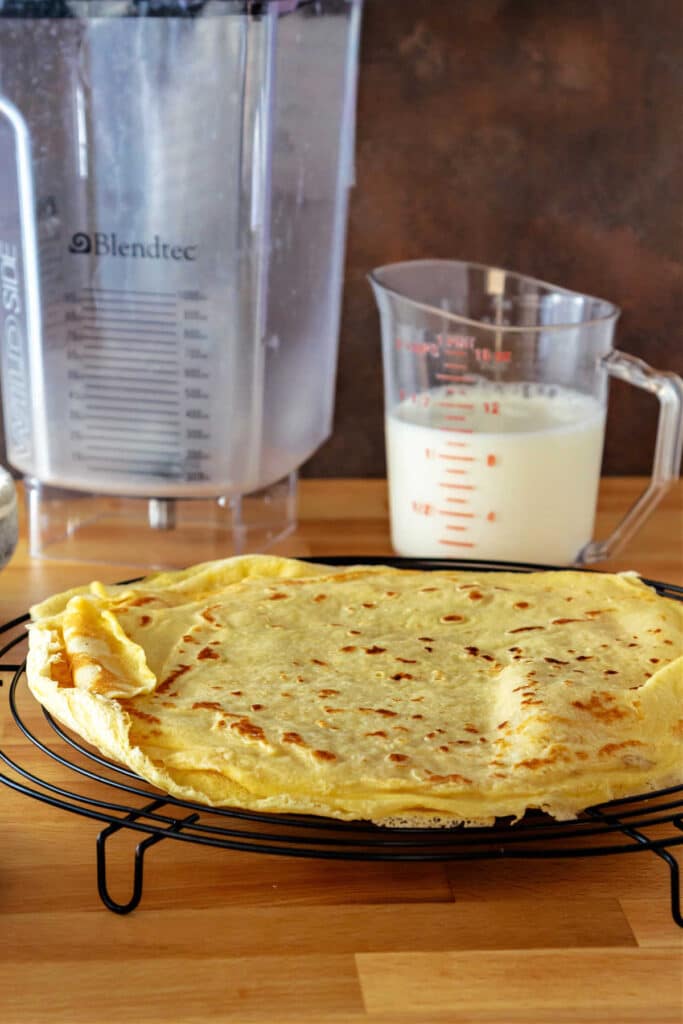
Helpful Tip: See how the batter is sloshed up the side of the pan? That’s from pouring excess batter back into the pitcher after swirling the pan. I picked up that trick from this video, and it’s especially helpful for those of us who don’t make crepes every day and occasionally misjudge how much batter to use.
The best way to flip without making a mess is to make sure the crepe is set and ready to be flipped before even trying.
The crepe should release pretty easily from the pan, especially once the edges begin to curl away from the pan.
Slide a thin spatula under the edge that is already most “lifted,” and then use the spatula to flip the crepe.
It may not be picture-perfect, but you will be able to straighten the flipped crepe out using the spatula and your fingers.
Let’s Make Some Crepes
These next sections will walk you through all the ingredients for crepes and give substitutions where possible.
I’ll run through the procedure again, give you some ideas for variations, tips for success, and serving suggestions.
Again, this post is very long, so if you don’t need all the supporting information, feel free to jump to the recipe.
Ingredients and Substitutions
- flour: Stick with all-purpose unless you want puffy crepes, in which case, start with self-rising flour. Note that, if you use self-rising flour, you most likely won’t need extra salt, and your crepes will be a touch thicker and might have a few little holes in them. They will still be tasty and will be sort of a hybrid between an American pancake and a crepe.
- salt: Brings the flavors into focus. Don’t leave it out unless using self-rising flour
- sugar: Adds a touch of sweetness, but more importantly, it assists in browning. I wouldn’t leave it out, even for savory crepes, although you could reduce the amount to 1-2 teaspoons rather than 1 Tablespoon. You could experiment with using brown sugar instead (say for apple-cinnamon crepes) or a little touch of honey or maple syrup
- eggs: Eggs lend color and structure. Think of crepes as a thin custard that just happens to have flour in it
- oil or melted butter (optional): I did not find the rich crepes to be more delicious than ones I made without butter or oil, so I am calling this an optional ingredient. Butter or oil, you don’t need much. Remember you’re cooking your crepes in butter, and they will absorb a certain amount of that already as they cook
- water and/or milk: Do not use just water–your batter won’t have enough structure and will be too thin. But you can play with a mixture of 50% water/50% whole milk or consider using half and half or a touch of cream. Remember the texture of your batter needs to be like heavy cream, so using too much of a higher-fat dairy will make your batter too thick.
Procedure
I’ve gone into depth with some of the procedures earlier in the post, so this will be a quick overview as a refresher.
Here is my “elevator pitch” for how to make crepes:
- Make the batter in a blender.
- Let the batter rest.
- Have your batter, butter, and crepe landing pad close at hand.
- Heat the pan over medium heat.
- Brush in some butter. It should sizzle immediately.
- Pour in the batter, swirl the pan, and pour any excess batter back into the pitcher.
- Let the crepe fully set on the first side before attempting to flip it.
- Loosen the edges with a thin spatula.
- Flip with your fingers or the spatula.
- Slide the pan out from under the finished crepe rather than trying to pull the crepe out of the pan.
Jenni Says: Crepes are too thin to keep warm in the oven. They’ll dry out. The heat from each crepe you add to your stack of finished crepes will keep the crepes warm for serving.
The answer is a qualified yes. Similar to making crepes with self-rising flour, you will need to use more liquid and egg than called for in your mix. For a standard pancake mix that calls for 1 egg and 3/4 cup milk per cup of mix, double the eggs and milk (or use half milk/half water). Note that crepes with leavening might end up with tiny holes in them, so be sure to let the batter rest overnight before using.
Crepe batter definitely benefits from a rest before using, but don’t keep it around too long. Blend it up and let it sit in the fridge overnight. Use it the next day, and all will be well.
You can cook a bunch on one day, stack them, and refrigerate when completely cool either wrapped in plastic wrap or in a zip-top bag to use over the next 3-4 days.
Absolutely. You can make the crepe batter the day before cooking them, and you can also refrigerate crepes for 4-5 days before using.
Yes, crepes freeze very well. Separate each crepe with a piece of parchment, stack them, and freeze them in stacks of 8-10 in a large zip-top freezer bag. Be sure to press out as much air as possible before freezing. They’ll be fine for up to 8 weeks or so. Thaw overnight in the fridge before using.
That’s its job. The first crepe will let you know if your pan is hot enough, so let it do its job, and then snack on it once it is cooked through, because even an ugly crepe can be a delicious crepe.
Serving Suggestions
Fill your crepe with anything you can think of, either sweet or savory.
You love a particular sandwich? Put those fillings in a crepe for a fancy, savory treat.
For example, I had this Croque Madame crepe at a crepe restaurant.

There’s ham and cheese inside of that guy plus bechamel sauce and a fried egg on top. So good!
I have a Monte Cristo Crepe recipe that is an Excellent use of your crepes. Look:
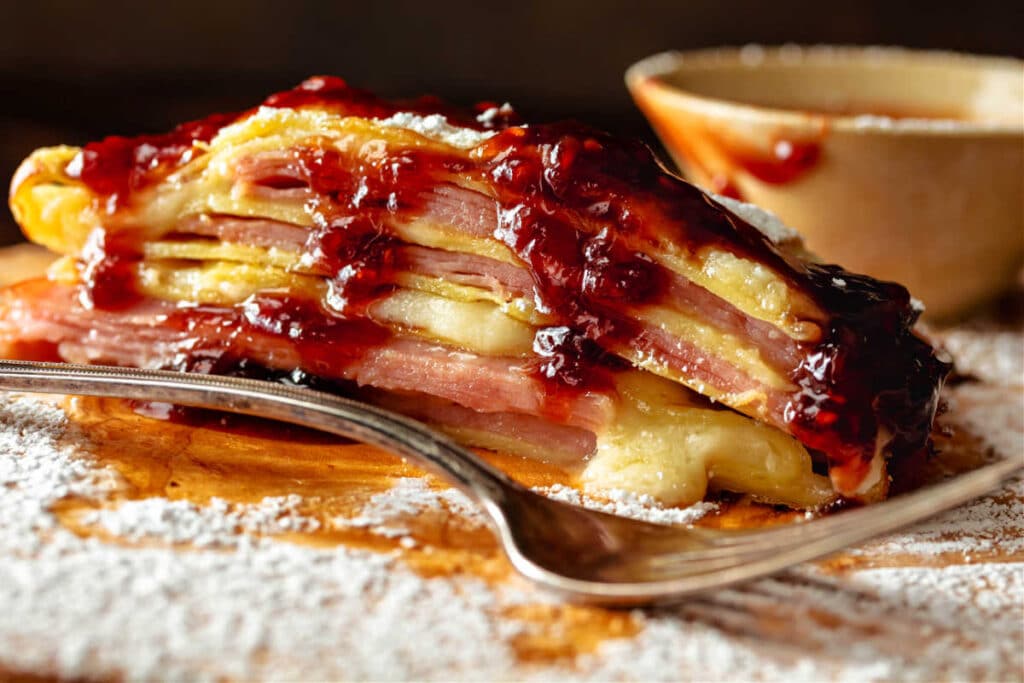
Once you start thinking of crepes as edible, fancy wrappers, a lot of possibilities open up.
For sweet fillings, you can make your fillings as simple or complex as you want.
I love a crepe with a little melted butter, a smear of cherry jam, and a little flaky sea salt.
Or try them filled with a smear or three of lemon curd or even lemon pudding.
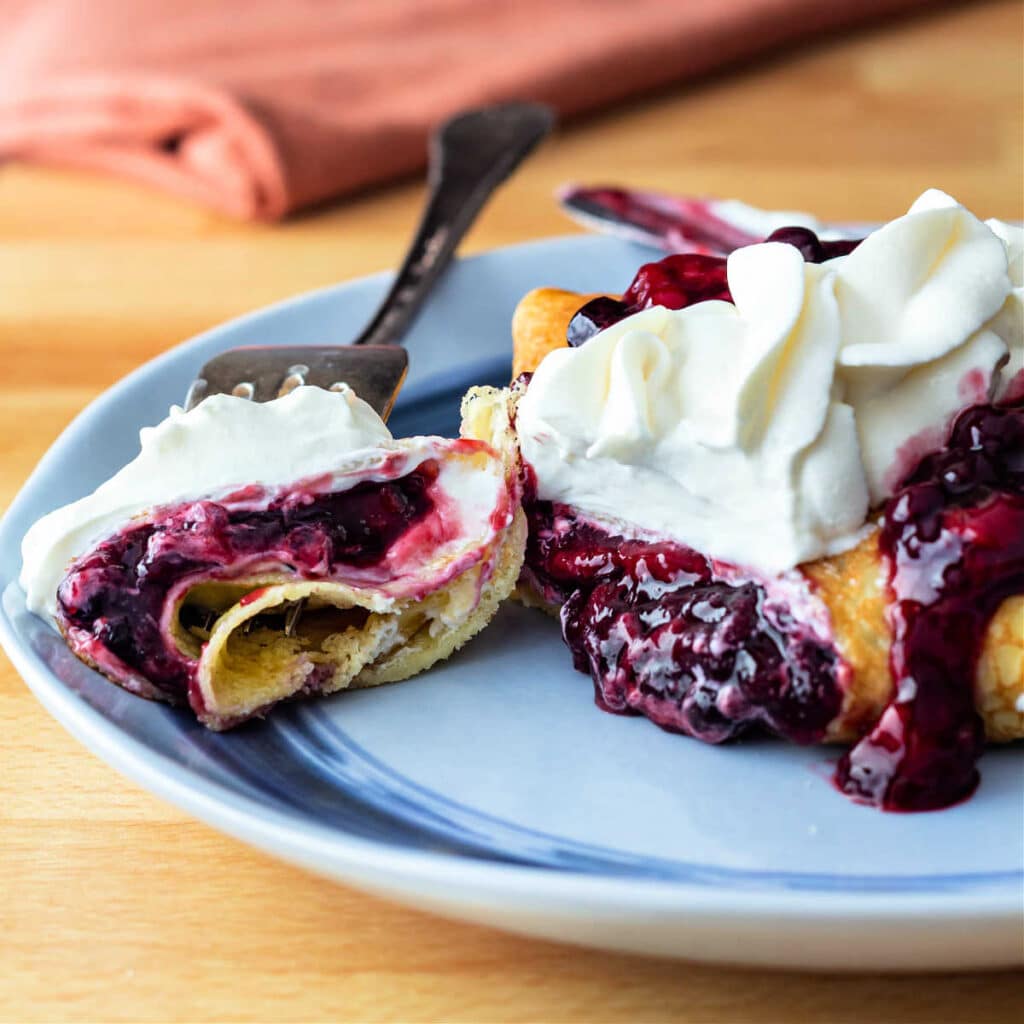
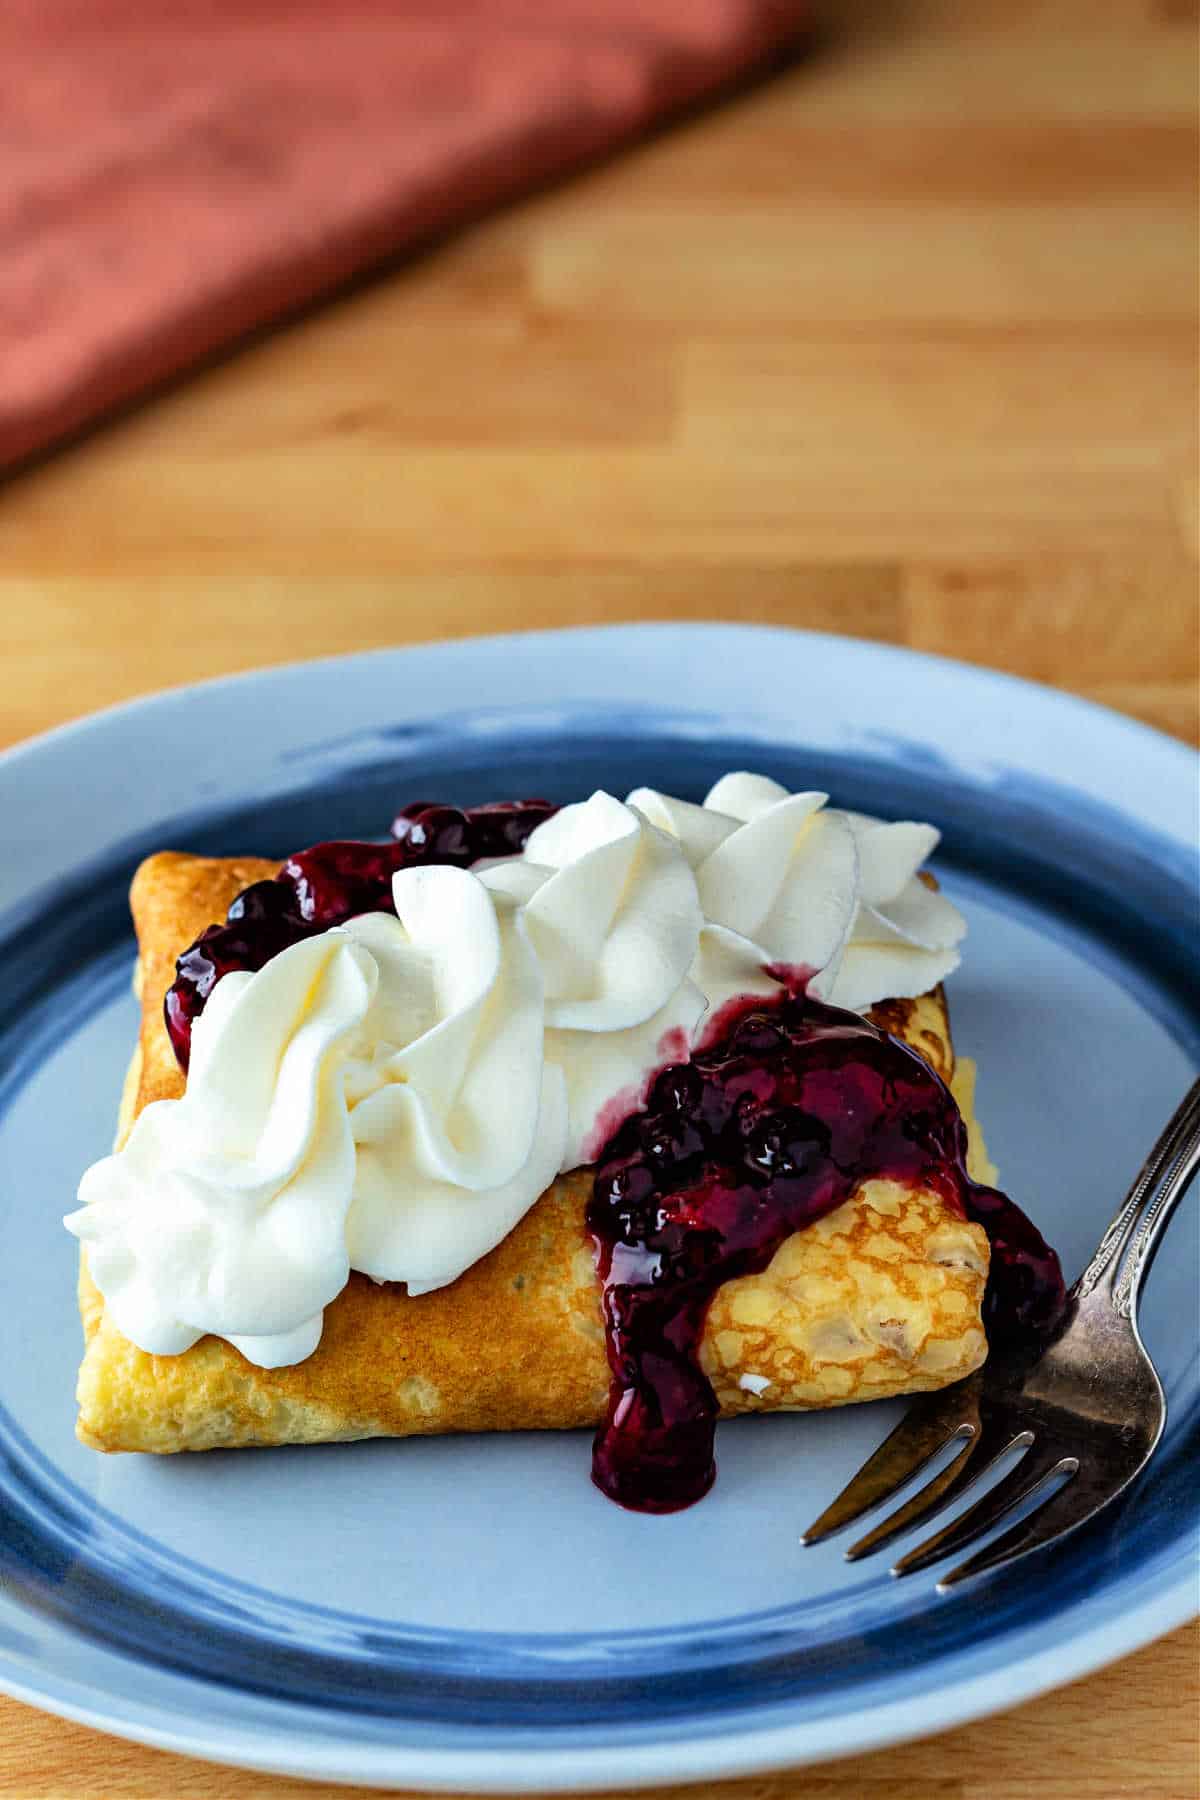
Here’s a quick filling I whipped up a couple of days ago: frozen blueberries and strawberries cooked in water, sugar, a little balsamic vinegar, and cornstarch until jammy and thick plus hand-whipped cream into which I whisked some Greek yogurt for a little tang. Or try a schmear of either my French-style strawberry preserves or blueberry jam.
An easy and lovely combination.
More Crepe Filling Ideas and Brunch Goodness
You might enjoy filling your crepes with lemon curd. I know I would! I have two versions on the site, and both are excellent.
And for any dessert or dessert-adjacent crepes, a drizzle of chocolate syrup or some old-fashioned hot fudge sauce is never a bad idea.
For a savory crepe filling, I don’t think you can do much better than my chicken pot pies. A ladle of that silky, chickeny magic folded up in a crepe? Oh, yes!
For more decadent brunch treats, consider whipping up my deep-fried French toast or my rather decadent chocolate pancakes.
If you prefer to get things ready the day before, when you whip up your crepe batter, go ahead and make my overnight yeast-raised pancake batter and/or my overnight yeast-raised malted waffles. What a bountiful brunch you’ll have!
Questions?
If you have any questions about this post or recipe, I am happy to help.
Simply leave a comment here and I will get back to you soon. I also invite you to ask questions in my Facebook group, Fearless Kitchen Fun.
If your question is more pressing, please feel free to email me. I should be back in touch ASAP, as long as I’m not asleep.

How to Make Crepes (Four Ways)
Ingredients
Basic Crepe Batter (See Notes for Variations)
- 130 grams all-purpose flour 4.5 oz or about a cup
- 2 large eggs
- 1 Tablesppon sugar
- ¼ teaspoon kosher salt I use Mortons
- 340 grams cold milk 12 oz or 1 1/2 cups
- Butter for cooking about 2 teaspoons per crepe
Instructions
- Measure all ingredients into a blender jar and blend on medium speed for about 30 seconds.
- Refrigerate for at least 30 minutes up to overnight.
- When time to make crepes, have your batter, your pan, some melted butter and a silicone brush, and a place to put your cooked crepes all within easy reach.
- Heat pan over medium heat until water sizzles when you flick a little into it.
- Brush in a little bit of softened butter, then pour in about 1/4 cup crepe batter.
- Immediately swirl the pan to distribute the batter evenly all over the bottom of the pan, then pour any excess back into your pitcher of batter.
- Allow the crepe to cook for about 90 seconds, or until the edges start pulling back from the pan.
- Carefully loosen the crepe with a thin spatula, and flip either with your fingers or with the spatula.
- Cook on the other side for 30-60 seconds.
- Carefully remove the cooked crepe to your "landing pad."
- Repeat with the remaining batter.
- You should be able to make 7-8 8-9" crepes. Batter doubles easily.
- See Notes for Variations
Did You Make Any Changes?
Notes
Variations
Rich Crepes: Add 1.5 oz melted and cooled butter or oil to the batter Lean Crepes: Substitute half the whole milk for water Puffy Crepes: Substitute self-rising flour for the all-purpose flour with whichever version you decide to make Chocolate crepes: Use the rich crepes variation above using butter not oil, substitute 30 grams cocoa powder for the same amount of flour, and add 1/2 teaspoon of vanillaWhy Let Your Batter Rest
There are a few reasons to let your batter rest:- To allow the flour to fully hydrate
- To allow the batter to have more body (goes along with 1.)
- To give the gluten a chance to relax a bit so your crepes are sturdy enough to flex, bend, and roll but not so sturdy that they bounce if you throw one on the floor
- To allow the bubbles to rise to the surface of the batter and pop, thus preventing crepes with tiny holes in them
Nutrition
Would you like to save this post?
Did I Help You Get Over Your Fear of Crepes? Please Rate and Review
It helps me and other readers so much if you take a moment to rate and review this recipe.
Your star rating and comments help others decide whether the recipe is worth making, and your feedback helps me continue improving recipes here at Pastry Chef Online.
Other lovely ways to share include pinning or posting on your favorite social media platform.
Thank you so much for taking the time!

Thanks for spending some time with me today.
I hope you enjoy the crepes. Please let me know what you decide to fill them with!
Take care.

Hi, y’all! I hope you’ve enjoyed this post and hopefully also learned a thing or two.
If you like my style, I invite you to sign up for my occasional newsletter, The Inbox Pastry Chef.
Expect updates on new and tasty recipes as well as a bit of behind-the-scenes action. I hope to see you there!


Join in Today!
Finally got around to making these! After finally getting my temperature right, these crepes were absolutely perfect! The thinnest crepes I’ve ever made! We had ours with strawberries, lemon marscapone and whipped cream as well as ham, potatoes, and gruyere with a bechamel sauce.
So glad I had the foresight to double the crepe recipe. Now I’ve got dinner for tonight, too!
I don’t know how I haven’t responded to this comment for so long–I’m sorry, Jessica! I’m thrilled you love the crepes, and I really love the fillings you’ve used, both sweet and savory!