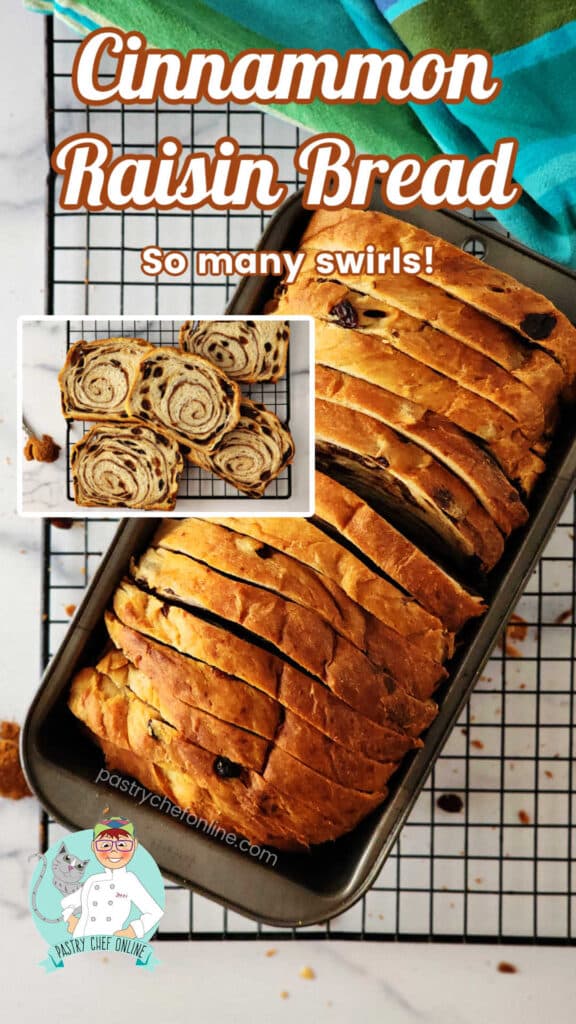
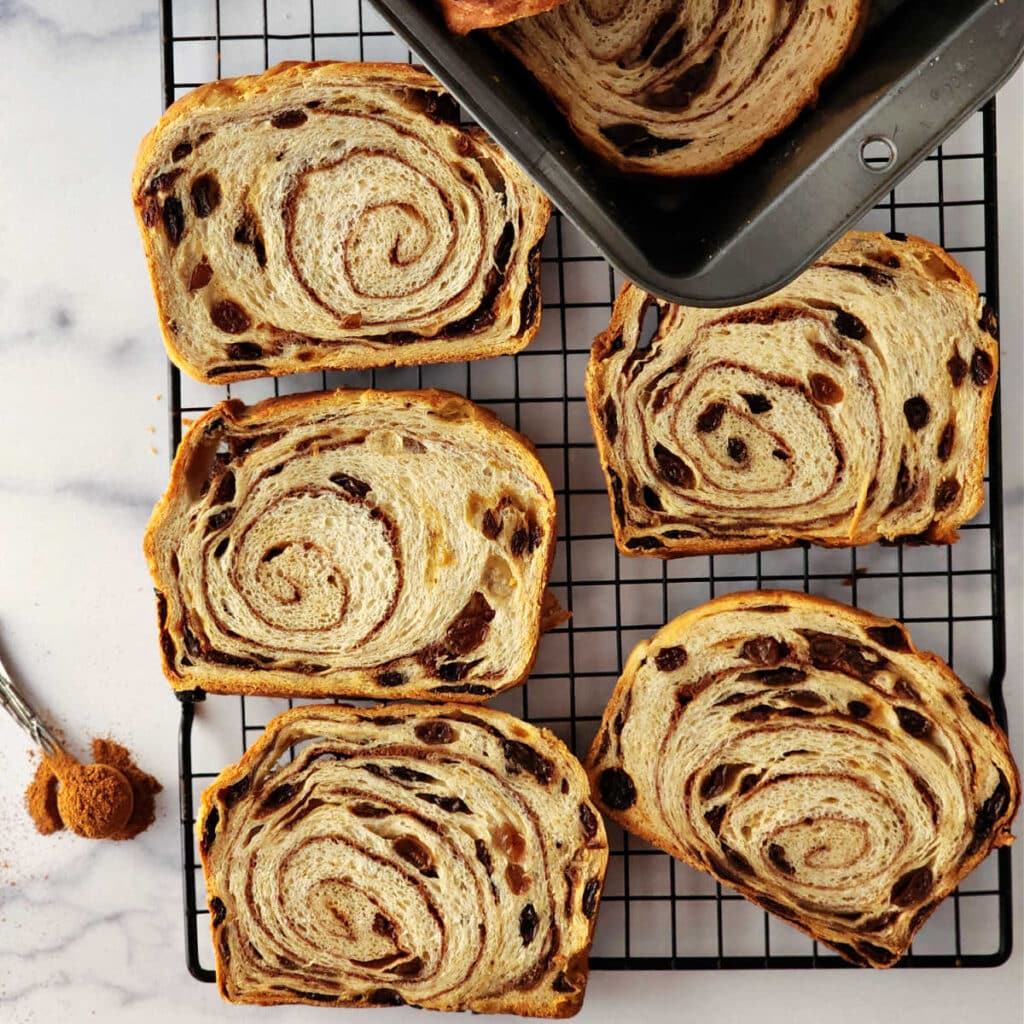
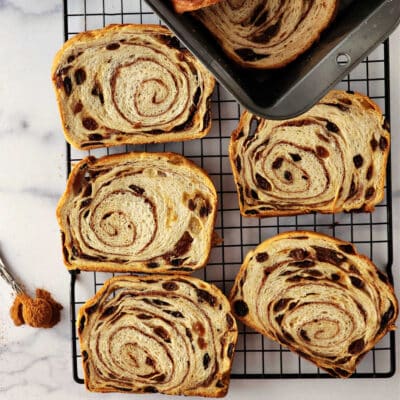
I’m so pleased to share this many-times-tested cinnamon raisin bread recipe—soft, swirled, and packed with juicy raisins. Whether you toast it for breakfast or use it for sandwiches, this bread holds together beautifully.
Unlike some cinnamon swirl breads, this one won’t fall apart when you slice it. The swirl stays put, so every piece is perfectly layered—no gapping, no unraveling, just pure cinnamon-sugar goodness.
Would you like to save this post?
For ease of browsing, you can find all my bread and roll recipes in one place. Now let’s get to it.
Pastry Chef Online Participates in Affiliate Programs. If you make a purchase through one of my links, I may earn a small commission. For more information click to read my disclosure policy
…a loaf full of raisins and cinnamon goodness. I have a feeling it won’t last for long. The smell as it was baking was amazing, the 45 minute wait seemed to last forever.
Reader Jane
Cinnamon Raisin Bread: At a Glance
✔️Skill Level: Intermediate (but do-able!)
✔️Skills: Mixing Bread Dough, Kneading, Proofing, and Tips for Swirl Success
✔️Texture: Soft, Fluffy, Slice-able, and No Gaps
✔️Number of Ingredients: 9 simple pantry staples
✔️Total Time: 4 hours (about 30 minutes of hands-on time)
✔️Yield: 1 loaf of about 16 perfectly swirled slices
Jump Straight to the Recipe
What Makes This the Best Cinnamon Raisin Bread?
If you are not interested in the why, you can skip straight to the recipe.
This dough is relatively lean—it has no eggs and just 5 tablespoons of butter—yet it still browns beautifully thanks to a touch of sugar and the natural milk sugars from whole milk.
Not only does milk assist in browning, it also provides for a more tender crumb and adds sweetness. Could you make this bread with water? Yes. But the bread won’t be as sweet, and it won’t brown as well.
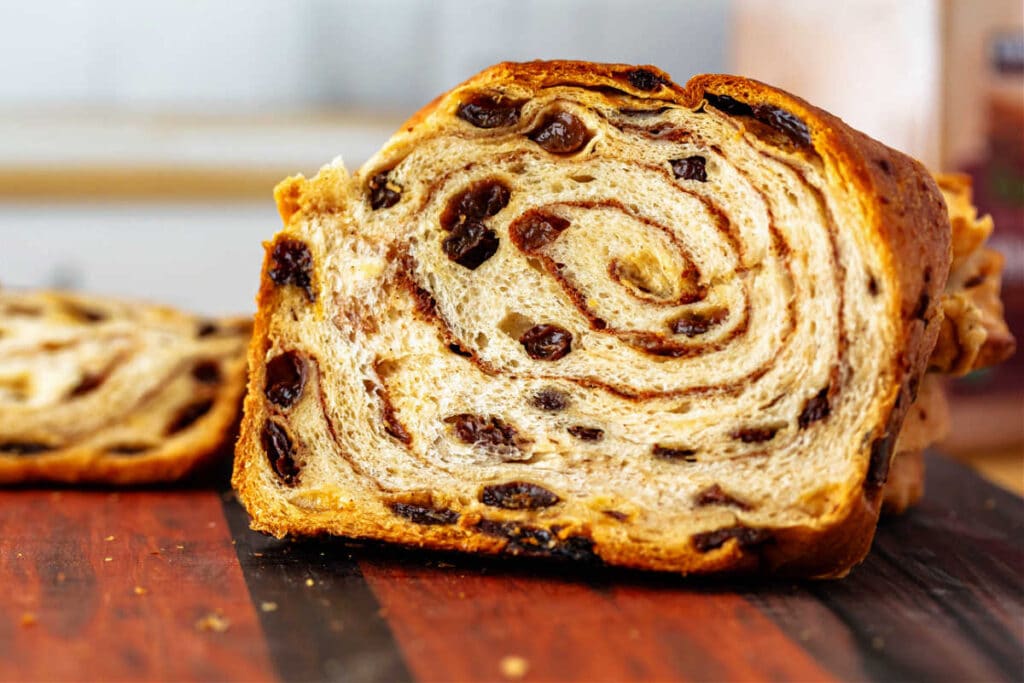
Now, let’s talk about what really makes this recipe stand out: the swirl stays put. Even when sliced thin, each piece holds together beautifully without separating.
If you’ve ever tried to make a sandwich or toast with cinnamon raisin bread, only for the swirls to fall apart, you know how frustrating that can be.
So why does that happen in other recipes? And why doesn’t it happen here? Read on!
Why Do Other Swirl Breads Separate? (And Why This One Won’t)
Don’t use fat in your swirl. Period.
Butter is mostly fat, and fat is a lubricant—which means things don’t stick to it.
And guess what else won’t stick? Your bread dough.
If you have struggled with your swirled bread gapping or delaminating, butter in the swirl is the likely culprit.
Unlike cinnamon rolls, which have concentric swirls that are made to be pulled apart in layers to eat (just me?), a swirled bread has swirls that run parallel to the pan. That means when you slice it, you’re cutting through the swirl, and if it isn’t tightly bound, it will gap and pull apart.
If the swirls aren’t tightly bound to begin with, gapping can and will occur, and it’s no fun at all.
The bread will still taste good, but it will be frustrating if you want to toast it or use it as you would a “regular” piece of bread.
Does Cinnamon Kill Yeast?
Cinnamon does have some antifungal properties, so yes, using cinnamon in bread dough can defintely slow down the rise.
The upside is that long rises yield more flavor, so in that way, cinnamon works in our favors to ensure a longer rise.
Also, cinnamon can act to increase the keeping qualities of bread, so while cinnamon can “mess” with the rise some, it also allows the bread to stay soft for a few days at room temperature.
And remember, yeast multiply, and the cinnamon doesn’t, so don’t worry that your bread won’t rise. It just may take longer.
To read more about using cinnamon in bread dough, check out this forum discussion over on The Fresh Loaf.
How to Make Cinnamon Raisin Bread
Next up, I’ll go through the ingredients, possible substitutions, and a step-by-step run-through of how to make cinnamon raisin bread. If you don’t need the refresher, feel free to skip down to the recipe.
Ingredients and Substitutions
Here are the ingredients you’ll need to make this delightful breakfast bread.
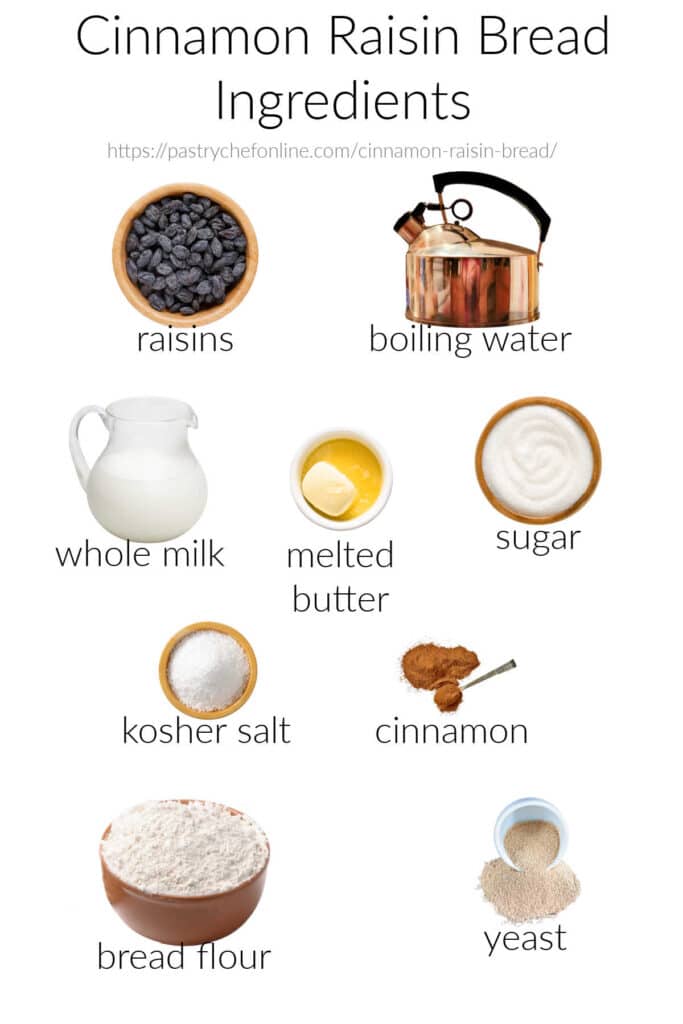
- raisins: You can omit them if you don’t like raisins. No other changes needed. If you like dates, I highly recommend using chopped dates in place of the raisins. Use any dried fruit of your choice such as cherries or dried cranberries
- boiling water: To hydrate the fruit. Don’t skip this step or the dried fruit will pull moisture from your dough resulting in a bread that dries out too quickly. Substitute fruit juice for water if you prefer
- whole milk: The main liquid in the dough. The milk lends milk sugar for a gentle sweetness as well as for brownability. You may substitute half milk/half water if you prefer
- melted butter: Adds tenderness, assists with browning, and carries flavors
- sugar: Much like the butter above, a bit of sugar adds sweetness and tenderness as well as assisting with browning. Substitute maple syrup and reduce the milk by 15-30 grams (1-2 Tablespoons)
- kosher salt: Regulates yeast growth and makes sure the flavors shine through
- cinnamon: Used in both the dough and the swirl. See section on “Does Cinnamon Kill Yeast?” to read more
- bread flour: Use a higher protein flour such as King Arthur breaf flour for nice chewy texture and the best possible rise. Bread flour yields the highest amount of gluten possible to catch all the carbon dioxide bubbles released by the yeast
- yeast: I use instant yeast. For best rise, consider using (affiliate link) SAF Gold Instant Yeast, which is formulated to work best with enriched and sweeter yeast doughs
Procedure
This bread is a bit of a process to make, but most of it is hands-off, and nothing is difficult, I promise.
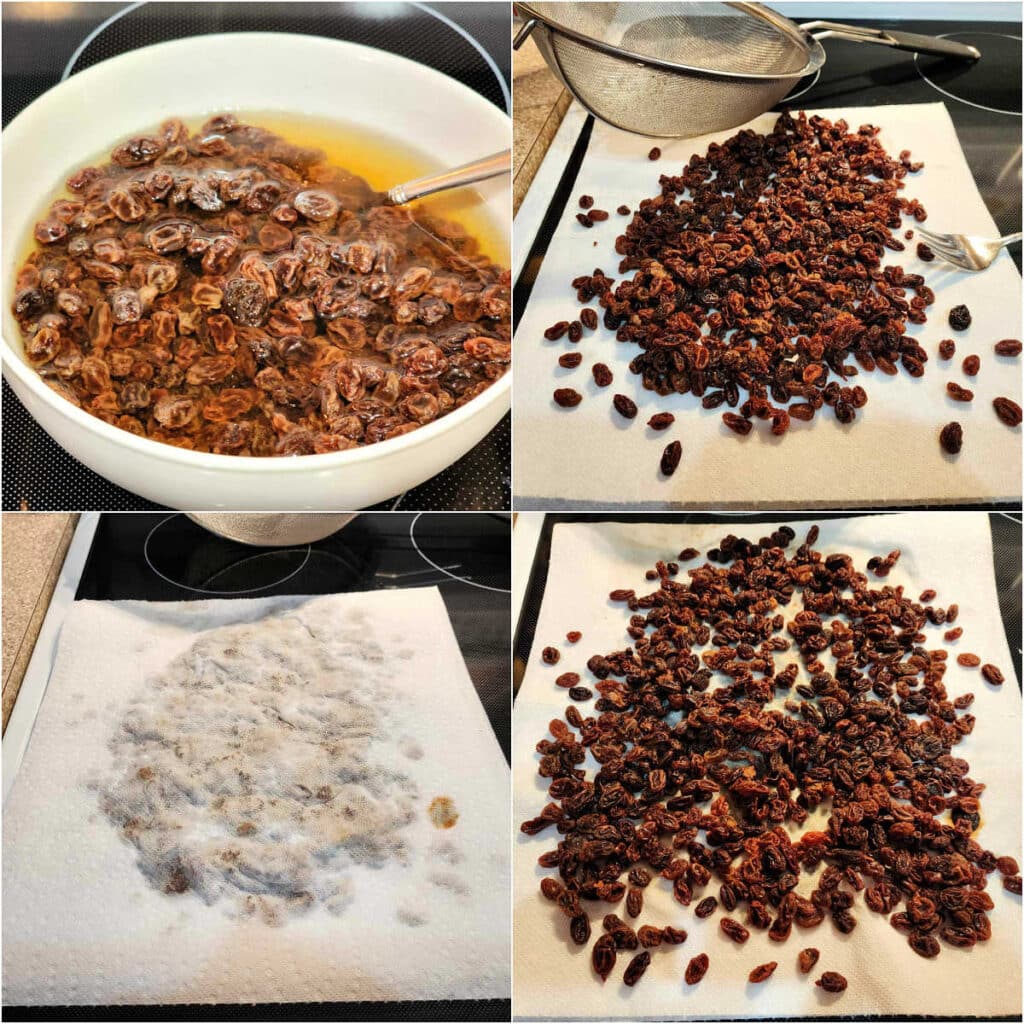
First, you’ll soak the raisins in boiling water for 10-15 minutes until they plump up and lighten in color a little.
Drain them, spread them out on a couple of thicknesses of paper towel, and blot them dry. You want them plump on the inside, not wet on the outside.
Scald the milk by bringing it up just to a high simmer, and then allow it to cool to about 120F. It should feel like cozy bath water. If it’s cozy for you, it’ll be cozy for the yeast.
PRO TIP: Kill two birds with one stone by cutting the butter in pieces and adding it to the hot milk. This will melt the butter AND cool the milk.
There’s always more than one way to do things, too. Feel free to melt the butter first the way I show in the video. All will be well!
Next up, add the sugar, salt, warm milk, butter, and cinnamon to the bowl of your
Dump all the flour on top and then add the yeast on top of the flour.
With the dough hook, mix on low until the dough comes together and then knead on medium-low for about 10 minutes, until the dough is soft, smooth, and stretchy. Even if it starts out sticking in the bottom of the bowl, it will completely clear the bowl by the end of kneading time. Please resist the urge to add more flour.
Once the dough is nice and stretchy, knead in the raisins.
This step can be a bit time consuming, so I use the mixer, still fitted with the dough hook, for about 2 minutes and then finish up on the counter, by hand.
PRO TIP: As much as possible, you want the raisins to be inside the dough and not just stuck on the outside, so it can help to press the dough out and then fold it up over any naked raisins. Do this a few times, and you’re ready for the next step.
Now it’s time for the first rise, which is also called the “bulk fermentation.” (Why? Because in a bakery, this is a large mass of dough. After the “bulk” has risen in a big old tub, then it’s divided and shaped into multiple loaves/rolls/etc)
Shape your raisin-filled dough into a smooth ball, making sure to tighten up the outside membrane using your hands with the dough on the countertop.
Do not flour or grease your counter. You want the friction a dry surface provides.
Mist or brush lightly with oil, and then put the dough in a cozy place to rise until doubled, about 2 1/2 hours or so.
PRO TIP: If you started late in the day, you can refrigerate the dough at this point, and let it have a long, slow rise in the fridge overnight. The next day, bring it out, let it rest for an hour, and then continue with shaping.
Shaping the Loaf
Plop the dough out onto a clean counter and press out the gases. Then roll it out into a long, thin rectangle, approximately 8″ x 24-26″. The longer it is, the more swirls you’ll have.
Brush the surface of the dough liberally with whole milk. You could also use water here. You just need a liquid the swirl can “bond” with into a thin sort of dough.
Sprinkle the swirl evenly on the dough and then spread it end to end and edge to edge.
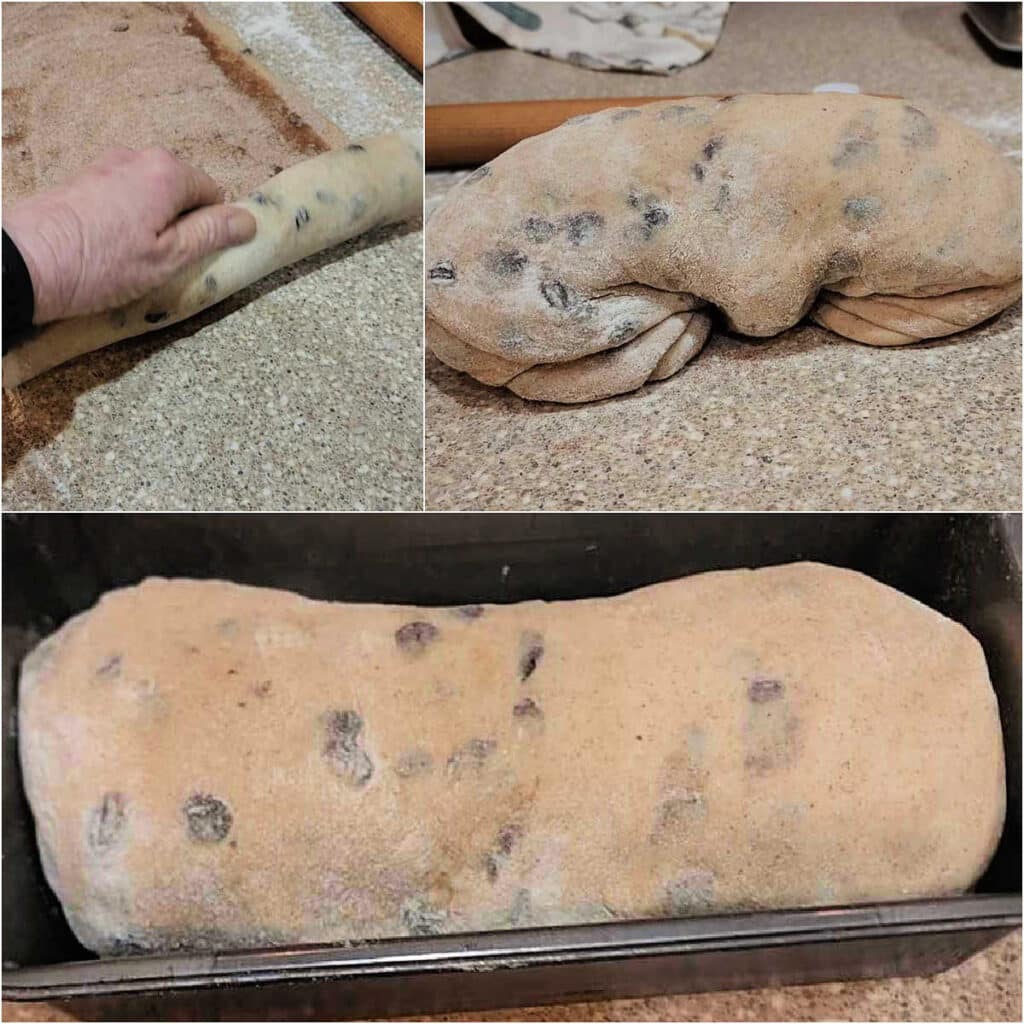
Roll up the dough from a short side, keeping light tension on it as you roll. In other words, keep pulling back a little every roll or two to keep the spiral nice and tight.
When you get to the end pinch the seams closed as well as you can.
PRO TIP: For maximum adherence and near-zero delamination on the outside of the bread after baking, when you get towards the end of rolling, brush the OUTSIDE of the roll with more milk to ensure the end bonds well.
Your roll will now most likely be much longer than your pan. That’s fine. Part of the fun of these breads is seeing what kind of swirl you get once you cut into it.
Just bend the log into a slinky shape, and then tuck the ends under. Then place the dough into a 9″x5″ loaf pan.
Press down firmly on the dough to even it out, spray it lightly with pan spray, cover, and let rise in a cozy place until the bread rises over the edge of the pan by about an inch.
All that’s left now is the baking.
…I am beyond happy with the results! The texture is absolutely wonderful and the flavor is spot on, not overwhelming with spices. It has the right amount of raisins, rose beautifully and the milk for the swirl was genius….
Reader Carol
Variations
I cannot recommend highly enough using my oatmeal bread recipe with the addition of a teaspoon (or even 2) of cinnamon, the swirl from this recipe, and chopped dates. (I get the kind in a bag near the raisins in our “regular” grocery store, and I don’t soak them).
This variaion is magic, and your house will smell like breakfast while it’s baking.
Also feel free to substitute chocolate chips (no soaking!) for all or part of the (soaked) raisins.
Consider adding orange zest or lemon zest to the dough and adding some espresso powder or instant coffee to the swirl mixture.
Equipment You May Need
A 9″ x 5″ bread pan is the perfect size to make this loaf. This set of two should last you for a very long time.
These pans are lightweight and easy to pick up with oven mitts on, thanks to the lip on either short end. They transfer heat efficiently so your loaves will be nicely golden brown all around. I have never had one warp, either. They should last you for years and years. I recommend handwashing these.
Cinnamon Raisin Bread Q & A
Yes. Since the swirl does not include any fat and uses flour and milk to help make a simple “cinnamon dough,” your swirls should bond with the main dough and stay perfectly laminated, even when sliced thinly.
This bread will stay fresh and moist for up to 5 days at room temperature. Even sliced. Make sure to wrap it well.
For longer storage, slice the bread and then freeze in a zip top freezer bag, pressing out as much air as possible before sealing. Remove pieces as needed and put them straight into the toaster or toaster oven. Or thaw in the microwave for about 8-10 seconds.
Yes. Substitute your favorite plant-based milk for the whole milk and melted plant butter for conventional butter.
Other Loaf Bread Recipes
If you love having homemade bread on hand for sandwiches, French toast, or for toasting, you may enjoy some of my other bread recipes.
- My Tangzhong pain au lait (milk bread) was my first foray into Tangzhong. The bread bakes up light and wonderful with a milky sweetness and a tender crumb.
- Another loaf that has excellent keeping qualities and makes a great sandwich bread is my potato sandwich bread.
- If you love grits, try adding cooked grits to your yeast bread. Grits bread is savory, a bit toothsome, and toasts super well.
Questions?
If you have any questions about this post or recipe, I am happy to help.
Simply leave a comment here and I will get back to you soon. I also invite you to ask question in my Facebook group, Fearless Kitchen Fun.
If your question is more pressing, please feel free to email me. I should be back in touch ASAP, as long as I’m not asleep.
A Note About Measurements
My recipes are almost all written by weight, including liquids, unless otherwise specified.
For accuracy and consistency of results, I encourage you to buy–and use–a kitchen scale.
I promise that baking and cleanup will be so much quicker and easier.
This is the scale that I recommend for home use. I have owned and used one for years.

Don't let its small price and small size fool you. The Escali Primo is an accurate and easy-to-use food scale that I have used for years. It's easy to store, easy to use, has a tare function, and easily switches between grams and ounces/pounds for accurate measurements.
Love This? Please Share It and Review It!
It will help me and other readers so much if you take a moment to rate and leave a review for this recipe.
You can use the stars to rate 1-5 (5 is best), and leave a review in the comments. It helps me make adjustments if any are needed, and comments help others decide whether the recipe is worth making.
Other ways to share include pinning, and/or sharing on your favorite social media platform.
Thank you so much for taking the time!

This is delicious! Followed the recipe exactly and the dough is lovely to work with. Made a loaf Saturday, toasted some Sunday for breakfast, now on Monday have another loaf rising. May be obsessed a little.
Reader and Raisin Bread Lover Carlin
The Best Cinnamon Raisin Bread
Video
Would you like to save this post?
Equipment
Ingredients
For the Raisins
- 7 oz raisins 198 grams or about 1 1/2 cups
- water to cover by 1/2"
For the Dough
- 10.5 oz whole milk 298 grams or 1 1/4 cups plus 1 Tablespoon
- 2.5 oz melted butter 70 grams or 5 Tablespoons
- 2 teaspoons salt 9 grams
- 1 ½ oz sugar 43 grams or 3 Tablespoons
- 1 teaspoon cinnamon
- 16 oz bread flour 454 grams or about 3 1/2 cups
- 1 ½ teaspoons yeast 7 grams
For the Swirl
- 2 Tablespoons bread flour
- 2 Tablespoons sugar
- 4 teaspoons cinnamon
- pinch salt
To Shape and Bake
- 3 Tablespoons whole milk
- 2 Tablespoons butter melted
Instructions
For the Raisins
- Add the raisins to a heat-proof bowl, and pour boiling water over them to cover by about 1/2".
- Allow the raisins to hang out in the hot water for 10-15 minutes. You'll know they're ready when the color lightens slightly and the water level has dropped.
- Drain them, then spread them onto a couple of layers of paper toweling or a lint-free tea towel. Blot dry. Set aside.
For the Dough
- In a microwave-safe bowl or in a pan on the stove-top, heat the milk until it is steaming but not boiling.
- Pour the milk into the bowl of your stand mixer, and add the butter. Whisk together to melt the butter and cool the milk.
- Add sugar, salt, and cinnamon and whisk well.
- Dump in all the flour on top of the liquid, and add the yeast on top. This keeps the yeast from coming into contact too early with concentrated salt (and the cinnamon, for that matter).
- Attach your dough hook and mix on low speed until all the flour is incorporated, about 1 minute.
- Increase mixer speed to medium-low and knead for 10 minutes until the dough is smooth, springy, and very stretchy.
- Dump in the raisins and mix on low speed for 2 minutes. Not all the raisins will be incorporated yet, but that's okay.
- Dump the dough and any loose raisins onto your clean counter and knead the rest of the raisins in, folding the dough over and then pressing it out to distribute the raisins as evenly as you can.
- Form the dough into a smooth ball, rounding it on the counter and using friction to pull the outer membrane fairly taut.
- Place the dough back into the mixer bowl, spray with pan spray or brush lightly with oil, cover, and let rise in a cozy place until doubled in size, about 2 1/2 hours.
To Shape and Bake
- Whisk together the swirl ingredients in a small bowl.
- Press the gases out of your dough, and then roll into a long, skinny rectangle, approximately 8" x 24-26" long.
- Brush the surface liberally with milk, and then sprinkle on the swirl mixture evenly. Use your clean hands to spread it evenly, top to bottom and end to end. Press the swirl mixture into the milk to encourage it to stick.
- Starting at one short end, roll up tightly, pulling back every couple of turns to keep the dough under tension. When you reach the end of the roll–maybe the last 2"–brush some additional milk on the outside of the roll to give those last 2" something to stick to. Pinch the seam together as well as you can, and roll the dough log seam side down.
- The dough roll will most likely now be much longer than the pan you're putting it in (9" x 5" loaf pan), so bend the dough like a slinky, with the two ends pointing down and then fit the dough into the pan. Press down firmly to even the dough out.
- Spray lightly with pan spray, cover, and let rise again until the dough rises over the edge of the pan by about 1", about 1-1 1/2 hours.
- Preheat your oven to 350F/180C. When your loaf is nicely risen, bake on the middle rack for about 45 minutes, or until the internal temperature of the bread reads 195-200F. Tent with foil if the bread is browning too quickly. This is likely, as cinnamon raisin bread takes longer to bake because of the moist raisins and swirl, so just go with it.
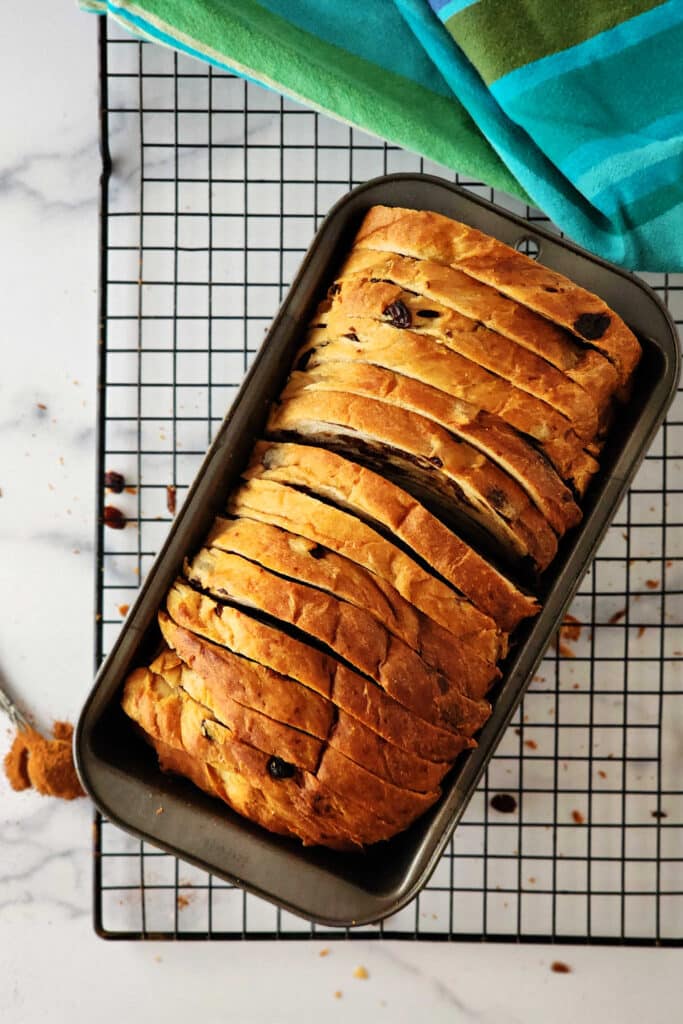
- Once your bread is done, remove the loaf to a rack and immediately brush the top liberally with the melted butter. Turn the loaf out of the pan and allow it to cool for at least an hour before slicing it. Ideally, you will wait until it's completely cool, but I won't blame you if you want to cut it early. I do. Every time.
- Enjoy straight-up, as toast, as a base for French toast or bread pudding, etc. Store cooled leftovers, well covered, at room temperature for up to 5 days. Slice and freeze for longer storage.
Did You Make Any Changes?
Notes
- apricots
- currants
- dried cherries
- dried cranberries
- dates
- figs
Nutrition
Thanks so much for spending some time with me today.
I hope you enjoy all the delicious cinnamony swirls in this bread, friends!
Take care, and have a lovely day.
I’ve made this bread 3 times now, and it is a beautiful, consistent recipe. Due to the lack of eggs this prices out to significantly less than a store-bought loaf, especially because it makes a larger quantity of bread. More than that, it tastes infinitely better. A slice of this toasted with peanut butter is my favorite breakfast.
Reader Shannon

Hi, y’all! I hope you’ve enjoyed this post and hopefully also learned a thing or two.
If you like my style, I invite you to sign up for my occasional newsletter, The Inbox Pastry Chef.
Expect updates on new and tasty recipes as well as a bit of behind-the-scenes action. I hope to see you there!


Join in Today!
I can’t wait to try this…I am curious, could I use an egg wash to hold the swirl when I spread it out? I wonder if that would not separate?
Yes you can. Egg is a great glue. If you want, you can mix it all up as a paste woth the cinnamon and sugar. I didn’t go the egg route this time, because I wanter to keep the recipe egg-free. It will work great, though!
Greatest cinnamon bread ever. This is the first review I’ve ever written and it’s because I didn’t need to change anything at all. It made a crunchy crust, the swirl was reminiscent of Cinnabon, and it was chock full of raisins and flavor.
I am so so happy you love it, Jamie!! Yay! And I really appreciate your letting me know–it means a lot!
Holy cow! This is the best cinnamon raisin bread I have ever made! What a great recipe and you don’t need to add any other ingredients. Just perfect!
Oh, yay, Bill! I’m so glad you like it! I worked hard to make it perfect, but not everyone has the same “perfect” for everything. So happy this recipe checked all your cinnamon raisin bread boxes!
I have never made a cinnamon raisin bread before, I followed all the directions, it rose beautifully, and looked so good when I cut it.
I had several slices then made french toast with some, the rest I sliced and froze, I will positively make again.
Wish I could send a picture of how beautiful it looked.
Alice, I’m so happy you love the bread and strongly approve of using some for making French toast! I’d love to see it. If you’d like, you can email a photo to [email protected] Take care, and enjoy the bread!
Love it!! Used sourdough starter for the yeast and doubled your sugar and salt when I should have tripled ♀️ and it’s still great!! But yes, needs more sugar…
Also, is half whole wheat. But I always soak my whole wheat in hottish water while I wait for the starter to double. My loaves are not your typical sourdough, they are just sourdough-starter-raised.
AND!!! LOVE THAT THERE’S NO SEPARATION!!! THANK YOU!!! I have a pic but I don’t know how to post it here.
I’d love to see your bread! You can email me a pic to [email protected] 🙂 I can’t imagine tripling the sugar, so I’m really glad you know how much you need to make your perfect loaf, Laurel! And it really is magical when you can cut a thin slice and it stays together. Enjoy every bite!
I forgot to say I had to triple everything because I was making three loaves. 😀 The other two I did not make into cinnamon-raisin bread. 🙂
Gotcha! Lots of bread for you!
This turned out amazing and I’ve never made bread before. I will say I am so thankful that you said your bread might take longer and I’m glad I didn’t take it out at 45 minutes and checked temp, it took a little over a hour. I don’t leave comments on recipes usually but this was too good to not too. I made a cream cheese dip and cinnamon sugar butter to go along with it!
Pamela!! Wow, I’m so impressed that your first bread was a cinnamon swirl and that it turned out so great! Thank you so much for leaving a rating and review, too. It helps Google–and other people–know it’s a good recipe! Also, yay for having an instant read–it can save a lot of heartache when guessing doneness. I love the cream cheese dip/cinnamon sugar butters to go with. Sounds fabulous!
Can you double this recipe to make 2 loafs at once?
Hey, Kourtney. Yes, you can double it with no problem as long as your mixer can handle the volume (or you have the arm power to knead a double batch). Hope you enjoy it!
I baked this today, adding some diced apple along with the raisins. The bread turned out perfectly. I especially like that the slices don’t separate along the swirl.
Oh, wow, I bet the apple is a great addition! And that has always been my issue with swirl breads–their propensity to “uncoil” when sliced. It’s fine for cinnamon rolls, but not so much for sliced bread. So glad you enjoyed it, Beth! xo
Can i use bread machine to make dough? thank you
Hey, Linda. I have never used a bread machine, but I imagine you’d be able to make the dough and do the first rise in a bread machine and then adding the swirl and shaping the loaf by hand. But I can’t swear to it since I’ve never done it. If it works out, please let me know and I can let folks know they can at least start the bread in a machine. I hope it works, because the bread is delicious!
Made this today….came out great and the house smelled wonderful on a chilly day
I’m so happy you’re enjoying it, Jeannie! Thanks for letting me know. Enjoy every bite!
I’ve been looking for the perfect raisin bread recipe with plenty of raisins. From your recipe and the amount of raisins along with the rave reviews, I know I’ve found the recipe I’m looking forward. Going to make it tomorrow!!!
I really hope you love it! Please let me know what you think. And definitely make a grilled cheese using it. Best grilled cheese ever! 🙂
Can this be made ahead and baked in the morning?
Hey, Karen! Yes, you can shape afyer the first rise, cover and refrigerate. Let it sit out the next day until it gets puffy and then bake. Or bake well ahead and the wrap it well and freeze for when you need it. Enjoy!
This bread is incredibly good. It does not fall apart. It is moist and sweet and I can’t wait to make it again. But I think there is a typo in the instructions. The milk instructions say 10.5 ounces (or 1 1/2 cups plus a TBS). But 10.5 ounces is 1 1/3 cups. I panicked when I was making this because I did not know which number to trust. I stuck with 10.5 ounces and ignored the 1 1/2 cups plus TBS. It came out perfect. Thanks for this recipe!
So glad you love the bread, Linda! And good catch on that amount–I will fix it! It should say 1 1/4 cups plus 1 Tablespoon.
Honestly, this was a rather different recipe compared to other cinnamon rasin breads I’ve made but I stuck with it since I had started it. Followed the recipie and instructions to a T, first rise the dough seemed very dry but I continued, second rise was over the time suggested in a warm environment and barely rose. Bread didnt cook all the way through so the center was raw after the 45 minutes and full rest time and the outer that was cooked was barely sweet and quite flavorless. Will definitely try a different recipie next time.
I’m very sorry this recipe didn’t work out for you. Many people have rated it 5 stars and love it, so it is possible that your yeast was dead. That would be my first thought, especially since your bread didn’t rise. I also wonder if you weighed or scooped your flour. This is a very supple dough and is not dry at all, so you could have used too much flour and/or not enough water. Happy to help you troubleshoot if you tell me exactly the measurements you used. Feel free to email me at [email protected] Thanks!
The most delicious cinnamon raisin bread ever
Suzanne, yay! I’m so happy you love it. Enjoy every bite!