Today I’m going to show you how to do The Creaming Method for making American-style butter cakes and cookies. This mixing method is probably one of the most vital to learn to do correctly for proper batter development.
I taught a cake class at a local cookware shop one time, and I demonstrated both genoise using the egg foam method and a 1-2-3-4 cake using The Creaming Method.
Several people said that they had no idea that they should cream the butter and sugar for so long, and few were really aware that the temperature of the ingredients is almost as important as the ingredients themselves.
Today, I’m going to go through the steps in detail, making sure to be as explicit as possible.
If you can master the creaming method–and I know you can if you haven’t already–you will be able to make a gorgeous cake just with a list of ingredients.
What Is the Creaming Method
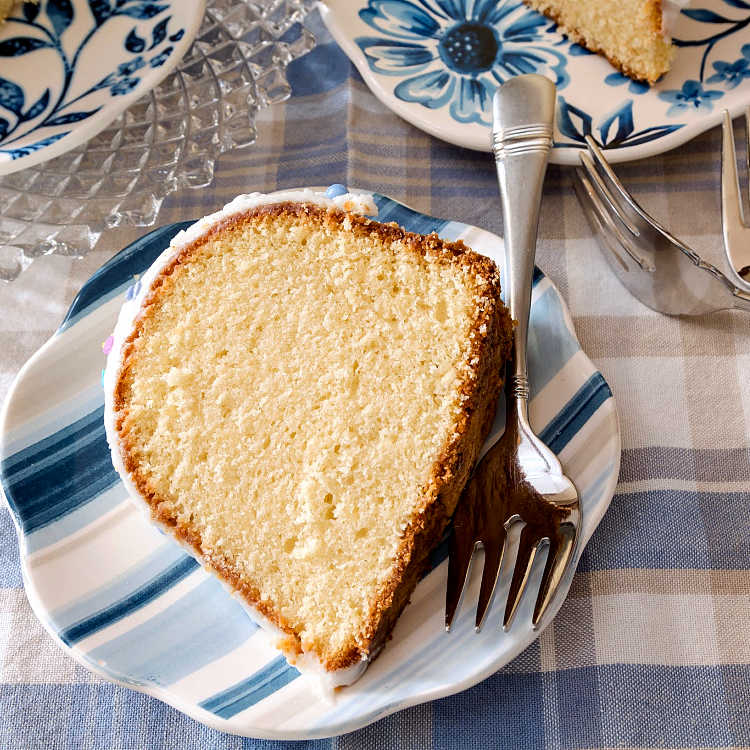
The creaming method is a method of “building” a cake batter or cookie dough to get the most stable emulsion possible so that your batter or dough is uniform, smooth and creamy (for cookies) or fluffy (for cakes).
It is one of the most widely used methods of mixing cookie and cake batter. The method allows for a nice balance between tenderness and structure–yielding an end product that can hold up to carving, stacking and knocking about while still having a nice melt-in-your-mouth quality and tender crumb.
Pastry Chef Online Participates in Affiliate Programs. If you make a purchase through one of my links, I may earn a small commission. For more information click to read my disclosure policy
Performing the creaming method correctly ensures your baked goods bake up light with an even crumb and no “sad streaks.”
The Basics
In short, here’s how it goes:
- Cream butter until smooth.
- Cream butter and sugar together until light and fluffy.
- Add eggs, one at a time, beating thoroughly between each addition and scraping the bowl as necessary. NOTE: I find that even only adding 1 egg at a time can mess with the emulsion, so I crack all eggs called for in the recipe into a bowl and beat them with a whisk so I can add the egg more gradually.
- Alternate adding dry and wet ingredients, the dry in 3 additions and the wet in two, starting and ending with dry.
The Details
I am sharing with you the modifications I’ve made to The Creaming Method over the years that give me the stable emulsion and thick yet billowy texture that I’m looking for in a good butter cake or pound cake batter.
Some of these steps might not even be listed in your standard list of steps for this method, but I’m listing them all so you will have the best experience possible:
Scaling
Scale out all your ingredients and have them all–dairy, eggs, butter, dry ingredients: everything–at about 68F.
In one bowl, weigh out your flour and leavener/s (baking powder and/or baking soda) and whisk them together well. In another bowl, crack all your eggs and beat them until they are evenly yellow.
In a measuring cup, have your dairy and/or other liquids all ready to go.
In the bowl of your
Creaming
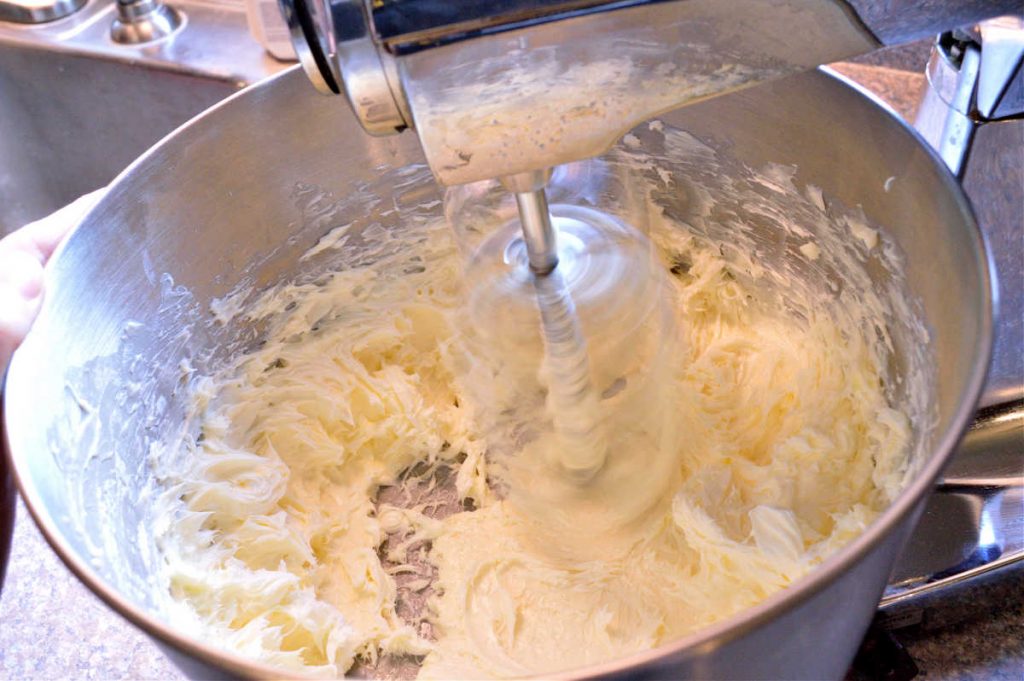
Turn your mixer (fitted with the paddle attachment) or your hand mixer on medium-low and cream until the sugar and butter are evenly incorporated.
Scrape the bowl and cream on medium speed until the mixture is noticeably lighter in color and is very fluffy.
This could take from 8 to 10 minutes or so, but do make sure your mixture stays cool. If at any time it seems to be warming up and breaking down some, refrigerate the whole lot for 30 minutes or so.
Scrape the bowl once or twice every 5 minutes or so.
The bubble structure you are building will capture and expand with the gases from your leaveners and also just from expansion through heating in the oven. This first step is the most critical step for a high rise and fine, even texture.
I have read some folks’ rules about The Creaming Method and they state to cream until you can no longer feel any graininess from the sugar. In my experience, there is not enough free water in the butter (and not any in coconut oil or shortening) to dissolve all of the sugar. For this reason, I don’t worry so much about graininess but about the overall texture, at least not in this step.
Adding the Eggs
With the mixer still on medium speed, drizzle in the beaten eggs, a tablespoon at a time.
Make sure that each addition is completely incorporated before adding the next addition.
The reason I add the eggs so slowly is to keep the mixture from breaking. (This looks like egg just randomly sloshing around in the bowl rather than getting mixed in. It won’t last long, but still, it’s a good idea to minimize this).
We’re building an emulsion, kind of like when you’re making homemade mayonnaise. The more slowly you add the eggs, the easier it will be for the eggs to get evenly incorporated.
Once you start adding the eggs, your batter will not increase in volume anymore, so make sure your fat and sugar are creamed to perfection before you start.
Once you finish incorporating the eggs, you’ll notice that the batter no longer feels grainy.
This is because there is enough water in the whites to dissolve the sugar.
When you’ve finished adding the eggs, the batter should look almost the same as before you started: light and fluffy.
Alternating Wet and Dry Ingredients
Now is the part where you add your dry and wet ingredients alternately, beginning and ending with dry. Here’s how I do it:
- With the mixer off, sift about half of the dry ingredients into your mixer bowl.
- Start the mixer on low speed and mix for about 5 seconds.
- Pour in half the dairy/liquid in a steady stream over the next 3-4 seconds or so. Let mix another 2-3 seconds.
- Stop the mixer and scrape down the sides of the bowl.
- Sift in half of the remaining dry ingredients.
- Start the mixer on low speed and repeat steps 2-4. At this point, all the dairy will be incorporated.
- Sift in the remaining dry ingredients and then fold everything together, making sure to scrape the sides and bottom of the bowl well.
- Mix on high speed for about 3 seconds. Now you’re done.
Scrape your batter evenly into your prepared pan/s and bake according to your recipe.
Why Adding Dry and Wet Alternately Is So Important
Since we’re building an emulsion, you don’t want to add too much of any one ingredient at any one time lest you overwhelm the batter and break the emulsion.
If you add too much of the dry ingredients at one time, the batter will become so stiff that it will be hard to incorporate the wet.
And if you add too much wet at one time, the batter will most likely break and become somewhat grainy.
You can also end up with lumps since adding flour on top of a really wet batter is a recipe for lumps. And we want cake. Not lumps.
Creaming for Cakes Vs. Creaming for Cookies
The procedure is basically the same. It’s just a matter of degree or how much creaming and at what speed.
For Cakes
- On medium speed, cream the butter until light and smooth.
- Add the sugar(s) and continue mixing on medium to medium-high until light and fluffy.
- With the mixer on medium speed, beat the eggs and drizzle them into the sugar/butter mixture over about 5 minutes, scraping the bowl as necessary.
- Add 1/2 of the dry ingredients (please whisk them together well so they are uniformly mixed and the leavening is evenly distributed), mixing just until incorporated. Scrape the bowl.
- Add 1/2 the liquid, mixing just until incorporated. Scrape the bow.
- Add 1/2 of the remaining dry ingredients, mixing just until incorporated. Scrape the bowl.
- Add the other half of the liquid, mixing just until incorporated. Scrape the bowl.
- Add the rest of the dry ingredients, mixing just until combined.
For Cookies
- On low speed, cream the butter and/or shortening until smooth.
- Add the sugar(s) and continue mixing until smooth and well-blended.
- Still on low speed, add the eggs (if there are eggs), one at a time, mixing well between each addition. (Again, with my modification, you would beat the egg/s together and then drizzle them in very slowly.)
- Mix in the dry ingredients until uniformly incorporated. You might need to finish by hand.
- Stir in any mix-ins, such as chocolate chips, toasted nuts, raisins, etc.
Why Ingredient Temperature is So Important
Here’s another reason why the temperature of the ingredients is so important.
When butter is cold, it’s very hard. It’s like bubblegum before you chew it.
You can’t blow a bubble with hard gum, and hard butter won’t expand to hold air either.
After working so hard to get your lovely cool butter all light and airy, if you add refrigerator temperature eggs and/or liquids to the batter, the butter is just going to seize up again and get grainy.
It’s not the end of the world. Your cake will still be yummy, but it just won’t rise quite as high. So, take the time to let the eggs and dairy/liquids warm up (or cool down, as in the case of hot liquids) to about 68F before adding them to your batter.
Ingredient temperature is so important that I use an instant read thermometer to make sure the temp is where I want it.
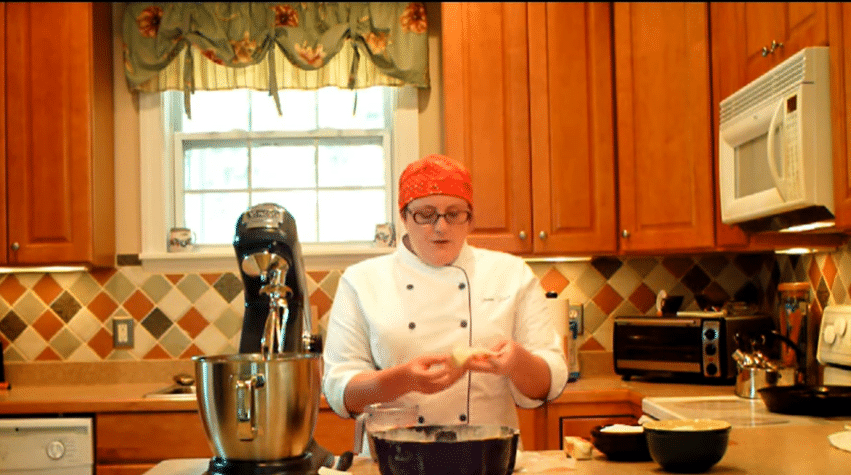
I think that pretty much covers it. I have a couple of videos that illustrate the creaming method, that you can watch as well.
Videos
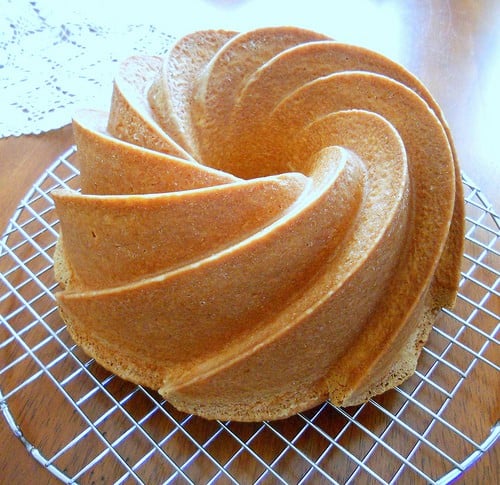
The video that will autoplay with this post shows me making 2 pound cakes simultaneously, illustrating my modified creaming method times two!
I also have another, longer video on YouTube that I made before I modified the way I add the eggs. Still, I give a lot of the whys of the method and hopefully show the hows very well too.
Here’s the longer creaming method video for you. Or you can click on the photo below.
Recipes that Use The Creaming Method
The vast majority of American-style cakes and cookies use the creaming method. Here is just a sampling of some of the recipes on my blog that utilize this method.
Creaming Method Cake Recipes
- 1-2-3-4 Cake is my idea of the quintessential birthday cake. An easy recipe to remember too
- Lemon Corn Pound Cake
- Chocolate Pound Cake
- Chocolate Espresso Pound Cake
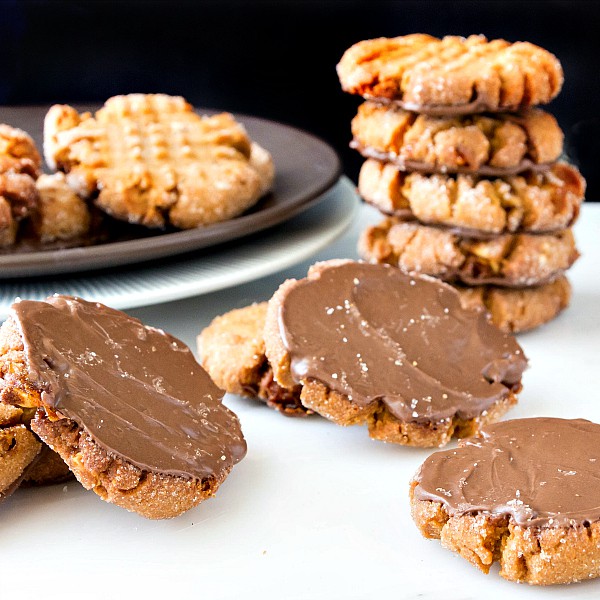
Creaming Method Cookie Recipes
- Malted Milk Ball Spider Cookies
- Caramel Walnut Shortbread Cookies
- Brown Butter Toffee Chocolate Chip Cookies
- Pecan Sandies Cookies are an example of using the creaming method to make cookies that have no eggs in them. The same goes for shortbread cookies.
Recommended Products
The most vital piece of baking equipment you need is a kitchen scale.
Even though in my recipes here I try to provide you with volume measurements as well, I encourage you to buy a kitchen scale for ease of measuring, accuracy, and consistency.
This is the scale I use, love, and recommend.
If you will be making lots of cookies and cakes, and you don’t have a
If you’ll only be making cookies and/or cakes occasionally, a hand mixer is a perfectly acceptable alternative.
I also recommend owning several spatulas of different shapes. I like the heat-resistant kind because they are more versatile and I can use them in pans on the stove.
Questions?
If you have questions about the creaming method or any other baking questions, don’t hesitate to get in touch. You can leave a comment on the post and I will get back to you within about 24 hours.
If your question is more urgent, please shoot me an email, and I will respond within 4 hours, unless I’m asleep.
If you have enjoyed or learned from reading this post, I’d appreciate it if you could share this!
I have Convenient share buttons that float to the left on desk top and on mobile which invite you to share on Pinterest, Facebook, Twitter or Yummly.

Hi, y’all! I hope you’ve enjoyed this post and hopefully also learned a thing or two.
If you like my style, I invite you to sign up for my occasional newsletter, The Inbox Pastry Chef.
Expect updates on new and tasty recipes as well as a bit of behind-the-scenes action. I hope to see you there!


Join in Today!
THANK YOU
My pleasure, Robyn!
Thank you so much for instructions on the “methods of creaming”, I found it very informative and helpful.
I am so pleased! Now, go forth and cream all the things! 🙂
look at step 7. After step 7 is complete, 25% of the liquid ingredients are still not added to the mixer.
Look at step 8. After step 8 all the dry is incorportated and now you are done…So what happens to the rest of the liquid?
Good catch Bob! You’re right–I misworded it. The liquid is added in two additions, so half first and then the remaining. Thanks for stopping in, and I’ve amended my directions so they’re correct and don’t leave folks with 25% of the liquid just hanging out!
nice.. well explained.. 🙂
I try to explain as fully as possible because I know how many questions I had when I first started baking, Marielle! Thanks for stopping in. =)