I think you’ll really love this chocolate cake with whipped chocolate ganache frosting, friends. This is definitely a chocolate lovers’ dream cake!
While I have filled my cake with ganache, you can also fill it with chocolate mousse (my recipe makes way more than you’ll need, but I’m sure you’ll be able to figure out what to do with the rest)!
Let me show you how to make this cake, and you’ll be making a double chocolate cake for all your special occasions. For ease of browsing, you can find all my cake recipes in one place. Let’s get to it.
Pastry Chef Online Participates in Affiliate Programs. If you make a purchase through one of my links, I may earn a small commission. For more information click to read my disclosure policy
Chocolate Cake & Whipped Ganache, At a Glance
✅Skill Level: Intermediate
✅Skills: The Two-Stage Mixing Method, Making Ganache, Whipping Ganache
✅Type: Layer Cake
✅Number of Ingredients: 9 in the cake, 4 in the frosting
✅Prep Time: 15-20 minutes
✅Cook Time: 40 minutes
✅Yield: 1 2-layer cake, about 12 slices
Jump Straight to the Recipe
Tasting Notes
This chocolate cake is deeply chocolatey. It has a fine crumb, much like a red velvet cake, and it’s very moist.
The ganache reinforces the pure chocolate goodness, so if you love an intensely chocolate dessert that isn’t too over-the-top rich, this cake fits the bill.
If this chocolate cake/whipped ganache combo does it for you and you make this cake, I have a favor to ask:
When you do make this recipe, it will help me and other readers if you:
✅Rate the recipes using the stars in the recipe card⭐⭐⭐⭐⭐
✅Leave a review when prompted in the recipe card (If it’s a positive review, and I hope it is, I’ll use it in the post as social proof)✍️
✅Leave a comment on the post📝
Thank you so much!😘
Ingredients and Substitutions
Here are the ingredients, including some optional ones, you will need to make this cake.
- Dutch process cocoa powder: If all you have is American cocoa powder, whisk it together with 1/4 teaspoon of baking soda to help neutralize the acid
- Boiling water: Blooming the cocoa powder like a tea releases all the chocolate flavor in the powder
- Optional Espresso Powder or Instant Coffee: Add 1 Tablespoon instant coffee to the boiling water to deepen the chocolate flavor of your cake. Add another Tablespoon to your cream when you make the ganache, too. If you want to really taste the coffee flavor, add extra to taste until you like the balance of coffee to chocolate
- Eggs: For structure and emulsification of the batter
- Vanilla extract: Rounds out the flavors and complements the chocolate beautifully
- Cake flour: You may substitute all-purpose flour if you like. The texture of the cake won’t be quite as fine, but it will still be delicious
- Granulated sugar: For sweetness and tenderness.
- Fine salt: Brings all the flavors into focus. Use fine sea salt or table salt
- Baking powder: Provides the leavening for the cake
- Butter: Adds richness, carries flavor, works with sugar to make a tender cake, and inhibits gluten formation by coating the flour with fat
- Heavy cream: Provides the liquid and fat for the ganache
- Chopped Chocolate: Whisked together with hot cream to get a dreamy ganache. Once chilled, you can whip the ganache to a lovely, spreadable texture
Mixing Method
This cake is made with the two-stage method, which is also called the reverse creaming method.
Rather than the usual creaming of butter/sugar, adding eggs, and alternating dry and wet ingredients, this mixing method results in a more tender cake. Here’s how it works
- Whisk dry ingredients–including sugar–in the mixing bowl
- Add your softened fat and eggs and beat on medium speed for 2 minutes. WHY: Mixing the fat into the flour with a minimum amount of water-type liquid helps to coat some of the flour with fat, and this inhibits gluten formation. At the same time, you’ll get some aeration from the beating together of sugar/fat/eggs
- Mix in your liquid last. WHY: Once you have the structure of the cake set in step two, including multiple tiny bubbles from all that mixing, you need to thin out the batter to bake as a cake. Without additional liquid, your batter will bake up more like biscuits or cookies. And in the case of this cake, the liquid is boiling water/cocoa powder/instant coffee/vanilla, so that’s where all the chocolate flavor comes from
Notes About Making the Cake and Ganache
- I made the layers in 8″x2″ cake pans using a slight variation on the formula for Perfect All-American Chocolate Butter Cake in The Cake Bible (p 54 in my edition). Yes, I boiled the water and “steeped” the cocoa powder in it, cooling it to room temperature before mixing the batter. Rose suggests (and I used) The Two-Stage Method of mixing. The cake bakes up richly chocolatey, buttery and moist. You will dig it for sure.
- Whip the ganache using a hand mixer rather than a
stand mixer . It is too easy to over-whip ganache using astand mixer , and over-whipped ganache equals grainy ganache. Please watch the video to see the texture you’re looking for. Once you’re close, finish by hand with a whisk.
Jenni Says: Before frosting, refrigerate the cake for about an hour. For the “cleanest” frosting without any crumbs, apply a thin crumb coat first, refrigerate for about 30 minutes, and then apply a thicker finishing coat of frosting.
Would you like to save this post?
How to Whip Ganache
In all seriousness, whipped ganache is a frosting and filling you want to have in your arsenal. It’s not hard to make, but it can be a little bit fussy. Read on for the Rules!
- Make ganache by heating cream to a high simmer (bubbling all around the edges and steaming but not at an actual boil).
- Pour hot cream into a metal bowl and add the chopped chocolate. Adding the chocolate to the cream instead of vice versa eliminates the admittedly small chance the chocolate could begin seizing before you get all the cream into the bowl.
- Whisk slowly to emulsify your ganache into a smooth, shiny, thick, gorgeous liquid.
- Chill until completely cold.
- Whip with a hand mixer and finish by hand (with a whisk) until lightened in color and at about medium peaks. Do not over-whip.
More Cake and Frosting Recipes for You to Try
- Chocolate Mayonnaise Cake (Rocky Road Cake)
- Lemon Buttercream
- Chocolate Stout Cake with Burnt Caramel Buttercream
- Swiss Mint Buttercream
Chocolate Cake Q & A
Cover tightly and refrigerate any leftovers for up to 5 days. Let the slices temper on the counter for a good 45 minutes before serving. This will allow the ganache to soften and the chocolate flavor to bloom.
Yes, it freezes very well. I prefer to freeze the layers before frosting, but if you’ve already frosted the cake, freeze individual slices on a sheet pan. Then wrap each in plastic wrap and foil. Defrost in the fridge overnight. When ready to serve, unwrap. For best flavor and texture, allow the slice/s to sit at room temperature for 45 minutes before serving.
Questions?
If you have any questions about this post or recipe, I am happy to help.
Simply leave a comment here and I will get back to you soon. I also invite you to ask question in my Facebook group, Fearless Kitchen Fun.
If your question is more pressing, please feel free to email me. I should be back in touch ASAP, as long as I’m not asleep.
A Note About Measurements
My recipes are almost all written by weight, including liquids, unless otherwise specified.
For accuracy and consistency of results, I encourage you to buy–and use–a kitchen scale.
I promise that baking and cleanup will be so much quicker and easier.
This is the scale that I recommend for home use. I have owned and used one for years.
Don't let its small price and small size fool you. The Escali Primo is an accurate and easy-to-use food scale that I have used for years. It's easy to store, easy to use, has a tare function, and easily switches between grams and ounces/pounds for accurate measurements.
Love This Chocolate Chocolate Cake? Please Rate and Review. Thanks!
It will help me and other readers so much if you take a moment to rate and leave a review for this recipe.
You can use the stars to rate 1-5 (5 is best), and leave a review in the comments. It helps me make adjustments if any are needed, and comments help others decide whether the recipe is worth making.
Other ways to share include pinning, and/or sharing on your favorite social media platform.
Thank you so much for taking the time!
Chocolate Cake Recipe with Whipped Ganache Frosting
Video
Would you like to save this post?
Ingredients
For the Chocolate Cake Layers
- 2.25 oz Dutch process cocoa powder 64 grams or about 3/4 cup
- 8.25 oz boiling water 234 grams or 1 cup, 1 1/2 teaspoons
- 1 Tablespoon instant coffee optional, but it does deepen the chocolate flavor
- 1 Tablespoon vanilla
- 3 large eggs
- 8.25 oz sifted cake flour 234 grams or about 2 cups
- 10 oz granulated sugar 284 grams or a slightly scant 1 1/2 cups
- 1 Tablespoon baking powder
- ¾ teaspoon fine salt
- 6 oz butter 170 grams or 3/4 cups (1 1/2 sticks)
- 1.75 oz vegetable oil 50 grams or about 1/4 cup
For the Whipped Ganache
- 24 oz heavy cream 454 grams or 2 cups
- 1 Tablespoon instant coffee optional, but it does deepen the chocolate flavor
- 12 oz bittersweet or semisweet chocolate, chopped, or high quality chocolate chips 227 grams or about 1 1/4 cups
- 1 teaspoon vanilla extract
- heavy pinch salt
Instructions
For the Cake
- Heat the oven to 325F and line the bottoms of 2 8" x 2" cake pans with a round of parchment. Spray the sides of the pan with pan spray. Set aside.
- Whisk together the cocoa powder, instant coffee, and boiling water. Add the vanilla. Cover and let cool to room temperature.
- In the bowl of your stand mixer or in a large bowl (if using a hand mixer), whisk together the dry ingredients: cake flour, granulated sugar, baking powder, and salt.
- Add the softened butter, oil, and eggs to the dry ingredients and mix on low to combine. Increase the speed to medium and mix for 2 minutes to develop the structure of the cake. Scrape the bowl as necessary.
- Add the cooled water/cocoa powder mixture and mix in on low speed for a few seconds.
- Finish mixing by hand using a rubber/silicone spatula to make sure all the ingredients are completely incorporated.
- Once the batter is mixed, divide evenly between your two pans. Swirl a knife back and forth through the batter to get rid of any large bubbles, then smooth the top of the batter.
- Bake for about 40 min or until the internal temperature of the cakes are 200-210F.
- Let the layers cool in the pan for about fifteen minutes, and then turn them out onto cooling racks. For moistest cakes, wrap the layers in plastic wrap as soon as you "depan," and allow them to cool this way, either on the counter, in the fridge, or in the freeer.
For the Frosting
- Heat heavy cream, pinch of salt, and instant coffee until it just comes to a boil.
- Add the chopped chocolate or chocolate chips to a large bowl. Pour the cream over the chocolate, scraping the pan to get out all the cream.
- Allow the mixture to sit for a minute. Add the vanilla, and whisk slowly until the cream and chocolate emulsify into a shiny ganache. Cover and let cool, then chill completely in the fridge.
- Once chilled, whisk with a hand mixer, finishing by hand until the ganache thickens, lightens in color, and holds its shape. Do not overwhip or your ganache will get grainy. Take it to just barely stiff peaks and then stop.
- NOTE: This amount of whipped ganache will generously fill and frost an 8" 2-layer cake. If you are more generous than I was, you will use it all. In the cakes in the photos, I ended up with about an extra cup of whipped ganache. So worry not, you will not run out.
To Stack and Frost Your Cake
- If your cakes are domed at all, slice off the domes and eat them as a snack or use them to make a few cake pops and eat those as a snack.
- Spread a bit of ganache on a flat serving platter, plate, or cake board.
- Position the first layer, cut-dome-side up, in the center and press down lightly.
- Plop on roughly 1/2-3/4 cup ganache and, using an offset spatula, spread to the edges of the layer.
- Place the second layer, cut-dome-side down, on top of the first layer and press down lightly.
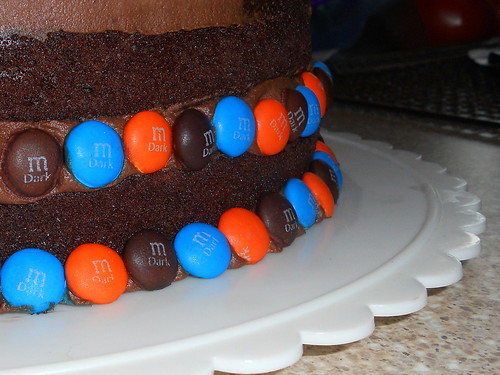
- If crumb coating, spoon about 1 1/2 cups frosting into a different bowl, and then spread a thin layer of ganache over the top and down the sides of the cake. Refrigerate for 45 minutes, and then use the rest of the "crumb-free" ganache to frost the rest of the cake. My favorite way to do this is to heap a very lot of ganache on top of the cake. Then, use an offset spatula to spread this across the top so it starts to slump down the sides of the cake. Use the offset to spread that excess frosting around the sides, filling in as necessary. You can frost it smooth or leave it with swirls and designs you make with your spatula.
Did You Make Any Changes?
Notes
- All ingredients should be at cool room temperature, so you’ll want your butter firmer than you need if using the two-stage method. And the water does not need to be boiling either. Use cool water.
- On medium speed, cream together the butter, sugar, salt, and vanilla until light and fluffy (about 7 minutes). Scrape the bowl as necessary.
- Whisk the eggs together in a bowl and then drizzle them in gradually over about 5 minutes.
- Whisk together the cocoa powder, flour, and baking powder.
- On low speed, alternate adding the dry ingredients in 3 additions with the water in 2 additions, beginning and ending with dry. Scrape the bowl as necessary.
Storing
Because of the ganache, I’d store this cake in the fridge, tightly covered. Slice as needed and for best flavor, allow the slices to sit at room temperature for about 45 minutes.Freezing
I prefer freezing the layers unfrosted and then icing the defrosted layers. But, if you have leftover pieces you want to save for later, put them on a parchment-lined sheet pan and freeze them solid. Then wrap each slice individually in plastic wrap before storing in a heavy-duty, zip-top freezer bag or in heavy-duty foil. The cake will keep in the freezer for about 3 months.Nutrition
Hi, y’all! I hope you’ve enjoyed this post and hopefully also learned a thing or two.
If you like my style, I invite you to sign up for my occasional newsletter, The Inbox Pastry Chef.
Expect updates on new and tasty recipes as well as a bit of behind-the-scenes action. I hope to see you there!
A Short Story About Baking for Neighbor Thomas and The Rise of the Machines
Jump back up to the recipe if you don’t care about neighbor Thomas or the rise of the machines.
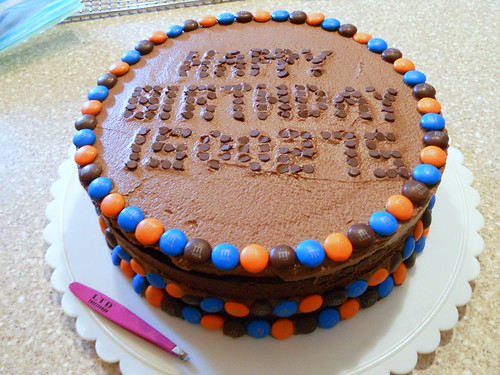
I have never wanted to be The Cake Lady. Wait. I take that back. I used to want to be The Cake Lady until I made a couple of wedding cakes and realized that it turns me into a snarling, cursing mess for the duration of the project. But, when friend Thomas calls and asks for a cake or other dessert, I have learned to say Yes. Because sometimes my creations end up on a buffet along with braised nutria. Sometimes I get to make a cake for a dude named Webby. And this time, rather than writing Happy Birthday insert-name-here, Thomas wanted me to write the Birthday Girl’s employee number. (The other folks at work wanted it to say, “Have a Good One, Slave Driver,” but Thomas voted them down because he’s the dude with the cake connection).
Anyway, I got to thinking that it would be the kind of cake that the folks who worked at Skynet would make. You know, before the Rise of the Machines. They’d nudge each other and say, “Hey, let’s make a birthday cake for our Robot Floor Sweeper. We dreamed that thing up four years ago next Tuesday. We can have the bakery write a message like a dot matrix printer, and we’ll all eat cake and sing Happy Birthday to RuFuS. (Because that’s what they’d call it. Obviously).”
So, maybe they didn’t realize that old RuFuS would Harbor Resentment on account of he didn’t have a mouth or stomach and couldn’t eat the cake. All he could do was envy the humans their whipped ganache and then sweep up the crumbs. And before you know it, you’ve got a HAL malfunction—Open the pod bay doors, HAL. I’m sorry, Dave. I’m afraid I can’t do that—that snowballs into machines inserting cyborgs into rebel barracks. And it all started with a cake. I hope you’re happy, Thomas.
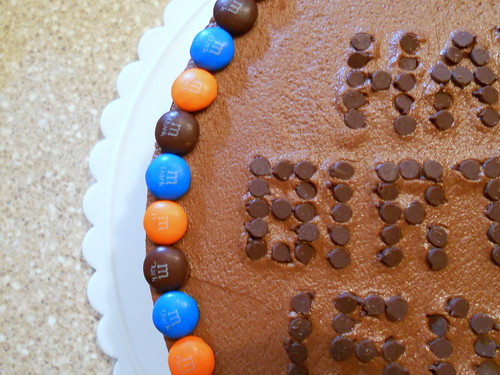
But, if you are Dead Set on making a cake decorated with M&Ms and you are determined enough to pick out only the orange, blue and brown ones, and you also decide that upside-down mini chocolate chips make a reasonable facsimile of a dot matrix printer readout, by all means, go for it. I won’t stop you. But don’t say I didn’t warn you. Don’t blame me when your whole house automation system locks you out in the yard and starts your sprinkler system. And then laughs at you. Because this is how it starts. Again, you’ve been warned.
And there you have it. A delicious, deeply chocolate cake with whipped ganache filling. Perfection for birthdays, picnics or pretty much any occasion where chocolate cake is needed.
Here’s the original cake I made for Thomas:
Thanks for spending some time with me today.
Take care, y’all.
Join in Today!
Hello!!
Baking a cake for my son’s bday! I was all set in my kitchen to back your chocolate cake with whipped ganache frosting when I clicked on the two step method and found that there is no milk listed in the recipe.
Is the 8.25 oz of boiling water in place of the milk mentioned in the method? And is the chocolate seeped in all 8.25 oz?
I don’t have the RLB book so I can’t figure this out without because your recipe has not instructions like your other recipes.
I can wait one more day as I was going to keep the cake in the fridge until tomorrow.
Thank you,
Elsie
Hi, Elsie! I will need to update my recipe–it is old old old, and now I always add all the steps in the card rather than sending you off to a different post.
But yes, use the boiling water and cocoa powder mixture in place of the milk. And yes to steeping the cocoa in the entire amount of water.
For the moistest (most moist?) result, cover the steeping cocoa/boiling water mixture with plastic wrap until it cools. That way water won’t evaporate out.
Also, once the cake layers come out of the oven and have cooled only slightly, wrap them in plastic wrap and let them come to room temp wrapped. Or you can put the wrapped layers in the freezer or fridge to speed things along. Either way, the idea is to keep all that moisture in the cake rather than letting it evaporate out of the cake. It is a magic trick. Once you try it, I think it’ll be your new default. Enjoy the cake and Happy Birthday to your son!
I’m going over all the chocolate cakes on PCO and just dying here. This is another divine recipe. I’m bookmarking this. You had me at whipped ganache frosting. How did I miss this post? Nevermind, here I am and will do this soon. Thanks for the recipe, JF!
LOL Betty Ann! Glad you found it! I hope you enjoy it–beware of Skynet, though! lol
I stopped making cakes (mostly) because of how crabby it made me:-) Love that you picked out only the blue, orange, and brown m&m’s to use…this cake is fabulous looking!!!
Yeah, I get a little OCD sometimes! Glad you like the cake:) And cake making can make me crabby too. It’s why I rarely make wedding cakes; makes me curse. A lot!
Jenni this looks SO good. Whipped ganache frosting?!?
Yup! Ganache is the duct tape of the baking world! Hope you had an amazing birthday, Carrie!
It was okay until she started to speak in microtransmissions. You know, “How did it go?” “Beep.” It looked prteey cool and smelled delightful.
Hey, I learned that from you sweetie! Beep. 😉