
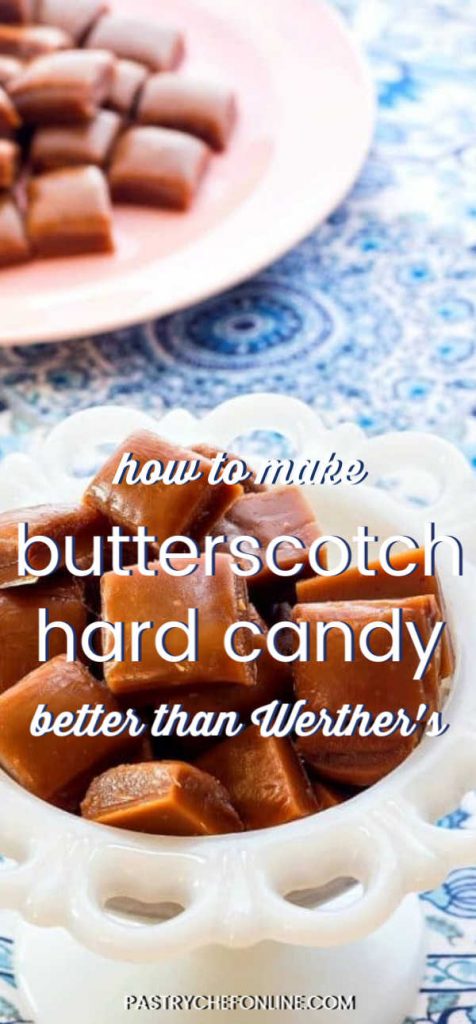
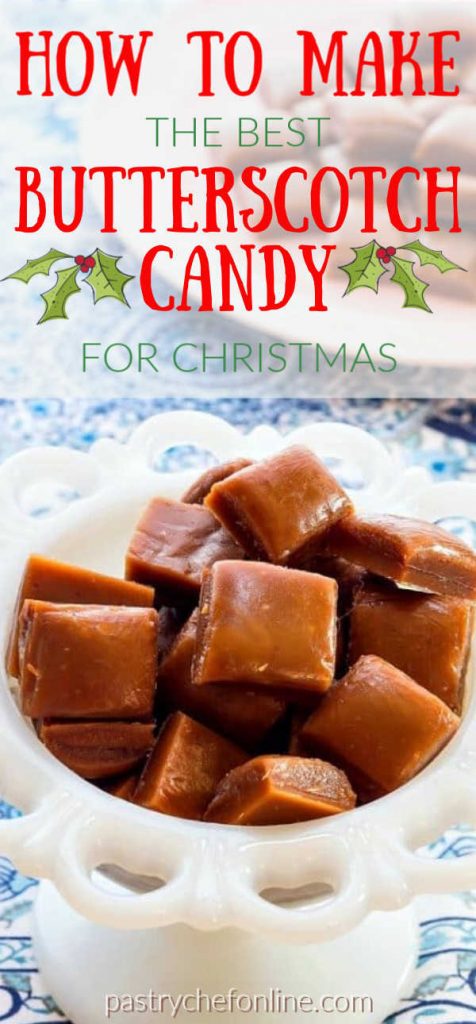

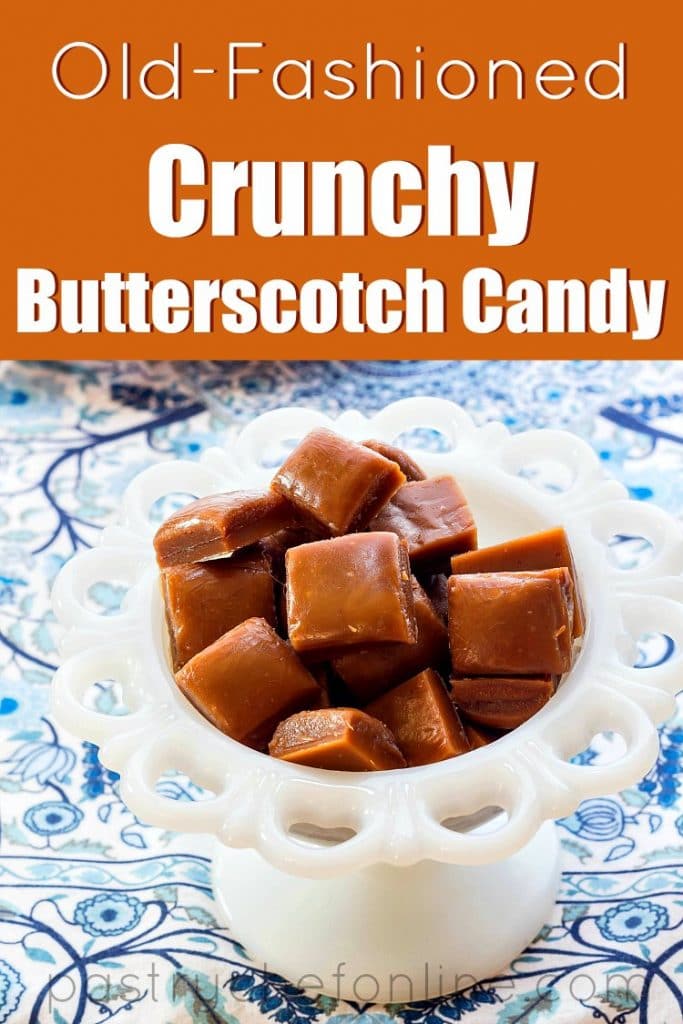
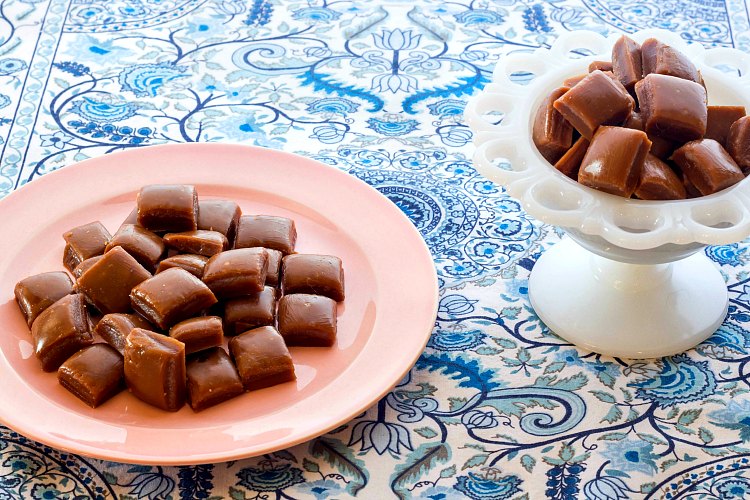
The hardest part of making butterscotch hard candy is waiting for it to cool. With a few tools and a few tips from me, champion of all things butterscotch, you’ll be making your own crunchy, buttery, hard to resist candy in no time!
If you’re into soft candies, you may like my chewy butterscotch candy recipe.
For ease of browsing, you can find all of my butterscotch recipes here and everyone of my candy recipes here.
Watch my butterscotch candy recipe web story here.
Butterscotch Candy
Y’all know I love me some butterscotch right? It runs a neck and neck race with caramel for my favorite flavor.
The problem is, most store-bought butterscotch just tastes like chemicals. Save me from boxed pudding and bright yellow ice cream sauce.
Pastry Chef Online Participates in Affiliate Programs. If you make a purchase through one of my links, I may earn a small commission. For more information click to read my disclosure policy
Real butterscotch should taste of deeply browned butter and sugar with a hint of molasses. It is magic.
Browned Butter + Caramelized Sugar + Molasses = Butterscotch
Amazing recipe, amazing result! It was easy and quick. My boyfriend and I love them and I will be making them regularly. They also don’t stick like crazy to my teeth. Thank you!
Reader Emma
How to Make Butterscotch Hard Candy
Ingredients
The ingredients are pretty basic. I almost always have everything on hand, and I bet you have most as well.
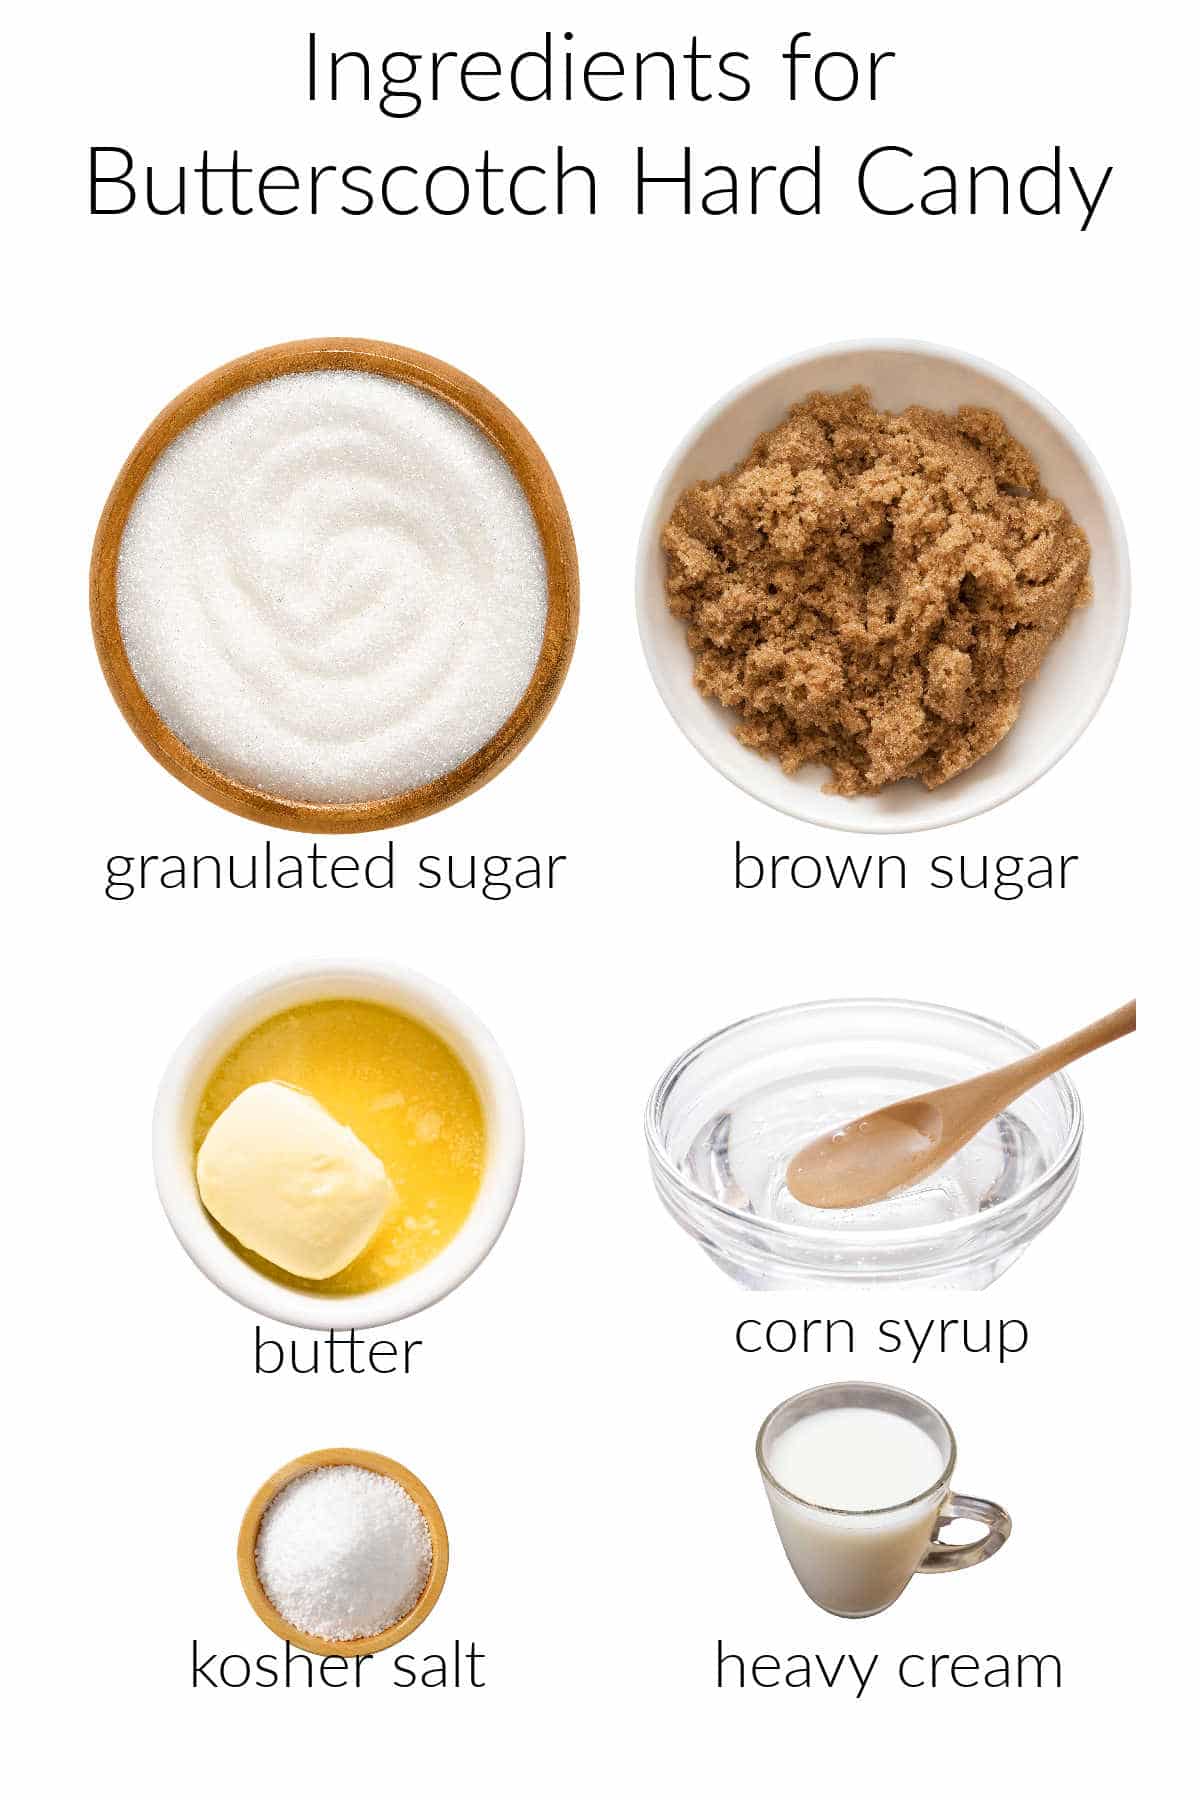
- granulated sugar
- brown sugar: I prefer a mixture of half white sugar and half brown sugar. If you like a more assertive molasses flavor, you may use 3/4 (6 oz) brown sugar and 1/4 white (2 oz) to make up the 8 oz you need
- butter: I always recommend using unsalted butter because it is usually fresher. Salt acts as a preservative, so I’m never sure how long salted butter has been sitting around. Plus I can add salt to my taste
- corn syrup: there’s just a touch of corn syrup in it to help prevent crystallization. If you really hate using corn syrup, you can substitute the mildest tasting honey you can find.
- kosher salt: salt is a part of the flavor profile of butterscotch, so be assertive with your salting
- heavy cream: the cream gives a softer bite to the candy, and I think it might be the magic ingredient that keeps it from sticking to your teeth.
Procedure
This candy is not hard to make, whether you’re making soft candy or hard candy. But you do have to respect the sugar, because you’re working with a really hot–really hot–mixture. In fact, you’re going to cook it to 295F, so be careful.
Here’s the lowdown on how to make this old-fashioned candy, y’all.
- Mix all ingredients except the cream together in a heavy-bottomed saucepan. You can either add the butter first and wait until it is all melted before adding sugar, corn syrup, and salt, or you can cut the butter up into pieces and then cook together over medium-low heat, stirring occasionally, until the butter is all melted. Then turn up the heat.
- Cook until you reach 250F. I encourage you to stir this candy and/or carefully swirl the pan while heating it up. The corn syrup will safeguard against crystallization when you stir (thanks, corn syrup), and the molasses in the brown sugar will be less likely to burn if you keep the mixture moving.
(Note my thermometer reads 240F. Sugar work is pretty precise, and I didn’t want to go over temp while trying to take a photo!)
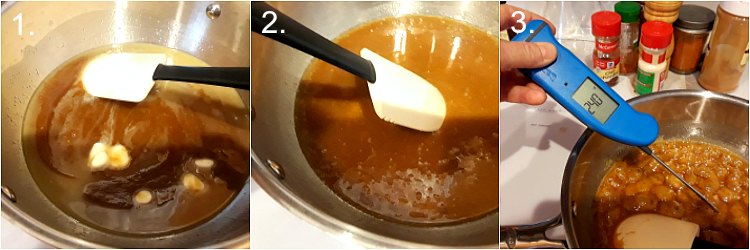
- Add the cream, and continue cooking until the candy reaches 295-300F. Add the cream carefully, because the candy will hiss and spit and bubble up a bit when you add it. Stir it in well. The temperature will obviously go back down and the candy will thin out some. Keep stirring, heating, and taking its temperature until it reaches 295-300F.
Once it hits the magic temperature, pour the candy into the prepared pan and let cool for approximately 10 minutes.
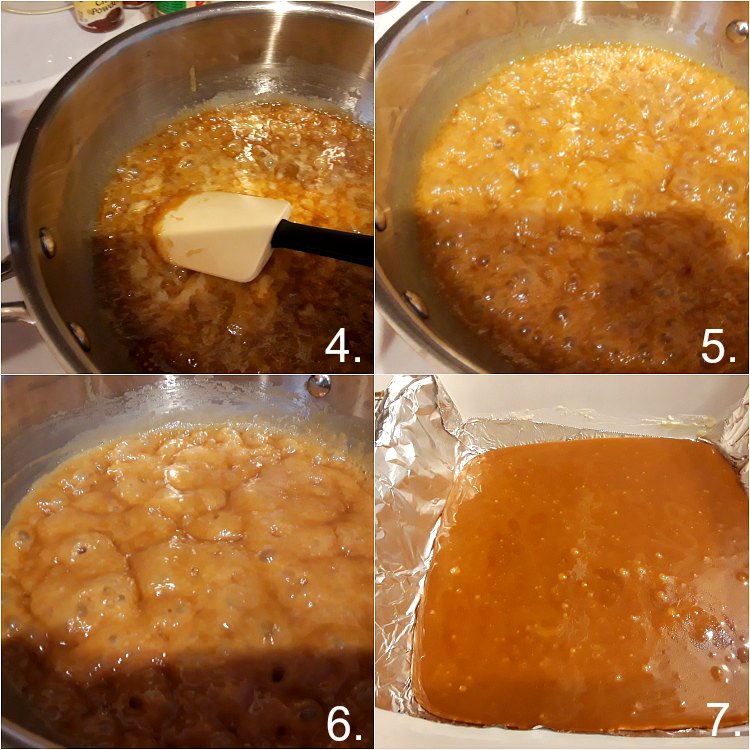
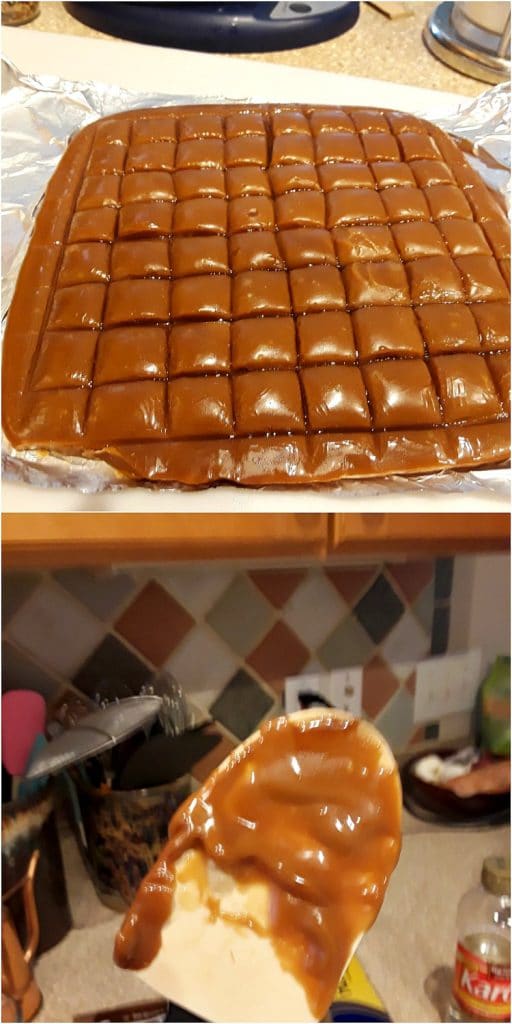
- Remove from pan and score. Once the candy is cool enough to hold its shape but not hard, use the foil to lift the candy out of the pan and onto a cutting board.
Use a pizza wheel to score the candy about halfway through, and then let cool completely. If you have a lot of patience, let the candy sit out in a dry area for several hours before breaking it along the score marks.
Any candy stuck to your spatula and any edges that need to be cleaned up are there for the cook to enjoy!
Adjusting Temperature for High Altitude Candy Making
A reader recently commented saying that his candy tasted great but had the wrong texture. It was too hard. He did his own research and realized that it was because the temperature called for was too hot at his altitude (5000 ft above sea level).
This information will help a lot of you, so thank you so much, dear reader. And I know your next batch of candy will be Perfection!
Here’s the rule: reduce the temperature by 1 degree for every degree below sea level boiling temperature of 212F.
Make Adjustments for your Elevation Like This:
- Take the temperature of your boiling water.
- Subtract 1 degree from the target temperature for every degree below 212F your water boils.
If your water boils at 208F, then you will have to stop cooking your sugar at 230F (4 degrees below 234F since your water boils at 4F below 212F).
For reference, I found this Altitude Conversion Chart in a booklet titled “The Art of Candy Making” from the USU Extension/Utah County in Provo, Utah.
Q&A

Since not everyone makes homemade candy every day, I’m hoping this section will answer any questions you have. If not, please email me, and I’ll help!
In the case of hard candies, a pretty long time. I don’t have a definitive guide to how long it will keep, but if you keep it in a low-humidity environment (a freezer bag works just fine for this), it should last you a good 2-3 weeks. Although I’m pretty sure you’ll eat this stuff long before!
Sugar is an interesting ingredient. It behaves in different ways depending on how hot you cook it to begin with. Cook it too a low temperature (say below 240F), and it will stay liquid when cooled.
Cooking it to between 240-270 or so will yield various states of chewy sugaru002du002dthicker and stickier the higher you cook it. Once you reach the 270s to about 305F, it will cool to varying degrees of u0022hard,u0022 from chewy hard to lollipop hard. For more information about the stages of sugar, see my Stages of Sugar chart.
Hot sugar is hot, so if it gets on you, it will burn. You can lessen the risk by using a pot that is larger than you think it needs to be for the amount of sugar you’re cooking and using a long-handled wooden spoon or high heat resistant spatula for stirring. Never stir with a metal utensil. Since metal is conductive, the heat will travel up the handle. No fun.
Rave Review
I sent a few pieces of the 4th and final round of butterscotch candy to my friend and food hero, Nathalie Dupree. She wrote me when she received it, and this is what she said:
Would you like to save this post?
Nathalie Dupree
Jenni, I received the butterscotch you sent me. I don’t know how you improved it. Crisp enough it barely sticks on teeth, doesn’t pull out fillings, and the flavor is deep and rich. Better than Werthers.
High praise, indeed, especially coming from a self-proclaimed huge butterscotch fan and one who has a recipe for said candy in her and Cynthia Graubart’s seminal Mastering the Art of Southern Cooking.
Now, before we get to the recipe, I want to make sure you exercise some candy-making safety. Here we go.
Candy Making Safety
To piggyback off of the “how to keep sugar from burning me” question, there are a couple of things to remember to be as safe as possible when making candy.
- Make sure there are no little kids or pets around. You don’t want to divide your attention between molten sugar and anything else.
- Have a bowl or small pitcher of ice water handy. If sugar does splash on your skin, immediately immerse the burned part in the water. Usually when it does splash, it’s just a little bit and in my experience, the damage has been minimal!
- Whatever you do, if you burn your finger on the sugar, don’t put it in your mouth. You’ll just end up with a burned finger and a burned mouth. Hence the bowl of ice water.
PRO TIP: A reader who is also a glass worker suggested keeping lavender essential oil in the kitchen to put on any small sugar burns you might get. She uses it when wee specks of molten glass get on her skin.
Tools for Candy Making
You will definitely need some specialized tools to make hard butterscotch candy or any type of candy. Most are not terribly expensive and will last you almost forever.
Of course you’ll need a heavy bottomed saucepan and at least one heat safe spatula.
Please make use of an instant read thermometer or a candy thermometer for accuracy. I know many people still want to use the ice water test because that’s what their mom or grandmother did, but trust me. If mom or grandma had access to an accurate thermometer, they’d have probably used it!
I like to use an oiled pizza wheel to score my candies. When making butterscotch, you don’t cut all the way through the candy. You score it (some say “scotch” it, which could be where the term “butterscotch” comes from in the first place).
Then, when the candy has cooled off, you break it along the score marks. Make these marks pretty deep–about halfway through the candy.
For the amount of candy this recipe makes, you’ll do well using an 8″ or 9″ square cake pan. I like to line my pans with non-stick foil for ease of lifting the candy out of the pan without anything sticking.
Other Candy Recipes You Might Enjoy
If you are a homemade candy fan, you might want to try your hand at some of these other candy recipes:
- Crunchy Butterfinger Candy Bars I tested this candy recipe 9 times to make sure I had it as “right” as I could get it. It’s one of the only crunchy Copycat Butterfinger recipes out there. Most are oddly soft and chewy.
- Bourbon Honeycomb Candy This old-fashioned candy is light and airy and barely tinged with bourbon flavor. I used a bourbon-infused honey to make it, but you can use regular honey, add in a touch of bourbon, or leave it out entirely
- Old-Time Simple Peanut Butter Candy Because sometimes you just want an old fashioned, comforting candy
- Homemade Butter Mints These mints are perfect for first-time candy makers because there is no cooking at all. If you can make frosting, you can make these mints!
Questions?
If you have any questions about this post or recipe, I am happy to help.
Simply leave a comment here and I will get back to you soon. I also invite you to ask questions in my Facebook group, Fearless Kitchen Fun.
If your question is more pressing, please feel free to email me. I should be back in touch ASAP, as long as I’m not asleep.
A Note About Measurements
It helps me and other readers so much if you take a moment to rate and review this recipe.
Your star rating and comments help others decide whether the recipe is worth making, and your feedback helps me continue improving recipes here at Pastry Chef Online.
Other lovely ways to share include pinning or posting on your favorite social media platform.
Thank you so much for taking the time!

Butterscotch Hard Candy Recipe
Equipment
Ingredients
- 5 oz 1 1/4 sticks or 10 Tablespoons unsalted butter
- 4 oz about 1/2 cup granulated sugar
- 4 oz about 1/2 cup, packed dark brown sugar
- 1 oz about 4 teaspoons light corn syrup
- ½ teaspoon kosher salt I used Mortons. If you use Diamond, you may need a touch more
- 4 oz 1/2 cup heavy cream
Instructions
- Butter an 8″ square metal pan with straight sides. Line with nonstick foil, pressing it down to smooth it out against the pan as much as you can. Put the pan on a cooling rack convenient to the stove.
- Cut the butter into small pieces and put in a heavy-bottomed pot over medium heat.
- Once the butter has melted, stir in the two sugars, corn syrup, and kosher salt. Stir well until mixture comes to a boil. Alternately stir with either a wooden spoon or a high heat spatula and swirl the pan to keep the mixture moving. SEE NOTES
- Either clip a candy thermometer onto the side of your pan or keep checking the temperature with an instant read thermometer. When the candy reaches 250F, add the heavy cream. The mixture will sputter some, so add it carefully and then stir it in well.
- Continue cooking the candy, stirring and swirling almost constantly until it reaches 295-297F.
- Carefully pour the candy into the prepared pan. You can use your spatula to gently help the last bit of the candy pour out, but don’t scrape to clean the pot out.
- Allow the candy to cool for about 10 minutes. (If you use a smaller pan, it will take a few minutes longer. You want the candy to be pliable but still be able to hold its shape.
- Use the foil to ease the candy out of the pan and put it on a cutting board, foil and all.
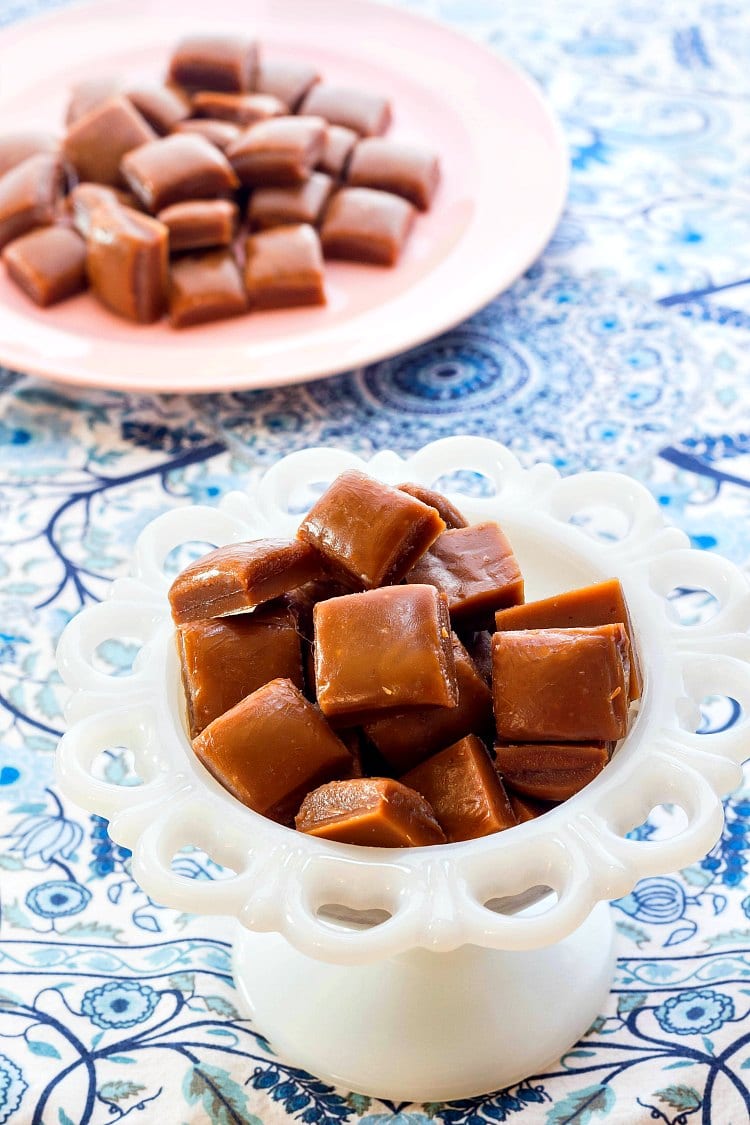
- Peel the foil back from the sides of the candy and, using a pizza wheel, score the candy into 64 pieces in an 8 x 8 grid. You can run the wheel over your lines a few times. Try to make the score marks fairly deep–about halfway through the candy. A little butter will leak out in the score marks, but worry not. It will reabsorb once the candy has cooled completely and cured.
- Move the scored slab of candy back onto the cooling rack.
- Let the candy cool for about an hour or so until completely firm. Allow the candy to sit in a dry spot where nobody will bother it for several hours or overnight. Then break the candy into pieces along the score lines. It will be easy to break.
- Store candy in an airtight container at room temperature for up to a week or so.
Did You Make Any Changes?
Notes
Nutrition
Would you like to save this post?

Hi, y’all! I hope you’ve enjoyed this post and hopefully also learned a thing or two.
If you like my style, I invite you to sign up for my occasional newsletter, The Inbox Pastry Chef.
Expect updates on new and tasty recipes as well as a bit of behind-the-scenes action. I hope to see you there!

Thanks for spending some time with me today, friends.
Enjoy the crunchy goodness, and no, you don’t have to share!
Take care, and have a lovely day.


Join in Today!
This has been a staple in our house for about five years. We make it every Christmas holiday and sometimes even when it’s not Christmas. I’ve even messed up and not cooked it to the hard crack stage and it makes lovely toffee. Just be very careful with the hot sugar, especially when you’re pouring it out. Work quickly because it does burn if you leave it in the pan too long.
I am so glad you’re a fan! And I agree it’s good as a chewy as a chewy candy.
Amazing Recipe.
Glad you like the butterscotch!
Just tried this. It’s really good and gives the texture that I want. I am trying to make caramel sea shells and really needed a recipe for hard caramels.
I did try a few shells at a lower temp around 260. The texture is still hard but a little bit gummy. Whereas the 295 texture is crisp crunch and a deeper flavor.
I’m so glad they work for you! I love the depth of flavor they have when cooked to the higher temp, too!
If anyone is curious about how the artificial butterscotch flavor is made, I found this entry on the Perfumers Apprentice website: https://shop.perfumersapprentice.com/p-7332-butterscotch-flavor.aspx
If you click on the link about custard notes in flavors, it takes you to a page telling you:
“Any time you have a flavor that has a vanilla, custardy, or buttery note to it, it will have one or all of the “custard note” family: acetyl propionyl, butanoic acid, and acetoin. Most, but not all, flavor houses have eliminated diacetyl from all formulations.”
Thanks for this, Elizabeth. And this is but one reason I will always make it from scratch. #BestFlavorEver 🙂
I cannot say enough great things about this candy! So easy to make! Turns out beautiful! Best of all, it tastes AMAZING! I can see myself making many batches for gifts!
Oh, Amy, I am thrilled that you love it! Huzzah!
Jenni I am still making your butterscotch and still loving it. Miss chatting with you!
Amy, hi! Glad you’re continuing to enjoy the butterscotch! Best way to stay in touch is by signing up for the newsletter. Only twice a week, and lots of yummy things! Happy Thanksgiving!
I was so intimidated to make this recipe, but the instructions are perfect! I made it once and my family ate it so fast, I’ve now made a second batch. It is SO delicious.
My only recommendation would be to bring the cream to room temperature. I did this and had no splatter when adding it to the hot mixture. Also, I weighed the ingredients the second time after buying a scale, and I think they turned out better.
Kelly, yay! I’m thrilled you made them. Twice! I will amend the recipe to tell folks warm cream = less splatter. I’m also really glad you weighed the second time. It makes baking and cooking so much easier and more accurate. Huzzah!
Hi Jenni, thanks for sharing! Wondering if it would be all right to double the recipe, or do I just need to make 2 batches?
Hi, Laurie! I haven’t tried to double this recipe, and while it will probably be fine, the concern would be getting a larger amount of sugar to the correct temperature and measuring accurately. I think I would stick woth two single batches unless you can afford to experiment. I hope you enjoy it!
Hi
I’ve tried this recipe twice and both times it burnt… second tasted fine at first then a very strong burnt taste. Kept it at medium and kept it moving the whole time, really don’t know what went wrong. Any ideas ?
Hey, will. I am not sure what went wrong, and I really have to taste yours to see if it was really burnt or not. The flavor profile of a traditional butterscotch is a little bit more bitter than like a Werther’s or something, so it could be just that you are not prepared for a traditional butterscotch flavor? How is the color? I guess that’s the best way to ask. If it’s much darker than mine in the photograph, it could have been burnt a little. But if it’s about the same color, I expect it turned out okay. How was your texture? Was it crunchy, and sort of creamy at the same time? Or was it just really hard and difficult to chew? Did it stick to your teeth? I just it’s hard to troubleshoot, unless I can actually taste it and see whether it’s truly burnt, or just has that bitter caramelized sugar edge to it. I don’t expect this is the most helpful response ever, but you may consider adding either a bit more cream, and/or a little more butter to help moderate that bitter caramelized edge.
10/10 recipe. Would 100% recommend and it was easier than I thought. I love how detailed the instructions are and the tips you gave.
Hi, Natalie! I’m thrilled you like the candy, and thank you for the feedback on the instructions. I try to be really detailed so even folks who only occasionally make candy can succeed. Yay!
Hello,
I have a question. Is it ok if I use coarse kosher salt by Morton instead of just kosher salt?
I use the Morton’s brand too. You are good to go!
Hello Jenni,
I found your butterscotch recipe while looking for a hard candy recipe that uses powdered corn sugar (dextrose). I don’t know enough of the chemistry around candy making…any chance you know if I can make your recipe substituting dextrose for the white sugar? Would the temperatures for each of the phases in cooking be the same?
I know dextrose is less sweet than sucrose, so I’m prepared for it to taste less sweet. That will work perfectly for me as I don’t really like things that are super sweet.
Thanks !
Judy
Hey, Judy. This is a great question that I do not know the answer to. I will hunt around and try to find a definitive answer for you. My initial thought is “yes” but it may be better to sub for just a portion of the sugar and not all. I will let you know what I find out.
I polled some candy-making friends. While we *think* it should work just fine, we *know* it will work with isomalt, which is mostly glucose with some mannitol and sorbitol in it. It too is slightly less sweet than sucrose. Give that a try. I think you’ll be pleased with your results.
I was a Callard&Bowser addict grrowing up-my whole family was as well and I mourned when they stopped making “scotch”… This is as close to that flavor as I’ve ever gotten and I’m so grateful to you for this recipe!
Your recipe was super easy to follow, helped me feel like I knew what I was doing, and resulted in some really delicious candy! Thank you for taking the time to write everything out so thoroughly; I can’t wait to try out some of your other recipes!
Amazing recipe, amazing result! It was easy and quick. My boyfriend and I love them and I will be making them regularly. They also don’t stick like crazy to my teeth. Thank you
Amazing recipe, amazing result! It was so easy to make and very quick. My boyfriend and I love them. They also don’t stick like crazy to my teeth! Thank you.
Oh, wow, I’m so glad you guys like them! Thank you for letting me know!
I’m confused – the “notes” say the recipe contains molasses, but there is no molasses listed in the ingredients?
Hi Olive. The molasses is in the brown sugar. Modern brown sugar is made by mixing molasses back into white sugar so they can control the percentage of molasses. I use dark brown sugar in this recipe which is 7% molasses. It’s not a lot, but that’s what gives the butterscotch its flavor: brown sugar (or molasses plus white sugar) plus butter cooked = butterscotch. 🙂 Hope that helps to clear things up!
Can you use liquid glucose instead of corn syrup?
Absolutely. 1:1 for the corn syrup, Darron. Corn syrup is generally cheaper and easier to find for home cooks, but if you have glucose, go for it!
Hi Jenni,
I love this recipe. What would be the exchange if I chose to use molasses in place of dark brown sugar? Or do you replace all the dark brown sugar?
Hey there, Wendy! It kind of depends on how much you like molasses. You can absolutely use granulated sugar and molasses rather than brown sugar. Dark brown sugar is about 6.5% molasses, so if, for ease of math, the recipe calls for 10 oz of brown sugar, I’d use 9.35 oz of sugar and .65 oz of molasses. If you want a candy that’s more molasses forward, go with a 9oz granulated sugar and 1 oz molasses. I hope that helps, and enjoy!
Thank you so . much. We do like molasses around here. I don’t think it will be to strong and i agree, without it the flavor is NOT butterscotch.
Please let me know how they turn out for you, and if you want to share a picture that would be The Best too! Merry Christmas!
I haven’t made this candy yet, so I can’t rate it. I always have light cream in the fridge. Can I use that? Will the texture be off a bit? I’m looking for a hard and buttery butterscotch
Hey, Suzan. Yes, I think you will be fine using the light cream. When you make the candy, you may notice some butter “leaking out” as it cools, but if you leave they candy to crystallize at least overnight, most of that butter will be magically reabsorbed. The candy has sort of a creamy crunch, and it shouldn’t stick to your teeth. Enjoy!
I made these today, and they are very good. I broke my candy thermometer on accident so I had to use cold water to test, but the results were still phenomenal. I think I’ll add 2 oz of molasses next time for extra flavor since I love the taste the molasses gives it.
OK, so it’s September and the dew point outside is 76 degrees and the temperature is around 93. I shouldn’t be making hard candy, but the AC is cranked up and it’s dry in the house. More importantly, I wanted butterscotch. More importantly I wanted the dark butterscotch of my youth, namely Collar and Bowser, which is long gone- as is my recipe.
I remembered what was IN mine, but not the amounts, so thank you for that.
I used all brown sugar, and instead of corn syrup, I used Mild molasses.
I cooked it the way I remember doing it, but did use your temps. It’s currently scored and cooling on the counter. I’ve been into a ridiculous amount of it already. It’s perfect.
BTW can I link to your site if I post my recipe on my blog so that people can use mine, yours, or your chewy one??
Oh, great! And nice call to add additional molasses rather than corn syrup for more robust flavor!
And of course you can link to my site, Caryl. 🙂 Thanks for asking. Enjoy the butterscotch–sometimes butterscotch is just plain necessary, regardless of the temperature outside!
Thank you so much for this helpful guide! I finished my candy about three hours ago and have been letting it cool and set, but it’s still quite buttery on the surface. I don’t think that the butter reabsorbed well after I scored it. Should I continue to wait a few more hours? Blot it with parchment paper? It tastes great and I’d like to make it again so I want to make sure I get this step right.
It took mine several hours for the butter to “soak back into the candy.” Some butter leaked out every time I made it, so I tested the recipe out with different amounts of butter. This version–I think it was try number 4 or 5 maybe–had the best “reabsorption” rate. The candy will always be just a touch slick on the outside since there are no emulsifiers in it, but it should not leak all over. If you can let it sit for a few more hours, you should find that the butter mostly magically disappears back into the candy. I’m glad you like it!
So happy to have this! Butterscotch is a favorite flavor in this house. I hope to make this soon. We love both crunchy and chewy so will be making both recipes! Thank you for such a complete guide!
Oh, wonderful! From one butterscotch lover to another, I hope you guys enjoy both kinds!
Each version of this was even better than the first, which was really tasty! They were all rich, buttery and full of flavor, and had a nice crunch that is holding up well as some the days go by. No that they’ll last much longer!
Thanks for being such an intrepid taste tester! xo
This is one of the best and most comprehensive butterscotch recipes I’ve ever seen. I know your attention to detail is second to none so I have no doubt this is amazing candy! I wanted to leave you five stars but it clicked on 4.5 and then I was unable to revise it. I’m certain this is a 5 star (*****) recipe!!
Thank you, Renee! I worked really hard on this so folks have the best chance of success with it! Thanks for rating it–I’ll take that 4.5! =)