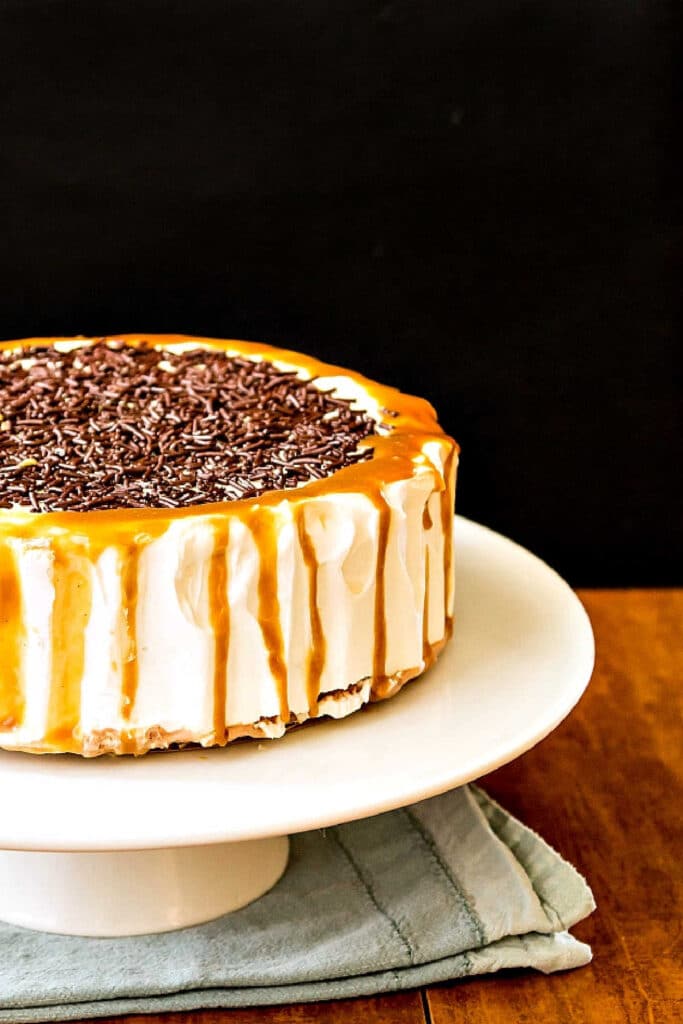
Learn how to make a birthday ice cream cake with whatever flavor ice creams are your favorite.
A simple layering of softened ice cream and crunchy cookie layers is easy to achieve and makes a festive birthday dessert!
You may also be interested in my Neapolitan ice cream cake, which is another fun ice cream smackerel.
For ease of browsing, you can find all my ice cream recipes in one place. Thanks for stopping by!

Why Have Ice Cream Cake for a Birthday?
For one, you don’t need to turn on the oven, so yay for a no-bake dessert.
Ice cream cake is generally something you buy from a shop, but when you make your own, you can customize the flavors and the decorations.
Another bonus? You won’t have to buy ice cream to go along with cake. It’s an all-in-one birthday extgravaganza!
Pastry Chef Online Participates in Affiliate Programs. If you make a purchase through one of my links, I may earn a small commission. For more information click to read my disclosure policy
If this sounds like your idea of a good time, you can skip straight to the recipe.
And if you do make this recipe, I have a favor to ask:
When you do make this recipe, it will help me and other readers if you:
✅Rate the recipes using the stars in the recipe card
✅Leave a review when prompted in the recipe card (If it’s a positive review, and I hope it is, I’ll use it in the post as social proof)
✅Leave a comment on the post
Thank you so much!
How to Make a Birthday Ice Cream Cake
I’m not saying that this is the only way to make an ice cream cake, but I was inspired by this recipe on Shutterbean, so I followed her lead. And I’m glad I did!
Here’s what you’ll need to make your own version.
Don’t focus so much on the specifics of the ingredients as the spirit. Use your favorite ice cream. Use your favorite cookies. Decorate however you want.
In general, though, you’ll need:

- ice cream: Store-bought or homemade. I would stick with traditionally churned ice cream. No churn is hard to work with and it melts very quickly.
- crushed cookies: Again, store-bought or homemade. Depending on the ice cream flavors you use, choose chocolate sable, ginger cookies, peanut butter cookies, chocolate chip cookies, Graham crackers, or Oreos. Or use one kind of cookie for one layer and another for the other one.
- heavy cream: Whipped cream is really the best frosting for ice cream cake. It’ll hold its shape and it melts in your mouth. Plus you can flavor it however you want
- ice cream sauce: For this cake, I flavored the heavy cream by adding some homemade butterscotch sauce to it. You can also use caramel sauce, hot fudge sauce, a fruity sauce, or just sweeten it with some sugar and add a touch of vanilla
- decorations: The sky is the limit here. I used real chocolate sprinkles, because they taste amazing and I love chocolate. Use your favorite decorations such as rainbow sprinkles or candy pearls.
- birthday candles: Because it’s not a birthday cake without birthday candles!
Here’s what you do:
- Line an 8″ x 3″ round cake pan (or use a loaf pan) with plastic wrap
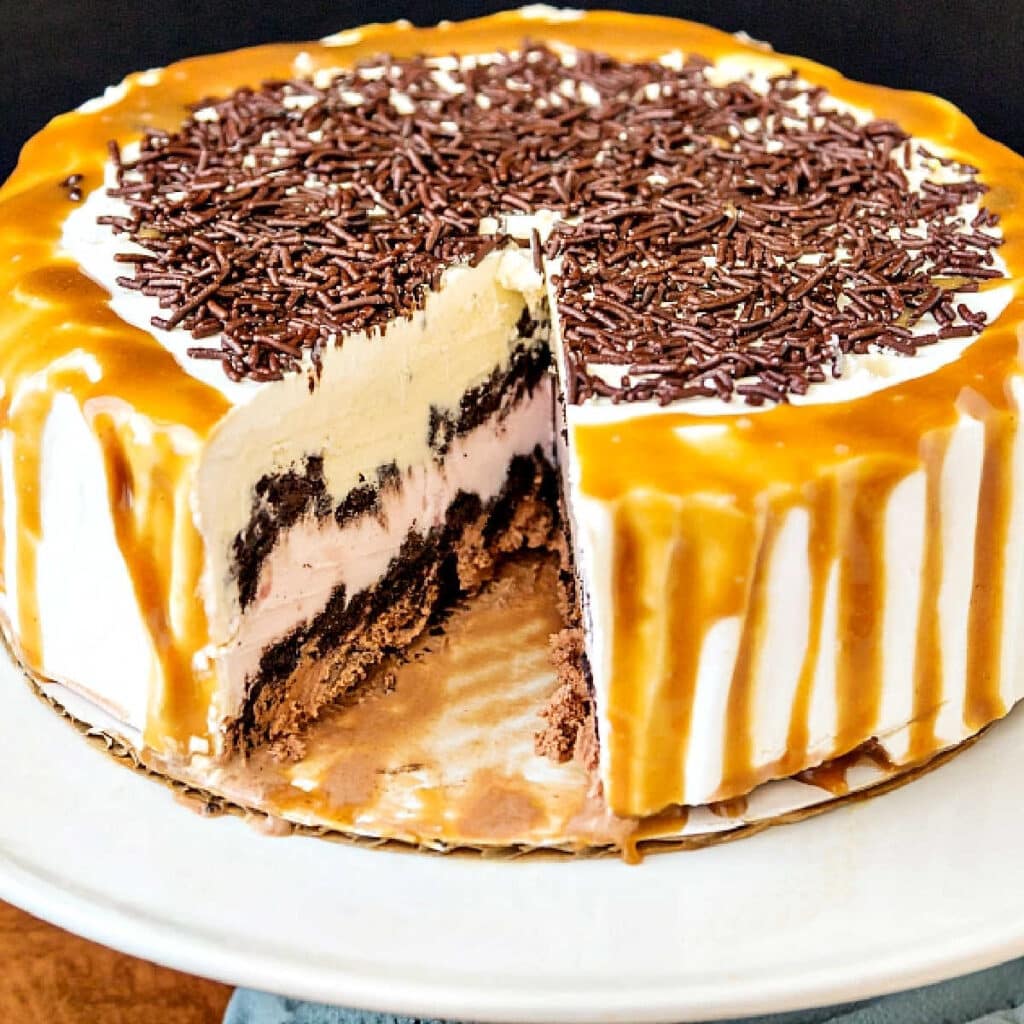
- Soften 3 kinds of ice cream
- Crush up some cookies that will complement your ice cream flavors
- Spread an even layer of ice cream in the pan (this will be the top layer)
- Top with crushed cookies and press them down just a bit
- Freeze for 20 minutes
- Repeat once more and then layer on the last of the ice cream
- Freeze until firm
- Unmold and frost with whipped cream
- Decorate as desired
Equipment You Will Need
I made my cake in an 8″ x 3″ cake pan lined with plastic wrap.
You can also use an 8″ x 3″ springform pan, but in that case, you won’t be turning the cake out, you’ll just be removing the sides of the pan.
To use a springform, I recommend placing an 8″ cardboard cake circle on top of the plastic wrap in the bottom of the pan. That way, you won’t end up with plastic wrap you can’t remove.
You can just unlock the sides, peel off the plastic wrap, and use a spatula to help you remove the cake and cake board to a cake pedestal for decorating and serving.
Would you like to save this post?
An offset icing spatula is ideal for spreading even layers of ice cream in your prepared pan.
Pro Tips

Before lining your cake pan with plastic wrap, spray the pan with pan spray. It will act as “glue” to hold the plastic wrap in place.
Don’t try to frost your ice cream cake with traditional frosting. It won’t spread well. Whipped cream is definitely the way to go. Flavor it however you want, and spread it on the frozen cake.
Questions?
It helps me and other readers so much if you take a moment to rate and review this recipe.
Your star rating and comments help others decide whether the recipe is worth making, and your feedback helps me continue improving recipes here at Pastry Chef Online.
Other lovely ways to share include pinning or posting on your favorite social media platform.
Thank you so much for taking the time!

Birthday Ice Cream Cake
Ingredients
- 3 cups each of three compatible flavors of ice cream softened
- 24 chocolate wafer cookies coarsely crushed (or other cookie you like)
- 1 ½ cups heavy cream 12 oz
- salted caramel sauce to taste (I used Postre)
- ¾ cup real chocolate sprinkles like these
- ice cream sauce (I used my coffee butterscotch sauce)
Instructions
- Spray an 8″ x 3″ cake pan or spring form pan with pan spray. Fit in three overlapping pieces of plastic wrap long enough so the ends hang out of either side of the pan by about 6″. The pan spray acts as glue to hold the plastic wrap in place.
- Spread the first flavor of ice cream evenly in the bottom of the pan (this will be the flavor on the top, so plan accordingly)
- Spread on half of the crushed cookies and pat down. Freeze for 20 minutes or so.
- Add the second layer of ice cream, spreading it on carefully. I found it easiest to plop on a bunch of dollops of ice cream and then smoosh them all together into one layer with an offset spatula. You don’t want to spread it really or you could pull up some of your cookie layer.
- Top with the remaining crushed cookies. Freeze another 20 minutes of so if the cake is a bit melty.
- Finish with the last ice cream flavor. Fold over all the overhanging plastic wrap so the cake is completely covered. Using a cake circle or plate (or other round item just large enough to fit inside your cake pan (bottom of a pot, maybe), press down gently on the whole cake to solidify the layers. Freeze for at least 4 hours.
- Turn the cake out onto a cold serving tray (I refrigerated mine for a good thirty minutes. You could also put it in the freezer if you have room).
- Whip the cream along with enough caramel sauce to make it as sweet as you like (or just use sugar and a pinch of salt if you don’t have sauce/don’t want to use it). Frost the cake as desired.
- Sprinkle the sprinkles on top and then spoon some slightly warmed butterscotch sauce around the edges so it runs down the sides in Artful Butterscotch Ribbons.
- Keep in the freezer until right before slicing and serving. Use a warm knife for the cleanest cuts, wiping off the blade between each cut.
- Enjoy.
Did You Make Any Changes?
Notes
Would you like to save this post?

Hi, y’all! I hope you’ve enjoyed this post and hopefully also learned a thing or two.
If you like my style, I invite you to sign up for my occasional newsletter, The Inbox Pastry Chef.
Expect updates on new and tasty recipes as well as a bit of behind-the-scenes action. I hope to see you there!

Please give this ice cream cake a try. Nobody but you needs to know how easy it was to make!
Thank you so much for spending some time here today. I can’t wait to see what kinds of ice cream cakes you guys will come up with!
Have a lovely day.


Join in Today!
Oh my goodness this ice cream cake just took my breath away. It is marvelous and now I’m motivated to make one. As always, I will come back to your recipe here to follow step by step. Thanks for sharing this, Jenni. Hope all is ok and you’re feeling better.
Oh yay, BA! I do hope you put your Filipino spin on it with ube ice cream or something! Enjoy it–it is a celebratory cake! =) And I am doing great. Thank you, friend! xo
Once again you have created magic and explained in a way that makes it simple for everyone to follow and create their own masterpieces. You are the Dessert Guru Jenni!
I can’t tell you how much your support means, Jane! <3
It is a really inspiring cake, and the photography too. The tiles are a great idea for beautiful background.
Thanks, Ben! I often tend to make stuff with long ingredient lists, so it was really nice to be able to make something pretty straightforward that also looks really cool! And I am indebted to Stacey Sprenz for her use of tiles. I ended up with 6 different surfaces for under $30 at Lowe’s!