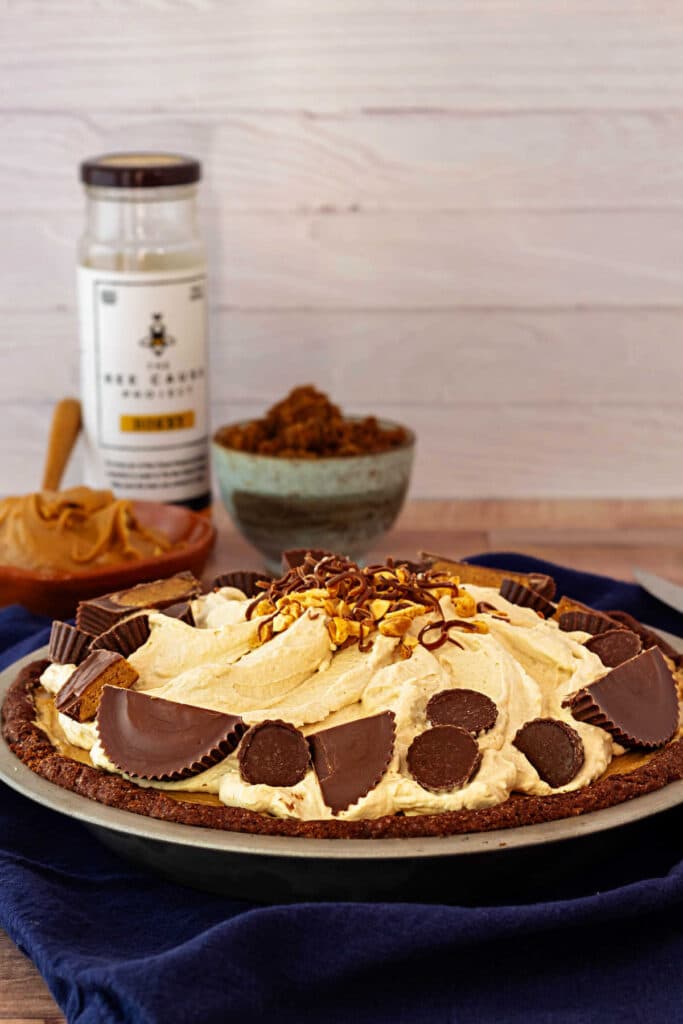
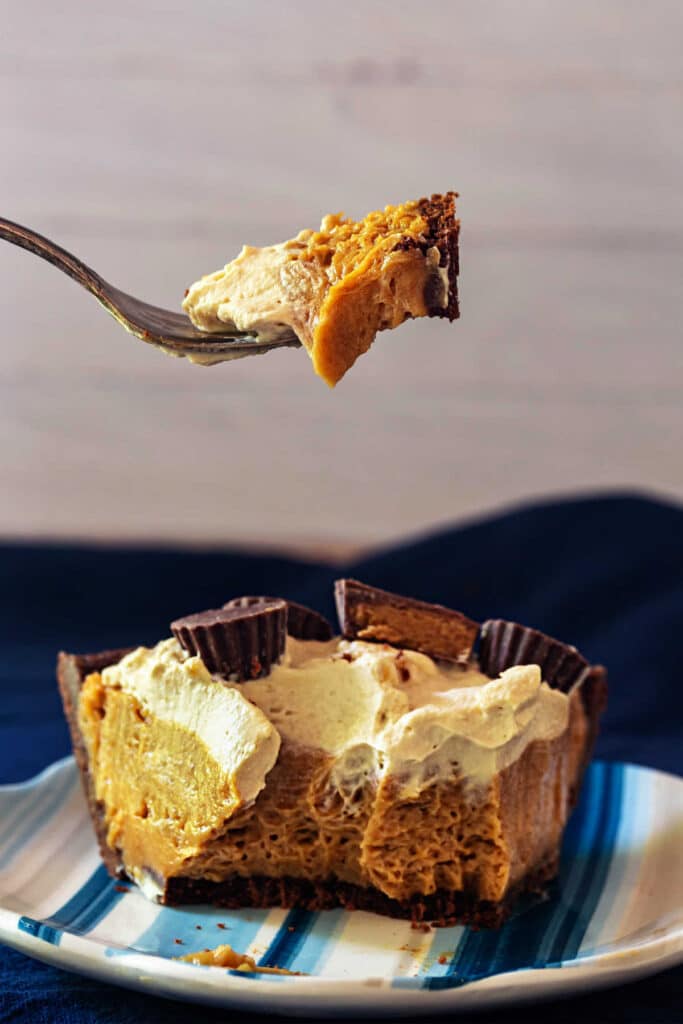
This lighter-than-air peanut butter mousse pie is so silky and light, I’ve been calling it Peanut Butter Cloud Pie.
Reader CJ requested a peanut butter pie made without cream cheese, and this one delivers. Sweetened with brown sugar and honey, it tastes homemade because it is homemade. Made with heavy cream instead of whipped topping, it’s rich and decadent while staying light on the palate.
Made for true peanut butter lovers, the peanut flavor shines through in the no-bake filling, unmuddied by whipped topping or tangy cream cheese. I know y’all are going to love it, so let me walk you through the surprisingly easy technique.
Pastry Chef Online Participates in Affiliate Programs. If you make a purchase through one of my links, I may earn a small commission. For more information click to read my disclosure policy
Peanut Butter Cloud Pie, At a Glance
✅Skill Level: Beginner
✅Skills: Whipping cream, spreading a filling, making the (optional) chocolate sable crust
✅Type: Chilled Pie with No-Bake Filling
✅Number of Ingredients: 7 in the filling, 9 in the optional sable crust
✅Prep Time: 15-20 minutes
✅Chill Time: 12 hours
✅Yield: 8-10 slices
Jump Straight to the Recipe
Reader Rave
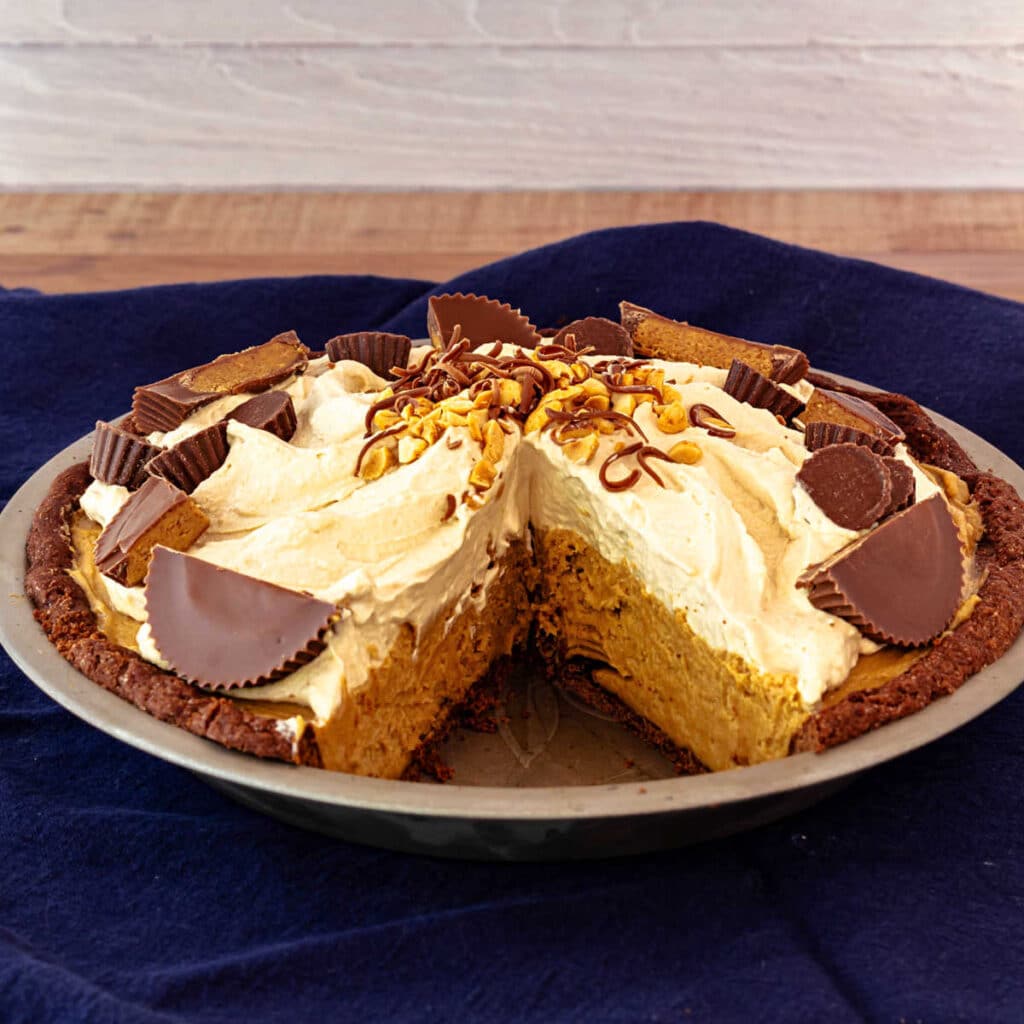
Very light & creamy, nice blend of flavors. Like eating a peanut butter cloud! With candy on top!
Happy pie-receiving neighbor Diane
Peanut Butter Pie: The Challenge & Solution
This section is for folks who crave the “why” behind the “how.” If you just want to make pie, feel free to skip to the recipe.
CJ challenged me to come up with a recipe with no cream cheese and no whipped topping. That is a bit of a tall order, because those two ingredients help the pie to set up. My challenge was to figure out a way to make a slice-able pie filling (and topping) without naturally firm/stabilizing ingredients.
In my first test, I used Instant ClearJel. While I loved the flavor, the filling was more pudding-like than pie filling-like. So then I tried using gelatin, which worked but yielded a rather off-putting, borderline-boingy texture.
As fate would have it, I tasted the Instant ClearJel (ICJ)-stabilized filling the next day, and it had firmed up into a lovely, slice-able texture. Because ICJ thickens by gradually binding available liquid—and this filling doesn’t contain a ton of free liquid—it needs a long chill in the fridge to fully work its magic. Patience is the key.
How to Make This Pie
In this section, I’ll discuss all the ingredients, their function, and offer substitutions where appropriate. I’ll also walk you through making both the filling and the topping. If you are ready to get started, go ahead and jump on down to the recipe.
Since the filling is the star here, I’m keeping the crust section brief. Use the listed ingredients to make my chocolate sablé crust, an Oreo crumb crust, or use your favorite prepared chocolate crumb crust. If you really want to lean into nostalgia, you can even make a Graham cracker crust.
Jenni Says: If making an Oreo crumb crust, I prefer to scrape out the filling first for a deeper chocolate flavor and crisper texture. If you’d rather choose not to participate in scraping out the filling, it is fine to leave them filled.
As a bonus, the filling and topping are naturally gluten-free (just check individual ingredients for any cross-contact warnings), so if you have a favorite gluten-free crumb crust recipe, you can easily make this pie gluten-free too.
This recipe falls squarely in the Hummer Pie category. If that sentence raises questions, allow me to introduce you to my pie vs. tart treatise.
With the exception of the peanut butter in the filling, the filling and topping ingredients are identical. This makes for a cohesive and harmonious flavor profile, and it also allows you to make both the filling and topping in the same bowl without having to wash it in between.
- heavy cream: Provides some liquid and a lot of butterfat which is necessary for developing the structure and texture of both the filling and topping
- honey: A liquid sweetener with a nostalgic link to peanut butter (peanut butter and honey sandwich, anyone?), honey adds sweetness, depth of flavor, and liquid. Since it is hygroscopic and attracts water, it also helps mediate the texture for a smooth mouthfeel that never feels stodgy.
- kosher salt: Focuses the flavors and counteracts any potential bitterness
- vanilla: Rounds out the flavors, providing a warm, complex background for the peanut butter.
- brown sugar: Provides sweetness as well as binding some of the liquid. The molasses provides a nostalgic flavor note. You may use regular granulated sugar if you want a purer peanut butter flavor
- Instant ClearJel: Instant ClearJel is basically cornstarch that has been gelatinized, dried, and pulverized into powder. This is why it works to gel liquids without having to cook them. If you cannot find or do not already have Instant ClearJel, you can substitute some instant vanilla pudding mix. I did a test using pudding mix, and there is little difference in flavor. For a cleaner ingredient list, my vote is to use ICJ if you have it, but know that instant vanilla pudding is a viable substitute.
- creamy peanut butter: Provides the peanutty flavor, peanut solids that contribute to the texture of the filling, and a marginal amount of liquid that the ICJ eventually binds with to yield a cloud-like texture full of peanut butter flavor
Making the Filling and Topping
Once you make and cool (or purchase) the crust, it’s time to fill, top, and chill.
In a nutshell, here is the order of operations:
- Whip up the filling and spread evenly into the pie shell.
- In the same bowl (don’t bother to rinse it), whip up the topping.
- Top the pie however you’d like–spread it, pipe it, spoon it, mound it.
- Chill, garnish (or not), slice and serve.
To Make the Filling
The filling is pretty straightforward to make. There are a couple of prep steps that will make the process flow smoothly, and it shouldn’t take more than 5-10 minutes, tops, to make the filling.
Would you like to save this post?
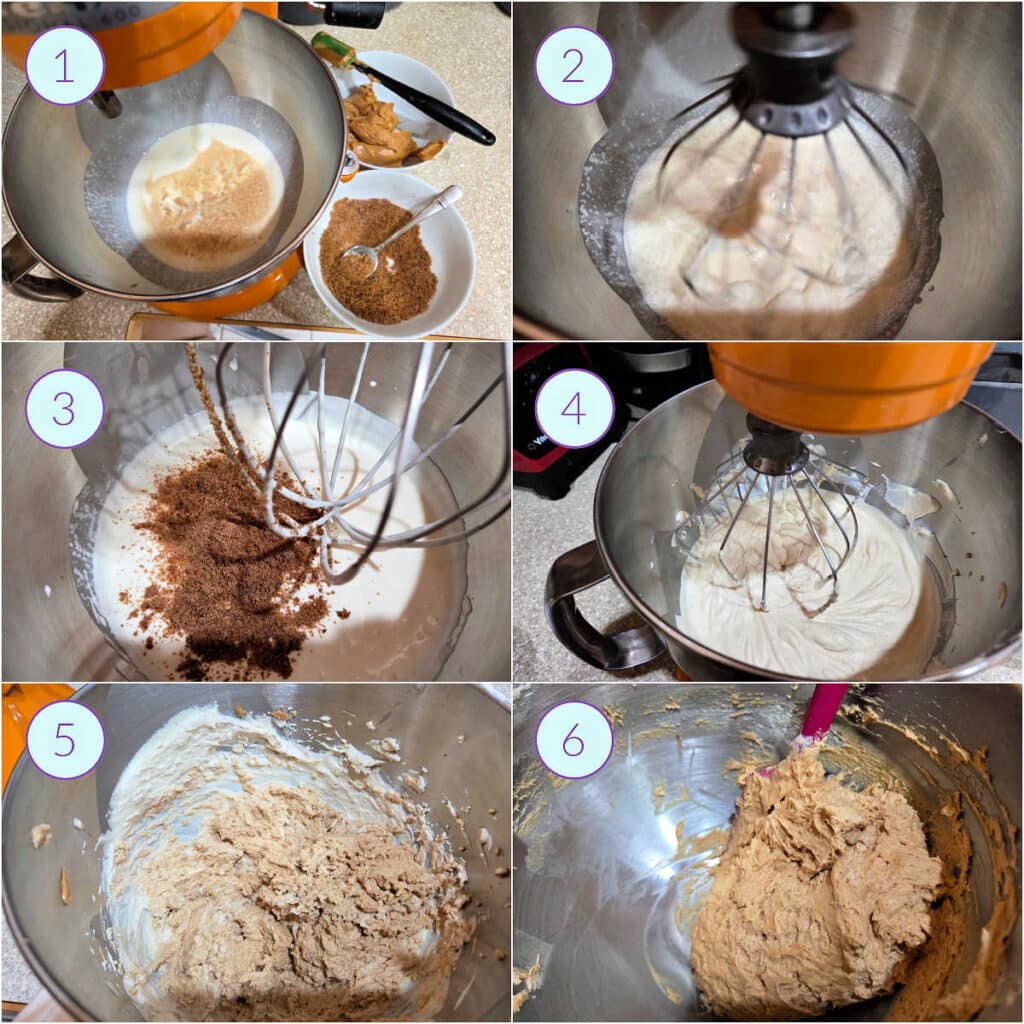
- Mise en place: Whisk the brown sugar thoroughly with the ICJ (or pudding mix, if using). This disperses the ICJ so it doesn’t clump when it hits the filling. Measure out the peanut butter. Add the cream, honey, salt, and vanilla to the mixer bowl fitted with the whisk attachment. Now you’re ready to roll.
- On medium speed (or by hand with a whisk), whip the heavy cream, salt, honey, and vanilla together until it thickens and the whisk leaves tracks in the cream.
- Add the brown sugar/ICJ mix and continue whipping/whisking to soft-to-medium peaks.
- When you raise the whisk, peaks should softly curl over, and most of the sugar crystals should have dissolved into the cream. Thanks, medium speed!
- Add the peanut butter and whisk in briefly–no more than 3-5 seconds.
- Mixture will thicken quickly, so finish by folding everything together, gently but thoroughly, until no light streaks remain.
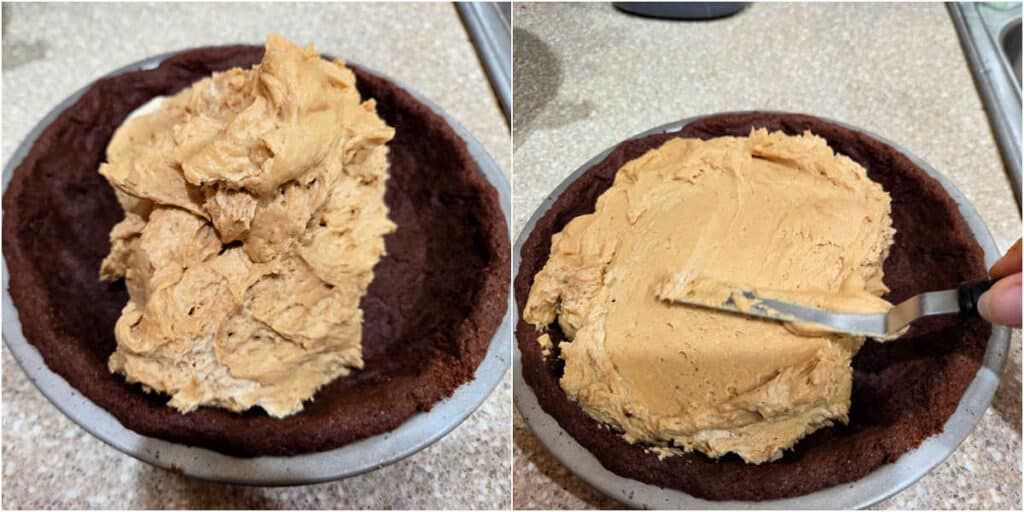
Scrape filling out into the waiting pie shell and, using an offset spatula, spread evenly. Filling should completely fill the crust.
To Make the Topping
The method is exactly the same as making the filling. The only difference is you don’t whip in peanut butter at the end.

- In the same bowl you used for the filling, whisk together the brown sugar and ICJ/pudding mix.
- Whip the cream, honey, salt, and vanilla until it softly mounds, then whip in the brown sugar mixture.
- If making on a stand mixer, finish whisking by hand to make sure there is no thinner cream hiding at the bottom of the mixing bowl.
- The topping should come to stiff peaks when you hold the whisk upright. The ICJ/pudding mix helps it stay that way.
Add the topping however you’d like: pipe it, spoon it on, swirl it, spread it. Dealer’s choice!
Jenni says: Especially when using dark brown sugar, it’s important to press it through a medium strainer to break up any little molasses lumps.
Whisking the ICJ together with the brown sugar keeps it from clumping when it hits cold liquid.
Peanut Butter Mousse Pie Q & A
Not only can you make this pie ahead, but since it needs a long chill time, you should make it at least the day before. You can make it up to 3 days ahead.
I would not use natural peanut butter that has to be stirred together before using. The oil could separate and the pie may not set up sufficiently. Stick to “mainstream” peanut butters like Skippy, Jif, or Peter Pan. Since it’s what I grew up with, I used Peter Pan for testing.
During my testing, I found that using double the amount of ICJ in instant vanilla pudding mix works beautifully. As a bonus, it’s easier to find than Instant ClearJel. The downside is that it contains a lot of additives, so for a cleaner ingredient list, I’d go with ICJ.
Whipping on medium speed does a couple of things here. First, it allows the bubble matrix to build up gradually, and this results in a more stable foam. Second, it gives the brown sugar time to dissolve into the cream before you reach peak peakage.
ICJ shines when gelling very liquidy ingredients. This pie filling contains relatively little free liquid, so it takes a while for the ICJ to bind with what’s available. If you taste the filling right after making it, you may notice a very slight chalky mouthfeel. That’s the ICJ wondering what to do and where all the liquid is. The long, cold rest gives the ICJ time to fully hydrate, creating a dreamy texture with zero chalkiness.
Yes, you can. Since ICJ binds liquids effectively, this pie freezes and (more importantly) thaws beautifully with no weeping. Allow the pie to set for a full 12 hours in the fridge before freezing the pie or individual slices. You can successfully freeze it for up to a month, but I wouldn’t push my luck much past that. Freeze unwrapped and then store in zip-top freezer bags until needed. Allow to thaw, still wrapped, in the fridge for about 12 hours before slicing and serving.
More Peanut Butter Goodness
If you are here because you wanted pie, then I have a few more pie recipes you might want to check out.
My chocolate chess pie is deeply chocolatey and homey. Definitely worth making.
For a pie showstopper, the deep dish lemon meringue tart, with its swoops of toasted meringue, fits the bill nicely.
And for an easy filling with timeless flavor and texture appeal, you may enjoy this traditional coconut custard pie.
If peanut butter is primarily what brought you here, then let me introduce you to a couple more peanut butter desserts.
Peanut butter sweet rolls are ooey, gooey, peanut buttery yum. And my peanut butter cookies boast twice the amount of peanut butter as in other recipes. Add in browned butter, and they are pretty much irresistible!
Questions?
If you have any questions about this post or recipe, I am happy to help.
Simply leave a comment here and I will get back to you soon. I also invite you to ask questions in my Facebook group, Fearless Kitchen Fun.
If your question is more pressing, please feel free to email me. I should be back in touch ASAP, as long as I’m not asleep.
A Note About Measurements
My recipes are almost all written by weight, including liquids, unless otherwise specified.
For accuracy and consistency of results, I encourage you to buy–and use–a kitchen scale.
I promise that baking and cleanup will be so much quicker and easier.
This is the scale that I recommend for home use. I have owned and used one for years.

Peanut Butter Cloud Pie
Equipment
Ingredients
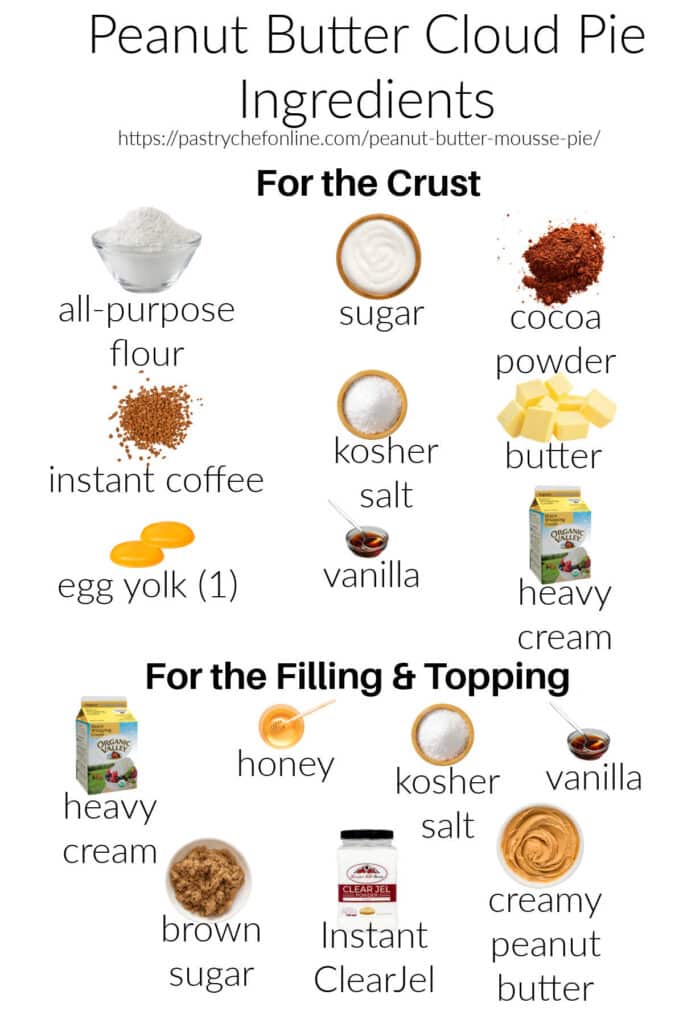
For the Crust
- 130 grams all-purpose flour 4.6 oz or 1 cup plus 1 Tablespoon measured by whisking, spooning, and sweeping
- 57 grams granulated sugar 2 oz or about 1/4 cup
- 22 grams cocoa powder 0.8 oz or a scant 1/4 cup
- 1 ¼ tsp espresso powder or instant coffee optional, but it adds depth
- ⅛ tsp kosher salt I use Morton's. If using table salt, use a pinch. If using Diamond Crystal, use 3/8 tsp
- 104 grams unsalted butter softened, 3.7 oz
- 1 egg yolk
- 1 tsp vanilla extract
- 1 to 2 tsp heavy cream as needed
For the Filling
- 340 grams heavy cream about 1 1/3 cups or 12 oz
- 80 grams honey 4 Tablespoons or 2.8 oz
- ¾ tsp kosher salt I use Morton's. If using table salt, use 1/2 teaspoon. If using Diamond Crystal, use 1 1/2 teaspoons
- 1 tsp vanilla extract
- 52 grams dark brown sugar 1/4 cup, packed or 1.8 oz
- 1 ½ tsp Instant ClearJel (NOT cook type) Sub 1 Tablespoon instant vanilla pudding mix if preferred
- 250 grams creamy peanut butter such as Peter Pan, Jif, or Skippy, 1 level cup or 8.8 oz
For the Topping
- 227 grams heavy cream 8 oz or 1 cup
- 20 grams honey 1 Tablespoon or 0.7 oz
- 26 grams dark brown sugar 2 Tablespoons, packed or 0.9 oz
- 2 tsp Instant ClearJel (NOT cook type) Sub 1 Tablespoon + 1 teaspoon instant vanilla pudding mix if preferred
- ⅛ tsp kosher salt I use Morton's. If using table salt, use a pinch. If using Diamond Crystal, use a slightly generous 1/4 teaspoon
- ½ tsp vanilla extract
Instructions
For the (Optional) Chocolate Sable Crust
- Set a rack in the center of your oven, and preheat to 350°F / 177°C.
- In a large bowl or in the bowl of a stand mixer fitted with the paddle attachment, mix flour, sugar, salt, espresso powder (or instant coffee), and cocoa powder together until evenly combined.
- Add the softened butter and mix until the mixture is clumpy and most of the dry ingredients are moistened.
- Mix in the egg yolk and vanilla, and beat on medium speed until the mixture gets clumpy and darkens in color.
- Add 1 teaspoon heavy cream and continue mixing. The dough should form a cohesive ball not unlike Play-Doh. If it doesn't quite come together, add the second teaspoon of cream and mix again.
- Remove the dough from the mixer, form into a disc about 1" thick (2.5 cm), and place on a work surface between two sheets of parchment paper.
- Roll the dough out into a 11-12" (28-30 cm) circle of an even thickness.
- Carefully peel off one piece of the parchment paper and center the dough circle on a 9" pie pan.
- Gently remove the other piece of parchment paper and fit the dough into the pan.
- Cut off any overhang even with the outside rim of the pan. Fold the dough edge back on itself and pinch together to reinforce the top of the crust. (See process shot for a visual.) No need to crimp–there will be plenty going on with all the filling and topping and whatnot.
- Crumple and then uncrumple one of your pieces of parchment paper and fit into the crust. Fill with beans or sugar, and bake for 30 minutes.
- Carefully remove the parchment and sugar. A little of the dough might stick to the parchment. Just peel it off and press it back into place. Bake for an additional 8-10 minutes, or until the center of the crust is no longer shiny but matte.
- Remove from the oven and let cool completely. Crust will continue to firm and crisp up as it cools.
For the Filling
- Press the brown sugar through a medium sieve or strainer to get rid of any lumps. Whisk together the brown sugar and Instant ClearJel (or pudding mix) and set aside. Measure out the peanut butter.
- In the bowl of your stand mixer fitted with the whisk attachment or in a large bowl using a hand mixer or balloon whisk, whip the cream, honey, salt, and vanilla together on medium speed until the whisk leaves tracks in the cream and very softly mounds when you lift the whisk.
- Add the brown sugar/ICJ mixture and continue whisking on medium speed until the cream reaches soft-to-medium peaks. Peaks will curl over gently when you raise the whisk.
- Add the peanut butter and whisk on high speed just to combine–no more than 5 seconds. Finish by folding with a spatula, gently but thoroughly, until no lighter streaks remain.
- Scrape into the cooled pie crust (or prepared crust) and spread evenly with an offset spatula. Filling should come to just below the rim of the crust.
For the Topping
- Use the same bowl you used to make the filling. No need to wash it or even wipe it out.
- Press the brown sugar through a medium sieve or strainer to make sure there are no lumps. Whisk together the brown sugar and ICJ and set aside.
- On medium speed, whisk the heavy cream, honey, salt, and vanilla together until the whisk leaves tracks and the cream very gently mounds when you raise the whisk.
- Add the brown sugar mixture and continue whipping to medium peaks. The peaks will curl over a little bit when you raise the whisk.
- If using a stand mixer, finish whisking by hand to ensure you get all the cream incorporated. Whisk to stiff peaks–peaks will stand up straight without curling over. One caveat: if piping, only whip to medium-stiff peaks. The cream will continue to firm up as it passes through the piping tip, and you don’t want it to overwhip and turn grainy.
- Apply the topping artistically to the top of your pie. Spread it, dollop it, pipe it. Have fun.
- Allow the pie to chill for 12 hours or overnight. The extended chill time gives the ICJ/pudding mix time to fully bind with all the sources of liquid: cream, honey, and peanut butter.
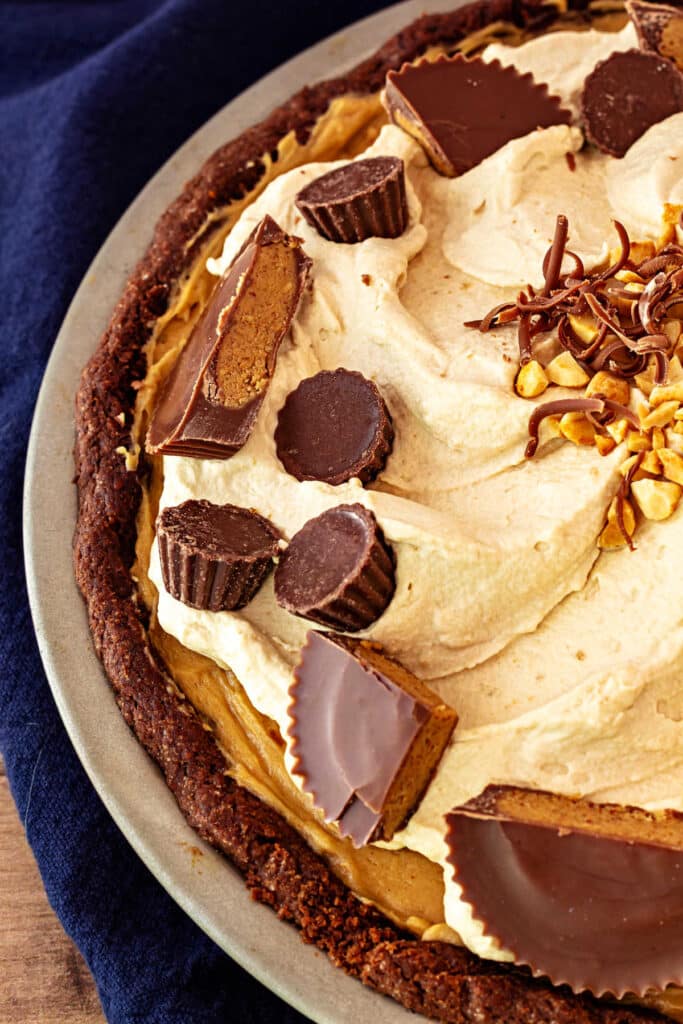
- Before slicing and serving, decorate the pie as desired with peanut butter cups, candy-coated peanut butter candy, chopped peanuts, etc.
- While the pie is delicious straight from the fridge, it is eyes-rolling-back ethereal at room temperature. Either way, for the cleanest slices, cut it while cold and wipe the knife clean between each cut.
Did You Make Any Changes?
Notes
- Be sure to use instant ClearJel, not the cook-type version. If using instant vanilla pudding mix instead, use the amount listed in the recipe (double the amount of ICJ).
- Standard creamy peanut butter such as Jif, Skippy, or Peter Pan gives the most reliable texture. Natural peanut butter can separate or make the filling softer. I tested with Peter Pan.
- Don’t rush the chill. The pie needs the full 12 hours or overnight for the filling to firm properly and slice cleanly.
- For the neatest slices, cut the pie cold with a sharp knife, wiping the blade clean between cuts. For the dreamiest texture, let slices sit at room temperature for at least 10–15 minutes before serving. I’ve left slices out for over an hour for testing, and they hold beautifully.
Nutrition
Would you like to save this post?
And there you have it, friends. A peanut butter mousse pie made sans cream cheese that totally earns the name Peanut Butter Cloud Pie. I hope you love it! And if you do love it, I have a request:
It helps me and other readers so much if you take a moment to rate and review this recipe.
Your star rating and comments help others decide whether the recipe is worth making, and your feedback helps me continue improving recipes here at Pastry Chef Online.
Other lovely ways to share include pinning or posting on your favorite social media platform.
Thank you so much for taking the time!

Thanks, y’all!

Hi, y’all! I hope you’ve enjoyed this post and hopefully also learned a thing or two.
If you like my style, I invite you to sign up for my occasional newsletter, The Inbox Pastry Chef.
Expect updates on new and tasty recipes as well as a bit of behind-the-scenes action. I hope to see you there!


Join in Today!
Hi,
Your pie sounds delicious!
I have a question about the Instant Clear Gel you use. I have used the product King Arthur sells but I do use it when baking pies. I am not familiar with a version not used for baking? Do you have a brand you can recommend?
Congrats for creating a peanut butter pie with no cream cheese!
Hey, Annie! I mean, this pie is Amazing–I am so happy! It looks like the icj on King Arthur is the cook type. I use one by Hoosier Hill. It comes in a pretty large tub, and I have had mine for years. Shelf life is LONG! I link to it in the ingredient discussion section, but here’s the link so you don’t have to hunt for it! https://hoosierhillfarm.com/shop-products/instant-clear-jel/ A reasonable sub is vanilla instant pudding mix, but my preference is ICJ to keep the ingredient list shorter and cleaner. I hope you love the pie. Let me know what you think!