
This is a guest post by Jane Bonacci from The Heritage Cook. She’s teaching us how to make fried chicken cutlets with herb gravy! It doesn’t get much better or more homey than breaded cutlets fried golden brown and served with a savory milk gravy.
Another delicious chicken recipe to try are my chicken chimichangas.
For ease of browsing, here are all my poultry recipes in one place. Thanks for stopping by!

Faster Fried Chicken!
Fried Chicken Cutlets with Herb Gravy pays homage to my grandmother. This is very similar to Mimi’s fried chicken with cream gravy, but a bit easier and a lot quicker to make.
I have always loved fried chicken, especially when cooked in a cast iron skillet by my grandmother. She would pack the skillet with chicken and then we would have to wait for what seemed forever until it was done and ready to eat. It was agonizing.
Contrary to popular tradition, we never use buttermilk in our fried chicken. Mimi was from Indiana and I think it is the difference between Midwestern and Southern styles. I prefer the simple preparation Mimi taught me.
Pastry Chef Online Participates in Affiliate Programs. If you make a purchase through one of my links, I may earn a small commission. For more information click to read my disclosure policy
Making It Healthier
Mimi’s seasoning was never more than just salt and pepper and she used a lot of vegetable shortening, so much that the meat was submerged halfway in the fat.
I wanted to make a dish that was reminiscent of my childhood memories, but better tasting, a bit healthier, faster to make, and with touches that make it my own: fried chicken cutlets with herb gravy.
Breaded Cutlets vs Fried Chicken
Grandma’s old-school recipe:
- used bone-in, skin-on chicken pieces
- took a long time to cook
- used a lot of fat
- was very simply seasoned with salt and pepper
- used heavy cream in the gravy
My Lighter Version:
- uses boneless, skinless chicken breasts pounded to an even thickness
- cooks more quickly
- incorporates herbs to boost flavor
- cuts the amount of cream by adding some chicken stock
- adds shallot and wine to the gravy (thankyouverymuch)
- brings a taste of France with the addition of thyme in the gravy
Step by Step Instructions
I’d call this recipe an intermediate recipe. It’s not hard to make, but there are several steps involved. Before we get to the full recipe, here’s the rundown:
- Prep all ingredients–the main things to remember are to mince the garlic and the onions and to pound out the breasts with a meat mallet or meat pounder.
To Make the Gravy
- Heat oil and butter in your cast iron pan (or other heavy skillet).
- Cook aromatics (shallot and garlic).
- Add flour and cook. You are making a roux by cooking together the fat already in the pan with some flour.
- Add liquids and cook some more.
- Keep warm.
To Make the Cutlets
- Set out two wide, shallow bowls: one with beaten egg and one with the breadcrumbs.
- Season the crumbs per the recipe (or however you like) and stir together well.
- Dip pounded breasts first into the egg, allow excess to drain, and then dip into the breadcrumb mixture, coating well. If you do a lot of breading and frying (or oven frying), consider purchasing a breading station so you’ll have dedicated tools for breading your foods.
- Optional but not really: Let the breaded cutlets sit out for about 10 minutes so the egg and breadcrumb layers can become one with each other. This will help to keep the breading on the chicken where it belongs and not in the bottom of the pan.
- Heat butter and oil in your skillet, then use tongs to add your breaded guys. Don’t crowd the pan, so cook in batches or use 2 pans.
Cook Time
- Cook until golden brown, then flip. Cook until chicken is cooked through, about 10-12 minutes. Shoot for 165F on an instant read thermometer.
- Whisk the browned bits from the pan into the warm gravy before serving. The browned bits are called fond, and there’s a ton of flavor there, so don’t skip this step!
- Plate and enjoy!
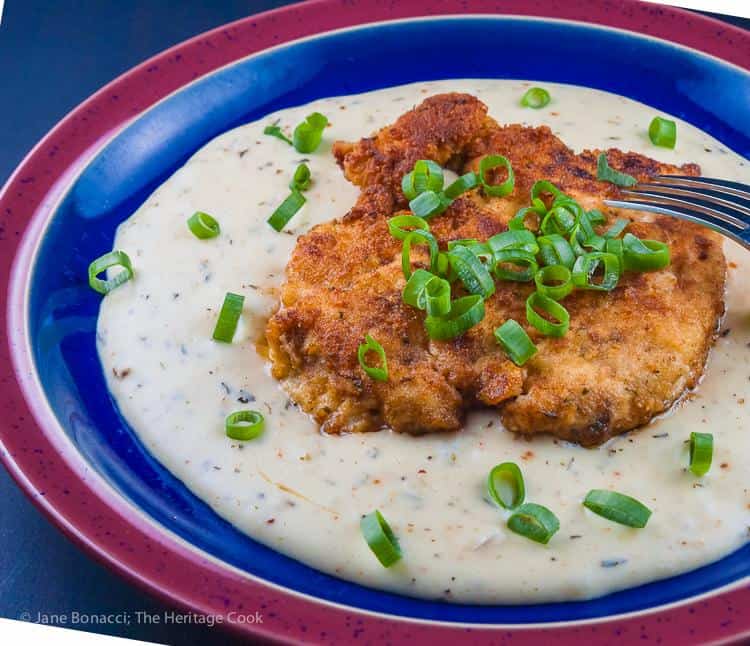
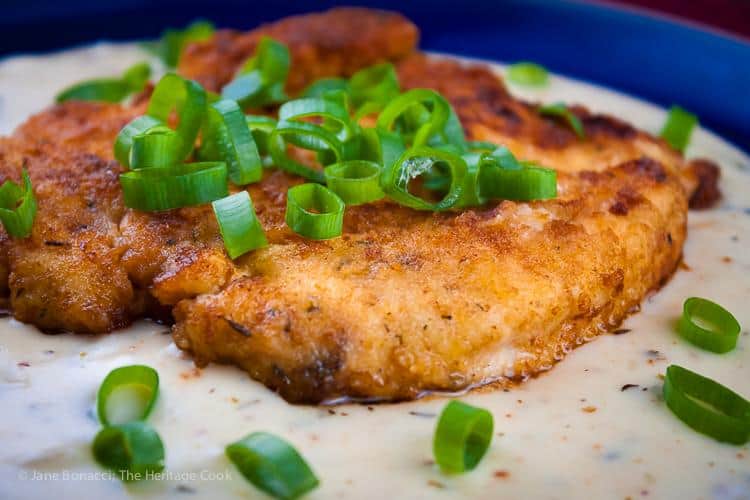
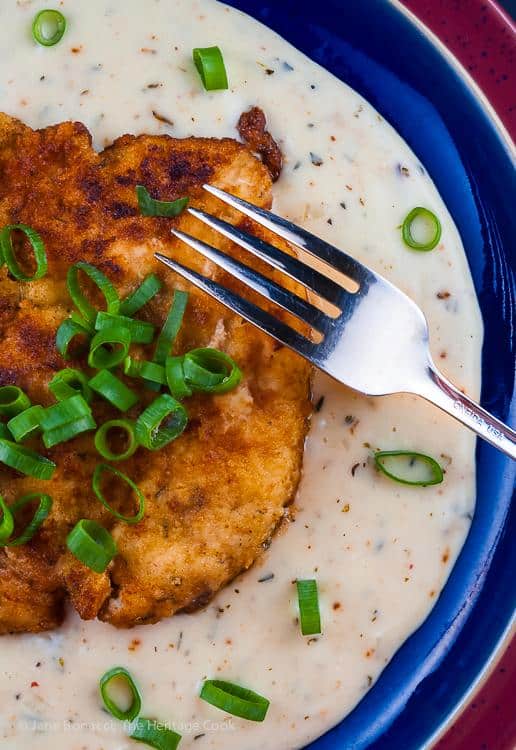
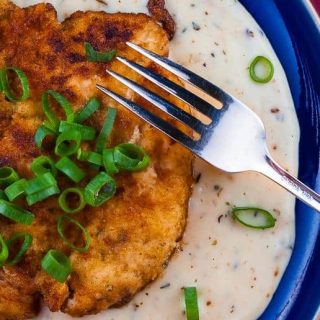
How to Plate So the Chicken Stays Crisp
When serving batter-fried foods with gravies, it is best to put the gravy on the plate first and then set the fried food on top. This helps keep the coating crunchy.
You can pass the remaining gravy at the table in case anyone wants to add more. (And they will. Or at least I will.)
Would you like to save this post?
How to Get This Meal on the Table Even Faster
Rather than pounding out breasts, buy a pack of chicken tenders and pound them out just a bit.
You’ll cut your frying time by about 4 minutes, and on a busy weeknight, every minute counts!
I hope you enjoy this taste of my childhood. Enjoy!
More Favorite Chicken Recipes
Digging the idea of the fried cutlets? Try these easy and comforting chicken recipes on for size!
- Keto Instant Pot Crack Chicken (Mexican-Style): VERY hard to stop eating
- Chicken Pot Pie with Puff Pastry: pure comfort in silky sauce.
- Southern Chicken and Dumplings (Slick or Flat Dumplings): my all-time favorite southern comfort food.
- Chicken with Mushrooms and Thyme: creamy and comforting skillet meal
- Golden Pan-Fried Gnocchi with Lemon Cream Sauce: Once you steam-fry gnocchi, you will never go back to boiling them!
Note these next sections. Jane adds these into all of her posts. Tips and Hints as well as Gluten-Free Tips both make that much easier to follow her already very clearly written recipes. Yay!
Pro Tips for Success
- Use a combination of butter and olive oil to raise the smoke point of the butter and help keep it from burning while frying. (The butter adds flavor and the olive oil is healthy for you. It is a winning combination!)
- Make the gravy before frying the chicken. This may seem backwards, but it is doubly beneficial.
- By making the gravy first and keeping it warm, the chicken is piping hot when you serve it.
- Stirring the remaining butter and browned bits after frying the chicken into the gravy gives you the same flavor as making it the traditional way. All the benefits with none of the hassle.
Make Them Gluten Free
You can use your standard gluten-free flour blend to make the gravy or any individual gluten-free flour such as rice, amaranth, cornstarch, potato starch, arrowroot, etc.
Some gluten-free flours require more liquid than others, so add more chicken stock as needed.
Sounds great, right you guys? I cannot wait to make this recipe, y’all. That creamy, herbed gravy and crispy breaded and fried chicken cutlets? Yes please!
I’m also thinking one could turn this into a sandwich by using a judicious amount of the gravy as a spread for the bread. Yowza.
Jane has an excellent post on making your own gluten-free flour blends on her site. Do give it a read!
Questions?
If you have any questions about this post or recipe, I am happy to help.
Simply leave a comment here and I will get back to you soon. I also invite you to ask questions in my Facebook group, Fearless Kitchen Fun.
If your question is more pressing, please feel free to email me. I should be back in touch ASAP, as long as I’m not asleep.
Fried Chicken Cutlets with Herb Gravy (GF Option)
Equipment
Ingredients
Herb Gravy
- ½ stick butter
- ¼ cup organic olive oil
- 3 shallots peeled and finely minced
- 2 tsp dried thyme leaves
- 1 clove garlic peeled and minced
- 4 tbsp all-purpose flour or gluten-free all-purpose flour blend
- 1 cup chicken stock
- ½ cup heavy cream
- ¼ cup Madeira wine dry sherry, or more stock
Chicken Cutlets
- 4 skinless boneless chicken breast halves
- 2 cups fresh breadcrumbs or gluten-free bread crumbs
- 2 tsp dried thyme leaves
- 1 tsp kosher or sea salt
- 1 tsp freshly ground black pepper
- 2 eggs well beaten
- 2 tbsp butter
- 2 tbsp organic olive oil
- Sliced green onions for garnish
Instructions
Prepare the Herb Gravy
- Heat the butter and olive oil in a large saucepan over medium-high heat. When the oil is shimmering, add the minced shallots and thyme and reduce the heat to medium. Cook until the shallots are softened. Add the garlic and cook another 30 seconds or until the garlic is fragrant. Add the flour and whisk until smooth with no lumps. Cook for about 2 minutes or until the flour no longer smells raw, but has not browned, whisking constantly.
- Slowly pour in the stock, wine, and cream, whisking constantly. Continue cooking, whisking until thickened and creamy. Add salt and pepper to taste. Keep warm.
Prepare the Chicken Breasts
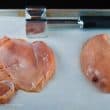
- Place each chicken breast, one at a time, in a resealable plastic bag and pound with the smooth side of a meat pounder until it is all one thickness. If your breasts still have the tenders attached, you can remove them prior to pounding the breasts and cook them separately. When flattened, transfer breasts to a baking sheet. Continue with remaining chicken pieces.
- Place the breadcrumbs in a shallow, flat dish (a pie dish works well) and season with the thyme, salt, and pepper. In another shallow dish place the beaten eggs. Set both containers next to the baking sheet.
- Dip the pounded chicken breasts in the beaten egg and then in the seasoned breadcrumbs. Shake off any excess and set back on the baking sheet. Repeat with the remaining chicken pieces.
Cook the Chicken
- In a large skillet, heat the butter and oil together over medium heat. When the butter is melted and the oil is hot, use tongs to add the chicken to the pan. Make sure to leave some room between the pieces so the butter and oil can brown the edges. Cook in batches if needed or use a second pan.
- Cook until well browned on the first side, then flip and cook the second side. Continue flipping occasionally, cooking until the chicken is cooked through. The timing will depend on how thick the chicken is and how hot the pan is. Mine took about 10 to 12 minutes to be cooked through. Transfer to a baking sheet and keep warm in a low oven while you finish cooking any remaining chicken.
- When all the chicken is cooked and has been transferred out of the pan, scrape any remaining butter and browned bits into the gravy. These browned bits will add tremendous flavor to the gravy. Whisk until everything is incorporated.
To Serve
- Use a ladle to pour some gravy onto each serving plate, swirling it to spread it out until it is slightly larger than the cutlets. Place a cutlet on the pool of gravy and sprinkle with the green onions. Serve immediately.
Did You Make Any Changes?
Notes
To Save Time
Substitute tenders for the cutlets to have your meal on the table even faster.To Reheat
Reheat the cutlets in a toaster oven on 375F for a few minutes until hot. I don’t recommend using the microwave because the breading will become soft. Reheat the gravy on the stove top over medium heat, stirring occasionally, until hot.Ideas for Leftovers
If you do have leftovers, here are some creative ideas for using them:- Slice the chicken up and serve it on salad greens.
- Reheat the chicken and gravy and serve as a hot sandwich on sandwich buns. Use the gravy as a sandwich spread.
- Get store-bought pizza dough and stretch it out. Shred the cutlets. Use the gravy as the pizza sauce and top with the cutlets. Use a mix of mozzarella and Swiss cheese to finish. Consider adding some small pieces of steamed broccoli to your pizza as well.
Nutrition
Would you like to save this post?
Please Take the Time to Rate and Review
It helps me and other readers so much if you take a moment to rate and review this recipe.
Your star rating and comments help others decide whether the recipe is worth making, and your feedback helps me continue improving recipes here at Pastry Chef Online.
Other lovely ways to share include pinning or posting on your favorite social media platform.
Thank you so much for taking the time!

I really hope you guys give this recipe a try. They sound perfect for these cold winter days where we crave comfort but don’t always have hours to make a slow-cooked dinner. Jane’s tastiness to the rescue!
Thank you for spending some time with me today, and please remember to check out Jane’s blog, The Heritage Cook. I know you’ll love what you see!
Take care, and have a lovely day.

Hi, y’all! I hope you’ve enjoyed this post and hopefully also learned a thing or two.
If you like my style, I invite you to sign up for my occasional newsletter, The Inbox Pastry Chef.
Expect updates on new and tasty recipes as well as a bit of behind-the-scenes action. I hope to see you there!


Join in Today!
Dang that looks so good. And the gravy… swoon!!!
I know! That gravy is everything! ❤️
I LOVE Jane’s recipes, she is such a sweetheart. I can’t wait to give this a try!
Isn’t she the best?! And these cutlets? Dang!
Made this tonight and it was wonderful! I made the chicken only for two but all of the gravy and served with German egg noodles. And broccoli. I love schnitzel, husband love gravy, we were both happy. Thank you Jane and Jenni.
This is the best! I’m so glad you and your husband enjoyed it, Carlin! I will share this with Jane as well–she’ll be so pleased!