The most important thing I want you to take from this post is that you can make ladyfingers as a sheet cake. So this is both a ladyfingers recipe and a ladyfingers sheet cake recipe.
The difference is whether you pipe the batter or just spread it in a pan. Either way, this light and airy sponge cake recipe works for everything from tiramisu to jellyrolls.
For ease of browsing, you can find all my cake recipes in one place. Thank you so much for visiting!
Why Make This Recipe
If you are looking for an easy ladyfinger recipe that can be baked as a layer in a half sheet pan or piped into fingers, this is the one you want.
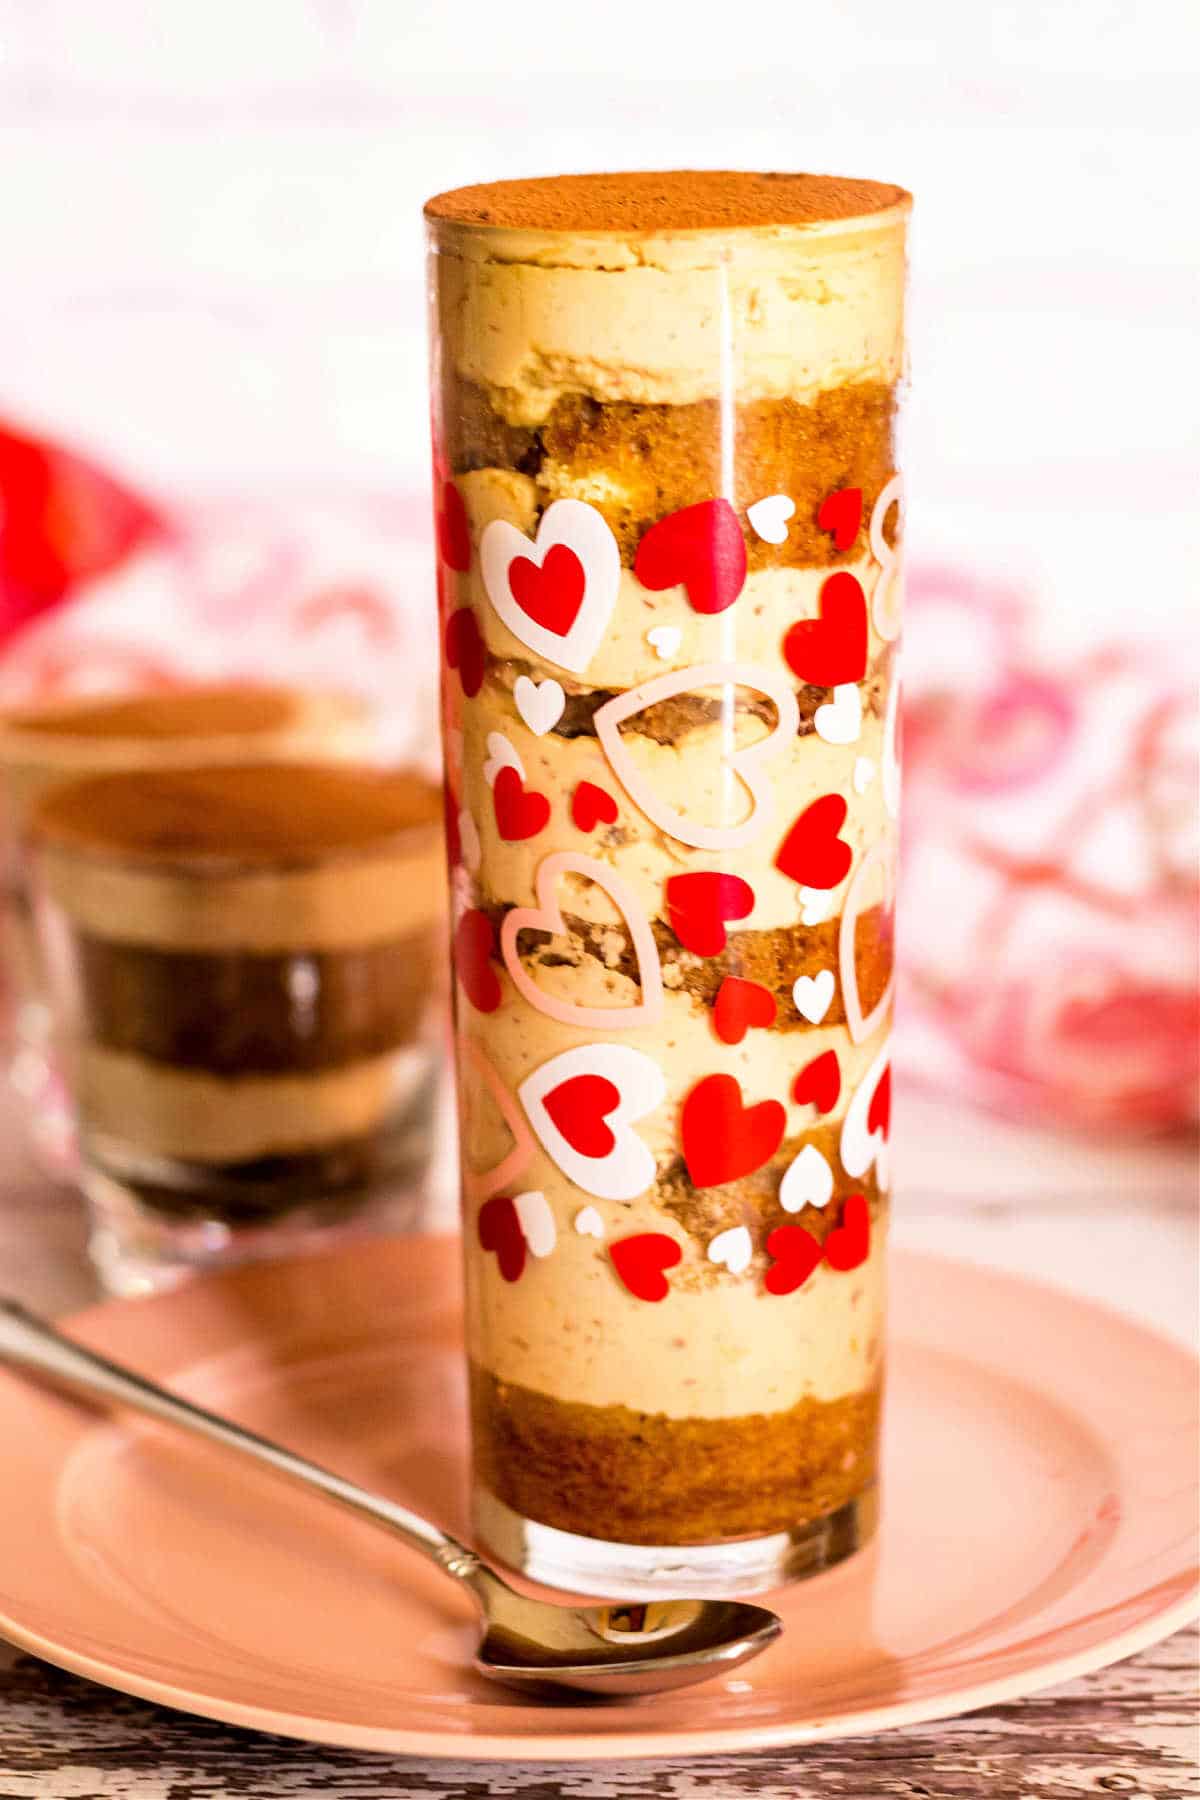
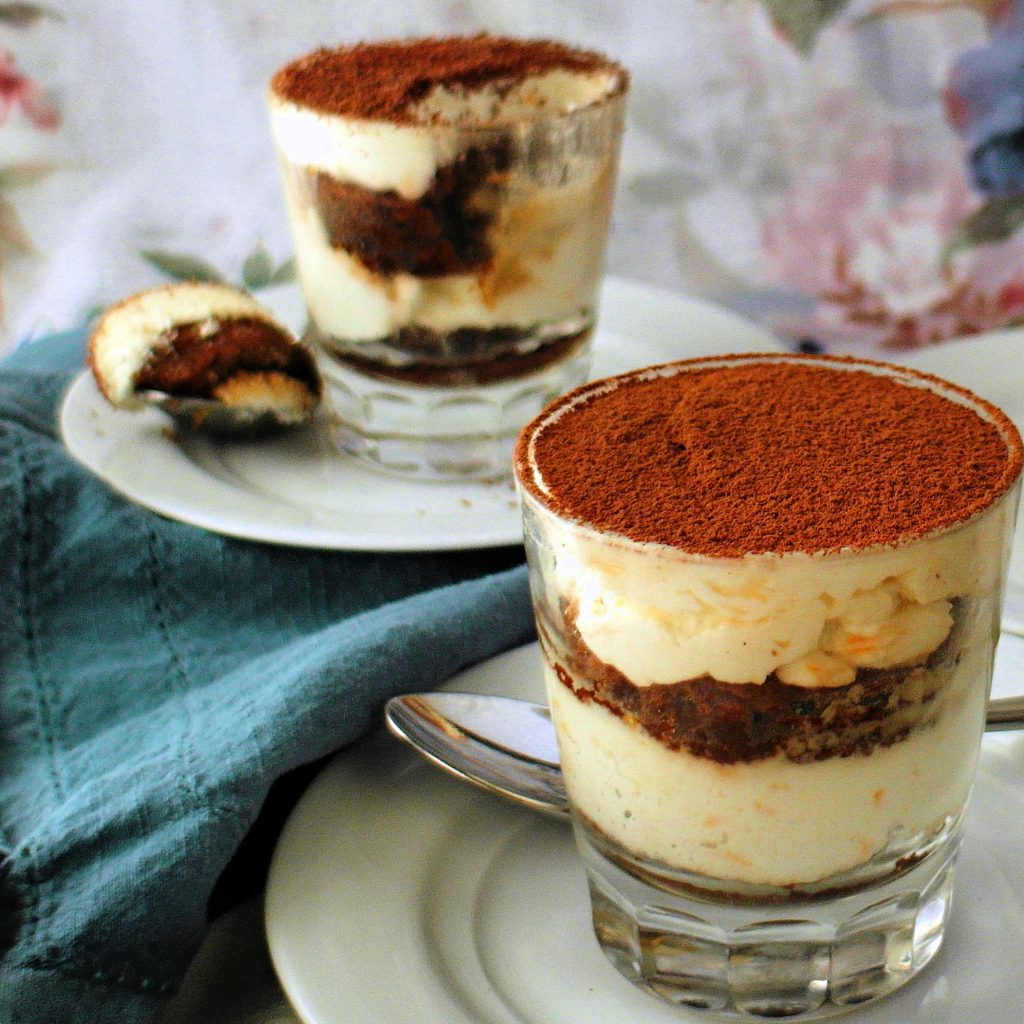
The cake/ladyfingers bake up light and spongy and ready to soak up espresso syrup for tiramisu (might I suggest my easy eggless tiramisu?) or any kind of simple syrup to be used in a trifle, jelly rolls, or pretty much any layered dessert you can think of.
This type of sponge cake is not a stand-alone snack.
Pastry Chef Online Participates in Affiliate Programs. If you make a purchase through one of my links, I may earn a small commission. For more information click to read my disclosure policy
What it is is a component that’s good to have in your back pocket for anything from a quick layer cake to a cake roll.
The recipe makes a generous amount of cake or ladyfingers, and you can make either a chocolate or vanilla variation.
How to Make Ladyfingers
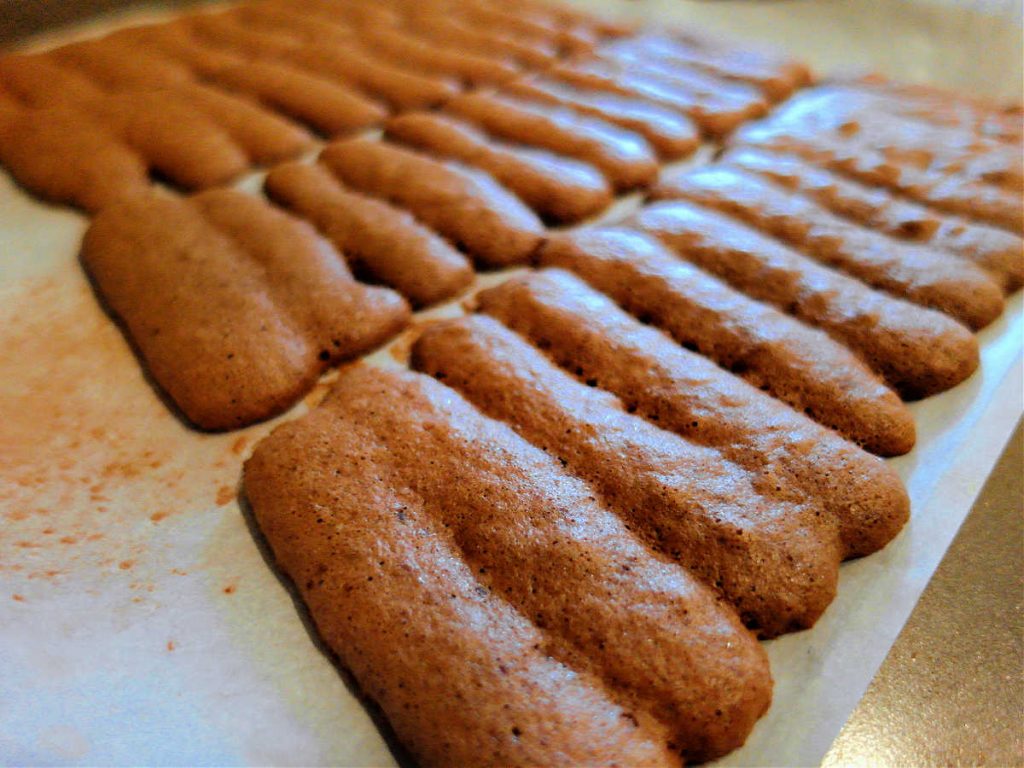
A ladyfinger is nothing more than a fat-free (added fat, anyway) sponge cake batter piped into a finger shape.
So, while their shape may set them apart, their ingredient list does not.
Ingredients
Here’s what you’ll need:
- Egg yolks: Assists in browning, leavening, and emulsification. The fat in the yolks is also the only fat in the recipe, so it helps to tenderize the sponge.
- Egg whites: Aids in structure and leavening.
- Sugar: Brings sweetness, assists in browning and retains moisture in the sponge cake.
- vanilla: Adds flavor and a negligible amount of water.
- salt: Helps to firm up the foam during mixing and brings out flavor
- cake flour: Adds bulk and structure with a relatively low amount of gluten. You can substitute all-purpose flour, but I prefer the finer texture that cake flour brings.
Chocolate Ladyfinger Variation
For chocolate ladyfingers, you’ll substitute 1 oz of cocoa powder for 1 oz of the cake flour and sift the two together.
Seriously, that’s the only difference.
You can add a touch more depth of flavor by adding in a couple of teaspoons of instant coffee or espresso powder.
To build a ladyfinger, you need 3 basic items plus some flavorings: eggs (separated), sugar, and flour.
Procedure
The procedure is fairly straightforward:
- Whip your yolks with some of the sugar until very thick and light.
- Whip the whites with the rest of the sugar to medium peaks and add on top of the yolk mixture.
- Sift flour over both, gently but thoroughly fold together.
- Pipe/spread and bake.
- The End.
What you’ll end up with is a very light, airy, dry little cake (or ladyfingers).
And that by itself does not seem like a Worthy Achievement. Until you bring some added moisture to the party.
Booze, simple syrup, coffee, fruit juice—whatever sounds good.
Liberally sprinkle/brush/spray/dunk your sponge with the liquid so it soaks it all up. You want it moistened all the way through but not dripping.
Equipment Recommendations
You can use a stand mixer or a hand mixer to make these delicate this ladyfingers recipe.
I like to use a large offset spatula to spread it gently into the pan. I use a half-sheet pan rather than a jelly roll pan because I find it to be a more versatile size and depth.
And while I often recommend parchment for baking, I think Silpat or another silicone baking mat is the way to go here.
If you do use parchment, spray lightly with pan spray and then dust with cake flour for vanilla sponge or cocoa powder for chocolate. That will make it easier to peel the paper off the cake once baked.
I use a fine-mesh strainer for sifting because I can also use it for other things, and many dedicated sifters are not dishwasher-safe.
Visual How-To
There’s not a lot of ladyfinger baking going on in the US, I don’t think.
So here are some short video clips to give you visual clues for what your yolks, whites, and the finished batter should look like.
I hope you find them helpful and instructive.
Note how thick and pale the egg yolks will get. They should be very, very thick, almost like marshmallow cream:
Don’t take the whites all the way to stiff peaks or you run the risk of overmixing them when you fold everything together.
Take the whites to medium to medium-stiff peaks. The peaks will curl over when you hold up the beater:
Once the whites are at the correct thickness, pour them on top of the yolks, and then fold them together along with the flour or flour/cocoa powder mixture.
Rather than dumping the flour in, use a sifter.
If you fold the yolks and whites together and then add the flour and fold that in, you could lose too much volume, so I like to fold all three components in at the same time.
Tips for Success
If you are doing all your mixing in the same bowl, whip the yolk mixture first. The yolks will hold up waiting for you to whip the whites, but the reverse is not true.
If piping into fingers, use a very large round tip, or just snip off the corner of a ziptop bag and pipe them without a tip. Forcing the batter through a small opening will make it deflate and become runny.
Once baked and cooled, the very outer top crust of the cake will be slightly moist and gummy. You can “roll” that outer crust off with your fingers. Not only does this improve texture, but it also allows syrups to more easily soak into the cake.
Baking time is 12-15 minutes. Test for doneness by pressing with your finger. It should completely spring back. If you can still see your finger mark, bake another minute or two.
In the following video clip, you can see my finger left shallow marks, so I baked the cakes for an additional minute before calling them done.
Ladyfingers Recipe Q & A
As written, they aren’t gluten-free. To make gf ladyfingers, substitute your favorite gluten-free flour blend for the cake flour. I like Bob’s Red Mill brand, but I am not an expert at gluten-free baking.
Yes, they are almost identical. In my experience, storebought savoiardi are drier and more round in profile than ladyfingers. To get crisp ladyfingers, use all the egg whites from the yolks (there are more yolks than whites in this recipe, so you’ll have to find a use for the leftover). That will provide more lift, a firmer foam, and a drier texture once baked. To be super traditional, sift a dusting of powdered sugar over the piped fingers before baking.
Since they are low moisture, they should keep for at least a week at room temperature. But they also won’t get super hard in the freezer because of that same lack of moisture. So I recommend freezing any leftovers that you’re not using in tiramisu or another dessert. Once soaked with syrup, the cake layers should be refrigerated for best keeping.
What Can I Make with Ladyfingers?
Most people think of tiramisu when they link of ladyfingers, if they think of them at all.
But this ladyfingers recipe (or ladyfinger sponge cake) can be used in many ways, especially when baked as a sheet and then cut to size and shape.
Since they don’t get hard in the freezer, they make an excellent cake base for ice cream cakes. Yes, you’ll still want to soak them with syrup, but most syrups have enough sugar in them that they won’t freeze hard like ice.
Note that the ice cream cake I link to doesn’t have a base cake layer, but that doesn’t mean you can’t add one or even two. Maybe one chocolate and one vanilla. Use your imagination and make the cake you want!
You can also use a ladyfinger spongecake for jelly roll cakes or even for a buche de noel.
You can also make a mousse cake by lining the bottom and sides of a cake pan or springform pan with ladyfingers–a circle of the sponge on the bottom and piped ladyfingers around the sides, spray them all with syrup, and fill with chocolate mousse or butterscotch mousse for a sliceable mousse dessert.
Cut slices of jelly roll and fit them tightly into a glass bowl lined with plastic wrap. Fill the center almost up to the top with softened ice cream.
Place a sponge circle to fit tightly on top of the ice cream. Freeze until solid, make and pipe on some Italian Meringue and then torch for a beautiful Baked Alaska.
These are just a few ideas for you. I hope you are getting the idea that ladyfingers are very versatile!
Questions
It will help me and other readers so much if you take a moment to rate and leave a review for this recipe.
You can use the stars to rate 1-5 (5 is best), and leave a review in the comments. It helps me make adjustments if any are needed, and comments help others decide whether the recipe is worth making.
Other ways to share include pinning, and/or sharing on your favorite social media platform.
Thank you so much for taking the time!

Ladyfingers (or Ladyfingers Sheet Cake) Recipe
Ingredients
- 6 oz cake flour
- ¼ teaspoon salt
- 5 oz egg yolk
- 6.5 oz egg whites
- 6.5 oz sugar (divided)
- 1 ½ teaspoons vanilla
Instructions
- Sift together the flour. Set aside.
- In the bowl of a stand mixer fitted with the whisk attachment, beat the yolks and salt with a bit more than half the sugar until very thick and light. The mixture should look almost like marshmallow cream.
- Whisk the whites with the remainder of the sugar and the vanilla until you reach medium peaks. (If using the same stand mixer, wash the bowl and whisk really well before proceeding. If whisking by hand or with a hand mixer, do it at the same time as you are whisking the yolks on the mixer. You can't overmix the yolks, so just let them go until you're finished with the whites).
- Scrape the meringue onto the yolk mixter. Resift the flour over the top of the eggs and then gently but thoroughly fold everything together.
- On a Silpat or parchment-lined 1/2 sheet pan, pipe into fingers or spread into a sheet.
- Bake at 375F until set and the top springs back when you touch it, about 12-15 minutes.
Did You Make Any Changes?
Notes
Chocolate Variation
To make chocolate ladyfingers/sponge cake, substitute 1 oz of cocoa powder for an ounce of the cake flour. Add a teaspoon or two of fine espresso powder if you'd like. The new measurements will be 5 oz cake flour, 1 oz cocoa powder, and 2 tsp espresso powder. Sift the cocoa powder and cake flour together twice and add the espresso powder to the yolk mixture. The rest of the recipe remains the same.Other Variations
You can also change up the flavors by adding extracts, citrus zest, or other spices, depending on what you're going to do with them. Consider lemon zest, orange zest, ground ginger, cinnamon, coffee extract or espresso powder/instant coffee, etc.Nutrition
Thanks for joining me today. Enjoy the ladyfingers recipe, and have a lovely day.

Hi, y’all! I hope you’ve enjoyed this post and hopefully also learned a thing or two.
If you like my style, I invite you to sign up for my occasional newsletter, The Inbox Pastry Chef.
Expect updates on new and tasty recipes as well as a bit of behind-the-scenes action. I hope to see you there!


Join in Today!
hey jenni, thanks for the recipe and explanation. i’m going to try these this weekend. just wondering, i saw another tutorial whipping the meringue and then the yolks into the meringue and folding the flour in after. would this result in a more deflated sponge? i’m going to try your method but just wondering if you have any experience with the other one.
Hey, Lily! Yes, you can absolutely do it that way. I prefer adding both at the same time because it’s less folding, keeping the entire mixture as light as possible. Either way will work though. Enjoy!
I’m a sucker for tiramisu. If it’s on the dessert menu, I’m getting it!
Thanks for sharing the recipe! Def need to bookmark this 🙂
-k
I feel the same way about flan! I can’t *not* order it if it’s on the menu. This tiramisu is pretty delicious, though. =) Glad you stopped by!
Wow choux is nmaed cabbage paste? SO interesting! I love this dessert, thank you for sharing the recipe for lady fingers
Some of the translations can be pretty amusing, even if they are kind of descriptive! Enjoy the lady fingers. They’re a good recipe to have in your arsenal since they are so versatile! 🙂
Yeah for homemade lady fingers!! I cannot wait to get some time to attempt this recipe. Very fun!
Hi Denise! I think you’ll enjoy them. I froze some of mine and whipped them out a couple of nights ago. Cut out some circles and soaked them in my espresso syrup, shoved them in the bottoms of glasses and then filled them up with choc-hazelnut gelato. Swanky dessert, almost zero effort!
Three of my chickens are named Tuile, Pavlova, and Cassis. (well, two of them have French names at least :-). I missed the “hangout” too….I am not sure how to sign up (I am looking..)
I usually post a link on facebook so you can watch either on G+ or on YouTube, Jane! 🙂
For what it’s worth, I’ve never heard the term “doigts de dames” in a French bakery (perhaps because it sounds too much like “women’s rights”? Only when one butchers the accent), instead, everyone calls this type of cake (no matter the shape, as far as I can tell) “biscuit cuillère”, which is just as hard to say as it is to spell. It means “spoon biscuit” or “spoon cake”. I don’t know why.
That is a very good thing to know, Camille! Wonder why they chose “spoon biscuit?” Seems an odd choice. Guess it’s better than lady fingers. Except they do look more like fingers than spoons… Odd. Tasty, though!
I was so sad I missed the hangout – thanks for posting this! They look amazing!
Hopefully you can make the next one, Nel! I hope you enjoy the rerun. 🙂