Jump straight to the recipe.
I have never been big on crafting. My best friend Julie used to make me participate in one obligatory Christmas craft per year, and as a result, I am the proud owner of an okra pod Santa, a wee snowman made out of an ice cream spoon and a Christmas tree with button ornaments. They are cute, but man was it a messy process. Not for Julie. No–she works clean and is generally not messy. Me on the other hand? It’s inevitable that I end up with hot glue on my fingers, paint in my hair and most likely also on my clothes and glitter all over the floor. I am a wreck. The vast majority of the times The Beloved and I go out to eat, I end up with at least one spot of food–in a startlingly contrasting color to whatever I happen to be wearing–either on my shirt or on my pants. If I wear white, which is rare, I end up with tomato sauce or salsa on it. If I am cagey and decide to wear a dark color to hide the inevitable spot or streak of food, I’m Jackson Pollacked with Alfredo sauce. The Beloved tells me it’s a gift. I doubt it. 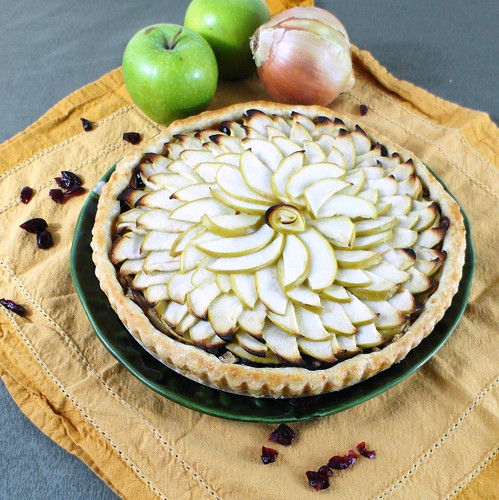 I am a messy, messy cook. I mean well, but if it can be spilled, I will spill it. If gravity is working, at least one or two items will fall to the floor. This is not a good trait in a cook and baker. I had to be very strict with myself when I was working in professional kitchens. I learned to work clean, and it kept me from getting yelled at. At home though, I am still
 pretty very messy. I also tend to fly by the seat of my pants.
Pastry Chef Online Participates in Affiliate Programs. If you make a purchase through one of my links, I may earn a small commission. For more information click to read my disclosure policy
I usually begin cooking or baking with a vague sense of what I want to do, and just as often as not, I end up switching gears mid-stream. It’s hard to get your mise en place together if you don’t know exactly what mises you will be placing, you know? I mean well though, and I prep as much as I can. Still, when I get an idea, I just run with it, mess be damned. Yesterday was Savory Apple-Onion Tart day. Not on any food calender, but in my brain. My initial thought was to just chop everything up and throw it all in a tart shell. It would be rustic. And then, I thought about my friend Liz from That Skinny Chick Can Bake.
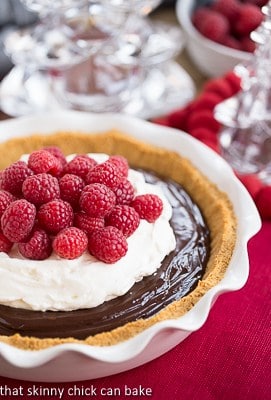
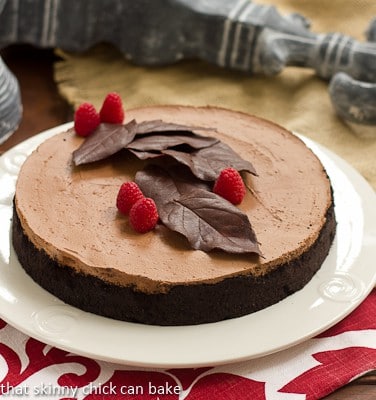
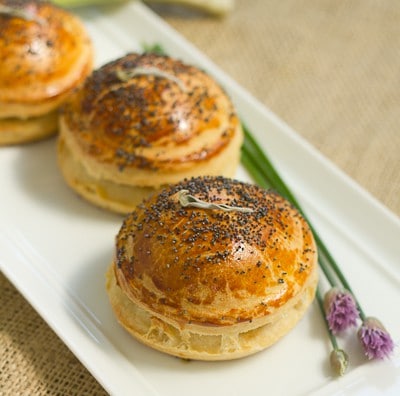
From where I stand, Liz has magical powers. Powers of Cleanliness, Orderliness, Sleekness. The food she makes is always gorgeous. Even if she writes that she and her family didn’t really like whatever it was that she made, the photos are always clean, elegant and classy. It’s kind of uncanny, and very un-Me. Let us take a moment to regard Liz’s work. (All photos used with permission–thanks, Liz!)
Chocolate Satin Pie
Chocolate Moussecake
Savory Brioche Pockets
I tried my hardest to channel Liz while making the tart. Not to just toss everything together but to really give it some thought and make it look classy and That-Skinny-Chick-Can-Bake-ish. Liz, I hope I made you proud. I tried!
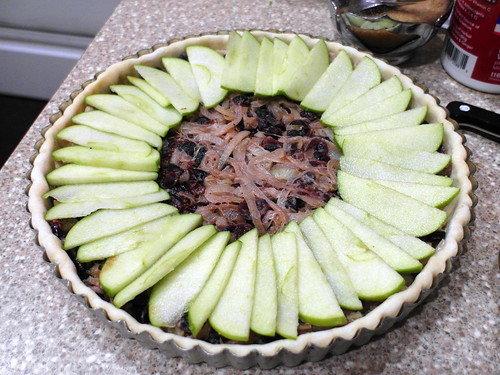
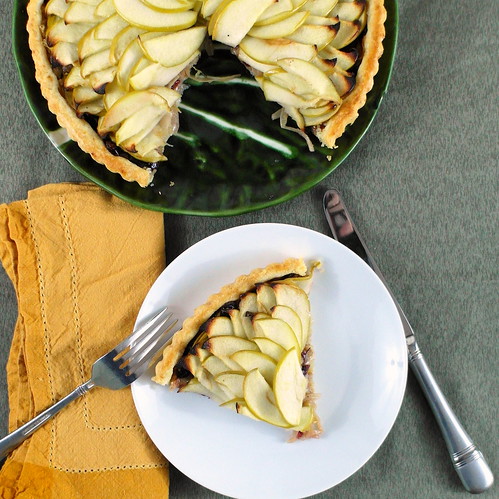
Savory Apple Onion Tart
I am not sure why I keep writing about savory tarts. Maybe because I was so inspired by the Mushroom, Thyme and Chevre Tart from Baking by Hand (see their ad at the top of the site for one of the best baking books I’ve had the pleasure of reading).
This particular tart is full-sized, but you can also make these in mini-cupcake pans. What you’ll end up with will be Eminently Poppable Bites for your Christmas and New Year’s Parties. It’s funny. Folks don’t think twice about the apple-onion combination when it’s used in stuffing, but leave out the bread and people think you’re being radical. Give it a chance. I think you’ll find the Savory Apple-Onion Tart to be reminiscent of stuffing in a very delightful way. The flavors are more intense since there is no bread to spread all that goodness out. That might be the best reason of all to make them bite-sized, but you know me. I generally don’t go in for fussy, and it’s way easier for me to make one big tart than a bajillion little tarts. Plus, I got to practice my Placement Skills with the apple slices.
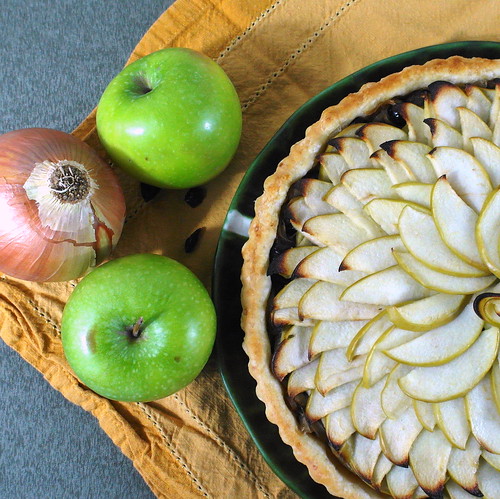
Here’s the trick to that, by the way. Slice your apples very thinly–mine were about 1/8″ thick, and some a bit thinner than that even. Toss them with a heavy pinch of salt and about 2 Tablespoons of sugar, and then let them hang out in a colander over a bowl for about an hour (if you’re making a sweet tart, scale the salt down to just a regular pinch). They’ll lose some of their liquid–which keeps your tart from getting squishy–and they also become much more pliable. You’ll even be able to roll the really skinny ones up into little roses like I did in the center. Pretty keen.
Would you like to save this post?
Oh, and let me tell you about the pie crust. I will be making a Little Video to show you how to make it (I’ll embed it later. Promise), because one can never make Too Many pie crust videos. Besides, this one will be set to music. At any rate, it’s a standard 3:2:1 pie crust: 3 parts flour, 2 parts fat, 1 part liquid, that I modified just a bit. I upped the fat by just a smidge so I could add in a bit of my piggy lard. I’ve been dreaming about a savory tart made with piggy lard in the dough for awhile now, but I didn’t want to use all lard since mine is fatback lard which is decidedly piggy.
Leaf lard is actually best for making pies, both because of its crystalline structure for optimal flakiness and its almost nonexistent pigginess, but since I don’t have any, I used mostly butter and added in just a bit of the piggy lard. The liquid is water with some apple cider vinegar in it (acids help to keep gluten in check), and the only other flavorings were about 3/4 teaspoon salt and a handful of sugar–maybe a tablespoon or so.
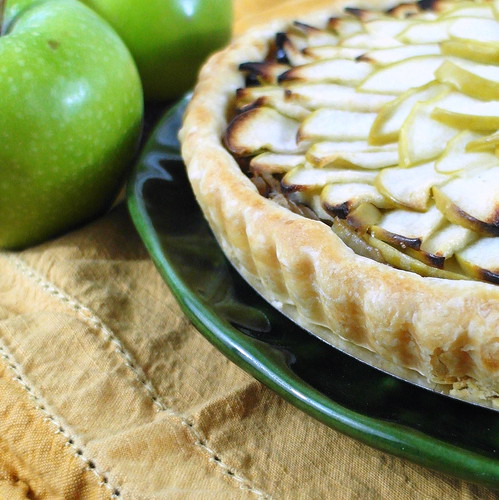
After mixing it all together, it got five rolls and folds (roll, fold in thirds like a business letter, roll again, fold, refrigerate, etc) so it would be really flaky but not puff up too much. It worked out very well–tons of flaky layers, crisp on the outside and tender on the inside without any real puffing up at all. Huzzah!
As the filling stands now, it’s vegetarian. That means little with lard in the crust though, so in for a penny, in for a pound is what I say. Next time, there will also be sausage in this tart. And feel free to make it with your favorite stuffing combination. You like chestnuts? Toss them in. Wild rice? Absolutely. Oysters? Why not–it’s your tart!
Here’s how I made mine, and I even measured some stuff, since I folks enjoy measurements.
Savory Apple-Onion Tart
Would you like to save this post?
Ingredients
For the Crust (Makes 2, so freeze one for later or halve the recipe)
- 12 oz all purpose flour
- ¾ teaspoon fine sea salt
- 1 tablespoon sugar (I used demerara)
- 7.5 oz cold , unsalted butter, cut into cubes
- 1.5 oz cold fatback lard
- 3.5 oz cold water
- ½ oz 1 Tablespoon apple cider vinegar
For the Tart Filling
- 3 medium tart apples (I used Granny Smith), organic if you can get them, washed and sliced very thin--about 1/8" or less
- ¼ teaspoon salt
- 2 Tablespoons sugar (I used demerara)
- 2 Tablespoons butter
- 1 medium sweet onion , peeled and sliced thin
- 1 ½ ribs of celery , cut in small dice
- ¾ cup dried , sweetened cranberries
- ½ teaspoon poultry seasoning
- salt and freshly ground black pepper , to taste
- 2 Tablespoons apple cider vinegar
- 2 oz . heavy cream or whipping cream
- 1 slice of bread (from a regular sandwich loaf--whatever you have) cut into very small dice or 1/2 cup bread crumbs
- 2 Tablespoons butter , melted
Instructions
For the Crust
- Whisk together the flour, salt and sugar in a large bowl. Cover and freeze for at least 30 minutes.
- Toss in the cold butter and lard and rub in well. It's perfectly fine to have larger pieces and smaller pieces. You know you're done when the flour seems mealy rather than floury and there are still some big-ish pieces of butter visible.
- Mix the water and vinegar together and then drizzle in roughly half evenly over the top of the flour mixture.
- Toss to combine. Drizzle in about half of what's left and toss again. Don't mix. Toss.
- Test the dough by squeezing a bit of it together in your hand. If it stays together even if you poke at it a couple of times, you're done. If not, drizzle in a bit more water, toss and test again.
- When the mixture still looks pretty sandy but you can squeeze it so it holds together, you're done.
- Turn the dough out onto a lightly floured surface--it will be crumbly, and that's okay. Just shove it all together into a mass, and have your bench scraper handy.
- Dust the top of the shaggy, crumbly dough and roll it out into a long rectangle. It probably won't hold together, but persevere.
- Once it looks sort of rectangle-like, use the bench scraper to help you fold it into thirds. If pieces fall off, just shove them back on.
- Give the dough a quarter-turn on the counter and roll it another roll into a long rectangle. It might look a little better this time, and it might not. Carry on, flouring lightly when things get sticky and using your bench scraper when necessary. Fold into thirds for the second time.
- Continue rolling and folding for another 2 or 3 times, or until the dough behaves itself nicely and doesn't fall apart when you roll. It also will stop crumbling when you fold it, and you might not even have to use the bench scraper again.
- During all this rolling and folding, if the dough gets boingy and wants to snap back a bit, just wrap it up and shove it in the fridge for half an hour or so.
- Once the dough is lovely, cut it in half. You now have 2 rectangles of laminated dough. look at the cut sides and admire your work.
- Form each square of dough into a disc, wrap it in plastic wrap and refrigerate for an hour or so.
- Roll out into a rough-ish circle about 1/8" thick and fit it into a 9" tart ring with a removable bottom, pressing it into the corners firmly. Try to avoid stretching the dough or it will have a tendency to shrink in the oven. You can also make this in a regular pie pan if you don't have a tart ring.
- Trim the edges so the overhang is almost as long as the sides of the tart pan. Then, fold in all the edges and press them firmly against the sides. You now have an edge that is twice as thick as the bottom of the tart. Cool, huh? Thanks, Baking by Hand for that nifty trick. I would never have thought of it. As an added bonus: no crimping--you have a smooth, rolled edge. Nice!
- Freeze for an hour until rock hard.
For the Filling
- Set your oven racks so one is on the bottom and one is in the center of the oven.
- Place a baking stone on the bottom rack and preheat the oven to 450F.
- Set a colander in a bowl.
- Toss the thinly sliced apples with the salt and sugar and put in the colander to drain while you make the rest of the filling.
- Heat a heavy skillet over medium heat.
- Add the butter. When melted, add the onion, celery, cranberries, poultry seasoning along with a healthy pinch of salt and several grindings of black pepper.
- Turn the heat to medium low and cook, stirring occasionally until the onions are soft and just starting to color, about 8-10 minutes.
- Add the vinegar and continue to cook until the mixture is almost dry.
- Add the heavy cream, turn the heat up a bit and let the cream reduce to almost nothing, stirring constantly.
- Taste and adjust the seasonings as necessary.
- Spread out on a plate to cool to room temp. Once it stops steaming, you can put it in the fridge to help speed things up a bit.
- Take the frozen tart shell out of the freezer and evenly spread the diced bread or bread crumbs in the bottom of the shell.
- Spoon on the onion mixture and spread it evenly over the bread crumbs.
- By this time, your apples should have released some liquid into the bowl and be wet and pliable. Don't rinse them. They're ready to go.
- Place a ring of apple slices about 1/2" in from the inside edge of the tart. These should be placed "shoulder to shoulder" with the peel facing the tart shell. This ring is there just to support the first row of apples and to make sure that there is plenty of apple in every bite. I didn't do this to begin with and had to lift up my apples a few at a time and shove a little apple shims in all around. Liz would have remembered. Sigh.
- Then, place the apple slices, overlapping as in the photo, in concentric circles, starting each circle about 1/2" in from the previous circle. If you want, you can alternate the direction of the slices. I only remembered to do that in the very center.
- When you get to the point where you only have an inch or so of open space to work with, take three or four smaller pieces of apple and arrange them in the open space to give the center of the design some support.
- arrange your center row of apples so the ends are touching in the very center. Take a couple of very thin slices of apple and roll them up into an apple rose. Place the rose in the very center.
- Brush all the apples and the edge of the tart shell with the melted butter.
- Bake on the baking stone for ten minutes. Check to see if your apple rose is getting a bit singed. If it is, cover it with a small piece of foil and bake for ten more minutes.
- Move the tart to the center rack and cover all the apples with a piece of foil, leaving the crust uncovered. Turn the oven down to 375F and bake an additional 10 minutes-15 minutes, or until the apples are very soft and the crust is a lovely golden brown.
- Remove from the oven and let cool. Serve warm or at room temperature.
Did You Make Any Changes?
I know that sounds like a lot, but most of those instructions are for the craft project portion where you’re placing apple slices. If you’d like your tart to be more rustic, simply chop up all the apples and mix them in with the onions and then put the whole shebang in the tart shell. But remember, if I can very occasionally class things up, so can you!
If any of you decides to make a savory apple onion tart or mini versions for appetizers, I’d love to hear about it.
Thanks so much for spending some time with me. Have a lovely day.


Join in Today!
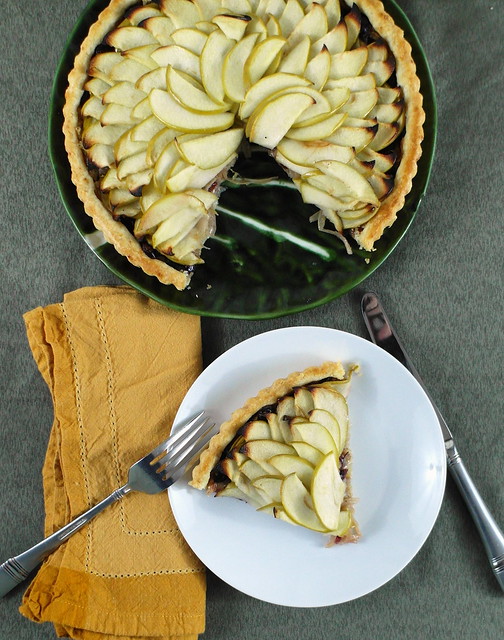
What I love about this sweet and savory pairing is one ingredient grows in the ground, the other high above on a branch. You’ve brought them together in a most visually appealing tart. I loved the “before” photo, but the finished one is special
You and I would be perfect in the kitchen and we could have Liz there just to show us the error in our messy ways. 🙂 I love this tart and will be making it. I like the idea of little appetizer tarts.
Obviously, you and I both need a Skinny Chick Intervention, Maureen! If you do make this, I’d love to hear how you like it. We had some barely warmed for breakfast this morning. So good! =)
Whoa, this is one gorgeous tart, Jenni!!! You did me proud (I had no doubt!). Thank you for your kind words…though I promise you that I walk around with flour on my black yoga pants most of the time. You’re in good company 🙂
I feel slightly better now, Liz! =) I always admire your photos and your approach, so I thought it was about time to tell everyone! Thanks for letting me, and thanks for the inspiration!