
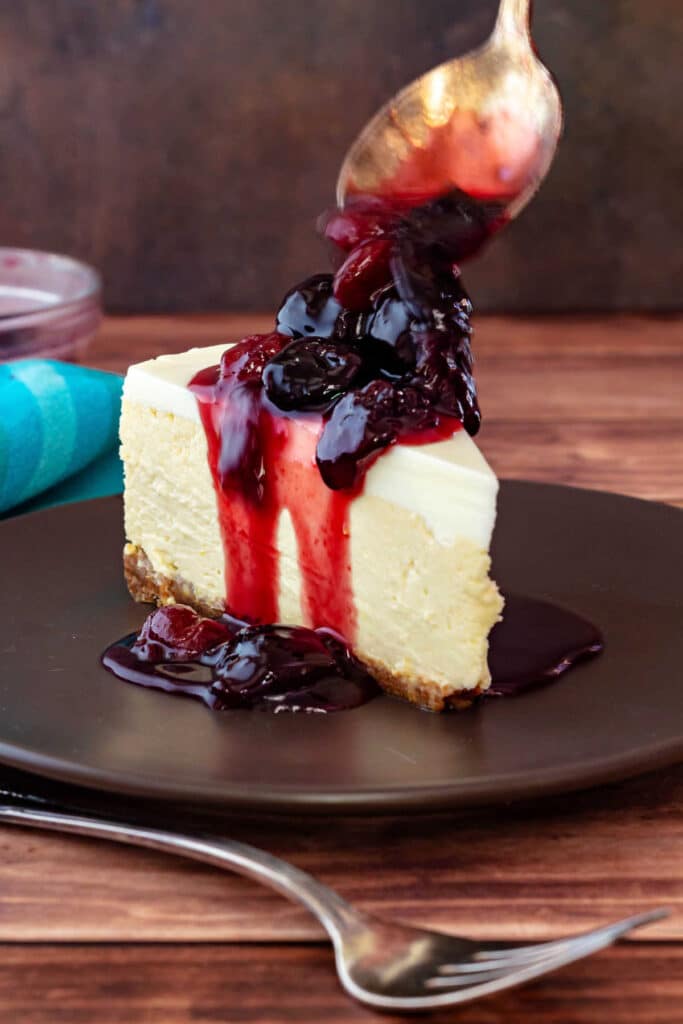
This Cherry Cheesecake with Spiced Cherry Preserves starts with a buttery graham cracker crust and a rich, creamy bakery-style cheesecake finished with a thin layer of sweetened sour cream.
But the cherries are what really make this dessert. Glossy whole cherries glazed with a syrup flavored with vanilla, lemon, and a hint of mace turn every slice into something a little like cherry pie meets cheesecake.
Serve the cheesecake beautifully plain, then pass the subtly spiced cherry pie preserves at the table so everyone can spoon on as much—or as little—as they like. Let us make this guy now, shall we?
Pastry Chef Online Participates in Affiliate Programs. If you make a purchase through one of my links, I may earn a small commission. For more information click to read my disclosure policy
Cherry Cheesecake, At a Glance
✅Skill Level: Intermediate
✅Skills: Crumb Crust, Water Bath, Thickening Preserves
✅Type: Creamy Cheesecake
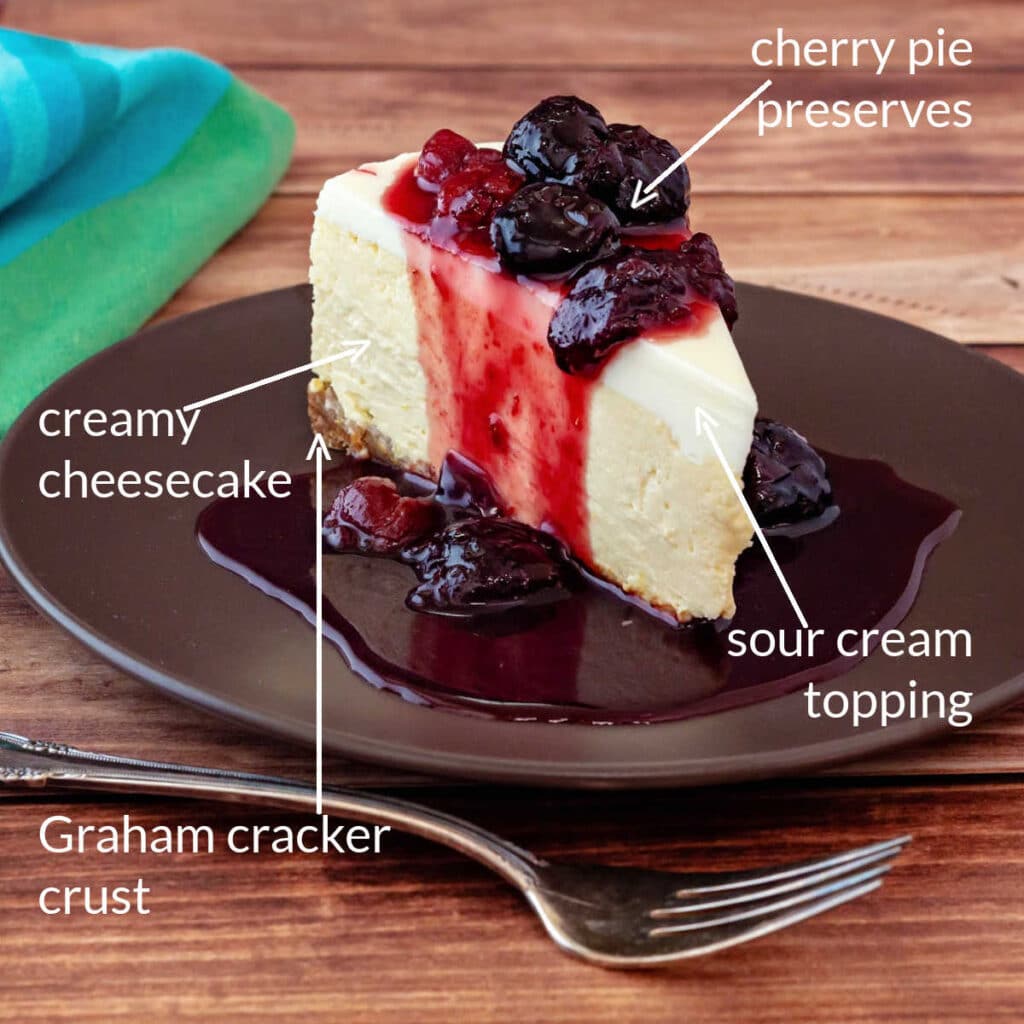
✅Components: 4: Graham crust, Cheesecake, Sour Cream Topping, Cherry Pie Preserves
✅Prep Time: 20-25 minutes (cheesecake plus preserves)
✅Cook Time: 1 hour, 30 minutes (cheesecake plus preserves)
✅Yield: 12-16 tall, sexy slices
Jump Straight to the Recipe
What Makes This Cherry Cheesecake So Good
There are four components to this cheesecake, each chosen purposefully to complement the others. The buttery graham cracker crust provides a crisp contrast to the creamy cheesecake, while the thin sour cream topping adds a cool, gentle tang and sweetness.
Then come the cherry preserves. They’re sweet, tart, subtly spiced, and syrupy enough to run down the sides of each slice.
The result is rich but not gluttonous, sweet yet balanced, with enough contrast in flavor and texture to keep you coming back, bite after bite.
Ingredients You’ll Need
For the complete ingredient list for all the components as well as for detailed how-to instructions, please see the individual posts:
- Classic, Bakery-Style Cheesecake (with sour cream topping): Creamy, tangy, and a bit lighter than a standard NY-Style cheesecake (thanks, buttermilk), this is my new standard against which I measure all other cheesecakes
- Graham Cracker Crust: While you can absolutely use store-bought Graham crackers to make the crust, try making it with homemade Graham crackers instead. So much more character and flavor.
- Cherry Pie Preserves: Sweeter than a cherry pie filling or topping, spoon them on with restraint and enjoy real, old-fashioned cherry pie flavor on top of every cool and creamy bite.
Here are a couple of ingredients that you might not generally have on hand but that you’ll need to make the recipe as written:
- whole wheat flour: The main ingredient in Graham crackers. Graham flour is very hard to find, but whole wheat flour makes a fine substitute with just a slightly smoother texture than Graham. In a crumb crust, it really doesn’t matter one way or the other.
- cream cheese: Provides the main structure, texture, and flavor of any cheesecake. Use full-fat cream cheese, Philadelphia brand if possible. It has the best flavor and texture, although I have used Kirkland with very good results. Do not substitute “tub” cream cheese, low-fat, or Neufchatel.
- whole/full-fat buttermilk: Not low- or non-fat. It adds exceptional tangy goodness without adding too much additional fat.
- cornstarch: Used in the cheesecake to inhibit weeping and to thicken the preserves
- cherries: You may use sweet, tart, or a combination of the two. Either fresh or frozen will work. Be sure to be diligent with pitting them, because those pits aren’t called “stones” for nothing! I get a 2 pound bag of frozen, mixed sweet and tart cherries at my local grocery store. If I could find sour cherries here, I’d use them over sweet, but a mix is lovely.
- mace: Traditionally called “the cherry pie spice,” mace is the outer, lacy covering on nutmeg. Difficult if not impossible to find at the “regular” grocery store, I buy my ground mace from Penzey’s.
How to Make This Cheesecake
Would you like to save this post?
This recipe is a story of components. Here’s the run-down, in a nutshell:
- Make the cherry pie preserves.
- Make up to a few weeks ahead and keep refrigerated.
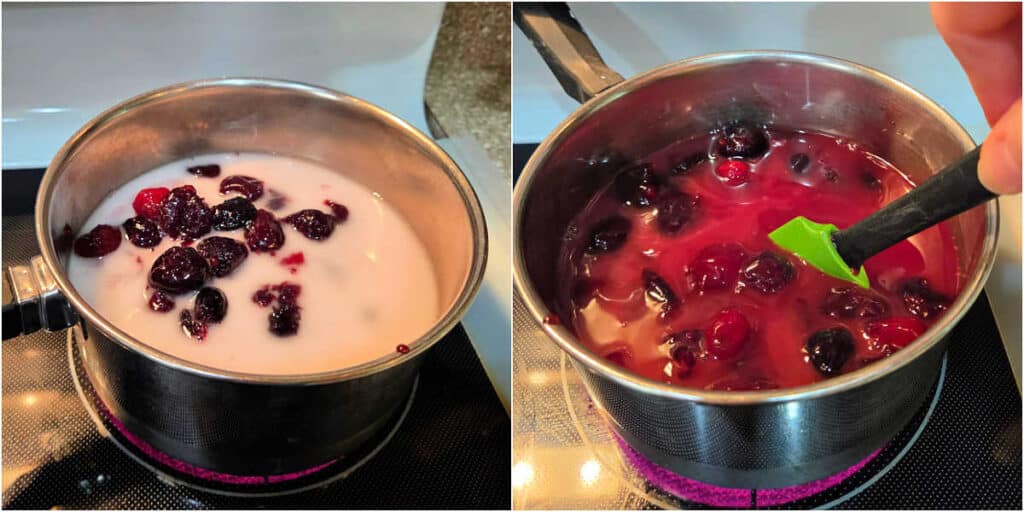
- To thicken for serving, combine 2 cups preserves with 6 Tablespoons of water and 4-6 teaspoons of cornstarch (depending on how thick you want them).
- Bring to a boil and let bubble, stirring constantly over medium-high heat, for 2 minutes.
- Off the heat, stir in 2 teaspoons of butter. Keep warm or let cool to room temperature, and pass at the table.
- Make the Graham cracker crust.
- Make the Graham crackers at any time a week or two before you want to make cheesecake.
- Bash the Graham crackers into fine crumbs and mix with melted butter.
- Bake to set the crust.
- Make the cheesecake and sour cream topping.
- Make sure all your ingredients are at room temperature and that the cream cheese is very soft.
- Mix all ingredients together starting with the cream cheese and sugar, making sure the mixture is completely smooth before adding any liquids. Stir in the eggs last on low speed.
- Pour into the Graham cracker crust, and bake in a water bath for 50 minutes to an hour or until jiggly just in the center.
- Spread on the sour cream topping and bake for an additional 8 minutes.
- Cool gradually before chilling at least overnight.
Jenni’s Tips for Making the Best Cherry Cheesecake
Here are a few things to keep in mind when making this cheesecake. Or any cheesecake, for that matter.
- Get that cream cheese soft, y’all. I’d even go so far as to let it warm up in my microwave with the surface light on.
- Take your time beating the cream cheese until there are zero lumps before adding sugar and certainly before adding any liquid ingredients.
- If you do have a few little lumps, you can just throw caution to the wind and bake as is, or you can strain the batter into the Graham crust through a fine-mesh strainer.
- Resist the urge to apply the topping before slicing the cheesecake. Here’s why:
- You’ll get cleaner slices
- Everyone will be able to add their perfect amount of topping. And some folks might pass altogether. That’s okay.
- Cleaner presentation in general. A pre-topped cheesecake, especially one with red topping, will stop looking glorious and start leaning into murder scene territory after cut number one.
- Slice the cheesecake right after taking it out of the fridge. It will be at its firmest when cold and easier to slice. Dip your knife into hot water and wipe it clean after each cut.
- For best texture, allow the cheesecake to temper while you’re eating dinner, or about 30-45 minutes. Then it will really show off its soft and creamy self.
Cherry Cheesecake Q & A
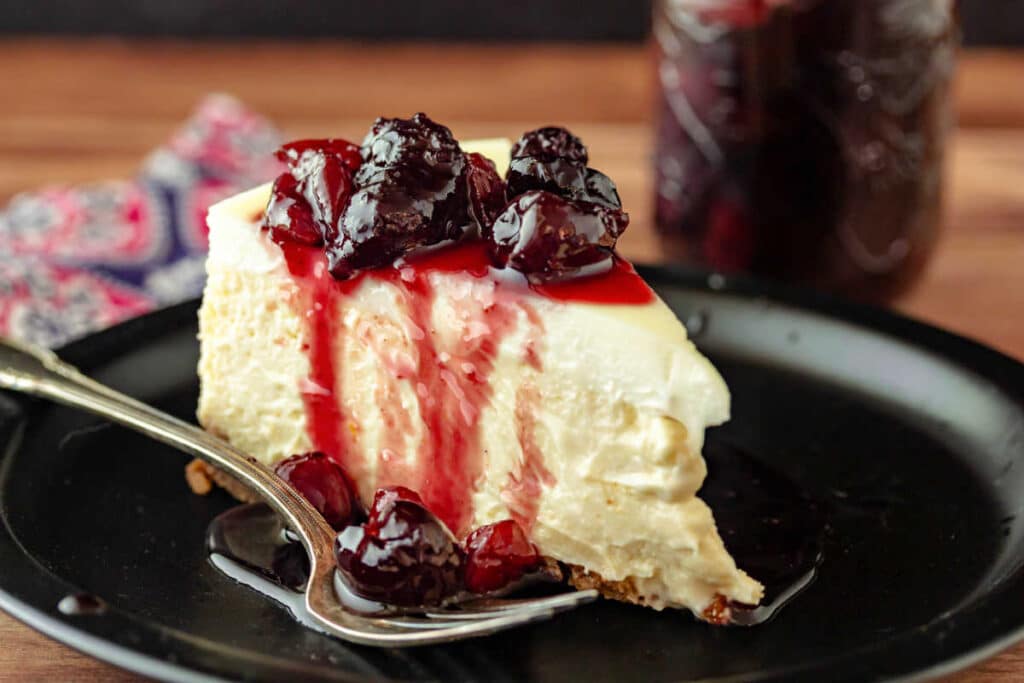
Yes, you can use cherry pie filling rather than the preserves. I would opt for the preserves for a couple of reasons, though. First, the flavor has depth and the fruit has a bit of chew to it. This makes the topping more interesting and taste more like old-fashioned cherry pie than plain cherry pie filling. And then there’s the color. There is just nothing like the jewel-toned syrup of a good preserve, and this one is pretty spectacular. Plus, it is less “gloppy” than canned pie filling and makes for a more elegant topping. I feel like canned cherry pie filling works well with no-bake cheesecake, but for a baked cheesecake, the preserves are a bit more sophisticated, both in flavor and color.
Yes, absolutely make this cheesecake ahead by at least one day. If it works well for your schedule, you can refrigerate the fully baked cheesecake for up to four days before serving.
Because I said so. But more helpfully, the sour cream topping has a couple of jobs. It adds an additional tangy, sweet lift to the flavor of the cheesecake, and it provides a snowy-white backdrop for the rather dramatic cherry preserves. And even if someone decides to forego the preserves, it still reads as a fully finished dessert and not a sad, naked piece of cheesecake that is Missing Something.
No, I am not the boss of you. But having said that, I think the sour cream has earned its place between the cheesecake and the topping because it adds to the flavor of the cheesecake and provides even more visual contrast with the deep red topping.
Yes, you can. Cheesecake actually freezes quite well. Please freeze it before topping (another reason to pass the thickened preserves at the table). Chill the cheesecake thoroughly overnight, and then place it in the freezer, either in its springform pan or “depanned,” for a good three hours or until the sour cream topping is firm. Then wrap the cheesecake tightly in plastic wrap and then foil. It will keep in the freezer for a good 2 months. Allow 24 to 36 hours in the fridge for it to thaw completely.
Questions?
If you have any questions about this post or recipe, I am happy to help.
Simply leave a comment here and I will get back to you soon. I also invite you to ask questions in my Facebook group, Fearless Kitchen Fun.
If your question is more pressing, please feel free to email me. I should be back in touch ASAP, as long as I’m not asleep.
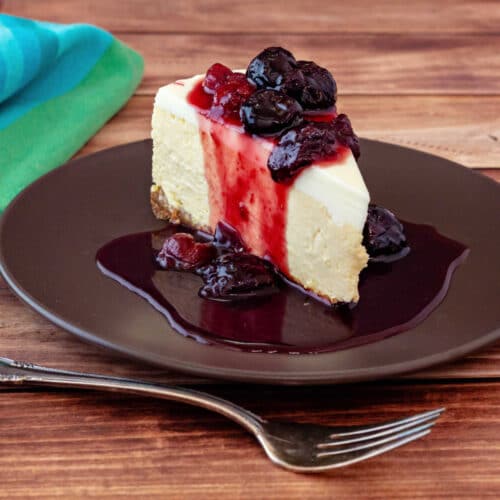
Cherry Cheesecake with Spiced Cherry Preserves
Equipment
- 1 KitchenAid Hand Mixer or stand mixer
- 1 Fat Daddio Push Pan Or a 9" springform pan
Ingredients
For the Cherry Pie Preserves
- 450 grams cherries 1 pound or 2 1/2-3 cups, washed and pitted, sweet and/or sour, fresh or frozen
- 270 grams granulated sugar 9.5 ounces or 1 1/3 cup + 1 1/2 teaspoons
- 1 ½ teaspoons lemon juice freshly squeezed
- ⅛ teaspoon kosher salt I use Morton's. If using Diamond Crystal, use 1/4 teaspoon. If using table salt or fine salt, use a tiny pinch
- ⅛ vanilla bean about 1/2-2/3" piece
- 1/16 teaspoon mace a tiny pinch, a little goes a long way
- 6 Tbsp water
- 4-6 teaspoons cornstarch depending on how thick you want your topping to be. For reference, in the photos, I used the lesser amount
- 2 teaspoons butter
For the Crust
- 190 grams Graham cracker crumbs 6.7 oz, about 1 1/2 cups or 13 sheets, crushed, homemade or store bought (See NOTES)
- 57 grams butter 2 oz or 4 Tablespoons, salted or unsalted, very soft or melted
For the Cheesecake Batter
- 900 grams cream cheese 32 oz or 4 "blocks" at room temperature
- 260 grams granulated sugar 9.2 oz or about 1 1/4 cups
- 175 grams whole buttermilk 6.2 oz or about 3/4 cup, room temperature, not low-fat or non-fat
- 85 grams sour cream 3 oz or about 1/3 cup + 1 Tablespoon, room temperature
- 4 teaspoons vanilla extract 20 grams or 0.7 oz
- 1 Tbsp cornstarch 8 grams or 0.3 oz
- 1 Tbsp lemon juice 15 grams or 0.5 oz, freshly squeezed and strained
- 4 grams lemon zest from about 2 medium-sized lemons
- 4 grams kosher salt 1 scant teaspoon of Morton's, about 1 1/3 teaspoons Diamond Crystal, or about 2/3 teaspoon fine salt or table salt
- 4 eggs at room temperature
For the Sour Cream Topping
- 340 grams sour cream 12 oz or 1 1/2 cups
- 150 grams granulated sugar 5.3 oz or 3/4 cup
- 1 gram kosher salt slightly heavy pinch
- 1 teaspoon vanilla extract
Instructions
For the Cherry Pie Preserves Topping
- Split and scrape the 1/8 vanilla bean. You'll be using the pod and the "innards" so don't throw anything away.
- In a large bowl, combine all ingredients: cherries, sugar, lemon juice, salt, split/scraped vanilla bean, and mace. Stir well.
- Cover and let macerate at room temperature until very soupy, 4-6 hours or overnight. If macerating overnight, refrigerate them.
- Once soupy and loose, strain the mixture through a mesh strainer into a large saucepan or saucier. Reserve the cherries.
- Over medium heat, bring the juices to a boil and cook to 220° F / 104.4° C.
- Add the reserved cherries to the syrup and continue cooking, stirring frequently but gently to avoid crushing the cherries, until the mixture reaches 223° F / 106° C. Skim off any foam that rises to the top. (See Notes for instructions on making jam rather than preserves)
- Fish out the vanilla bean, scrape it down to get all the cherry goodness off of it, and then discard. It has given its all to this project.
- Pour into very clean jars or a large bowl, cover, and let cool. Refrigerate for 48 hours to allow peak set, but it's also okay if you need to dive in immediately.
- When ready to turn the preserves (or jam) into topping, scrape the preserves into a small saucepan and add the water and your preferred amount of cornstarch (4-6 teaspoons).
- Over medium-high heat, bring to a boil, stirring frequently at first and then constantly once it comes to a boil.
- Turn the heat down to maintain a slow, steady boil, and cook for 2 minutes, stirring constantly.
- Remove from the heat and stir in the butter. The topping will thicken as it cools down to warm. If making ahead, refrigerate and then rewarm briefly to pass at the table.
Mise en Place
- About an hour before you plan to bake, gather the cream cheese, sour cream, buttermilk, and eggs. Measure out the sour cream and buttermilk into the same bowl and then put the containers back in the fridge.
- Set a rack in the center of the oven and heat to 350° F / 177° C. Spray the bottom and sides of a 9" push pan or springform pan lightly with pan spray.
For the Crust
- Whether you make your graham crumbs in a food processor or by bashing them up in a zip top bag with a rolling pin, mix the Graham cracker crumbs and butter until evenly combined and the mixture holds together fairly well when squeezed.
- Press evenly and firmly into the bottom of a 9" push pan or springform pan. I use a small glass with a flat bottom to assist in getting the crust flat and nicely compacted.
- Bake for about 12 minutes until the crust has deepened in color just a bit.
- Remove from the oven to cool on a rack.
- Turn the oven temperature down to 325° F / 163° C.
For the Cheesecake Batter
- In the bowl you measured out the sour cream and buttermilk in, add 1 Tbsp cornstarch, the lemon zest, lemon juice, and vanilla, whisk together and set aside.
- In a large bowl or in the bowl of your stand mixer, beat the very soft cream cheese and salt until completely smooth. Start on low, but you can mix on medium if you need to.
- Add the granulated sugar and beat again on medium-low speed. Sugar is abrasive, so if you have any little lumps left in your cream cheese, this step should take care of them. Be thorough, scrape the bowl often, and make sure your mixture is soft and smooth.
- Pour/scrape in the buttermilk/sour cream mixture and mix on low to medium-low speed to evenly incorporate, scraping the bowl as needed. Mixture will now be much thinner and pourable.
- Add all 4 eggs and mix them in on low speed. Once the eggs are in, you don't want to beat any air in, so slow is the name of the game. Finish by hand, scraping the sides of the bowl and making sure all the eggs are incorporated and you have a gorgeous, smooth batter.
- Heat 6-7 cups of water on the stove or in the microwave until very hot. It doesn't necessarily have to be boiling, but it should be steaming.
Baking in a Water Bath
- Tear a long rectangle of aluminum foil and fold it in half so you have a square. Place the pan with the crust in it in the center of the square and bring up all the ends and sides, pleating it to form it to the pan. This does not have to be perfect. You just want to make sure the foil comes up higher than the water in the water bath will.
- Pour and scrape all the cheesecake batter into the foil-covered baking pan. Wiggle the pan a little to level the batter.
- Pull out the center rack, and place a half-sheet pan on the center rack.
- Put the cheesecake on the sheet pan and then pour in the hot water to come up the sides of the pan by about 3/4". I promise, it's all you need.
- Carefully slide the rack back into the oven to avoid sloshing, and bake the cake for about 55–60 minutes. Add more hot water during baking if needed to maintain the water level.If your oven has a pronounced hot spot that you know about, you can carefully rotate the pan inside the water bath. Otherwise, let the cake bake undisturbed.
- The cake is done when the top is a pale, buttery cream color, it looks marginally puffy around the edges, and the center jiggles but doesn't slosh. The internal temperature should read between 152°-155° F / 67°-68° C.
- Carefully pull out the rack, and pour the sour cream topping on top of the cheesecake. (Instructions below) Spread evenly with a small offset spatula, and push the rack back in. Continue baking for about 8 more minutes.
For the Sour Cream Topping
- While the cheesecake is baking, combine the sour cream, sugar, vanilla, and salt in a small bowl. Whisk well. The mixture will be grainy, but the sugar will dissolve within about 10 minutes.
- After 10 minutes, whisk again so the mixture is smooth, pourable, and creamy. Set aside.
For Gradual Cooling
- Turn the oven off, leave the cake in the water bath in the oven, and crack the oven door for about 45 minutes-1 hour.
- Remove the cake from the water bath, and carefully run a small offset spatula or thin knife down around the inside edge of the pan. This will make sure that, as the cheesecake continues to cool, nothing is stuck around the sides that could potentially cause a crack.
- Place the cheesecake somewhere cozy and draft-free. I use the microwave with the surface light on, taping the door to keep it cracked open by 4-5". Let it cool in the cozy place for 45 minutes-1 hour.NOTE: Leave the water bath in the oven until it cools completely so it's easier and safer to pour out.
- Remove the cake to a cooling rack on the counter at room temperature, and let cool for another 45 minutes to an hour. At this point, go ahead and take the foil off the pan. Then place the cheesecake in the fridge to cool completely and chill for at least 8 hours or overnight.
For Serving and Storing Leftovers
- Run a thin knife or small offset spatula around the inside edge/down the sides of the push pan or springform pan. Then place the push pan on a mug or small bowl so you can push the sides down to reveal the cheesecake. If using a springform, unlock the sides and carefully pull up to lift away from the cheesecake.
- Slice straight from the fridge, using a hot, clean knife to make each slice. For best flavor and texture allow the slices to sit out at room temperature for 30-45 minutes before serving. Cover leftovers with plastic wrap and refrigerate for up to 4 days. Honestly, I doubt it will last that long. Enjoy!
Did You Make Any Changes?
Notes
- To make jam instead of preserves: Mash the cherries against the side of the pan as they cook. For an even smoother texture, after cooking, run the jam through the coarse die of a food mill. Tada: Cherry jam to turn into cherry jam topping!
- If Using Store-Bought Graham Crackers: Increase the butter from 4 Tablespoons to 6–7 Tablespoons. Store-bought grahams are much drier than homemade and need more butter to bind them.
- Room Temperature Ingredients: The cream cheese, sour cream, buttermilk, and eggs should all be at room temperature before mixing. This is especially important for getting the cream cheese completely smooth and keeping the batter smooth as you add the remaining ingredients.
- About the Buttermilk: Use whole buttermilk rather than low-fat or nonfat. You can use all sour cream if you don’t have or don’t want to buy buttermilk. The recipe will work just fine, and the cheesecake will still taste great. Note that it will be less tangy, a bit denser, and will have a higher fat content than when made with whole buttermilk.
- Water Bath: A shallow water bath is plenty. You only need about 3/4″ of hot water in a rimmed half-sheet pan; there’s no need to haul out a deep roasting pan. If your oven heats unevenly, carefully rotate the cheesecake during baking; otherwise, leave it alone.
- Trust the Thermometer, Not the Clock: Start checking around 55 minutes, but pull the cheesecake based on its internal temperature, 152–155°F / 67–68°C, rather than baking for a specific number of minutes. The center should still jiggle slightly.
- Release the Edges After Baking: After the first stage of gradual cooling, run a thin knife or small offset spatula around the inside edge of the pan. The cheesecake may contract slightly as it continues to cool, and releasing it from the pan helps keep the edges from catching and potentially causing a crack.
- Plan Ahead: This is a make-ahead dessert. Allow roughly 2¼–3 hours for gradual cooling, followed by at least 8 hours in the refrigerator. Overnight is ideal.
- For the Cleanest Slices: Slice the cheesecake straight from the refrigerator with a thin knife dipped in hot water and wiped dry between every cut. For the creamiest texture and best flavor, let individual slices sit at room temperature for 30–45 minutes before serving.
- Pass the topping at the table: To avoid an unfortunate murdery serving situation, slice the cheesecake and serve plain. Then pass the topping at the table, allowing everyone to use as much or as little cherry topping as they like. And if they want to skip it altogether, that’s fine too.
Nutrition
Would you like to save this post?
Did You Love This Cherry Cheesecake? Please Rate and Review
It helps me and other readers so much if you take a moment to rate and review this recipe.
Your star rating and comments help others decide whether the recipe is worth making, and your feedback helps me continue improving recipes here at Pastry Chef Online.
Other lovely ways to share include pinning or posting on your favorite social media platform.
Thank you so much for taking the time!


Hi, y’all! I hope you’ve enjoyed this post and hopefully also learned a thing or two.
If you like my style, I invite you to sign up for my occasional newsletter, The Inbox Pastry Chef.
Expect updates on new and tasty recipes as well as a bit of behind-the-scenes action. I hope to see you there!



Join in Today!
hey.
what do i do to add flavor to the cheesecake filling. strawberries for instance?
You can swirl in strawberry puree right before baking. Or closer to the end of the baking time, you could carefully pour it on top and then finish baking. If you’re doing a flavor that will be throughout, just blend it in as you mix everything. If you have any other specific questions, I’m happy to help; just let me know!
Cookie bath sounds so much better than water bath. Thanks for the great info!
This is very timely! I am craving cheesecake…
My fave is any kind that comes with fruit – raspberry, strawberry, cherry, blueberry….. mmmmm….
New York style cheesecake has always been at the very top of my ‘fave desserts’ list but I think Goat Cheese Cheesecake will give it a run for its money.
So here’s the question I didn’t ask about the chocolate pudding – is it possible to reduce these recipes so that I can make individual-sized cheesecakes? There’s only Mr. Noodle and myself, and it’s almost too cruel to have an entire cheesecake for us to finish!
And now I’m qualified to make New York (and other) style cheesecake, or at least qualified to try. That’s smashing that is, just smashing.
So, based on the ingredient list, we could use water in place of the alcohol for the cherry topping? I don’t drink or cook with alcohol.
Thanks!
Bingo, Memoria! You could use water or juice instead of the alcohol. You might not get quite the depth of flavor, but you can always hit it with a little orange zest or a pinch of mace or a tiny, tiny splash of almond extract. And don’t forget that pinch of salt! 😉
Oh, it looks perfect! I love cherries so it is my favorite kind of cheesecake!