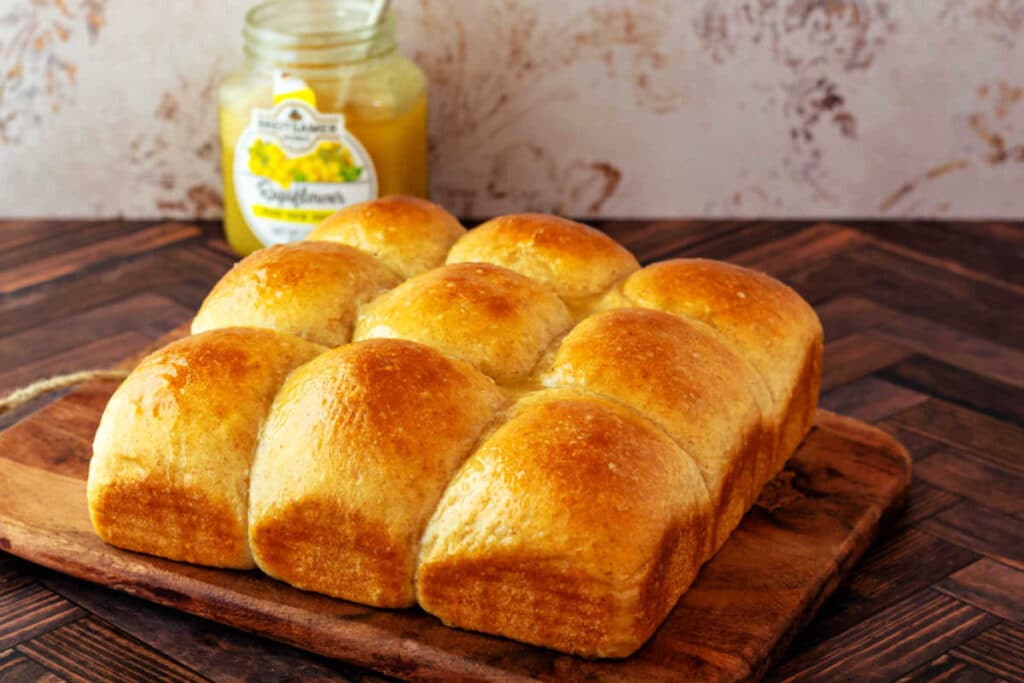
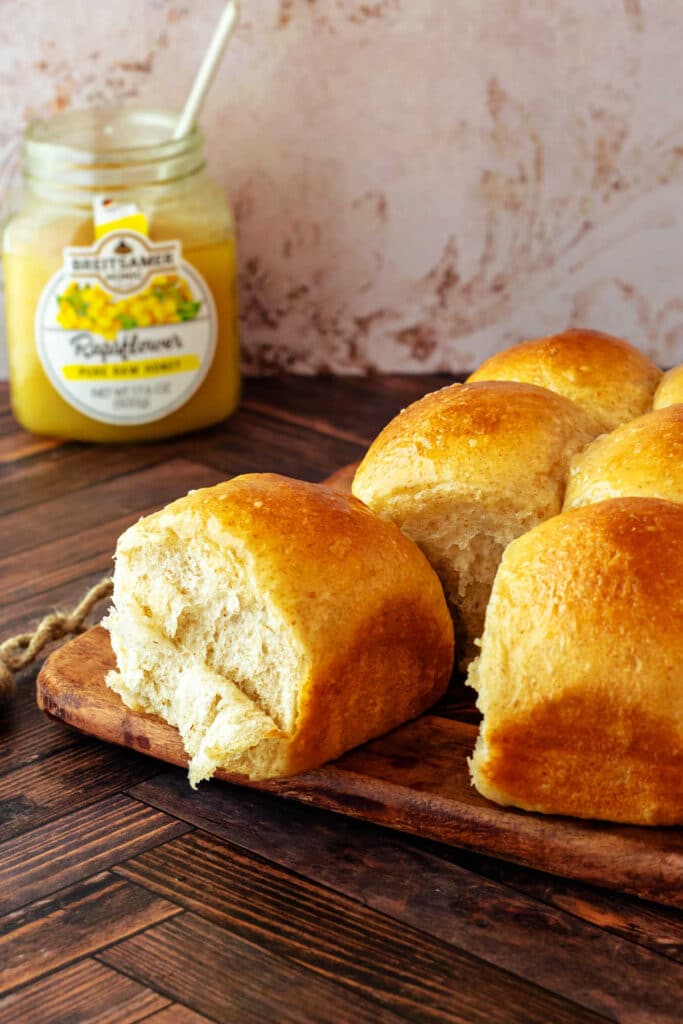
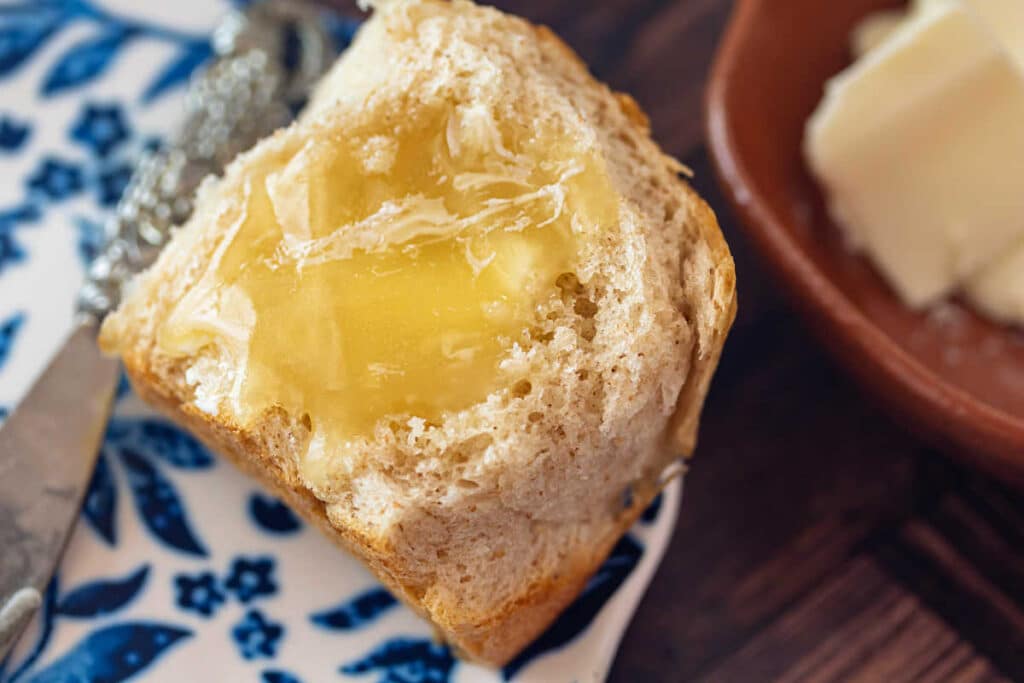
If you love those pillowy soft, fluffy steakhouse rolls that practically melt the second you tear into them, these honey wheat rolls are for you. They bake up tall and pull apart beautifully, with shiny honey-butter tops and a tender, lightly chewy crumb.
A little whole wheat flour, wheat germ, and buttery instant potatoes give these rolls a warm, slightly nutty flavor without making them dense or heavy. These are honey wheat rolls for people who love soft white rolls but also want to feel slightly virtuous.
They freeze and reheat beautifully, making them just as welcome on a holiday table as they are alongside a weeknight bowl of soup. A smaller batch of 9 doesn’t necessarily mean leftovers, though!
Pastry Chef Online Participates in Affiliate Programs. If you make a purchase through one of my links, I may earn a small commission. For more information click to read my disclosure policy
Soft Honey Wheat Rolls, At a Glance
✅Skill Level: Advanced Beginner
✅Skills: Using a scale, Shaping rolls
✅Type: Bountiful Dinner Rolls
✅Number of Ingredients: 11
✅Prep Time: 25 minutes
✅Total Rise Time: 2 hours, 10 minutes
✅Cook Time: 30 minutes
✅Yield: 9 Pull-Apart Rolls
Jump Straight to the Recipe
They really ARE like pillows!
Tester Dani’s Aunt
Why These Honey Wheat Rolls Work So Well
When reader LaFern requested honey wheat rolls, my brain did not go to Pucks of Health Food. No, friends. My mind immediately landed on plush, steakhouse-style rolls. Rolls that would make people stop and say, “Wait. These are whole wheat rolls?!” after just one bite.
I wanted soft, lightly wheaty, lightly sweet, generous rolls with a feathery crumb and shiny-sweet tops. These are like white rolls with benefits.
The job was to create rolls with whole wheat flour with the texture of soft white rolls. Rolls that feel both a little virtuous and somewhat decadent.
Enter Team Plush: the ingredients that weaken gluten just enough, hold onto moisture, and encourage an exuberant rise with a soft, tender crumb. I’ll tell you all about them in the ingredient section.
No weird food-scientist ingredients here, though. As it happens, there are plenty of regular grocery store ingredients that can help us out.
Before we get to the ingredients, let’s talk about this dough and the way it behaves.
Wait. Why Is My Dough So Soft?
This dough does indeed start out very soft, so you are right to question it. The reason it is so soft right after mixing is that all the ingredients that contribute to the plush texture of the rolls don’t contribute much structure before baking. What results is a very soft dough indeed.
When you begin to knead, it will look much more like a batter than a dough, but please do not despair. During the relatively long kneading time of 15 minutes, the gluten from the all-purpose and whole wheat flours gets organized into long strands, becoming supple and stretchy.
At about 11-12 minutes of kneading, the dough develops enough gluten structure to begin pulling away from the sides of the bowl. By the 15-minute mark, the sides and bottom of the bowl should be pretty clean with just a thin ring of dough around the inside of the bowl. At the end of kneading, scrape that bit of dough into the rest of it, and you are good to go.
Whatever you do, please resist the urge to add extra flour. The dough truly doesn’t need it. What it needs is time to get organized and cohesive. When it’s time to gather it into a ball, oil up your hands with a teaspoon or two of the same oil you used in the dough. That will keep our fine-tuned hydration intact while still allowing you to form the dough into a ball without weeping.
The only thing I’d suggest in the final post is to tell dummies like me to trust the process, let the mixer do its thing, and resist adding more flour!
self-deprecating, awesome tester Dani
During the 90-minute first rise (bulk fermentation), all the ingredients–the flour and the softeners alike–fully hydrate, and when your timer goes off, you will be rewarded with a soft, supple, and somehow “blowsy” dough that is a dream to work with.
Seriously, add zero extra flour. If you’re worried, email me, and I will reassure you.
You Have Questions About These Rolls? I Have Answers.
This dough has a ton of “softeners” in it, or what I like to call Team Plush. These ingredients contribute to the soft, billowy, abundant nature of the rolls, but they don’t provide much structure. That job is left to the all-purpose and whole wheat flours, which have to do a lot of heavy lifting in this recipe.
As a result, when you first start mixing the dough, it may look almost batter-like. I promise that once the gluten gets stretchy and organized, the dough will start to firm up and come together. By the end of the 14-minute knead, most of the dough should be wrapped around the dough hook rather than clinging sadly to the bottom and sides of the bowl.
The dough will still be fairly sticky, but please resist the urge to add more flour. During the first rise, both the flour and Team Plush will fully hydrate, and by the time you shape the rolls, you’ll wonder why you were worried in the first place.
As written, this recipe contains about 15% whole wheat flour. The rest of the hearty wheat flavor comes from the wheat germ. You can comfortably increase the whole wheat flour to 20%, substituting it for an equal amount of the all-purpose flour. Beyond that, the rolls will gradually lose their soft, plush steakhouse-style texture. There are plenty of wonderfully hearty whole wheat rolls in the world, but I developed this recipe for people who love soft white rolls and just want a little extra wheat flavor and virtue.
To achieve the springy texture and abundant rise, yes. Both ingredients add softness, tenderness, a nostalgic character, a little bit of chew, and are really integral to the plush crumb of these rolls.
Absolutely. A standard mixer should be able to handle a double batch of this dough with zero issue, especially because it’s so “blousy.” Weigh out 18 equal portions, shape, and bake in a 9″ x 13″ pan in 6 rows of 3.
These rolls freeze beautifully. And they thaw beautifully, so feel free to make them ahead by as much as a couple of weeks. Don’t bother to brush the tops with the honey butter before freezing. Just allow the rolls to cool completely, slip into a zip top freezer bag, press out as much air as you can, and seal. Allow them to thaw at room temperature. When I just want one roll, I take it out, thaw it in the microwave for 30 seconds and then warm it up in the toaster oven so the crust gets a little bit crisp. Highly recommend.
The rolls are phenomenal!! They are everything you described and more!!!
Roll Recipient and friend Carol
How to Make Perfect Steakhouse-Style Honey Wheat Rolls
Now that we have the dough texture under control, I will introduce you to the ingredients and supply substitutions where appropriate. Take notes, because you’ll be able to use some of these ingredients in other favorite bread and roll recipes.
Ingredients and Substitutions
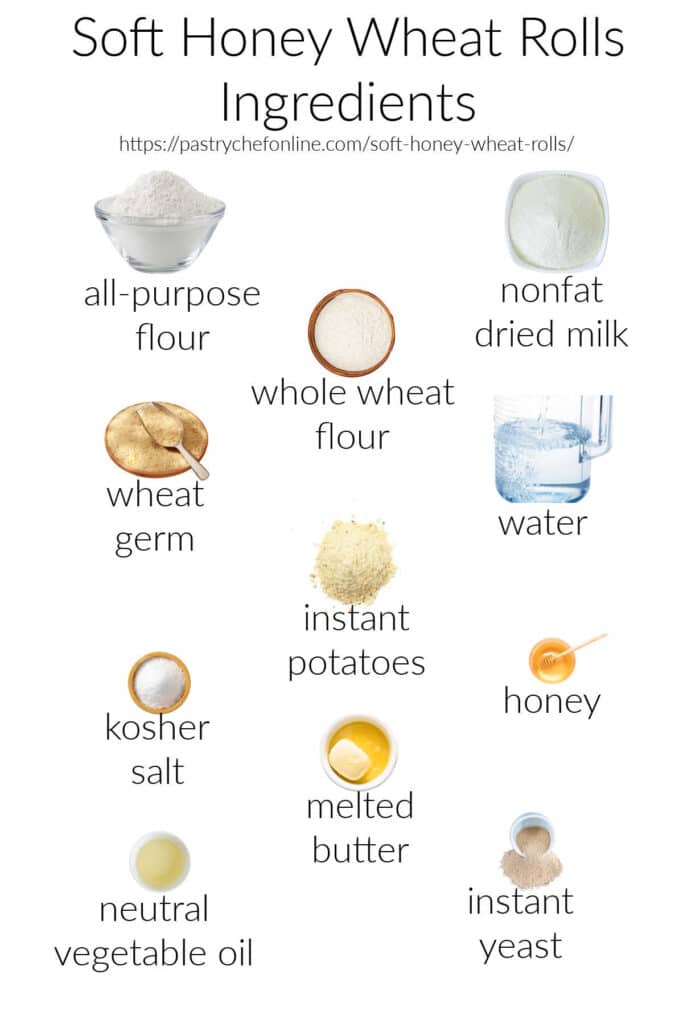
- All-purpose flour: Provides the bulk for the rolls as well as the proteins that combine to form gluten for structure, crumb, and chew. I strongly advise using a higher protein all-purpose flour like King Arthur. You can also use bread flour, although the rolls will be a bit chewier.
- Whole wheat flour: Adds some bulk to the recipe as well as wheat bran and germ. Whole wheat flour generally doesn’t have a strong gluten structure, mainly because the bran acts as little knives and cuts the strands. Hence the addition of Team Plush, described below.
- Nonfat dry milk powder (Team Plush 1): Provides milk solids and milk sugars without contributing additional water. NFDM (nonfat dried milk) assists in browning, enhances flavor, and creates some chew and a tender crumb. Lots of heavy lifting for this one humble ingredient.
- Wheat germ (Team Plush 2): Literally the part of the wheat grain that will become the baby plant, the germ helps to bind some moisture as well as contributing a nutty flavor and a nutritional boost.
- Instant Potatoes (Team Plush 3): Like most starches, instant potatoes rehydrate to hold onto moisture. They also provide a pillowy, tender crumb while enhancing flavor, nutrition, and keeping properties of baked goods. I prefer Idahoan Buttery Homestyle for this recipe, but feel free to use plain instant potato flakes.
- Water: Provides the liquid for the recipe allowing for gluten formation and starch gelatinization while hydrating Team Plush.
- Honey: Adds gentle sweetness, assists with browning, and helps keep the rolls soft and fluffy since honey naturally attracts and holds onto moisture. Maple syrup will also work here, but then you’ll have to change the recipe name to Maple Wheat Rolls.
- Salt: Enhances all the flavors and moderates yeast growth so you don’t end up with a flabby dough. Very important with as many “soft” ingredients that are in this recipe.
- Butter: Adds a touch of richness, a little more milk solids, and carries flavor. Butter also aids in browning.
- Vegetable oil: Like the butter, oil adds richness and helps keep the rolls soft after cooling since it remains liquid at room temperature. Any neutral oil will work well here, including vegetable, avocado, sunflower, and similar.
- Instant Yeast: Provides the rise. Yeast really loves starches, so it will be very happy in this dough. This leads to a fairly fast rise without sacrificing flavor. Active dry yeast may be substituted; increase the amount from 1 1/2 teaspoons to 2 teaspoons.
Making the Honey Wheat Dough
This roll dough, despite all its softening additives and whatnot, is quite easy to put together. Here are the broad strokes:
- In a medium-sized mixing bowl, weigh out the all-purpose flour, whole wheat flour, milk powder, wheat germ, and instant potatoes. Whisk until evenly combined.
- In the bowl of your stand mixer, weigh out the water, salt, honey, butter, and oil.
- Pour the dry ingredients on top of the wet ones and top with the instant yeast.
- Mix on low and then knead for 15 minutes.
Now, let’s walk through in a bit more detail.
Mixing and Kneading
The dough for the rolls is made using the straight dough method: everyone in the pool. There is an order for adding that will help ensure the best possible mix, though.
Would you like to save this post?
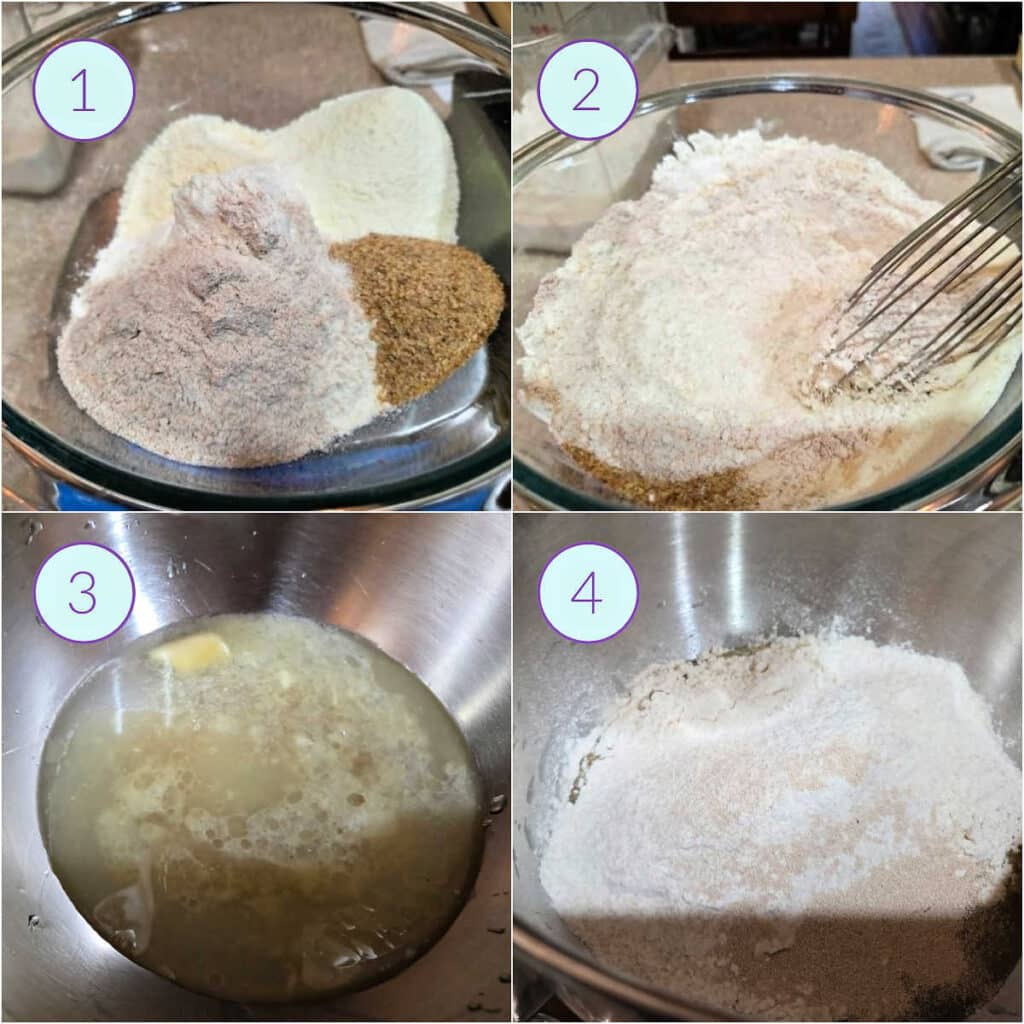
- Put all the flour and flour-like ingredients in a medium mixing bowl: all-purpose flour, whole wheat flour, and Team Plush: wheat germ, powdered milk, and instant potatoes.
- Whisk them up well.
- In the bowl of your stand mixer, combine water, honey, melted butter, oil, and salt.
- Pour in the dry ingredients, and top with the instant yeast.
Jenni Says: Adding the yeast last ensures that everything gets mixed well before the yeast comes into direct contact with the salt. Concentrated salt inhibits yeast growth, and we want our yeast very happy.
Now that the ingredients are all in the pool, it’s time to bring it all together into a smooth, stretchy, plush dough. The secret weapon here? Kneading time. Check it out.
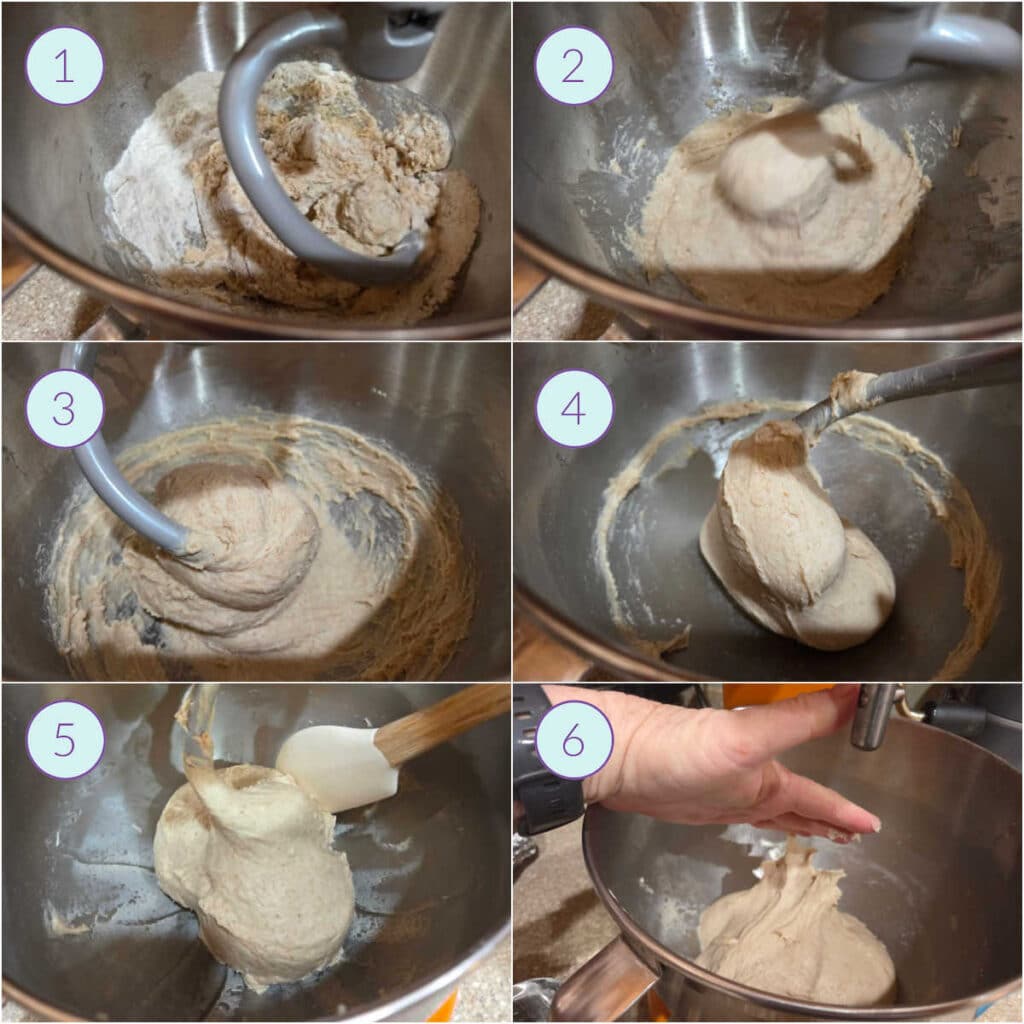
- Mix on low speed until all the ingredients are moistened, about 2 minutes.
- Turn the speed to medium (4-5 on a KitchenAid), and begin kneading. At first, the dough will seem very much like batter, and you might start to worry.
- Minute 8-9 of kneading. Notice how the dough is starting to come together around the dough hook and beginning to clear the sides of the bowl? This is what happens during kneading. The gluten gets organized into long strands and eventually into stretchy sheets. Think of gluten a little like bubble gum: once it gets stretchy and cohesive, it prefers sticking to itself rather than everything around it. That’s why the bowl gradually starts clearing during kneading.
- Minute 15: At this point, the dough is so stretchy that it easily pulls the dough in from the sides of the bowl and gathers itself together, wrapping around the dough hook like a well-behaved dough should. Generally, I find this magic happens around minute 11-12. Give this dough a full 15 minutes, though. While the dough kneads, Team Plush continues to hydrate.
- By the end of kneading, the bowl should be mostly clear with just a thin “water line” of dough clinging around the inside of the bowl to show where the dough used to stick before the gluten fully organized itself. Scrape that remaining “water line” dough into the rest.
- Note that, at this point, the dough will still feel very sticky. It will also be smooth, shiny, supple, and plush.
Please trust Jenni and resist the urge to add more flour in your mixer. The process really does work, and the rolls are just amazing.
enthusiastic tester dani
Jenni Says: Just like bubble gum needs to be chewed for a while before you can blow a bubble, dough needs to knead for a while before the gluten gets organized. For this reason, I recommend resisting the urge to add extra flour to any bread recipe until you’ve reached the 11-12 minute mark. And for this particular plush and blowsy dough, I reiterate: do not add extra flour. It’ll be fine!
The First Rise
The theme of not adding flour continues here. Our secret weapon? Oil.
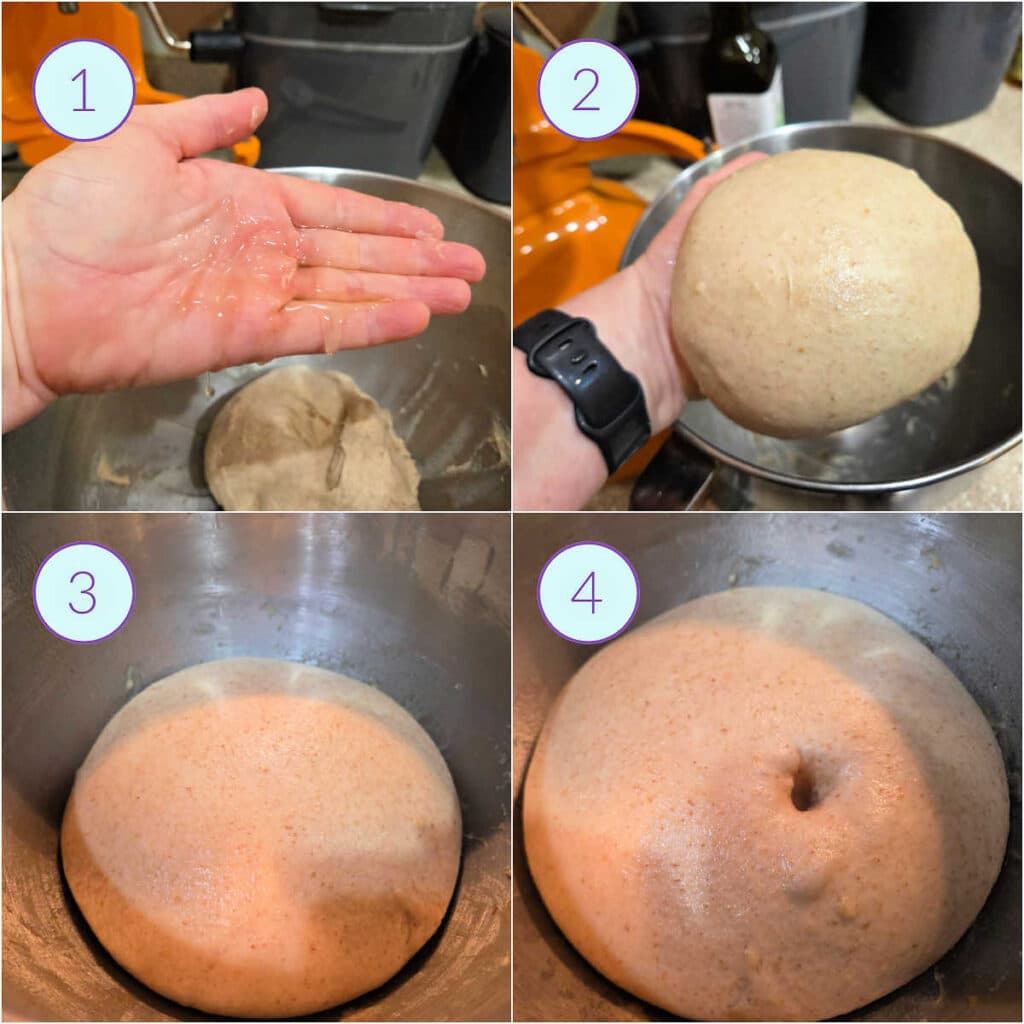
- Use 1-2 teaspoons of the oil you used in the recipe to oil up your hands.
- Scrape the dough out of the bowl and shape it into a ball.
- Plop it back in the mixing bowl and oil the top.
- Cover and let rise in a cozy place until doubled in size. Test it by sticking your finger into the dough by about 1″. The indentation should stay put without filling back in. This takes about 1 1/2 hours.
Shaping the Rolls
And now, we shape. After the 90-minute rise, the flour and softeners will have all fully hydrated. The dough will be cohesive and minimally tacky. It’s very easy to work with and shape.
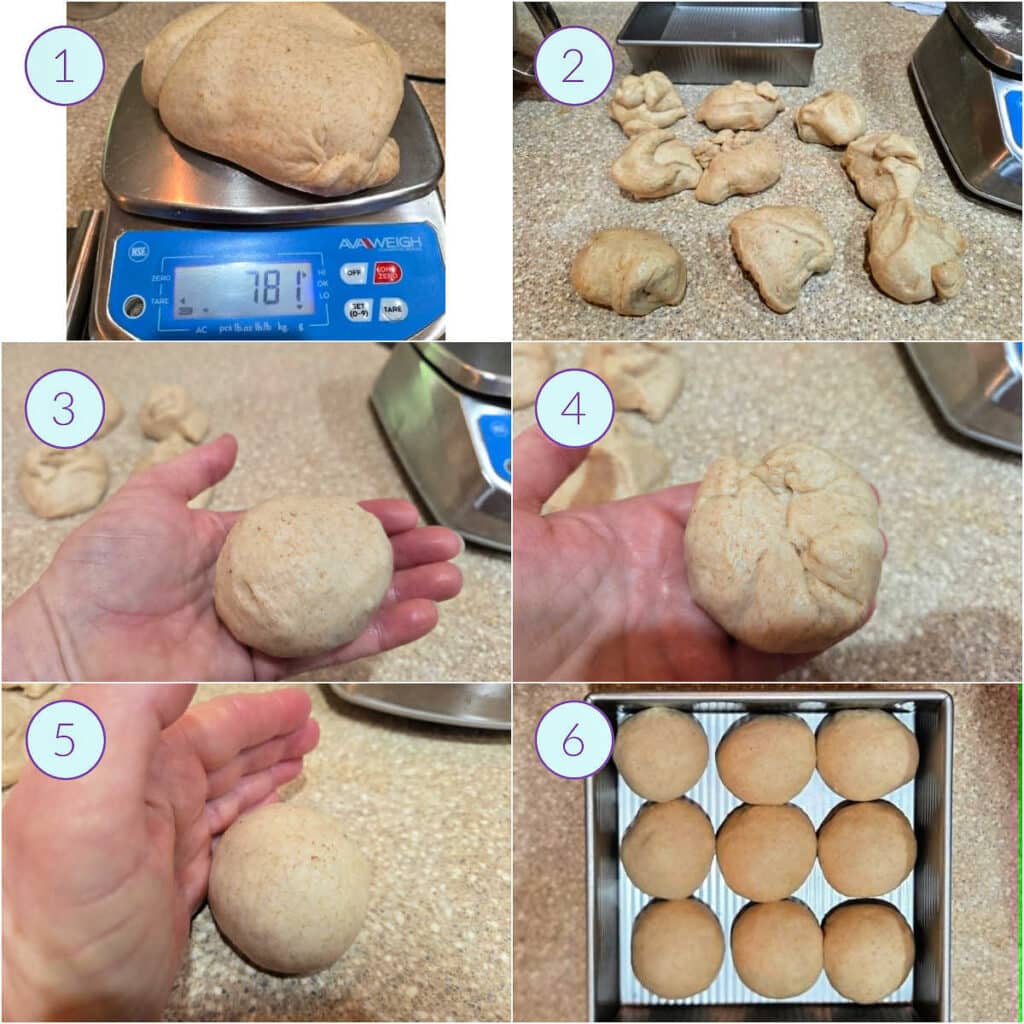
- Weigh your dough in ounces or grams, whichever you prefer. Divide the total weight by 9 to determine how much each roll should weigh. My dough weighed about 780 grams, so I scaled most of the rolls at 86 grams and a few at 87 grams to end up with 9 evenly sized rolls.
- Use a bench knife to portion out the dough into equal pieces.
- Loosely shape each roll into a ball.
- This is the underside of the ball of dough. No magic here. All you have to do is pull the dough gently and gather it underneath so the top is smooth.
- Use the friction of the countertop to tighten the dough into a smooth ball. Rather than rolling it all over the counter, keep it mostly in place while gently rotating it against the surface with your hands. This creates surface tension so the rolls rise evenly and hold their shape beautifully.
- Place your gorgeous, shaped rolls in an 8″ square baking pan, 3 x 3. Oil the tops, cover, and put them in a cozy place.
Note the Marked Absence of flour in that collage. You do not need flour during shaping. Adding extra flour will only weigh down the rolls and destroy the friction you need to tighten them into smooth balls.
Second Rise and Baking
The second rise goes pretty quickly, so start heating your oven to 325F.
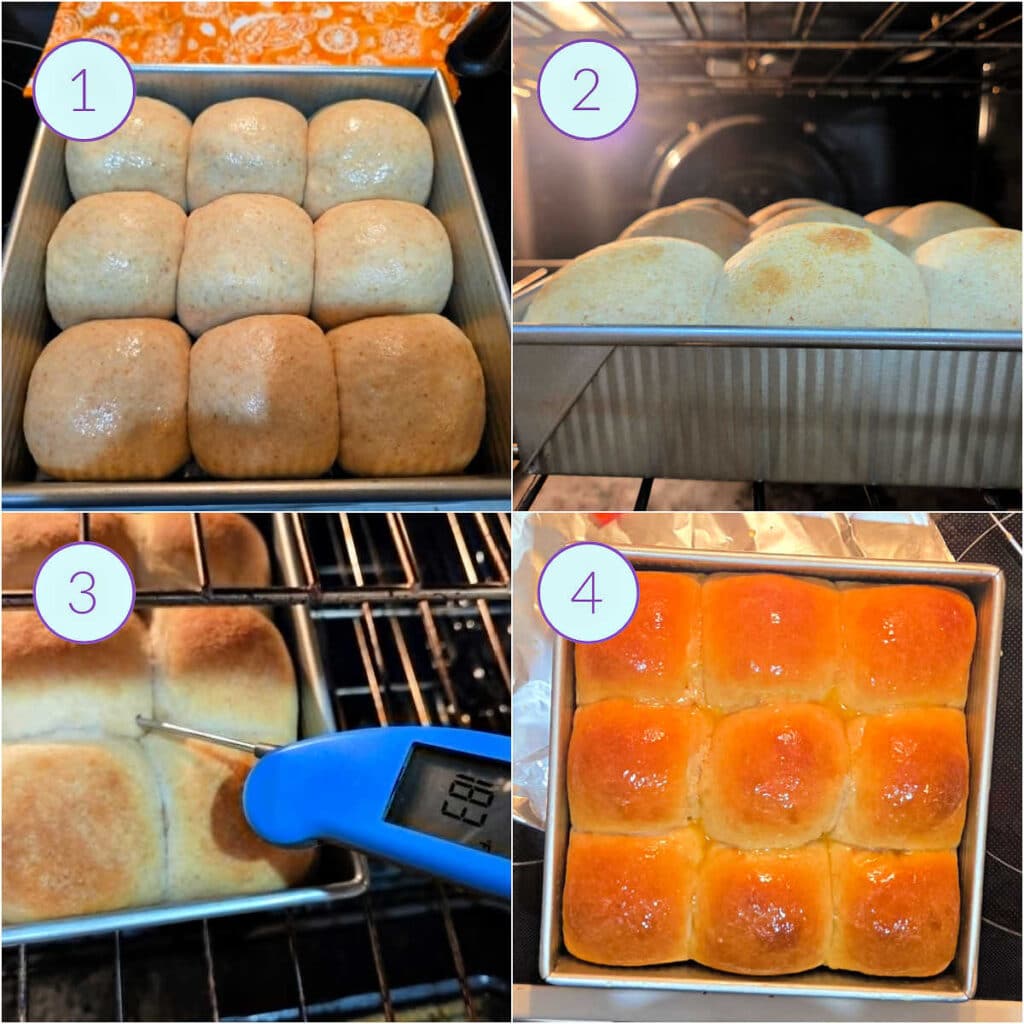
- When ready to bake, the rolls will be noticeably puffy and snuggled up together. This takes about 40 minutes in a cozy place.
- Bake on the center rack, rotating the pan every 10 minutes to promote even browning.
- Measure the temperature in the center roll. You are shooting for 188°F / 87°C. This will take about 30 minutes in all. Cover the rolls with foil if you think they are browning too quickly. I covered mine for the last 5 minutes of the bake.
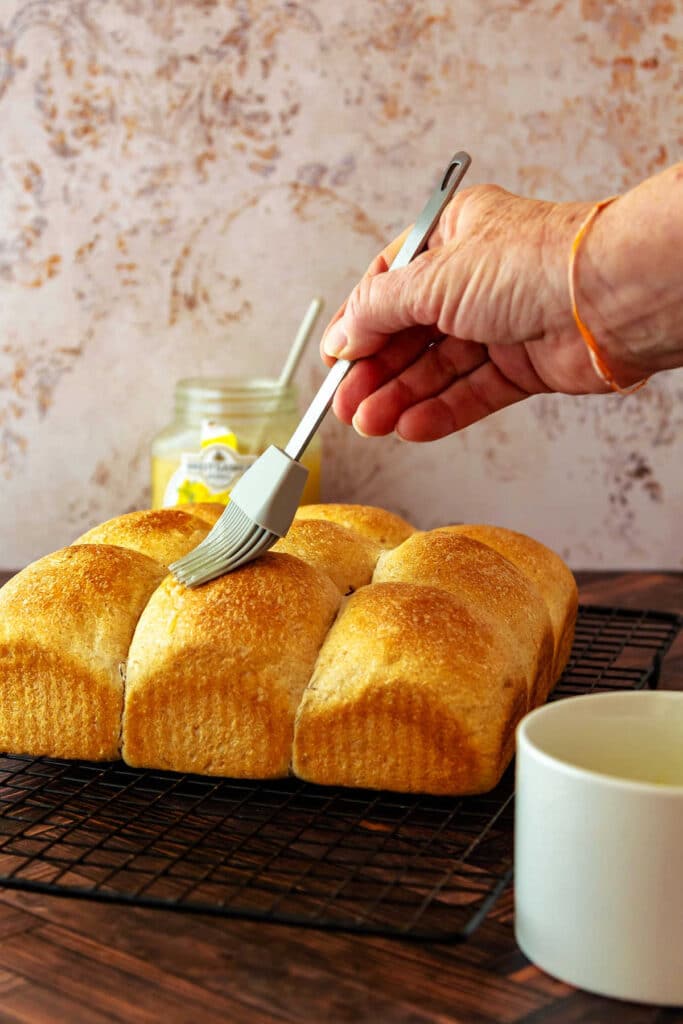
- Remove the rolls from the oven and brush with honey butter. Let the rolls cool in the pan for about 10 minutes before depanning onto a cooling rack.
To best appreciate the plush texture, serve warm, either fresh from the oven or cooled and then reheated.
Questions?
If you have any questions about this post or recipe, I am happy to help.
Simply leave a comment here and I will get back to you soon. I also invite you to ask questions in my Facebook group, Fearless Kitchen Fun.
If your question is more pressing, please feel free to email me. I should be back in touch ASAP, as long as I’m not asleep.
More Dinner Roll Recipes to Enjoy
I mean, once you make these rolls, you may not need other roll recipes. But just in case you are looking for a different flavor profile, I have some other options for you.
For folks who love the softness of a potato roll, try my garlic herb soft potato dinner rolls, soft potato sandwich buns. These easy cheese rolls get their texture and flavor from cheddar cheese and Idahoan instant potatoes.
For pumpkin lovers, pumpkin works to keep rolls soft in much the same way potato does. And the flavor it lends is subtly sweet. Try my soft pumpkin dinner rolls, or if you’re feeling fancy, check out my herbed pumpkin focaccia.
And if you are gluten-free, or are baking for someone who is, check out my friend Sandi’s melt-in-your-mouth gluten-free honey dinner rolls. Your gluten-free friends will thank you!
A Note About Measurements
My recipes are almost all written by weight, including liquids, unless otherwise specified.
For accuracy and consistency of results, I encourage you to buy–and use–a kitchen scale.
I promise that baking and cleanup will be so much quicker and easier.
This is the scale that I recommend for home use. I have owned and used one for years.
The texture is amazing, not thick and dense at all like most whole wheat breads are, and they just melt in your mouth…It’s exactly what I was searching for, and girl, you nailed it!
Honey Wheat Roll Recipe Requester LaFern

Soft Honey Wheat Dinner Rolls
Equipment
Ingredients
- 285 grams all-purpose flour 10 oz or 2 3/8 cups, King Arthur strongly preferred
- 52 grams whole wheat flour 2 oz or a scant 1/2 cup
- 30 grams instant potatoes 1.1 oz or about 1/3 cup, I prefer Idahoan "Buttery Homestyle"
- 35 grams nonfat dry milk powder 1.2 ounces or about 1/3 cup
- 20 grams wheat germ 0.7 oz or a scant 1/4 cup
- 280 grams water 9.9 oz or a scant 1 1/4 cup, at room temperature
- 40 grams honey 1.4 oz or 2 Tablespoons
- 28 grams melted unsalted butter 1 oz or 2 Tablespoons
- 14 grams neutral vegetable oil 0.5 oz or 1 Tablespoon
- 7 grams kosher salt 1 teaspoon fine salt, 1 1/2 teaspoons Morton's kosher or 2 1/4 teaspoons Diamond crystal
- 5 grams instant yeast 1 1/2 teaspoons
For Brushing
- 14 grams unsalted butter 0.5 oz or 1 Tablespoon
- 10 grams honey 1 1/2 teaspoons
- pinch salt
Instructions
- In a medium bowl, whisk together the all-purpose flour, whole wheat flour, wheat germ, powdered milk, and instant potatoes. Set aside.
- In the bowl of your stand mixer, measure the water, honey, salt, melted butter, and oil.
- Pour the dry ingredients on top of the wet.
- Sprinkle on the yeast.
- On low speed, mix the dough with the dough hook until evenly moistened.
- Knead for 15 minutes on medium speed (speed 4/5 on a KitchenAid). The dough will look worrisomely soft to begin with, but by the 11-12 minute mark, it will begin clearing the bowl and gathering around the dough hook. By 15 minutes, you'll wonder why you worried in the first place.
- Scrape any remaining dough off the sides of the bowl.
- Oil your hands and scrape the dough out of the mixing bowl. Gently shape into a smooth ball, plop it back in the mixer bowl, and oil the top.
- Cover the bowl and let rise in a cozy place until doubled, about 1 1/2 hours.
- Scale the dough into 9 evenly-sized pieces. Form each into a ball and tighten on the counter.
- Arrange in an 8" square pan 3 x 3.
- Heat the oven to 325°F / 163°C.
- Oil the tops, cover, and let rise in a cozy place until nice and puffy, about 40 minutes.
- Bake on the center rack for about 30 minutes, rotating the pan every 10 minutes to promote even browning. Loosely tent with foil once you like the color. I tented mine after 25 minutes.
- While the rolls are baking, melt the butter, honey, and salt together in the microwave on medium power. Stir well.
- Rolls are done when beautifully risen and deeply golden brown. The internal temperature of the center roll should be 188°F / 87°C.
- Remove the pan from the oven and brush the tops of the rolls with the honey butter mixture.
- Allow to cool in the pan for 10 minutes. Then turn them out onto a cooling rack to cool to warm. Serve warm, or cool to room temperature and reheat to serve. These rolls freeze beautifully, too, so don't hesitate to freeze leftovers, defrosting them in the microwave and reheating in the toaster oven.
Did You Make Any Changes?
Notes
- This is a very soft dough. Resist the urge to add extra flour and give the dough the full 15-minute knead time to properly develop gluten. Seriously.
- Instant potatoes and dry milk powder are key to the plush texture and keeping quality of these rolls and are strongly recommended. The Idahoan Buttery Homestyle is the perfect choice, because the butter flavor hits all the nostalgic steakhouse roll notes.
- For evenly sized rolls, weigh the dough and divide by 9. My dough weighed about 780 grams, making each roll approximately 86-87 grams.
- These rolls freeze beautifully. Cool completely, freeze airtight, thaw briefly in the microwave, and reheat in a toaster oven before serving.
Nutrition
Would you like to save this post?
Love These Soft, Steakhouse-Style Honey Wheat Rolls? Please Rate, Comment, and Review!
It helps me and other readers so much if you take a moment to rate and review this recipe.
Your star rating and comments help others decide whether the recipe is worth making, and your feedback helps me continue improving recipes here at Pastry Chef Online.
Other lovely ways to share include pinning or posting on your favorite social media platform.
Thank you so much for taking the time!


Hi, y’all! I hope you’ve enjoyed this post and hopefully also learned a thing or two.
If you like my style, I invite you to sign up for my occasional newsletter, The Inbox Pastry Chef.
Expect updates on new and tasty recipes as well as a bit of behind-the-scenes action. I hope to see you there!


Join in Today!
If I could give this a 10+ I absolutely would! When I asked Jenni if she would come up with a Honey Butter Wheat Roll I had no idea what would happen but WOW, did she ever come through with a winner! The rolls are soft, as everyone has mentioned, and not dry and dense like a lot of wheat bread and roll recipes. These are SO GOOD, and if you love rolls, please give this a try. Be sure to measure accurately and as Jenni said, then the dough will come together in about 15 minutes. I timed it and it was right on schedule. Putting the ingredients together is so easy because once you have the dry ingredients whisked together to blend them, you just pour the flour mixture over the liquid in the mixer bowl and let it go. I didn’t even have to oil my hands much to get it into a ball. The dough rose beautifully and I did weigh it when I was ready to form the rolls. I decided to make 12 instead of 9 and the rolls filled a 9×13 pan perfectly. I could not wait for the rolls to cool and ate one while it was still hot … YUM! So yep, Jenni came up with a winner that you should try if you love making rolls! You won’t regret it!!
Wow, LaFern! I don’t think I have the words to tell you how thrilled I am that the rolls were exactly what you were looking for! So great to know that 12 fit in a 9 x 13–I will add that to the recipe! Enjoy all the rolls, and I hope you make them often. Too good not to! xo
10/10!! So easy to make and deliciously soft and yummy. Just enough wheat to give a hearty, wholesome flavor and texture. Could probably easily add-in or top with other ingredients like sesame seeds, dried fruit, or herbs to tilt the flavor profile any way you like. My only alteration to the recipe would be to brush with the honey/butter *after* depanning, to prevent damaging the very soft rolls. Otherwise the directions are spot on, as they always are for any of Jenni’s well-tested recipes. If you’re gonna fall off the keto wagon, do it with these rolls!
Thank you, Niko, for the review! And I’m thrilled you love the rolls! Definitely worth putting keto aside for a day!
Loved them! Fluffy pillows of yumminess!!!!!
Kim, I am so happy you and your family enjoyed them! I might be biased, but I think “fluffy pillows” is the perfect description! Thanks very much for the review!
These rolls are absolute perfection. Truly. Please trust Jenni and resist the urge to add more flour in your mixer. The process really does work and the rolls are just amazing. I did use olive oil and dried whole milk powder (from King Arthur – it was what I had already open in my pantry) and suffered no ill effects from either.
I did also test these on a half sheet pan (in addition to the 8×8 pan) and I can confirm they were still just as pillowy and soft and delicious.
These will be a fantastic addition to any dinner gathering and especially your holiday table! Jenni absolutely knocked it out of the park with this one. 10/10 ⭐️
I cannot thank you enough for testing these–multiple times, just because you were a fan of the dough–and for reviewing them here. And for sharing them with your Aunt!