You guys, please stop whatever you’re doing and make this pepperoni bread recipe, stat. Filled with all the pepperoni and lots of cheese along with an intensely flavored pizza sauce, this pepperoni cheese bread will be the hit of your game day snacks or a fun twist on your pizza night!
If you want to be super fancy, you can use grandma pizza dough to make your braided loaf. And for a similar filled bread recipe, you may want to try my pizza bread recipe.
For ease of browsing, here are all of my appetizer recipes. Thanks for stopping by!
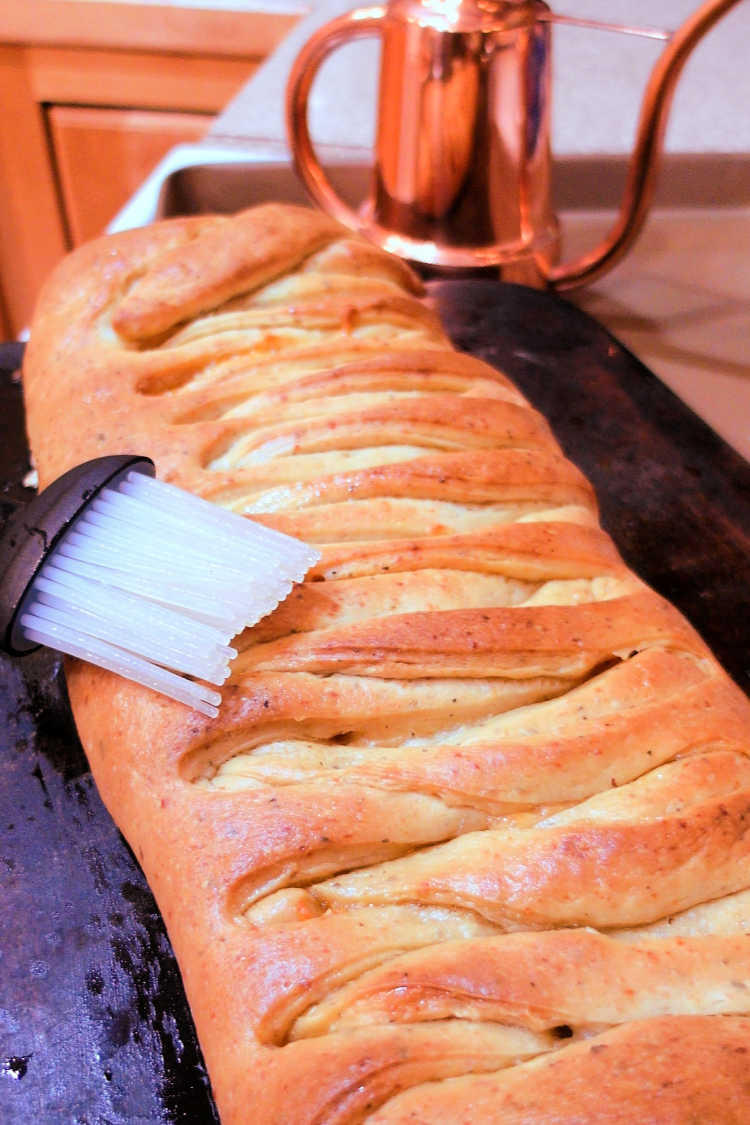
Pepperoni Bread vs Pepperoni Roll
An old boyfriend used to make this bread. He learned to make it from his mom, ladder braid and all. I always loved it, so when it came time to make a snack to take to a Super Bowl party, I was all in for pepperoni cheese bread.
I started doing some research and it turns out that pepperoni rolls are a big Thing in West Virginia. Neither my old boyfriend or his family were from West Virginia, so I’m not sure where his mom learned to make this version, but there you go.
Turns out, items very similar to what I was making also live in cellophane bags at almost every gas station and convenience store in West Virginia! Who knew?
Pastry Chef Online Participates in Affiliate Programs. If you make a purchase through one of my links, I may earn a small commission. For more information click to read my disclosure policy
Well, some folks did. Turns out that pepperoni rolls are a West Virginia coal miner’s best friend. Kinda like a Cornish pasty: hearty pastry wrapped around savory or sweet filling (and sometimes pasties had one-side-savory and one-side-sweet, sort of like a precursor to Wonka’s flavor changing gum).
But in this case, it was soft white bread dough wrapped around a hunk or shreds or slices of pepperoni. When baked, the oils would permeate the bread.
The main difference between my pepperoni bread and pepperoni rolls is that my recipe uses pizza sauce and cheese along with sliced pepperoni.
How to Make Pepperoni Bread
Many of the recipes I’ve seen for pepperoni bread involve frozen dough, jarred pizza sauce, shredded mozzarella and pepperoni slices. And that’s it.
You either roll out the dough, layer on the toppings and roll it up like a big cinnamon roll (no slicing–you bake it in a big snake) or you arrange the toppings in layers in the center third of the dough and then cut an equal number of strips into either side of the dough.
You just fold the strips over, alternating sides, until the fillings are completely enclosed and the loaf looks all beautifully braided. Magic!
I’m giving recipes for all the components, but there is no shame in buying some pre-made components like pizza dough and sauce.
Pepperoni Bread Components
Here’s what I made sure to include for Maximum Flavor Impact:
And of course, lots of pepperoni!
Here’s What You’ll Need to Make This Recipe
For the Dough
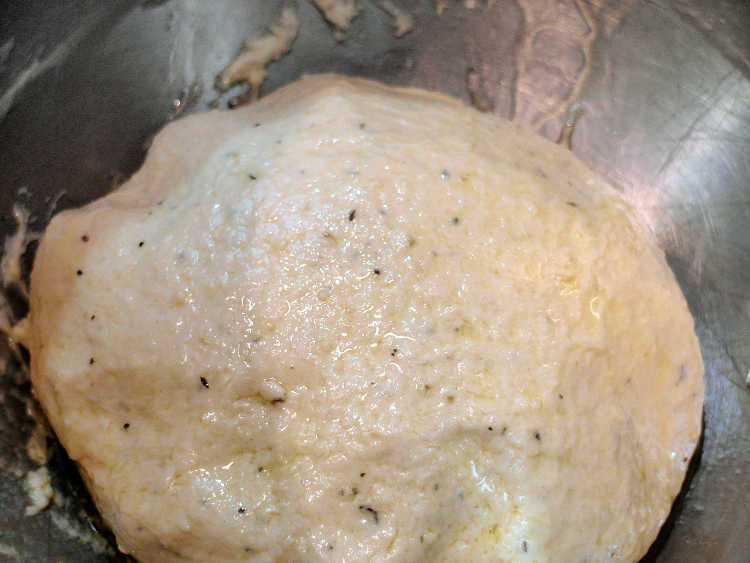
- warm water: For gluten development and for getting all ingredients into solution
- olive oil: For a touch of richness
- bread flour: You may substitute all-purpose flour, but your dough will not be as sturdy. I use bread flour so I can also add Parmesan cheese. Consider leaving out the cheese when using all-purpose flour
- salt: Helps moderate yeast development, adds structure to the gluten, and flavor to the dough
- yeast: Rising agent. You may use instant yeast or active dry. If using active dry, proof the yeast first in a portion of the warm water
- garlic powder: For flavor. Not strictly necessary, but if you get a bite of bread that doesn’t have pepperoni or cheese in it (which can happen towards the ends of the loaf), the bread itself has lots of flavor
- Italian seasoning: Same as above
- black pepper: Ditto
- Parmesan cheese: Ditto, and the Parm also helps to make the dough more delicate like a pastry and less like bread
PRO TIP: For best quality, if you’re not going to make your own dough, opt for balls of dough usually available at the deli counter rather than a “Pop-N-Fresh” can or frozen dough.
For the Sauce and Filling
- olive oil
- garlic
- Italian seasoning
- salt
- black pepper
- canned diced tomatoes: You can start with canned whole tomatoes if that’s what you have. Just break them up as they cook so the sauce isn’t too chunky
SUBSTITUTION: For a twist, use vodka sauce in place of the pizza sauce
- fresh mozzarella: usually sold in large balls in the deli section of the grocery. If they have marinated little mozzarella “pearls,” those would be delicious as well
- block mozzarella (I don’t recommend pre-shredded because it doesn’t melt as well): part skim or whole milk
- sliced or diced pepperoni: lots of it. Layers and layers! The first couple of times I made this bread, I used only 2 layers of pepperoni. Don’t be like me. If you’re going to go for it, go big so you can really taste the pepperoni
Procedure
This pepperoni bread loaf has a few steps, but it’s not hard to make. And the results are truly delicious, friends.
- Make the pizza sauce. You can do this ahead by several days and refrigerate it.
- Make the pizza dough, let rise, then roll out into a rectangle.
- Pile on all your fillings in the middle third of the rectangle of dough: sauce, fresh mozzarella cheese, shredded mozzarella cheese, and a ton of pepperoni.
- Make the ladder braid (See Video in Recipe Card)
- Let it rise, then bake. Cool to warm before slicing and eating. Or cool completely and then reheat to serve.
Making the (Easy, Delicious) Sauce
The sauce for your pepperoni bread is easy to make, so I generally just go for it rather than subbing storebought.
You can serve it as a dip on the side, or you can spread some onto your bread before baking. Or both!
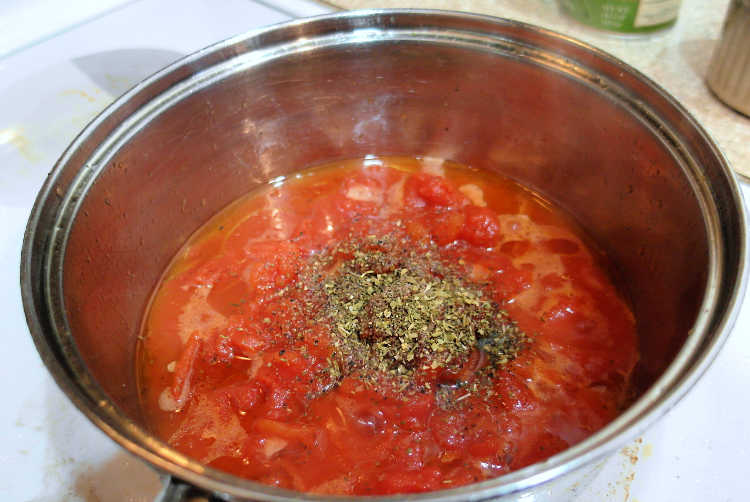
All you have to do to make the sauce is heat the oil, add the garlic and let it get a little color on it, then add in the canned tomatoes, salt, pepper, and Italian seasoning.
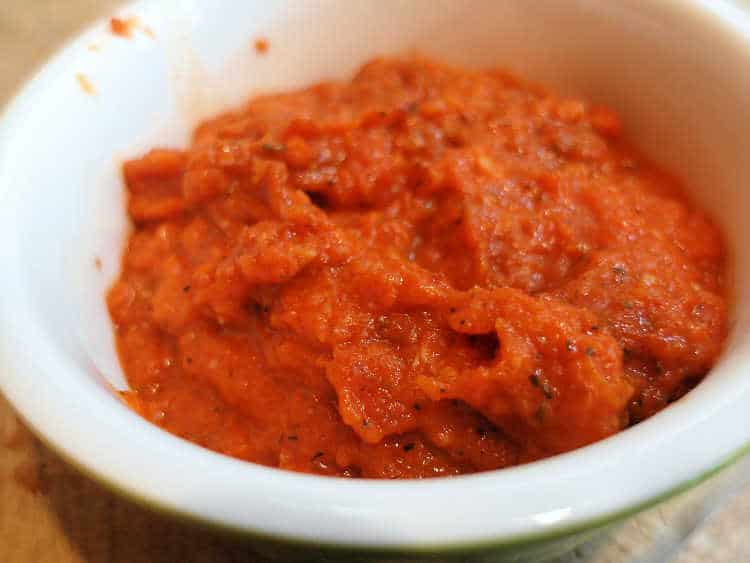
Let it simmer until very thick, and this is what you’ll end up with:
Another Shortcut
As I said above, you can use store bought dough as a shortcut. You can also use store bought pizza sauce if you’d like.
If you decide to go this route, I recommend either:
- reducing the sauce on the stove, and thus intensifying the flavors and making it thicker and less likely to leak out of your bread or
- pouring your jarred sauce into a strainer lined with a coffee filter and letting some of the liquid drain off. This will yield a similar result.
How to Make the Ladder Braid
You’ll definitely want to watch the video to see how to make the “fake braid.” Here are the steps:
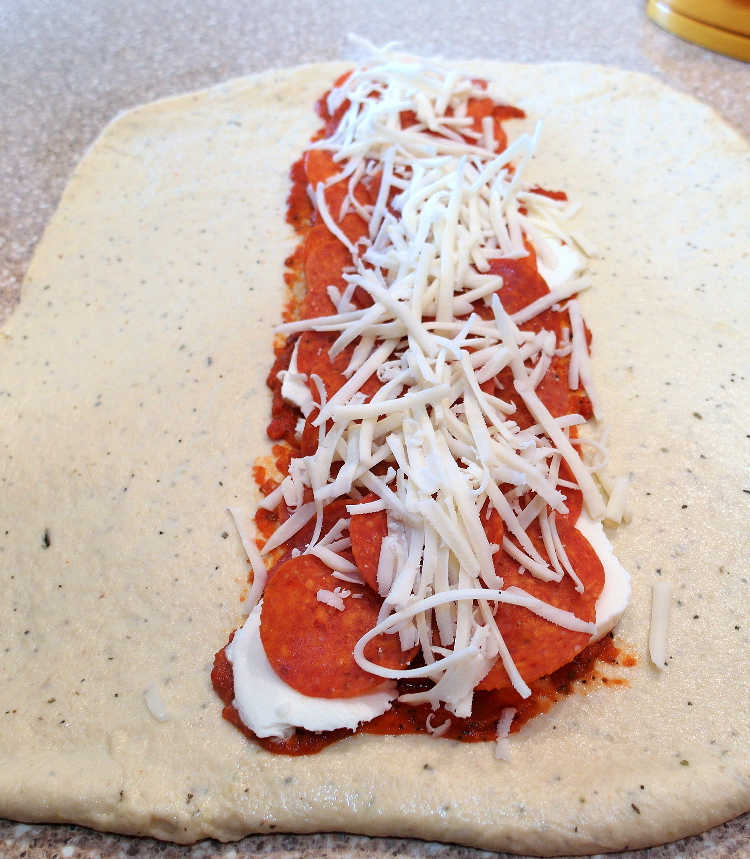
- Roll your dough out into a rectangle.
- Make cuts in from the long edges, about 1″ apart and about 3″ or so into the rectangle.
- Spread your filling ingredients in the center part of the dough where there are no cuts.
- Fold one short edge up over the end of the filling and then cross one cut strip over the filling to the other side.
- Then cross the matching strip on the other side over to the first side.
- Continue alternating crossing strips until the filling is encased in dough and you have a pretty ladder braid.
- To finish the last 2 strips, first, fold the far end of the dough up over the last little bit of filling, and then cross the last 2 strips, tucking them in or under the dough as you can to make a tidy loaf.
More Game Day Snack Options
I am not one to watch The Game–any game, except for Game of Thrones–but I am all about the game day food!
Soft pretzels are a fantastic option. And don’t forget the beer cheese for dipping.
If you love queso, I have a great spicy queso dip that makes 3 cups, so it’s great for a crowd. Similar but meatier, chili cheese dip is also an excellent option.
Laying out a spread of hummus, either homemade or store-bought, along with easy hummus toppings is an impressive but low-stress option as well.
Questions?
If you have any questions about this post or recipe, I am happy to help.
Simply leave a comment here and I will get back to you soon. I also invite you to ask question in my Facebook group, Fearless Kitchen Fun.
If your question is more pressing, please feel free to email me. I should be back in touch ASAP, as long as I’m not asleep.
A Note About Measurements
My recipes are almost all written by weight, including liquids, unless otherwise specified.
For accuracy and consistency of results, I encourage you to buy–and use–a kitchen scale.
I promise that baking and cleanup will be so much quicker and easier.
This is the scale that I recommend for home use. I have owned and used one for years.
Don't let its small price and small size fool you. The Escali Primo is an accurate and easy-to-use food scale that I have used for years. It's easy to store, easy to use, has a tare function, and easily switches between grams and ounces/pounds for accurate measurements.
Please Take a Moment to Rate and Review
It will help me and other readers so much if you take a moment to rate and leave a review for this recipe.
You can use the stars to rate 1-5 (5 is best), and leave a review in the comments. It helps me make adjustments if any are needed, and comments help others decide whether the recipe is worth making.
Other ways to share include pinning, and/or sharing on your favorite social media platform.
Thank you so much for taking the time!

Pepperoni Bread
Equipment
Ingredients
For the Dough
- 8 oz warm water
- 2 Tablespoons extra virgin olive oil
- 13 oz bread flour
- 1 teaspoon salt
- 1 rounded teaspoon active dry yeast
- 1/4-1/2 teaspoon garlic powder
- 1 teaspoon Italian seasoning
- several grindings of black pepper
- 2 Tablespoons grated Parmesan cheese
For the Pizza Sauce
- 3 Tablespoons extra virgin olive oil
- 2 cloves garlic smashed
- ½ teaspoon Italian seasoning
- ½ teaspoon kosher salt
- several grindings black pepper
- 1 28 oz can diced tomatoes
To Assemble and Bake
- dough
- 1/4-1/3 cup sauce
- 1 round fresh mozzarella sliced
- sliced pepperoni (how much is up to you)
- about 4 ounces grated/shredded mozzarella cheese
- More extra virgin olive oil for brushing
Instructions
For the Dough
- If you are sure of your yeast, just dump everything in your mixer together. If you’re not sure, proof it in the warm water. Once it’s happily bubbling away, add all the other ingredients.
- Fit the mixer with the dough hook and turn it on to medium low speed. The dough hook will eventually incorporate all the ingredients and then knead the dough.
- Check the dough occasionally by stretching it. It should be pretty smooth and extensible when you’re done–a total of about 10 minutes.
- The dough will be kind of soft, so make sure you have oil up your hands and the dough.
- Turn the dough out and shape it into a ball.
- Spray the mixing bowl with pan spray or oil and then drop the dough back in, smooth side up. Spray the top of the dough and then cover to let rise in a warm place until doubled, about 1 1/2-2 hours, depending on the temperature in your kitchen.
For the Sauce
- Heat a small saucepan over medium heat.
- Add the oil–it looks like a lot, but it’ll be okay.
- Add the garlic and let the garlic get some nice color. Watch is closely so it doesn’t burn. Some lovely deep golden brown patches are what you’re shooting for.
- Dump the tomatoes in, juice and all.
- Season with salt, pepper and Italian seasoning.
- Turn the heat down to medium low and continue to cook until almost all the liquid is gone. You can stir occasionally during this process, but mostly it will take care of itself.
- Taste for seasoning and adjust if necessary.
- Puree using an immersion blender (it’s really not enough to put in the regular blender). You can always choose to keep it chunky, if you want.
- Let cool to room temperature.
To Assemble and Bake
- Once the dough has doubled, press out all the gases and then turn it out on a pan-sprayed surface.
- Roll the dough out to about a 12″x15″ rectangle (no need to whip out the ruler).
- Spread the sauce in a strip about 3″ wide down the center of your rectangle. Top with sliced mozzarella, pepperoni and the shredded mozzarella. Repeat the layers of cheese, pepperoni and cheese once more (to get extra meaty-cheesy goodness. Or you can just stop at the first layering).
- Use a pizza cutter to cut 1″ strips in towards the filling. Stop the cuts about 1″ from the filling to help guard against blowouts.
- Fold some of the dough over the top and bottom edges of the filling to keep it from leaking, and then cross the strips over, one over the other, all the way down until the loaf is completely Sewn Up.
- Use a couple of large spatulas to transfer the loaf to a baking stone or a greased cookie sheet.
- Brush the top of the loaf with olive oil and cover. Let rise for about 35-45 minutes.
- Preheat the oven to 375F
- Once the dough has risen again nicely, bake on the center rack until the internal temperature in the center of the loaf reaches 205F, give or take just a few degrees.
- Remove the loaf from the oven and brush again with some olive oil.
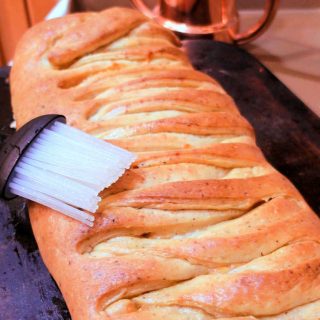
- Let cool and then serve at room temperature or reheat to serve hot. Don’t serve it straight from the oven, or the dough won’t have had a chance to set up and will taste gummy.
Did You Make Any Changes?
Video
Nutrition
And there you have it. I hope you enjoy the pepperoni bread as much as I do, friends.
Thanks for spending some time with me today. Take care, and have a lovely day!

Hi, y’all! I hope you’ve enjoyed this post and hopefully also learned a thing or two.
If you like my style, I invite you to sign up for my occasional newsletter, The Inbox Pastry Chef.
Expect updates on new and tasty recipes as well as a bit of behind-the-scenes action. I hope to see you there!


Join in Today!

My bread isn’t turning brown what am I doing wrong?
Is your oven at the right temp and preheated correctly? Browning is the last thing to occur, so maybe it hasn’t been in long enough. I don’t have much to go on. If you’d like me to help troubleshoot, I’ll need a lot more information. You can email me at [email protected] for “faster service,” too. Happy to help if you can provide more context. Thanks!
I’ve made more pepperoni rolls than I can count, and this recipe is truly the best! The herb-infused dough perfectly compliments the filling. After baking, the dough doesn’t end up with a huge gap between it and the filling. Highly recommend.
I made a double batch of this bread because upon reading the recipe, I just KNEW it would be delicious. This is seriously The Best Pepperoni Bread! The dough is very flavorful, soft and delicious in it’s own right, and the filling is a perfect compliment. Everyone in my family of 6 loved it! I’ll be making this recipe for years to come.
Thanks, Jenni! YOU ROCK!
Oh, my goodness! If Family Bacon Slayer loves it…! I am so glad it’s a hit, Kirsten! ❤️❤️❤️
Can you specify weight on the “1 can of diced tomatoes.” They typically come in 14.5 oz. and 28 oz. cans for consumers.
Good call, Janet. I use the larger, 28 oz cans. I’ll update the recipe to reflect that. Enjoy!
Hi, Jenni! Thanks for linking to my recipe. Loved your post! Your braid is gorgeous. I’ll have to try it that way next time!
-Becky at The Two Bite Club
And thank you guys for the inspiration! 🙂
IF you havent seen the Youtube Video she is amazing everyone should watch and this is an awesome treat Thanks Jennifer!
There IS no VIDEO! ???????????
It’s going to be okay, Wanda. I had no idea the video didn’t transfer over when I changed recipe cards. Things sometimes break, so it should be where it belongs now. In case it’s not, here is a direct link to the same video on YouTube. I made it live, and the video is about 20 minutes long. I hope you find it helpful and that you enjoy the bread. Hard to believe we all used to cook without videos not that long ago! lol https://www.youtube.com/watch?v=dH1w7qcZcXI
Can you prepare this ahead of time and bake the day of party?
It really depends on how far ahead you’re talking about. If you make it the evening before up until the point where you fill it, you can cover it w/plastic wrap and let it have its second rise in the fridge. Bring it out about 2 1/2 hours before serving to let the dough come up to temp for about an hour or so (depending on how cold it is in your kitchen). Bake and let cool at least 30 minutes before slicing and serving. Any farther in advance than that, I’d suggest baking it, letting it cool completely and then wrapping it tightly in plastic wrap and foil and freezing it. Take it out to thaw, wrapped,and then re-warm in the oven before slicing and serving.
This is an okay breakfast food, right? 😉 Looks AMAZING!
I highly recommend it as a Breakfast food, Jen! lol Enjoy. 🙂
Jenny omg looks delicious….. i’m going to try. Question: its different bread flour than the regular one??
Oh yay, Dollys! Bread flour has more protein in it than all purspose, so it gives you a bit more chew. For something like this, you will be completely fine using a good all purpose flour like King Arthur. Hope you like it. 🙂
Jennifer, This looks wonderful! I particularly love the regional story behind it as I’ve never heard of Pepperoni Bread. The ladder braid is spot on too. Thanks for sharing the recipe.
Hey thanks for taking the time to stop in, read and comment, Brooks! The first time I ever had it, an old boyfriend made it. Said his mom used to make it, but I don’t know where she was raised. But I’m glad someone invented it because it’s good stuff! Hope you give it a try–looking forward to playing w/your peanut brittle recipe as well!