Today I’m sharing with you some important baking tips and pastry tricks I learned during my time working as a pastry chef.
Following these tips can help you to become a better cook and baker.
Remember that learning to cook and bake is a process, and there is no substitute for learning about ingredient function and mixing methods, but these tips can certainly make your kitchen life a bit easier and maybe even more fun.
You may also be interested in these basics to make you a better cook.
For ease of browsing, you can find all my fundamentals posts in one place. Thanks so much for visiting!
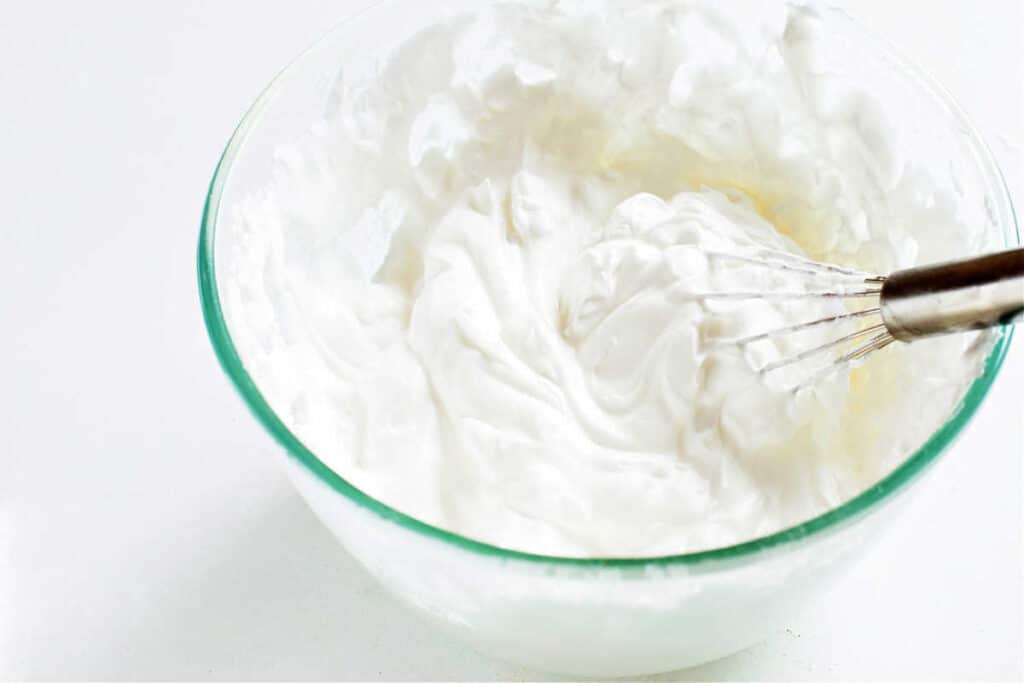
Whipping Cream
Cream whips best when cold.
I usually whip cream in a stainless steel bowl set in a larger bowl filled with ice and a little water. (Read more about water baths and ice baths)
I really like this set of nesting bowls.
Pastry Chef Online Participates in Affiliate Programs. If you make a purchase through one of my links, I may earn a small commission. For more information click to read my disclosure policy
Read more about how to whip cream by hand.
Meringue
Egg whites whip faster at room temperature and tend to be more stable when heated and then whipped.
Separate eggs when cold and then allow whites to come to room temperature before whipping.
Adding no more than a teaspoon of water per egg white to your whites before whipping will get them started more easily with no appreciable loss in foam stability.
While older whites whip more easily, fresh whites will hold their shape better.
To read more about meringue: Italian meringue, Swiss meringue, French meringue
Salt
I cannot overemphasize the importance of salt. Put it in everything. Seriously.
If you think of salt as a substance that enhances flavor rather than one that makes things salty, this makes more sense.
Your chocolate will be chocolaty-er. Your vanilla will taste more vanilla-y. Your strawberries will taste more strawberry-y. For cooking and baking recipes, use kosher salt or fine sea salt for the purest flavor.
To add a final layer of flavor, an occasional crunch and some visual appeal, almost every pro I know adds a tiny sprinkle of finishing salt to each plated dish.
The options here are pretty limitless. Try fleur de sel, Hawaiian pink salt, Himalayan salt, smoked salt, herbal salt, etc. If you’re not quite sure where to begin, you can buy reasonably priced sampler sets to get you started.
Read more about using salt in desserts.
All-Purpose Bowls
Always use metal bowls for ice baths.
Just as metal is used to make pots and pans to quickly conduct heat to food, it is just as effective for conducting heat away from food (and into surrounding ice).
Think of it this way. Glass is an insulator, so why would you put something you want to cool down quickly in a glass bowl?
Glass bowls have their place, but for quickly getting heat into–and out of–foods, metal is the way to go.
Infusing Flavor Into Cream
Steep any sort of flavoring (vanilla bean, herbs, spices–whatever) in cold cream at least overnight to add an extra dimension of flavor to your whipped cream or custard.
Infuse a flavor in hot cream and you run the risk of extracting some undesirable bitter flavors. So, if you have the time, cold infusion is better.
[bctt tweet=”Cold infusion takes longer but results in purer flavor. –Pro Tip” username=”PastryChfOnline”]
Ice for Caramel
When making caramel, like for a flan, have a cup of ice ready nearby.
When your caramel is the color you want it, kill the heat and immediately throw in a handful of ice.
Stir it with a very long-handled spoon or spatula. Stand back–it will splatter madly, but it will lower the caramel temperature quickly enough that the color you want is the color you get.
Read more about uses for ice in the kitchen.
Metal Containers for Ice Cream
This tip sort of goes along with the kitchen tip for using metal bowls.
When making ice cream or anything else that needs to be very cold, if not frozen, put the target container(s) in the freezer for at least 15 minutes before filling.
This slows pesky melting, especially if you’re putting your product into a metal container like my favorite loaf pan.
Pot Doesn’t Have a Lid
No lid for your pot?
Cover a hot pot with plastic wrap.
The plastic will even shrink up around the pot and provide a tight seal.
Need it to vent some? Cut a small slash in the plastic with a sharp knife. Remove the wrap with tongs or something else long. Steam can give really bad burns.
You can also set a plate on top of a pot that doesn’t have a lid, buy a universal lid that will fit many different sizes of pots, or even stick a cookie sheet or half sheet pan on top.
I have done all these things, and they all work very well.
Tip for Using a Dry Measure to Measure Liquids
You need 1/2 cup of liquid and all you have is a 1 cup dry measure? No problem.
Hold the measure at a 45 degree angle then pour slowly so the surface of the liquid you’re measuring just comes to the lip of the cup on one side and just meets the bottom of the cup on the other side. Voilà–1/2 cup!
Geometry at work. And you thought you’d never have to bisect anything ever again!
Quickie Chocolate Glaze
Need a quick chocolate glaze on the fly?
Combine equal parts of corn syrup and heavy cream and heat them to just below a boil.
Off the heat, add dark chocolate, a bit at a time, whisking all the while, until the mixture coats your finger (okay, or a spoon) without the skin (metal) showing through.
Cool in a water bath–it should thicken up a bit more as it cools.
The corn syrup is for shine, and don’t forget the pinch of salt! Try my favorite chocolate chips in this “recipe” and see what you think!
Buttermilk Substitutes
If you need buttermilk and don’t have any on hand, add a healthy squirt of lemon juice or vinegar to whole milk, stir to distribute, and let sit for ten minutes.
Also, be aware that pretty much any dairy can be subbed for other dairy products.
Acidic dairy such as creme fraiche, sour cream, yogurt and buttermilk can all stand in for each other. If they’re too thick for your purposes, thin them out with a bit of water.
And “sweet” dairy such as cream, half and half, whole milk, and 2% milk can also stand in for each other in baking.
Just remember, the higher the fat content of the dairy, the more tender the final product.
How to Thicken Frosting
If your standard American icing, made with 10x powdered sugar, is too thin, don’t add more sugar.
Sugar is hygroscopic and will attract more water, and especially on humid days, you could end up with a soupy mess.
Try whipping in more butter instead.
Preventing Sugar Crystals
You know how they say to brush down the insides of your pan of sugar syrup with a wet pastry brush to get rid of sugar crystals?
Don’t do that. As soon as your water and sugar come to a boil, slap a lid or a piece of plastic wrap on top and let boil for 2-3 minutes.
This will wash off any errant sugar crystals, and you won’t end up with a sticky brush.
Caramel
And as long as we’re talking about caramel, the darker you take it, the less sweet and more complex the flavor will be.
The lighter your caramel is, the sweeter and more one-note the caramel is.
I tend to take mine to Pretty Darned Dark.
And always add salt to caramel–it will counteract any bitterness and really bring out the complexity of flavor, even in a light caramel.
Uses for Vanilla Beans

After you use a vanilla bean, wash it well, let it air dry and then throw it in the sugar bowl.
You can also take the sugar and a vanilla bean and whir them up in the food processor for a couple of minutes. Either way: vanilla sugar.
Ripening Cookie Dough
Most cookie dough benefits from some ripening in the fridge.
If you have the patience, cover and refrigerate your dough overnight. Or even over two nights.
Even a couple of hours makes a difference.
The chilly rest allows the flavors to develop and marry happily and also for the flour to completely hydrate.
More Quickie Baking Tips for You
And here are some additional tips for you, at no extra cost!
- Roll pie and cookie dough between two sheets of parchment so you don’t have to add extra flour–this keeps the dough more tender.
- Greasing and flouring a pan for a chocolate cake? Don’t use flour. Use cocoa powder (or a mixture of flour and cocoa powder), instead.
- Horrible black carbonized mess in your best pan? Bring water and baking soda to a boil in the pan, scrape gently with a wooden spoon, then wipe. You probably won’t even have to scrub!
- If a recipe doesn’t call for salt, use some anyway. You’ll thank me.
- If a recipe calls for x amount of salt, it will probably benefit from at least 1.5x or even 2x.
- Use Saran Wrap to line your pie crusts for blind baking. Honest. This is the best tip ever, and should have been first, but it was feeling cheeky, so I put it in the middle.
- Whip egg whites and cream on medium speed. It’ll take longer, but you’ll get a more stable foam.
- If a recipe says to fold in some stuff and then later fold in some more–fold it all in at one time. You’ll ultimately do less folding and you’ll have less loss of volume.
- The most important thing in a chemically-leavened cake is to evenly distribute the leaveners. Whisk leaveners and flour together thoroughly before proceeding with a recipe.
- You can make those candied nuts from the mall at home.
- Pastry cream pretty much equals vanilla pudding. If you wouldn’t make pastry cream from a wee box, don’t make pudding from one, either.
- If you burn yourself and it’s a little blistery and hurts like crazy, keep an ice pack covered with a wet towel on the burn until the burning sensation stops. This could seriously take up to 8 hours. Do it anyway–you’ll cut your recovery time drastically and probably be able to avoid huge blisters.
And there you have it: my best baking tips to make your life in the kitchen run a bit more smoothly.
If you have questions about this post, don’t hesitate to get in touch. You can leave a comment on the post and I will get back to you within about 24 hours.
If your question is more urgent, please shoot me an email, and I will respond within 4 hours, unless I’m asleep.
It will help me and other readers so much if you take a moment to rate and leave a review for this recipe.
You can use the stars to rate 1-5 (5 is best), and leave a review in the comments. It helps me make adjustments if any are needed, and comments help others decide whether the recipe is worth making.
Other ways to share include pinning, and/or sharing on your favorite social media platform.
Thank you so much for taking the time!


Hi, y’all! I hope you’ve enjoyed this post and hopefully also learned a thing or two.
If you like my style, I invite you to sign up for my occasional newsletter, The Inbox Pastry Chef.
Expect updates on new and tasty recipes as well as a bit of behind-the-scenes action. I hope to see you there!


Join in Today!
For the plastic wrap for blind baking, does the plastic wrap melt? What temperature can the pie crust be baked to with the plastic wrap on? Thank you for this great list of tips. I learned a lot.
Hey, Ellen. I’m glad you learned some things from this list of tips! As far as the plastic wrap in the oven, I wouldn’t go over 375F in the oven for blind baking. Use a high quality plastic wrap top. No flimsy off-brands, just to be safe. And the plastic *will* melt if it comes into contact with metal, so fold it 8n on top of your beans or other pie weights and make sure it isn’t touching the racks and you will be good to go.
how do you make caramel for dipping apples? How do you keep it from hardening before you finished dipping all the apples?
Very good question. Do you want a thin, hard candy coating of caramel, or a thick, chewy one? For a traditional caramel apple with thick, chewy caramel, you’ll have some cream and maybe a touch of butter in the mix, both of which help to keep the candy soft enough to coat. If it does get too thick before you’re done, gently rewarm it until it is liquid again and continue dipping. The key is gentle here, so rewarm in a double boiler or over very low heat.
Hello, this is such an amazing site!
I would like to ask you about ice cream (looks like its out of topic but hopefully, you will help me.)
I am a culinary student from Indonesia. Currently I am writing on my final paper entitled “The Texture of Ice Cream”. I’ve been struggling to find photos of visual texture defects (how can you tell by sight if the texture of ice cream is buttery, fluffy or sandy?) I’ve been trying to look everywhere but can’t find any related web nor picture. Those webs only described the defects but none are showing any picture. So would you please kindly explain me the defects that may occurred to ice cream along with the photos?
Thank you very much. Looking forward to hear from you 🙂
Hey there! Ice cream isn’t off-topic at all–it’s one of my favorite subjects! If you are looking for help with photos of ice cream textures, I’d contact the folks at http://icecreamnation.org. That site is truly dedicated to ice cream in all its forms. If I were to explain all the defects and give you photos, that’s sort of doing your work for you. What I’d suggest you do is make different batches of ice cream using different formulas and photograph them straight out of the churn, after ripening in the freezer, after scooping, as they melt, etc to get a good idea of how different ice cream formulas behave under different conditions. Some of the bases I would try would be ones where the water is not bound by anything (Philadelphia-style), custard bases, starchp-thickened bases, ice cream made with differing amounts of milk fat, etc. Hope that helps, and I know icecreamnation will be a good resource for you for finding information on all the different types of ice cream. Good luck with your final paper!
I don’t know why I haven’t read your tips before Jenni! I just learned quite a few things, thanks chickadee! Like the plastic wrap trick 🙂
That plastic wrap trick is the best! Did I mention that it was one of only 2 truly new things I learned in culinary school? Very expensive tip! lol
My grandmother said to drop a raw potato into soup to counteract over-salting. Any truth to that?
Thank1
You know, I always thought that there was until I read this post by a friend of mine. The tone is a bit snarky, but the information is sound. I consider this the definitive answer to the question: http://blog.kitchenmage.com/2011/12/debunk-of-day-potato-fixes-over-salted-soup.html