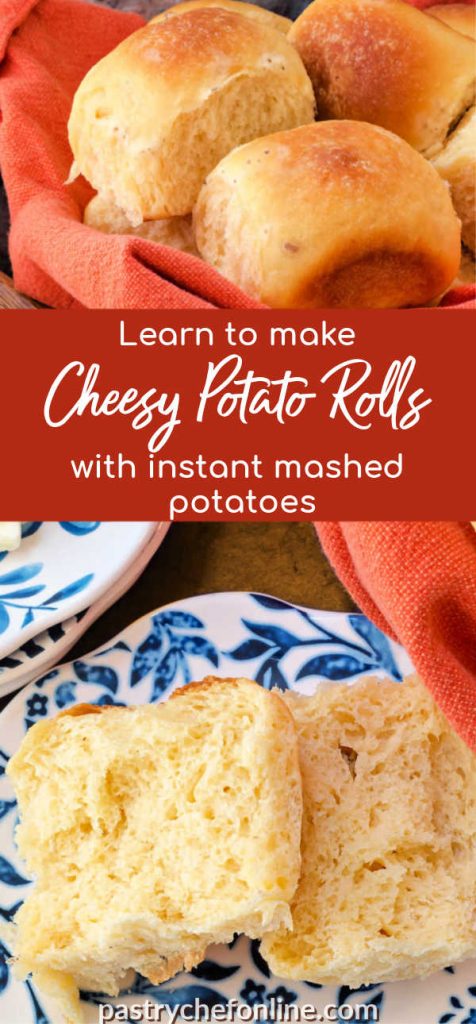
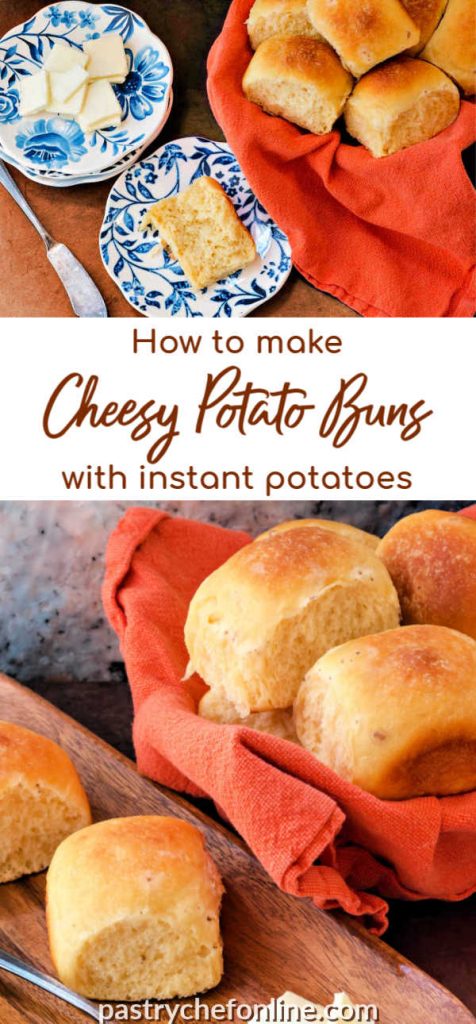
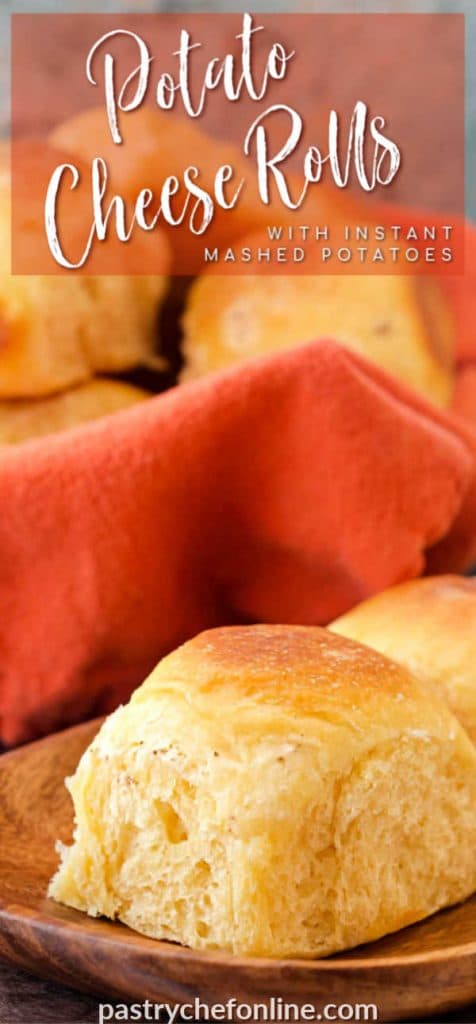
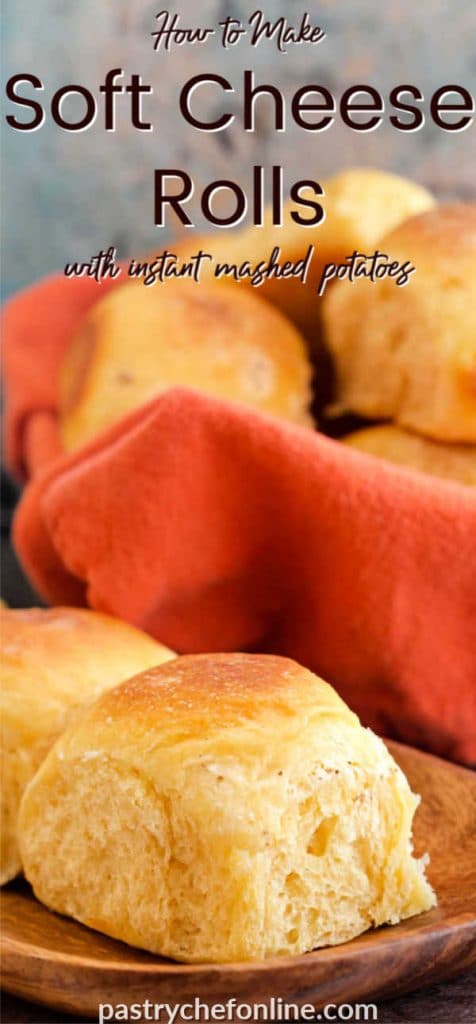
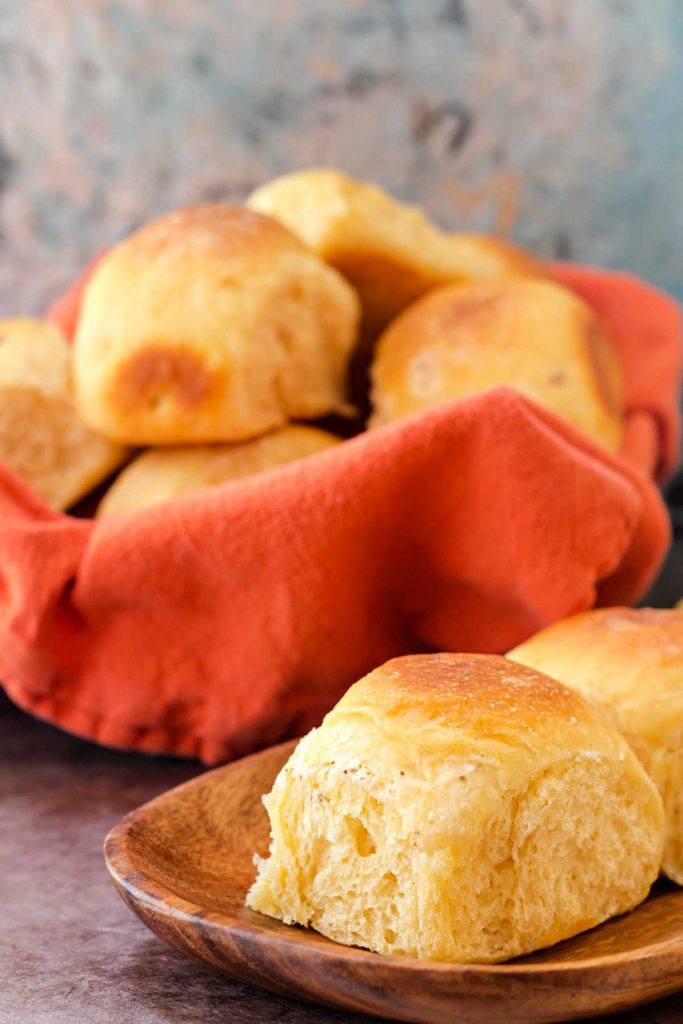
Today, I’m bringing you some absolutely delicious potato cheese rolls, friends. Made with Idahoan® cheesy Mashed Potatoes in the dough, these might be the tastiest cheese buns ever. This is a very easy roll recipe, and since yeast loves potatoes so much, the rolls rise quickly and have a ton of flavor. Let’s get to it, shall we?
You may also enjoy my potato sandwich bread and soft sandwich rolls, both of which are made with Idaho® potatoes.
For ease of browsing here are all of my bread and roll recipes. Thanks for stopping by!
Pastry Chef Online Participates in Affiliate Programs. If you make a purchase through one of my links, I may earn a small commission. For more information click to read my disclosure policy
GREAT RECIPE!! I am a bread making addict and made this today, in a word “fantastic” soft fluffy sweet inside savoury top a real tear and share winner. Thank you <3
Reader Long
Cheese Rolls, At a Glance
These rolls are easy to make and have a nice, rich cheese flavor. Here’s what to expect, in a nutshell.
✅Skill Level: Beginner/Intermediate
✅Skills: Straight dough method, shaping, rising, baking
✅Type: Dinner Rolls
✅Number of Ingredients: 8
✅Prep Time: 15 minutes
✅Rise Time: 2 hours, 15 minutes
✅Cook Time: 30 minutes
✅Yield: 18 rolls
Jump Straight to the Recipe
Varying the Flavor with Idahoan® Mashed Potatoes
I am generally the girl who wants to make everything from scratch, including my mashed potatoes.
I’ve made other dinner rolls using Idaho® Russet potatoes, cooked and mashed, in the recipe. You can see how that works in my garlic Parmesan dinner roll recipe and garlic chive potato rolls.
This is the first time I’ve developed a recipe using “instant” mashed potatoes, and let me tell you, it won’t be the last.
One of the cool things about the different flavors is that you can use any flavor to make your rolls.
So if you use four cheese kind, you can add additional cheese and maybe some cayenne to make extra cheesy rolls.
And if you make these rolls with the Bacon and Cheddar Chipotle kind, you can sub in pepper jack for the cheddar and add a touch of chipotle powder.
Make the rolls your own by switching up the flavor of Idahoan® mashed potatoes you use. Easy!
Ingredients You’ll Need
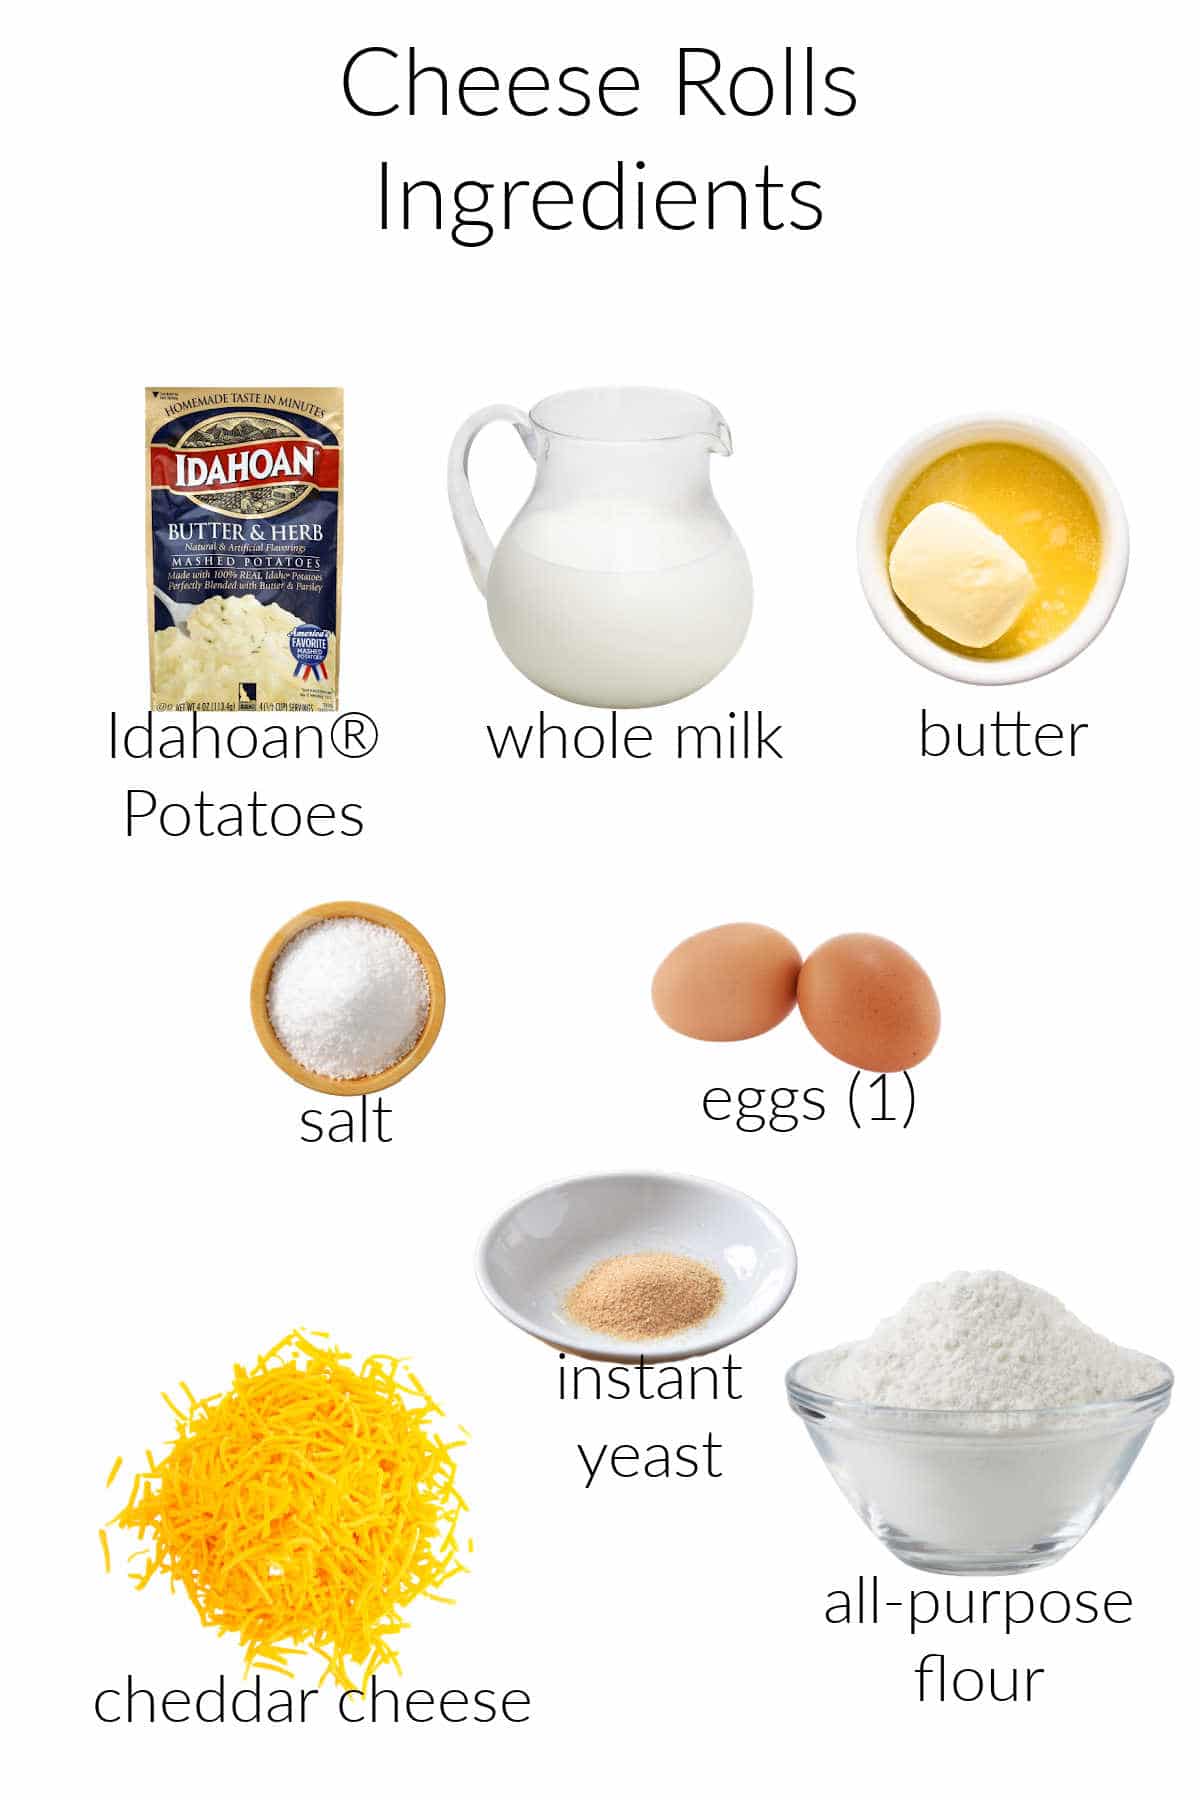
- Any flavor of Idahoan® Mashed Potatoes. 2 caveats here: you want the Russet kind, not the Red-Skinned kind. And I’d make sure the flavor already has cheese in it just to up the cheese factor. Otherwise, the choice is yours
- whole milk
- butter
- salt
- egg
- sharp cheddar cheese (or whatever cheese will go best with your flavor of mashed potatoes)
- all purpose flour (I use King Arthur)
- instant yeast
Procedure
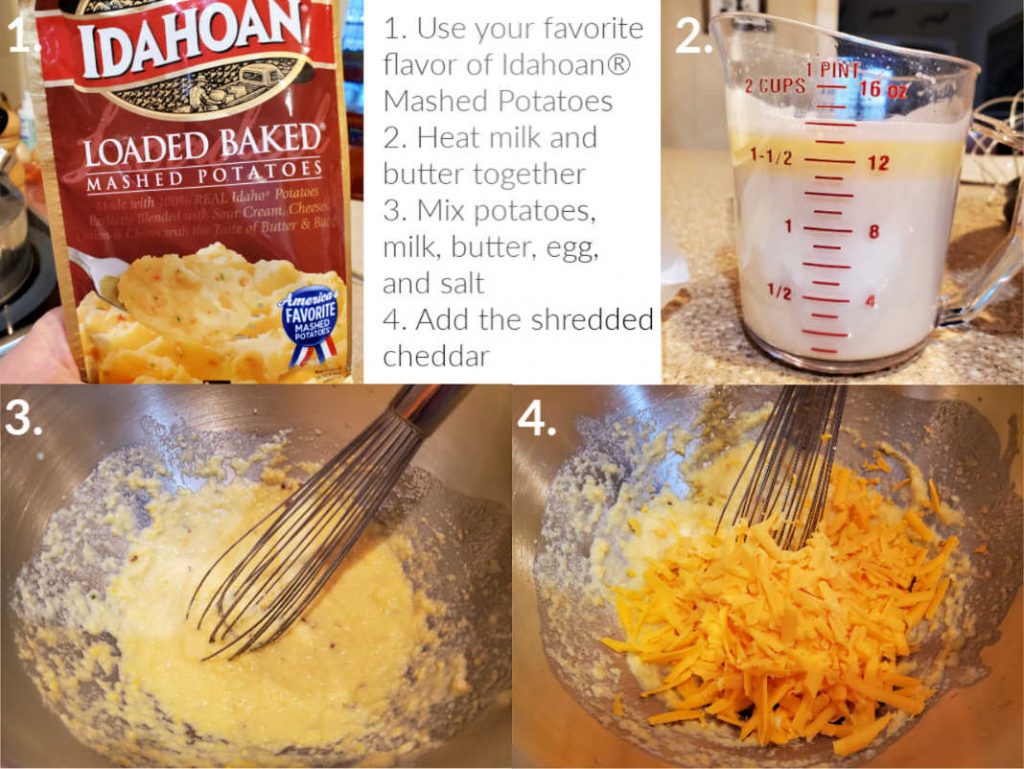
- Pour the Idahoan potatoes into your mixer bowl
- Add hot milk and melted butter and stir
- Add egg and salt and whisk well
- Pour the grated cheese on top of the mashed potatoes followed by the flour and then the yeast
- Mix and knead until dough is soft, shiny, and stretchy
- Let rise, punch down, shape the rolls
- Let the rolls rise again
- Bake
- Brush with butter
- Let cool to warm
- Put in face
Do you have to rehydrate the potatoes before making the rolls?
Yes, but you rehydrate them as part of the process of making the bread.
Then, all you have to do is add the flour and yeast and mix and knead with the dough hook. It’s very easy, and you don’t have to plan ahead!
Shaping
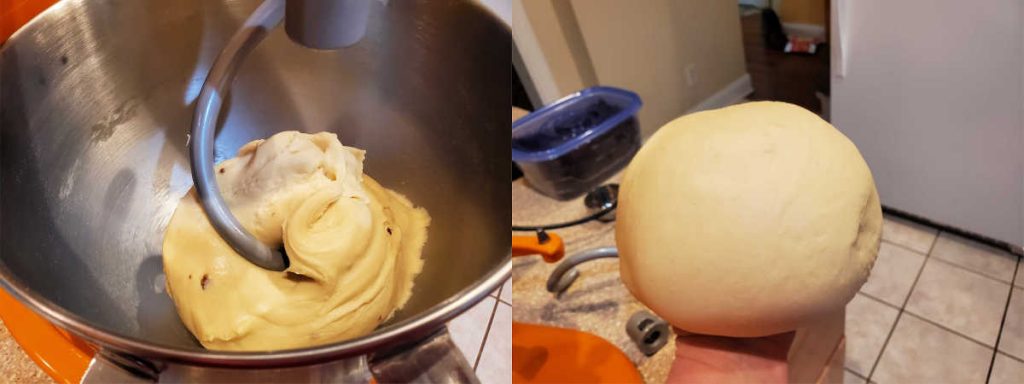
This dough is really lovely to work with. It’s soft and stretchy, but not really sticky.
Once your dough rises the first time, press out all the gases, turn it out, and then divide it into 18 pieces. I actually use my scale to weigh the entire amount of dough and then divide by 18 (or the number of rolls I want, depending on how large I want them to be).
A note about portioning the dough
My dough turned out to weigh just over 43 oz, so I scaled each of my rolls at about 2.4 oz which is a really nice size for a dinner roll.
If you scale your dough at 4 oz and place them farther apart on baking sheets, you can make burger buns with this recipe. Or you can make mini rolls by scaling each at about 1.5 oz.
Would you like to save this post?
They’re your rolls, so you make them how you want them!
Here’s what the rolls will look like at different stages so you’ll know when they’re ready to bake and ready to come out of the oven:
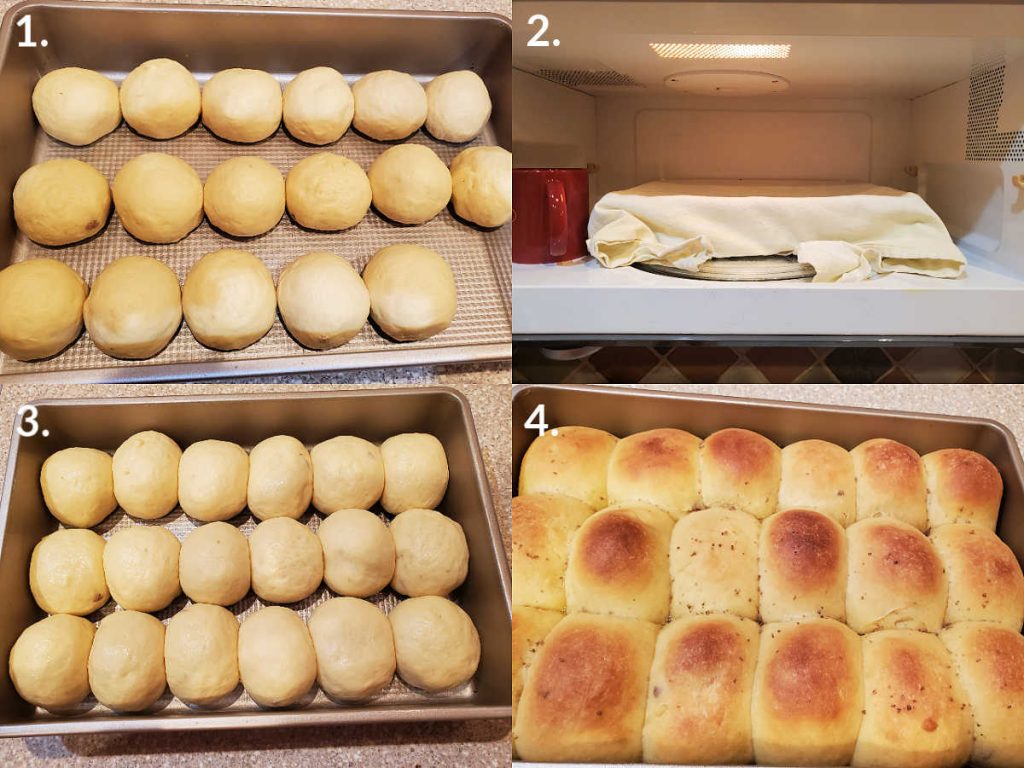
You’ll notice in the first photo that the rolls touch each other in each row, but the columns don’t touch.
Making them a cozy place to rise
Then they spend about 45 minutes, covered, in the cozy microwave.
I make it nice and cozy in there by boiling a mug of water for 3 minutes, then moving it–carefully!–to the side and sliding in the tray of rolls. Once I close the oven door, it stays nice and moist and warm for quite some time.
The third photo shows the buns after they’ve risen. See how they now all look more oval than round? The columns still might not be quite touching, but once they look like this, you’re good to go.
The last photo shows how much they continue to rise in the oven. No space at all between any of the rolls, making them truly pull apart rolls. Nice!
A note about browning
I will note that these cheese buns don’t brown quite as deeply as some other breads and rolls I’ve made, and that’s because I didn’t add any sugar to the dough.
I’d normally add sugar to give the yeast something to nibble on, but yeast really loves potatoes and is quite happy to nosh on that without the need for extra sugar.
If you want slightly browner rolls, feel free to add 2 Tablespoons of sugar to the dough along with the potatoes. Otherwise, you’re (mostly) done.
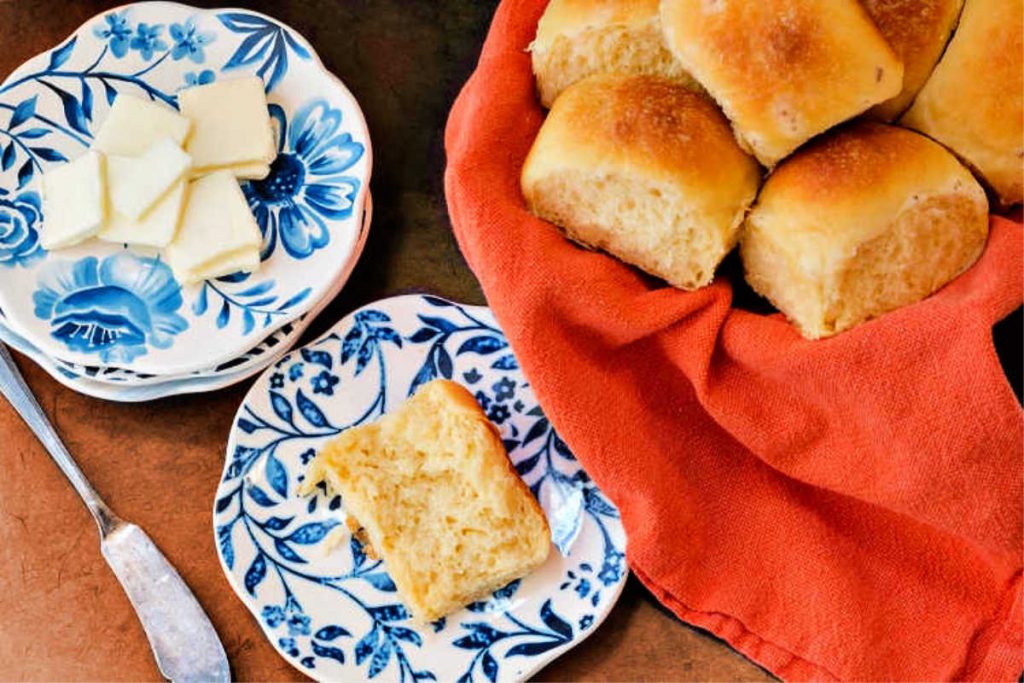
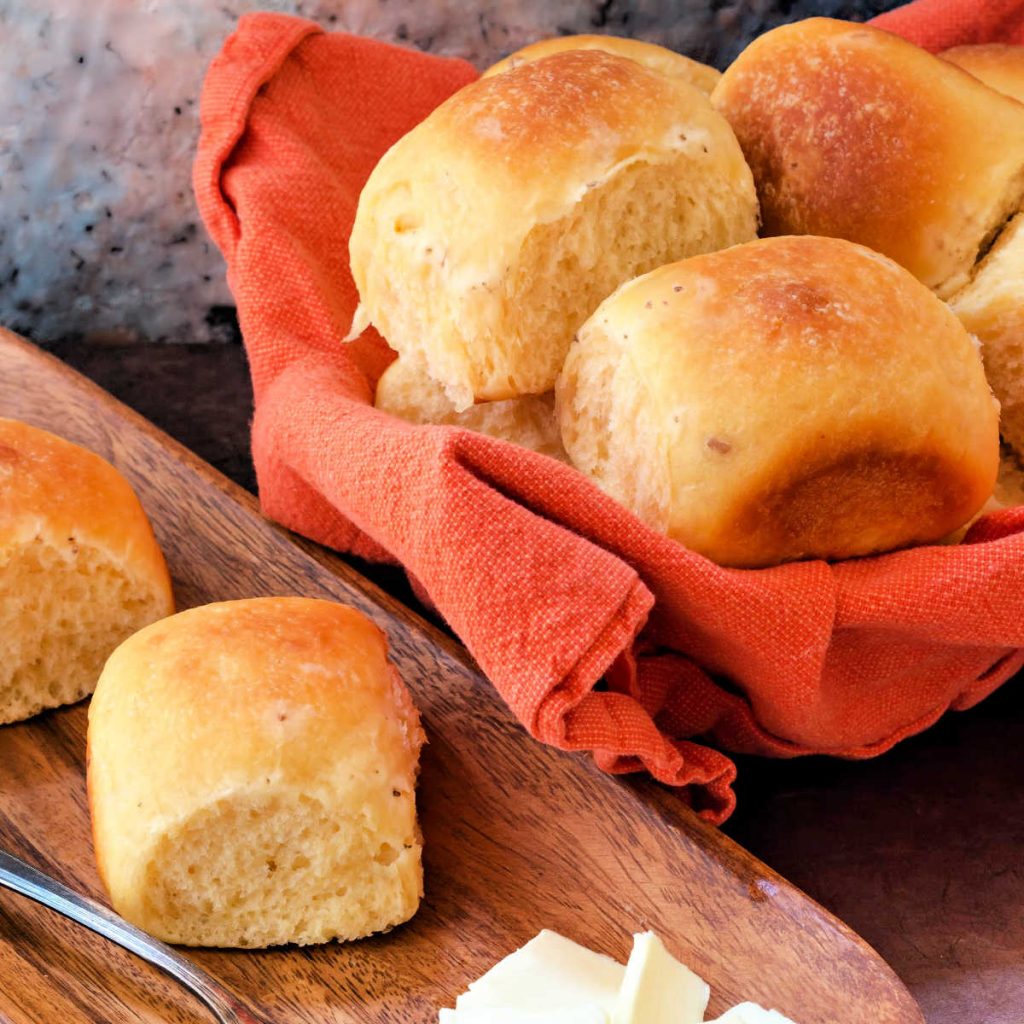
As a finishing touch, I brush the tops of the rolls with butter right when they come out of the oven. The little specks you see on them are little crystals of smoked salt which I added just because I could. You can if you want to as well, but it is completely optional.
Recommended Equipment
This section contains affiliate links. For more information, please see my disclosure policy.
This is a very easy dough to make, and your mixer will do all the work. Since it’s not a very large batch of dough, you’ll be fine with a 4.5 qt or 5 qt mixer. For reference, I have a 6 qt mixer and you can see how much room is left in the bowl.
What To Serve with Your Homemade Rolls
Honestly, these guys are really good all on their own. But I wouldn’t say no to serving them alongside some chili for dunking.
And they’d be an especially nice accompaniment to tomato soup, too.
And, if you want to revel in carby goodness, serve them with my creamy pasta sauce. Now that’s a match made in heaven!
Questions?
If you have any questions about this post or recipe, I am happy to help.
Simply leave a comment here and I will get back to you soon. I also invite you to ask question in my Facebook group, Fearless Kitchen Fun.
If your question is more pressing, please feel free to email me. I should be back in touch ASAP, as long as I’m not asleep.
A Note About Measurements
My recipes are almost all written by weight, including liquids, unless otherwise specified.
For accuracy and consistency of results, I encourage you to buy–and use–a kitchen scale.
I promise that baking and cleanup will be so much quicker and easier.
This is the scale that I recommend for home use. I have owned and used one for years.
Love These Cheese Rolls? Please Rate and Review!
It helps me and other readers so much if you take a moment to rate and review this recipe.
Your star rating and comments help others decide whether the recipe is worth making, and your feedback helps me continue improving recipes here at Pastry Chef Online.
Other lovely ways to share include pinning or posting on your favorite social media platform.
Thank you so much for taking the time!

Easy Cheese Rolls Recipe
Equipment
Ingredients
- 13.5 oz about 1 2/3 cup whole milk
- 2 oz 1/2 stick unsalted butter
- 2.5 oz about ½ cup Idahoan® Loaded Baked Mashed Potatoes (or your favorite flavor)
- 1 large egg
- 1 teaspoon salt
- 4 oz sharp cheddar cheese shredded (for best results, shred your own cheese)
- 20 oz about 4-4 ½ cups all purpose flour (I used King Arthur)
- 2 teaspoons instant yeast
To Finish
- 1.5 oz 3 Tablespoons unsalted butter, melted
Instructions
- Put the milk and butter in a microwave safe measuring cup and heat until the butter has
melted and the milk is hot but not boiling, about 1 minute. Stir well to make sure all the
butter melts. - Pour the dry Idahoan® Mashed Potatoes into the bowl of your stand mixer fitted with the
dough hook. - Add the milk/butter mixture, the egg, and the salt.
- Whisk or stir well to combine. Mixture will be very soupy.
- Add the shredded cheese to the bowl and top with all the flour.
- Spoon the yeast on top.
- Mix on low speed until a shaggy dough forms.
- Kneading, Rising, and Shaping
- Increase speed to medium and knead for 7-8 minutes, until the dough is smooth and
shiny and very extensible. - Shape the dough into a ball and place it back into the mixer bowl.
- Spray the exposed surface of the dough with pan spray or brush with neutral oil.
- Cover the dough with a lint-free kitchen towel and let rise in a warm place for 1 to 1 ½
hours until doubled in bulk. - Press the gases out of the dough and then turn it out onto a clean work surface.
- Portion the dough into 18 equal balls. If you have a scale, they should each weigh
between 2.4-2.5 oz apiece. - Press each scaled piece of dough into a disc and then gather up all the edges into the
center, making a small ball. Place the ball, smooth side up, on the work surface and cup your
hands around it, pushing it around in small circles on the counter and using that friction
to tighten up the outside and make them nice and smooth. This will help the crumb to be more uniform and help them to rise more evenly. - Place the shaped rolls into a sprayed 9”x 13” pan in 3 rows of 6. The rolls in each row will
touch but each “column” of rolls may not. That’s okay. - Spray the rolls with pan spray, cover with a lint-free kitchen towel, and let rise in a warm
place until almost doubled in bulk again, about 45 minutes to an hour. After about 30
minutes, preheat the oven to 350F. - Bake the rolls for 25-35 minutes, until the rolls are lightly golden brown on the tops and
the internal temperature reaches 195-200F. Since there is no added sugar in this recipe, the rolls will not brown as deeply as rolls with additional sugars in the dough.
To Finish:
- Remove the pan of rolls from the oven and immediately brush the tops with the melted
butter. - Allow the rolls to cool for 10 minutes in the pan and then use a spatula to help you slide
them out onto a cooling rack to cool completely. - Reheat to serve, either wrapped in foil in the oven for 10-15 minutes at 350F or for a few
seconds in the microwave. - Store rolls at room temperature, covered, for 3 days.
- For longer storage, place in zip top freezer bags and press out as much air as you can
before sealing and freezing.
Did You Make Any Changes?
Notes
To Spread the Work Over Two Days
You can break up the work over 2 days if you like. After you knead the dough and then shape it into a smooth ball, you can put it in the fridge overnight. The next day, scale out the dough into 18 rolls, pan them up and let them rise until almost doubled. It will most likely take a bit longer since they’ll be cold from the fridge, so plan on maybe 2 hours before baking. You could also let the dough rise the first time, press out the gases, shape and pan the rolls and then refrigerate them, taking them out of the fridge about an hour before baking. To Store the Rolls Thanks to the potatoes, the rolls will stay nice and soft at room temperature for 3 days or so. I keep them in a plasticNutrition
Would you like to save this post?

Hi, y’all! I hope you’ve enjoyed this post and hopefully also learned a thing or two.
If you like my style, I invite you to sign up for my occasional newsletter, The Inbox Pastry Chef.
Expect updates on new and tasty recipes as well as a bit of behind-the-scenes action. I hope to see you there!

And there you have it friends. Really good and easy to make potato cheese rolls made with instant mashed potatoes. Enjoy!
Thanks for spending some time with me today, and thank you to the Idaho Potato Commission for sponsoring my work.
Take care, y’all.


Join in Today!
Can you make these without the cheese? Would you substitute something else
You can substitute a “non-cheesy” potato flavor and then just leave out the cheese and you should be fine. Or you could use my recipe for soft potato buns instead: https://pastrychefonline.com/soft-sandwich-buns-idaho-potatoes/ These are made with mashed potato rather than instant potatoes. Enjoy, and Happy Easter!
GREAT RECIPE!!I am a bread making addict and made this today, in a word “fantastic” soft fluffy sweet inside savoury top a real tear and share winner. Thankyou <3
I’m thrilled you enjoyed it! Yay! Thanks so much for letting me know!
Jenni! I have never heard of nor thought it possible for instant mashed potatoes to be included in a recipe so you have pretty much opened a vault of ideas for me!
Yay! Yes, once you start thinking about the possibilities, things really open up, Kari! Thank you so much for stopping in, and I hope you give adding instant mashed potatoes to bread a go! 🙂
I’ve heard yeast adores potato, but I’ve yet to use it in a bread recipe. Gotta tell you Jenni, these rolls look dreamy and I’m loving the brush of butter on top with crystals of smoked salt. Lip-smacking goodness!
You seriously must try it. “Real” potato or dehydrated–the dough is joyful!
I love these Jenni! Being a native Pacific Northwesterner I heart all things that remind me of home, and will make these soon! Thanks for the great recipe <3
Aw, thanks, Angela! I really hope you enjoy them! Stay safe. xo
OMG! These have such a short ingredient list and look so beautiful. You are such a brilliant baker. The color on these are stunning and they are so easy to make. Going on rotation in our house!
Oh, thanks, Beth! I am going to make them in all the flavors. You should too! ❤️