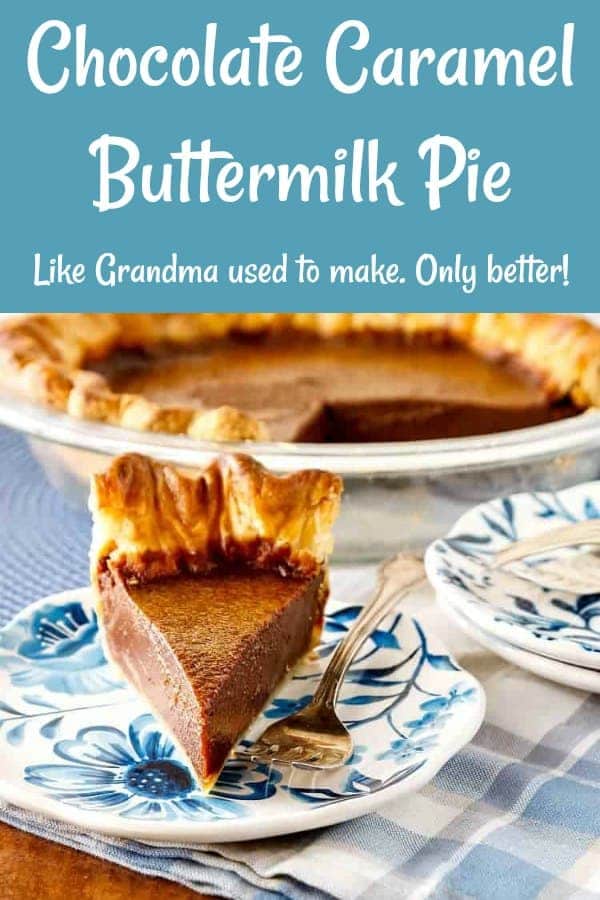
I have a delicious chocolate caramel buttermilk pie for you today. I am super happy with how this pie turned out, and I think you will really enjoy it.
It was a bit of a challenge to make sure I didn’t “break” my buttermilk when making the caramel, but in the end, the care and attention was worth it!
If you’re a fan of chocolate pies, you might also enjoy my chocolate chess pie. And if old-fashioned pies are your thing, try any of my other my old fashioned pie recipes.
For ease of browsing, here are all of my pie and tart recipes in one place. Thanks for stopping by!

Can A Pie Be Too Rich?
This is how it happened.
Last week, I decided I’d make an old-school buttermilk pie because I had some buttermilk left over from…something. So, as I normally do when wanting to try something I’d never tried before, I Googled both “classic buttermilk pie,” and “traditional buttermilk pie.” This recipe from Food.com is the one I settled on. I read the reviews and noted the changes some folks decided to make.
I decided to use slightly less sugar, more salt, and double the vanilla. I was all excited about it. I even made Stella‘s super buttery laminated pie crust from Serious Eats.
Pastry Chef Online Participates in Affiliate Programs. If you make a purchase through one of my links, I may earn a small commission. For more information click to read my disclosure policy
I love this rich and easy to handle crust. In the case of the buttermilk pie, though, it was a little bit too rich. The pie itself had a whole stick of melted butter in it, and that plus the the super buttery crust just made the pie seem too rich. Is that even possible? Yes. Yes it is.
How To Change a Pie Recipe to Suit Your Tastes
I was honestly a bit underwhelmed by the flavor of the pie itself. I don’t know what I was expecting, but I guess I was expecting more. More flavor maybe? More tang? I don’t know, but I wasn’t the hugest fan.
I didn’t give up on the idea of making a version of this pie, though. I needed a way to make it more complex. Since caramel is more interesting and complex than regular sugar, starting off with a caramel base seemed like a good plan. So that’s what I did.
From there, I checked out some recipes for chocolate buttermilk pie and realized that all I needed to do to make my pie chocolate was to add some cocoa powder to the base.
Adding just a bit of espresso powder seemed like a good idea. Using less reinforces the chocolate. Using just a bit more allows the coffee flavor to shine through. Either way is acceptable and will turn out a delicious pie. It’s totally up to you.
And that’s how Amish buttermilk pie morphed into Chocolate Caramel Buttermilk Pie.
Tender and Flaky Pie Crust (Science-y Stuff)
What Are the Ratios for Pie Crust?
A standard ratio for pie crust is 3:2:1 flour:fat:liquid.
I’m not saying this will give you the most delicious pie crust ever, but if you are out at your lake house and decide it’s time to make pie but you don’t have a recipe lying around, the 3:2:1 ratio will yield a nice crust.
You can certainly play with that ratio like Stella Parks did to come up with her rich and flaky pie crust if you want, but nobody is going to say no thanks to a 3:2:1 crust.
For the chocolate caramel buttermilk pie, I knew I wanted my crust to fall somewhere between the standard 3:2:1 ratio and Stella’s 2:2:1 ratio. I started with 9 ounces of all purpose flour. Following 3:2:1, I’d have needed 6 oz of butter or other solid fat and 3 oz of liquid.
I went with 7 oz of butter and 3.5 oz liquid. I also used buttermilk for a portion of the liquid knowing that the acidity would help with tenderness and that giving it some quick rolls and folds would help with the flakiness.
It turned out to be a great crust that yielded enough to make a standard double-crust pie or 2 9″ standard pies. I made my pie in a deep dish pan, so I have enough dough left over to make maybe a galette or something.
How to Make This Guy
Would you like to save this post?
The stick of butter called for in the first pie was just too much. You know how I know? Because once I pulled the pie out of the oven and it began to settle, butter started rising to the top.
I mopped up a lot of it, because as much as I like butter, I am not a fan when it comes leaking out of a pie filling.
So still using the original recipe as a guide, I cut the butter back to 3 oz from 4.
This still yielded a pie that was plenty rich, especially with all the other flavors going on.
The buttermilk tang helps to keep things feeling light, so this pie works equally well as a summer pie and as a nice treat in winter when there is not much fresh fruit to be had.
There are a lot of steps in making this pie, so if you don’t want to deal with the caramel part, you certainly don’t have to. I’ll provide alternate instructions in the notes at the end of the recipe if you want to make it without all the cooking of sugar and whatnot. It will still be excellent, I promise.
Equipment You May Need
Before we start baking, here are some of my recommendations for equipment for pie baking, whether it’s chocolate caramel buttermilk pie or otherwise. These are affiliate links.
When baking custard pies, I find it especially important to check the temperature to ensure doneness, so invest in a good instant read thermometer. Having some standard pie pans as well as a deep dish pan gives you options as well. And don’t forget some cooling racks and a pie server. They really do make life easier.
A Note About Measurements
It helps me and other readers so much if you take a moment to rate and review this recipe.
Your star rating and comments help others decide whether the recipe is worth making, and your feedback helps me continue improving recipes here at Pastry Chef Online.
Other lovely ways to share include pinning or posting on your favorite social media platform.
Thank you so much for taking the time!

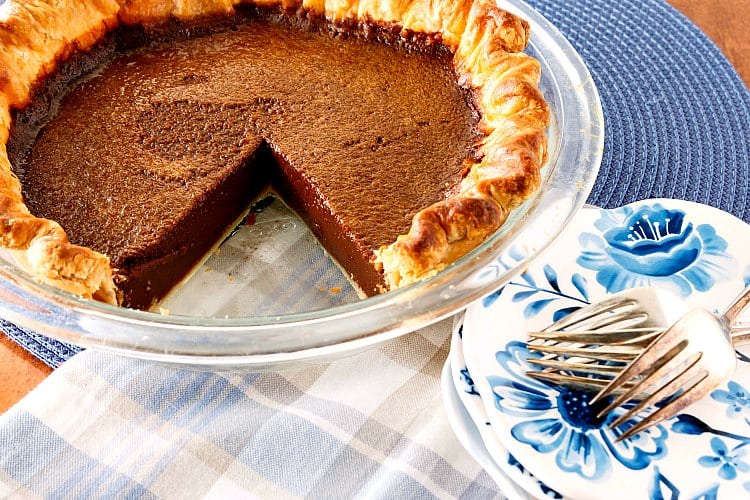
Chocolate Caramel Buttermilk Pie
Equipment
Ingredients
For the Pastry
- 9 oz all purpose flour (I used King Arthur)
- 1 Tablespoon granulated sugar
- 1 teaspoon kosher salt
- 7 oz unsalted butter straight from the fridge
- 2 oz cold water
- 1.5 oz buttermilk straight from the fridge
For the Filling
- 9 oz granulated sugar
- 1 cup buttermilk
- 4 Tablespoons all purpose flour
- 3 Tablespoons cocoa powder
- 3 large eggs
- 3 oz melted unsalted butter (3/4 stick or 6 Tablespoons)
- 1-3 teaspoons espresso powder (use 1 teaspoon if you want to reinforce the chocolate. Use the greater amount for mocha)
- 2 teaspoons vanilla extract or paste
- ½ teaspoon kosher salt
- 3-6 Tablespoons granulated sugar (See Recipe Notes)
Instructions
For the Pastry
- In a large bowl, whisk together the flour, sugar, and salt.
- Cut the butter into 10-12 pieces and toss with the flour. Use your fingers and thumbs to pick up flour and butter and sort of smoosh the flour into the butter. Keep some of the pieces larger (maybe the size of small marbles). The flour that is coated with the fat will add tenderness. Larger pieces of butter will help to build flakiness. When the butter is mixed in, the flour should look a bit mealy with larger pieces of butter still visible.
- Mix the water and buttermilk together and evenly pour it over the flour-butter mixture. Toss to combine and then press the dough against the sides of the bowl to collect all the loose floury bits in the bottom and to gently knead it until it comes together.
- Turn the dough out onto a liberally floured surface. Flour the top of the dough as well.
- Roll the dough out into a rough rectangle that is approximately four times as long as it is tall. Fold both short ends in towards the center so they meet, and then close that like a book. Fold in half again so you have a fat square. (All of this is Stella’s procedure in her Serious Eats dough linked in the post). Roll out again until you have about a 10″ square and then fold into thirds like a letter. Wrap in plastic wrap and refrigerate for about an hour.
- Once the dough is well-chilled, cut the dough in half (or slightly more than half for a deep dish pie) and roll one half out on a floured surface to fit into a pie pan. I used deep dish, but you can also use a regular pie pan. You’re looking for about a 14-15″ circle for deep dish and about a 12-13″ circle for a standard pan.
- Fold the dough loosely in fourths and transfer to the pan. Unfold and gently lift and press the dough to fit the pan. Try not to stretch it or it will want to shrink back when baked.
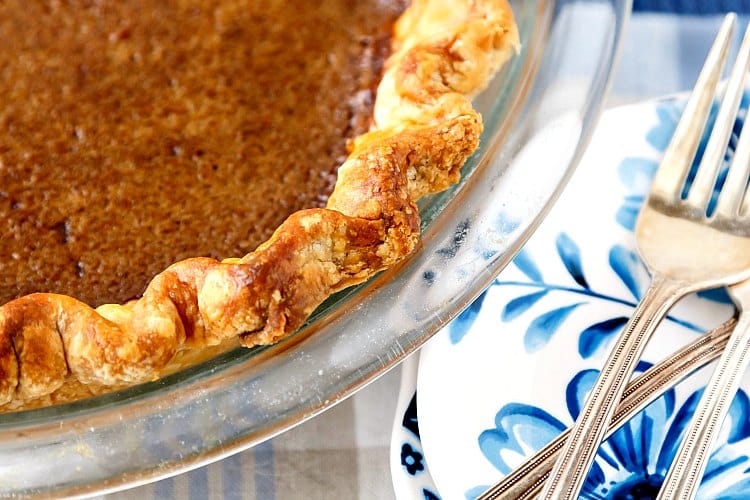
- Trim the dough so there is about a 1″ overhang and then tuck the overhang underneath to form a rim with a double layer of dough. Crimp in your favorite way.
- Freeze the crust for at least an hour until it is very hard. Overnight wouldn’t be the worst thing, so feel free to split your pie making into a two day process if you’d like.
- When you’re ready to bake the crust, prick it all over the bottom and sides with the tip of a sharp knife. Line the crust with a coffee filter, parchment or heavy duty plastic wrap. Fill with beans (chickpeas work great for this. So do lentils or rice). Bake at 375 for about 15 minutes.
- Remove the paper/plastic and beans and brush the crust all over with an egg wash (1 egg beaten well with 1 teaspoon of water and a pinch of salt). Return to the oven until the bottom of the egg wash on the bottom of the crust is dry, about 10 minutes. Now your crust is ready for the filling.
For the Filling
- Fill a bowl large enough to fit the pan you’re cooking the sugar in with ice and water. Set 2-3 ice cubes aside.
- Put the 9 ounces of sugar in a heavy bottomed saucepan. Add enough water just to get everything wet and stir well.
- Heat over medium high heat until boiling. It’s okay to stir at this point. Once the sugar is boiling, put the lid on for 2 minutes to wash down any sugar crystals that might be hanging out on the sides of the pan.
- Remove the lid and watch carefully as the sugar cooks. It will turn a pale honey color and then begin to deepen. Cook the sugar until it is a deep reddish brown. It will smoke, and that’s okay. Just be ready to act fast.
- As soon as the caramel is the color you want, remove it from the heat and set the pan in the ice bath. Carefully toss the reserved ice cubes into the caramel and swirl the pan. All the foolishness is to make sure you arrest the cooking at exactly the point you want.
- Check the temperature of the caramel. You want it to be around 140F.
- Pour in the buttermilk. The caramel will be hard at this point and you will be sad. It’s okay. All will be well. Set the pan over medium-low heat and reheat, stirring, to melt the caramel into the buttermilk. Don’t let the mixture boil or the buttermilk will curdle, so just take it slow and use a spatula to scrape up the melting caramel from the bottom of the pan and stir it into the buttermilk. This will take about 10 minutes. Keep the mixture around 165F or so and then cool it to below 140F before proceeding.
- Whisk together the eggs, flour, and cocoa powder. Whisk them really well to avoid lumps.
- Whisk the egg mixture into the caramel mixture. Whisk in the melted butter, espresso powder, vanilla, and salt.
- Taste the filling. Add additional granulated sugar if you would like it a bit sweeter. If you don’t cook your caramel as dark as I cooked mine, you might not need extra, but it’s up to you. I think I ended up adding in about 5 extra Tablespoons of sugar.
- Pour the filling into the blind-baked pie shell. Bake at 400F for 10 minutes. Reduce the heat to 375, loosely tent the pie with foil and bake until the pie wiggles but doesn’t slosh in the center, about 30-35 minutes. Check the temperature in the center of the pie. It should be about 165F.
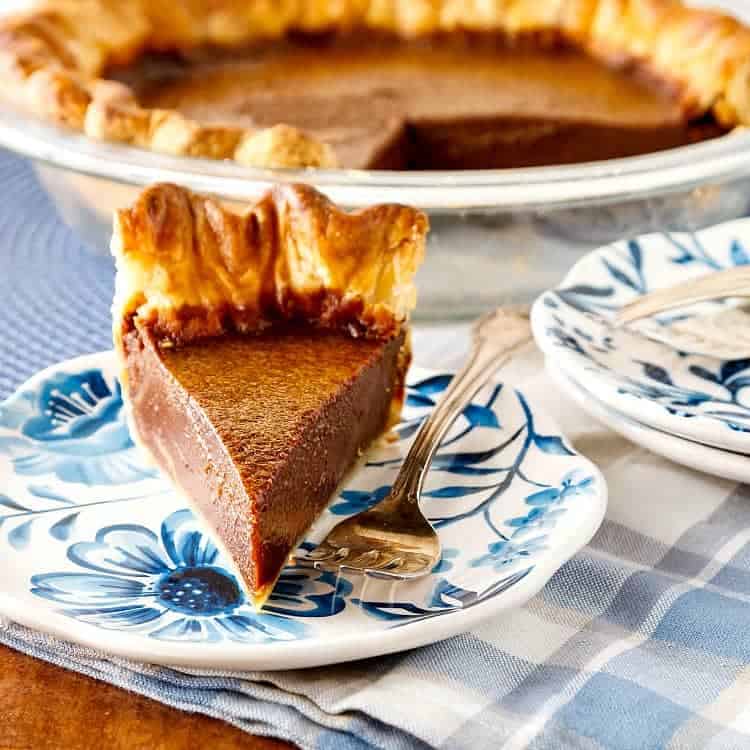
- Remove pie from the oven and set on a rack to cool. Serve barely warm. Refrigerate the leftovers. Pie is good cold or gently rewarmed in the microwave on low power for a few seconds.
Did You Make Any Changes?
Notes
- Don’t caramelize the sugar. In that case, you won’t have to add any additional sugar. Just whisk all the ingredients together and you’re good to go.
- You can also switch out heavy cream for the buttermilk (in which case it won’t be a buttermilk pie. But it will be a very tasty chocolate caramel pie). In that case, you don’t have to mess around with the ice bath and ice cubes when you caramelize the sugar. Just remove the caramel from the heat once it’s at the color you like and pour in 8 oz of heavy cream. It won’t curdle like the buttermilk will. It will make your life easier. In that case, reduce the amount of melted butter to 2 ounces rather than 3 oz.
Nutrition
Would you like to save this post?

Hi, y’all! I hope you’ve enjoyed this post and hopefully also learned a thing or two.
If you like my style, I invite you to sign up for my occasional newsletter, The Inbox Pastry Chef.
Expect updates on new and tasty recipes as well as a bit of behind-the-scenes action. I hope to see you there!

And that’s it. I think you will love this buttermilk pie, whether you make it as a chocolate buttermilk pie or as the full-on chocolate caramel version.
It’s a bit fussy to make the caramel with buttermilk, but I think the flavor and tang it gives is worth it.
Note the alternate instructions in the recipe notes if you’d like a streamlined procedure.
Thank you for spending some time with me today. Enjoy the pie, and have a lovely day.


Join in Today!
I made this pie it was outstanding I tweeked the recipe and call it a mocha chocolate Carmel cream pie great reviews in my restaurant
Hello Jennifer! I’ve been messing around with Chess/Buttermilk pies for the last few days. I made this pie yesterday without caramelizing the sugar. On cutting into the refrigerated pie, I can clearly see two different layers. The top half layer being more cake/mouse like and the lower layer being gooey. Any ideas why perhaps?
Flavor is awesome though. I can’t see 2 layers in your pie slice. Anything to do with the sugar not melting as I did not caramelize it possibly?
Thank you Nikita
Hey, Nikita. Thanks for the question. When I make anything based on caramel, I call for more sugar than I would if I weren’t caramelizing it. That’s because caramel is less sweet than straight sugar, and I don’t want to necessarily lose sweetness even though I want to up the flavor. So I’d bet that your pie separated into 2 layers because the amount of sugar didn’t completely go into solution in the liquid part of the recipe. Glad you like the flavor, though, so that’s kind of awesome to know. If you want to try it again without caramelizing, cut back on the sugar by maybe 25%.
Are those ounce measures by weight or volume? Excited to try this!
Good question, Ana. All oz measurements, including liquids, are by weight. I’ll update the post to make sure that is clear. Thanks, and enjoy the pie!
I love this recipe. One thing I kind I’d like to try is a thin crisp crust on the surface of the pie which gives chocolate pie a slightly browny like mouth feel. Is there a way to achieve that with this recipe. But if not it’s not a big loss the pie is great and I love your additional suggestions of the pie without chocolate. I make buttermilk each week and am always looking for new ways to use it.
I am really thrilled you love this pie. It was an experiment that turned out so well! To try and get that crisp thin crust, which is really a very thin sheet of meringue, whip the batter really *really* well once you add the eggs. Then the bubbles whipped into the eggs should sort of float to the top during baking. Not sure it will work since this isn’t brownie batter, but I think it’s your best chance! Let me know!
If Jane wasn’t deathly allergic to chocolate… I’d make it tomorrow. Alas, I’ll just have to be satisfied with staring lovingly at your photos and sniffing a box of cocoa
You know what? Leave the cocoa powder out and you’ll have a lovely caramel buttermilk pie. You could call it a macchiato pie if you add enough espresso powder!