
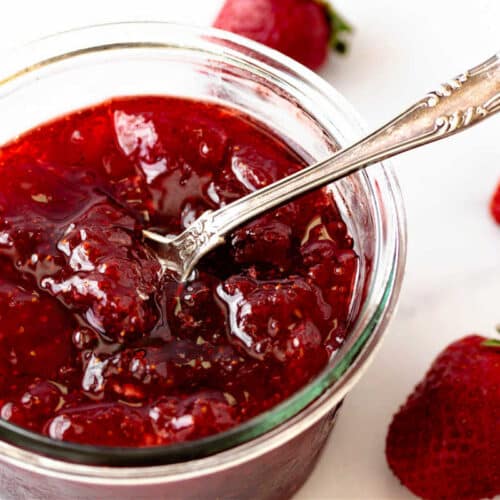
This French-Style strawberry preserves is made without pectin, and it tastes like sunshine and strawberries.
Many jam recipes call for equal weights of fruit and sugar, but I used 80% sugar, or a 5:4 ratio to make it slightly less sweet so the berry flavor really shines.
You may also want to check out my strawberry balsamic preserves which only has 3 ingredients, is a faster-to-make version, and has a really lovely tang to it. For ease of browsing, you can find all my jam and condiment recipes in one place. Now, on with the show!
Pastry Chef Online Participates in Affiliate Programs. If you make a purchase through one of my links, I may earn a small commission. For more information click to read my disclosure policy

Strawberry Preserves, At a Glance
✅Skill Level: Intermediate
✅Skills: Macerating Fruit, Cooking a Sugar Syrup
✅Type: Fruit Preserve
✅Number of Ingredients: 4
✅Prep Time: 10 minutes active time
✅Cook Time: approximately 25 minutes
✅Macerating/Resting: 2 days inactive time
✅Yield: about 24 oz or 3 8oz jars
Related Reading: Mixed Berry Jam (Quick French-Style), French-Style Blueberry Jam
Jump Straight to the Recipe
Tasting Notes
You wouldn’t think the flavor of a little spoonful of strawberry preserves could grow in your mouth, but that’s exactly what this sweet summer jam does.
The flavor is of pure, bright strawberry with just a little bit of vanilla added at the end of cooking to give it a very slight creamy edge.
As a bonus, with only 4 ingredients and a minimum of necessary equipment (big pot, instant read thermometer, something to stir with, something to put the jam in), you can be enjoying the taste of summer for months.
If this sounds like a winner to you and you end up making it, please do me a quick favor, if you would.
When you do make this recipe, it will help me and other readers if you:
✅Rate the recipes using the stars in the recipe card⭐⭐⭐⭐⭐
✅Leave a review when prompted in the recipe card✍️
✅Leave a comment on the post📝
Thank you!😘
Credit Where Credit Is Due
I learned the technique for making this jam by reading this post from Kate Batistelli. I was looking for the full, multi-day procedure, and she had it.
In the post, she says she learned it from the book, Mes Confitures (My Jams), by Christine Ferber.
The ratio of fruit to sugar is my own, but it’s a small, if delicious, contribution.
How to Make French-Style Strawberry Preserves
This is not at all a difficult recipe to make. It seems a bit intimidating because the work is spread over 3 days, but all the steps are easy.
Do make sure you have a good instant-read thermometer, because that’s the best way to tell when your jam will set up properly.
Ingredients and Substitutions

- strawberries: Fresh and perfectly ripe strawberries are your best bet here, but if you have some strawberries that are a bit past their prime, go for it. I wouldn’t use frozen strawberries for this unless they are all very small berries. When you use fresh, you can leave tiny ones whole, cut medium fruits in half, and quarter large berries. With a preserve, the idea is to have large, identifiable “chunks” in a thick, spreadable syrup
- granulated sugar: Lends sweetness and is responsible for the texture of the finished jam (see stages of sugar for more information)
- lemon juice: Balances the sweetness of the preserves and is the classic French addition for acidity in jams and preserves
- vanilla extract: Just a touch at the end of cooking yields a background creamy finish to the jam. While not strictly necessary, it really does add a little something extra. If you’re feeling fancy, use 1/2 vanilla bean, split and scraped, and add it on the first day so the vanilla has plenty of time to infuse the syrup. Then just fish it out once you take the preserves off the heat on Day 3
Procedure
If you’ve made this sort of jam before, please feel free to jump to the recipe.
For those of you who’d like a detailed run-through of what to expect, here we go, day by day.
Days 1 & 2

On the first day, wash and cut the green tops off the berries. Weigh them after trimming.
Put the berries, the sugar, and the lemon juice in a large, heavy-bottomed, high-sided non-reactive saucepan. By non-reactive, I mean a pan that won’t interact with the acid in the berries, so stainless steel or a ceramic-coated cast iron pan.
Do not use an aluminum pan.
Cover the pan with a lint-free towel, and put it in the fridge until the next day.
Jenni Says: Use a pan that holds at least 3 quarts, because during the cooking on the 3rd day, the preserves will boil up high in the pan. The last thing you want is a jam overflow situation.
What’s Happening During This Time?
As the berries sit in the sugar, osmosis happens. The sugar pulls the juices out of the berries, and then the cells in the berries suck that sugar/juice combo back inside.
In this way, the fruit sort of candies and the sweetness between fruit and juices equalizes.
On Day 2, bring the fruit out of the fridge, set it over low heat, and bring it up to a high simmer. This could take an hour or so, since the pan and the fruit are both really cold.
You’ll know you’ve achieve high simmer when the berries sort of mound up in the center and little bubbles are burbling up in and around the fruit in the center of the pan.
Let the pan cool for about 45 minutes or so, cover it with your trusty lint-free towel again, and then refrigerate overnight.
What’s Happening This Time?
The heat helps to further break down the fruit inside its little skin, allowing each bite to taste like a burst of jammy goodness within the preserve. Nice, right?
Day 3
Today, friends. Today is the day when you get to enjoy the fruit of your labors. Literally!

Okay, here we go. Nothing hard here, but this is the most involved day.
Looking at that collage above, now:
- Grab the pot of fruit out of the fridge and strain the berries through a fine mesh strainer. Let it drain for a few minutes to get most of the syrup. Shake it gently, but don’t mash down on the berries unless you want jam and not preserves.
- Return the juices to the pan. Note how humongous the pan looks with just a relatively small amount of juice in the bottom? You need that space. Keep an eye on the other photos and you can see how the volume increases.
- Cook the juices over medium heat until the reach 220F/104.4C.
- Add the berries back to the pan along with any additional collected juices. Note the temperature will drop a fair bit when you add cold fruit to the hot syrup.

Now cook the berries and the fruit together, stirring and scraping the bottom of the pan continuously without any mashing that could smush your lovely jewel-like pieces of fruit.
It will take a relatively short amount of time to go from 200F/93.3C to 220/104.4, and then it will feel like it takes ForEVer to get from 220F to 223F/106C. I don’t know why it stalls out, but it just does.
This happens when you make pate de fruits too. It’s a mystery.
If you do happen to know why it stalls like that, please share in the comments.
At any rate, once the temp finally reaches 223F/106C, your strawberry preserves are officially done.
All that’s left to do is skim off any foam–as much as you can, anyway–and stir in the vanilla extract.
I “quick canned” my preserves. It’s how most French folks can their preserves, but I have to stress this is not approved in the US. Here, the only way to go for jams and preserves is water bath canning. But I don’t do that. It’s up to you.
How to Quick Can (Again, not approved by the USDA)
- Wash and drain standard canning jars and new canning lids.
- Fill jars to within 1/2″/1cm of the top.
- Place the lids on top and screw on the rings.
- Turn the jars upside down and let them cool.
- When you turn them right side up, the lids will seal. It’s magic. Well, it’s also because the hot air inside the jar has contracted as it cooled forming a bit of a vacuum in the jar, thanksverymuch
Again, I have to say this method is Not Considered Safe here in the US. The preserves police have yet to catch me, though.
If you don’t can at all, the jam will be good for weeks in the fridge, so that’s good news.
A Little Strawberry Preserves Q & A

Yes. The only difference between preserves and jam is that in preserves, the fruit is whole or in large pieces, and in jam, the fruit is mashed. So if you are craving a fancy, French-style strawberry jam, just mash the fruit as you bring it up to a simmer on Day 2. Tada!
It depends on how long it takes for you to eat them. With such a high sugar content, there should be little if any danger of it getting moldy. It should be fine for several weeks, but to err on the side of caution and food safety, try to consume it all within about 3 weeks.
Questions?
If you have any questions about this post or recipe, I am happy to help.
Simply leave a comment here and I will get back to you soon. I also invite you to ask question in my Facebook group, Fearless Kitchen Fun.
If your question is more pressing, please feel free to email me. I should be back in touch ASAP, as long as I’m not asleep.
A Note About Measurements
My recipes are almost all written by weight, including liquids, unless otherwise specified.
For accuracy and consistency of results, I encourage you to buy–and use–a kitchen scale.
I promise that baking and cleanup will be so much quicker and easier.
This is the scale that I recommend for home use. I have owned and used one for years.

Don't let its small price and small size fool you. The Escali Primo is an accurate and easy-to-use food scale that I have used for years. It's easy to store, easy to use, has a tare function, and easily switches between grams and ounces/pounds for accurate measurements.
Love This? Please Take a Moment to Rate and Review
It will help me and other readers so much if you take a moment to rate and leave a review for this recipe.
You can use the stars to rate 1-5 (5 is best), and leave a review in the comments. It helps me make adjustments if any are needed, and comments help others decide whether the recipe is worth making.
Other ways to share include pinning, and/or sharing on your favorite social media platform.
Thank you so much for taking the time!

French Style Strawberry Preserves Recipe
Ingredients
- 1.5 pounds fresh strawberries washed and topped. Weigh AFTER topping
- 19.2 oz granulated sugar
- 1 oz freshly squeezed lemon juice
- 1 ½ teaspoons vanilla paste or extract
Instructions
Day 1
- Cut large strawberries into 4 pieces, medium guys in half, and leave small ones whole. It's up to you to decide where you draw those lines!
- Put them in a large, non-reactive saucepan with all the sugar and lemon juice. Cover loosely with a lint-free towel and refrigerate.
Day 2
- Take your berries out of the fridge. You will be amazed at how juicy they will have gotten as osmosis works its magic!!
- Heat over low/medium-low heat until it comes to a high simmer. It'll sort of bubble up in the middle but won't be at a hard boil. This could take about 45 minutes to an hour. Don't rush it.
- Remove from heat, allow to cool to warm, cover with your trusty lint-free towel, and refrigerate.
Day 3
- Strain the berries through a fine mesh strainer, shaking the strainer gently and letting it drain for a good 10-12 minutes.
- Set the berries aside, pour the juices back into the pan, and heat to 220F.
- Add the drained berries back in, along with any extra accumulated juices, and cook over medium to medium-high heat, stirring almost constantly, until the mixture reaches 223F. No mashing, only stirring, unless you want to crush all the fruit into jam. Which you can do. Your call. Getting the fruit to 223F will take way longer than you think it will, but it will happen. The mixture will also bubble up alarmingly, so make sure you are indeed using a large pot.
- Once the preserves have reached 223F, remove from the heat, and skim off any foam that may still be lingering. Stir in the vanilla, and then pour into clean jars–either a pint jar and an 8 oz jar or 3 (or 4) 8 oz jars.
Did You Make Any Changes?
Notes
To Scale the Recipe Up or Down
No matter how many berries you have, this recipe is easy to scale up. Figure that for every pound (16 oz/454 grams) of strawberries, you’ll need 12.8 oz of sugar. (80% of the weight of the berries) And for each 1.5 pounds/680 grams of berries, you’ll need 1 oz/28 grams of fresh lemon juice. The easiest way to arrive at the amount of sugar is to multiply the weight of the berries by 0.8. So, for example, if you have 2 pounds of berries, that’s 32 oz. 32 x 0.8 = 25.6 oz. In grams, that would be 907 x 0.8 = 726 grams sugar.To Make Jam Instead of Preserves
All you have to do is mash the fruit rather than keep the large pieces and whole berries intact. Mash during Day 2 when you bring it to a simmer and/or mash on Day 3 as the fruit and syrup is coming up to 223F. Voila: jam!Nutrition

Hi, y’all! I hope you’ve enjoyed this post and hopefully also learned a thing or two.
If you like my style, I invite you to sign up for my occasional newsletter, The Inbox Pastry Chef.
Expect updates on new and tasty recipes as well as a bit of behind-the-scenes action. I hope to see you there!
I really hope you love the strawberry preserves, friends.
Thanks for spending some time with me today!


Join in Today!
Finished making the jam today. Yes it takes longer than usual but it was definitely worth it. I like tartness over being too sweet and this fit the bill. Could have easily added more sugar but I didn’t. Perfect flavor with a little tartness. Hubby even liked it.
Yay! I am so happy you enjoyed it!