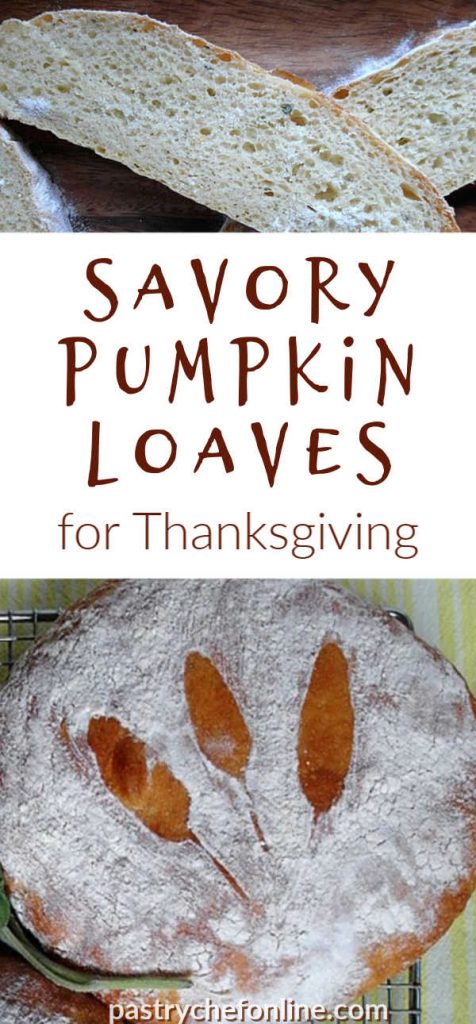
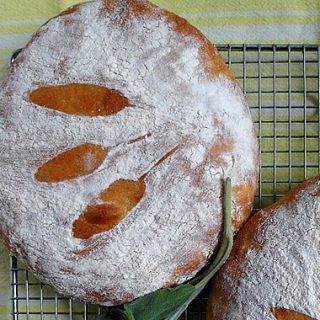
Today, I’m sharing with you these beautiful loaves of savory pumpkin bread. I made them for my friend’s church’s Communion service.
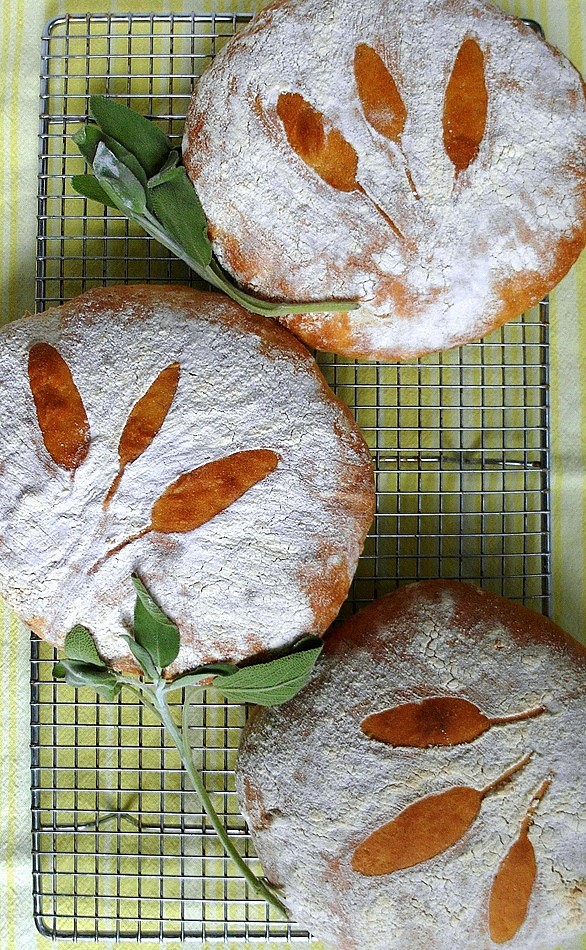
Feel free to make them as rolls or into loaves, and of course you can always shape them into rounds as I did.
The dough for this yeast-raised pumpkin bread is very wet, and the loaves, while rustic on the outside, bake up soft on the inside. Perfect for sopping up gravy or sauces.
If you’d like some other Thanksgiving bread and roll options, you may like my garlic parmesan rolls or my soft pumpkin rolls.
For ease of browsing, here are all my bread and roll recipes.
How This Bread Came About
Sometimes I like to come up with a recipe out of whole cloth, and that’s what I did with this pumpkin bread.
Aside from coming up with the general flavor profile, I made this savory pumpkin bread up as I went along. Fortunately I took notes, because it’s delicious.
Since I wanted to use a bunch of butter for richness (the theme of Communion was abundance), the crumb is quite soft.
Pastry Chef Online Participates in Affiliate Programs. If you make a purchase through one of my links, I may earn a small commission. For more information click to read my disclosure policy
What looks like rustic, crusty loaves on the outside are actually very tender and mellow, with an almost-sandwich bread texture.
How Does This Bread Taste?
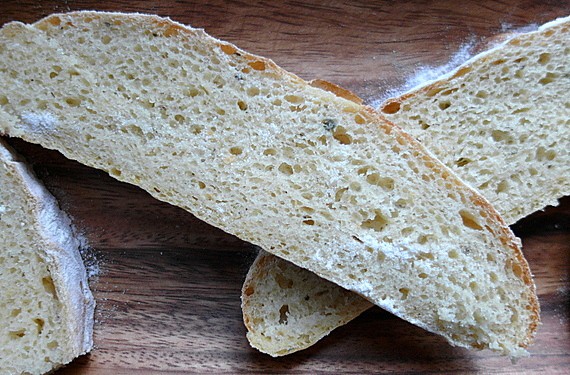
When we tried the bread (I made three loaves and sent Nadine two) with pasta and meat sauce, I can attest to the fact that it sops up sauce like a champ.
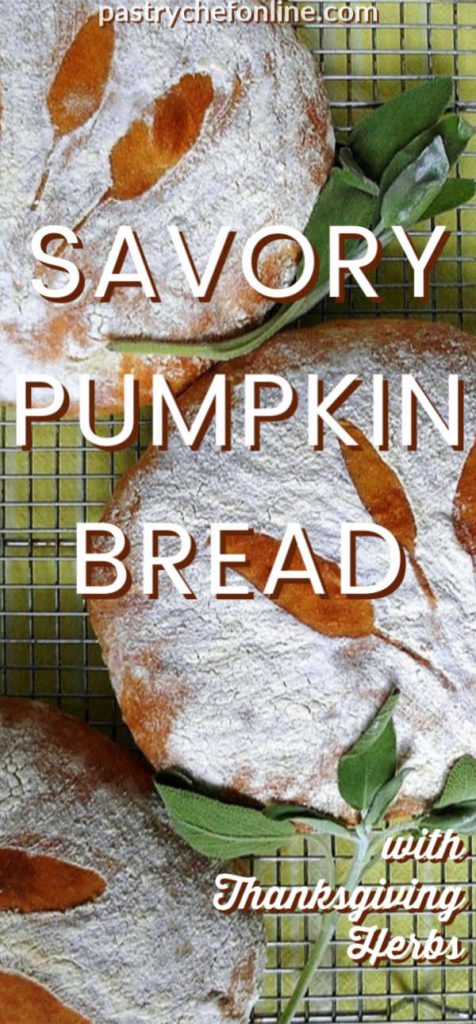
The pumpkin is very subtle and mellow, and the sage complements the buttery bread perfectly.
It’s so good and soft that the next time I make it, I’ll make them into dinner rolls.
Perfect for my, or your, Thanksgiving table!
This Recipe Uses Bread Flour. What If I Don’t Have Any?
You can do one of two things:
- You can go ahead and use all purpose flour, but use one with a higher protein content such as King Arthur. Your bread will be a bit softer, and you will probably have to reduce the liquid by just a little.
- You can make your own bread flour. If you don’t know how, my friend Jen has written a great article on how to make bread flour that will help you out!
Ingredients
Here’s what you’ll need to make this bread (or rolls):
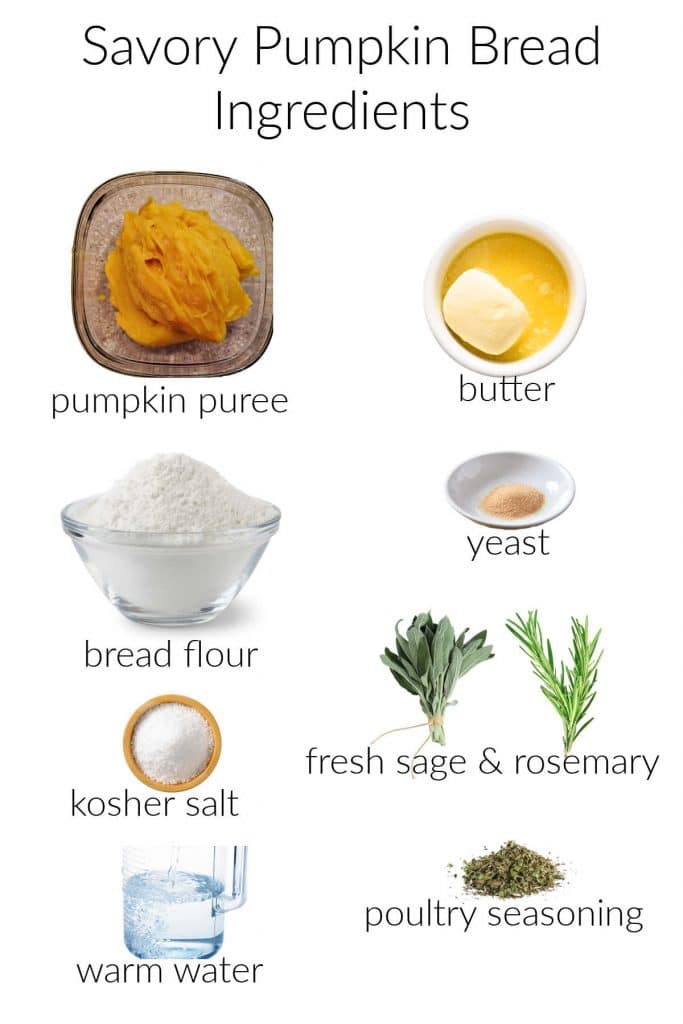
- pumpkin puree: make your own or use canned. And switch things up by using other winter squash puree if you’d like. Consider acorn squash, Hubbard squash, or butternut
- bread flour: I use King Arthur. You can substitute all-purpose, but you will need to cut back on the water by just a hair
- kosher salt: Moderates yeast growth, adds to structure, and brings out all the flavor. Please do not leave the salt out!
- water: I generally use filtered water. If your water is very hard, you may want to do the same
- butter: carries flavor, softens the crumb, and just tastes wonderful. Use unsalted butter here since we’re adding our own salt. If all you have is salted, you will probably be able to cut back the added salt by about 1/2 teaspoon
- yeast: if using active dry, you can proof it in a portion of the water before adding it to the rest of the ingredients. If you know your yeast is active or if you are using instant yeast, you can add the yeast in with the dry ingredients
- fresh rosemary and sage: for flavor. You can use all of one or the other if you’d like
- dried poultry seasoning: because it smells and tastes like Thanksgiving!
What To Expect from This Pumpkin Dough
I wanted this to be a very slack, or wet, dough, so I decided to shoot for a hydration of 70%.
In other words, for every 10 oz of flour, I’d use 7 oz of water.
Since both the pumpkin and the butter contain water, the actual amount of water I added was much less than 70% of the weight of the flour.
This dough is super slack.
It will clear sides of the bowl just a little bit, but it’ll stay all stuck and webby in the bottom of bowl even after ten minutes of kneading on medium speed.
I just want you to be prepared if you make this: the dough is Super Wet. You will need to oil your hands every time you handle it, and even then some of the dough might stick on your fingers.
PRO TIP: When working with very slack dough, always oil your hands and your work surface rather than using flour. This will keep the dough nice and light and still allow you to work with it with a minimum of sticking.
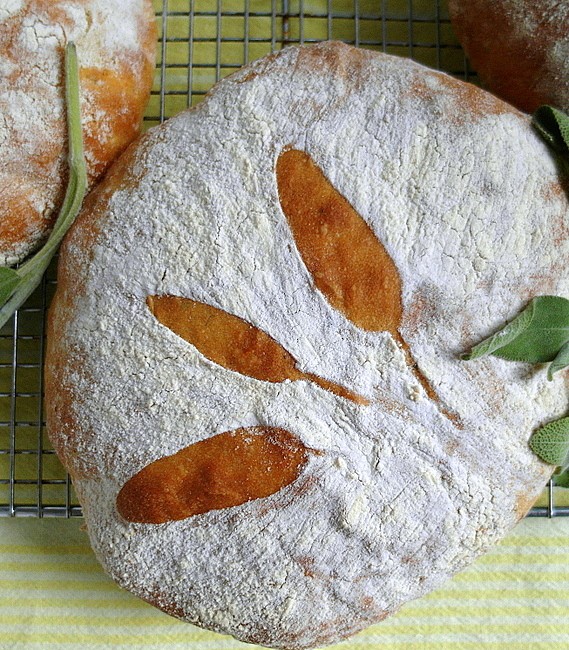
Imprinting the Bread with Herbs
I had seen an absolutely stunning loaf of Bread Baking Babe Heather‘s a few weeks ago where she decorated the top of the loaf by pressing herbs into it and then coating it with flour, like a reverse stencil.
I checked with her about exactly how she did it, because I thought sage leaves would make a beautiful impression on my loaves. Her explanation of how she achieved the look was great, so I was off and running. Thank you, Heather!
Here’s the procedure for imprinting your loaves with herbs:
- Make some “glue” by whisking egg yolk with just a little bit of water.
- Brush this glue on the back of your herbs–you’ll do best with herbs that lay flat such as sage, basil, or flat-leaf parsley
- Press your herbs, glue side down, gently onto your loaf in whatever design you want
- Sift some flour evenly all over the top of your loaf
- Cover and let rise for about 30 minutes.
- Sift more flour over the top of your loaf right before baking.
- Carefully use a pastry brush to remove a good amount of flour, especially on the leaves themselves, so your design stays nice and crisp
- Peel each leaf off, one at a time
- Bake
To Spread Out Making the Loaves Over Two Days
If you have the time to let the dough rise over a couple of days, reduce the yeast from 2 1/2 teaspoons to 1 1/2 teaspoons.
I made this in just a few hours, and the amount of yeast, the slackness of the dough and a warm place to rise had this dough tripling in size for both the first and second rises.
On day one, make and knead the dough, oil it, and refrigerate it overnight.
On day two, press out the gases from the first overnight rise, cut dough into 3 equal pieces and continue with the recipe.
Freezing and Storing
Store savory pumpkin bread at room temperature for up to two days.
For longer storage, this bread (like most bread) freezes really well. You can wrap and freeze entire loaves (or rolls if you make them into rolls), or you can slice the loaves and then freeze them.
Either way, make sure the bread is completely cool. Then place in heavy duty freezer bags, pressing out as much air as you can before sealing.
You can also wrap in a double layer of plastic wrap followed by aluminum foil.
Bread will stay nice and fresh for a good 3 months in the freezer.
To thaw, remove from freezer and allow to thaw, still wrapped, at room temperature.
Do not store bread in the fridge as the fridge tends to draw out moisture, making your bread stale more quickly.
Other Breads I’ve Made for Communion
PS Interested in more of my communion loaf collaborations? Here they are:
- Milk and Honey Communion Bread (the first loaf I made for Nadine’s church)
- Herb Bread with Lemon- and Rosemary-Infused Olive Oil
- Saffron Crackers with Citrus Fennel Salt
- Parmesan-Cornmeal Crackers (a variation)
- Lemon Tarragon Focaccia with Citrus Fennel Salt
- Tahini Swirl Challah (minus the swirl)
- Champagne Yeast Pita Bread
- Spent Grain Crackers

A Note About Measurements

Don't let its small price and small size fool you. The Escali Primo is an accurate and easy-to-use food scale that I have used for years. It's easy to store, easy to use, has a tare function, and easily switches between grams and ounces/pounds for accurate measurements.
This recipe has a lot of steps. Don’t be intimidated. Remember, I’m just trying to help by being explicit.
Read the instructions over and I think you’ll see it really isn’t so hard. And if you have any questions, all you have to do is ask. I promise to be a helper.
It will help me and other readers so much if you take a moment to rate and leave a review for this recipe.
You can use the stars to rate 1-5 (5 is best), and leave a review in the comments. It helps me make adjustments if any are needed, and comments help others decide whether the recipe is worth making.
Other ways to share include pinning, and/or sharing on your favorite social media platform.
Thank you so much for taking the time!

Savory Pumpkin Sage Bread
Ingredients
- 10 oz roasted pumpkin puree (I used my own. You can also use canned)
- 4 oz butter, melted and cooled to warm 1 stick
- 26 oz bread flour (I highly recommend King Arthur)
- 2 ½ teaspoons active dry yeast (you can use Rapid Rise, too)
- 2 ½ teaspoons kosher salt
- 1 Tablespoon each minced sage and rosemary
- 1 teaspoon dried poultry seasoning
- 7-9 oz slightly warm water
For the Design, if you want to do what I did
- 1 egg yolk combined with 1/2 teaspoon water
- 9 sage leaves
- ½ cup bread flour
For Baking
- 2-3 ice cubes per loaf
Instructions
- In the bowl of your stand mixer, whisk together the pumpkin and butter.
- In another large bowl, whisk together all the dry ingredients, including the minced herbs.
- Dump the dry ingredients onto the pumpkin mixture.
- Add about 6 oz (3/4 cup) water to the bowl, fit your mixer with the dough hook, and mix for a good 3-4 minutes until there is no loose flour in the bowl and the dough is starting to come together. Remember, we want a really slack dough, almost more of a very thick batter (think about the consistency of pate a choux, but sproingier because of the gluten formation).
- Add another 2 Tablespoons (1 oz) of water and mix (again with the dough hook) for another couple of minutes until the water is all absorbed into the dough. Things should be sticking quite nicely in the bottom of the bowl by now.
- Increase the mixer speed to medium and watch it for a minute or so. Lots of times, dough that sticks at lower kneading speeds magically clears the bowl at higher speeds. You should still have a ton of sticking in the bottom. If not, add another tablespoon (two, if necessary) of water and keep going.
- Once the dough is nice and slack, knead for ten minutes. You’ll still have a bunch of dough stuck in the bowl, but some of it will also have climbed up the dough hook. Oil your fingers and stretch out a bit of the dough. If it stretches farther than it looks like it should, you’re done.
- If your mixer bowl holds at least five quarts, you can let the dough rise right in your bowl. If your mixer is smaller, you’ll have to let it rise in a different bowl.
- Use a bowl scraper to gather the dough into a ball at the bottom of the mixer bowl, or scrape it all out into another large, oiled bowl. With oiled hands, tuck the edges in and try to pull the top of the ball a little bit taut.
- Realize that all is going well, even if you’re a little sweaty and unsure. Spray the top of the dough with some cooking spray or oil and cover the bowl with some plastic wrap.
- Heat up some water to boiling in the microwave. Move the mug to one corner of the microwave, add your covered bowl and shut the door. Let the dough proof for 1 1/2-2 hours. The dough will be up to the top of your bowl by then.
- Oil your hand, or a large silicone spatula, and press out the gases pretty thoroughly. Fold the dough over a couple of times to redistribute the yeast, then, form it into a rough ball again. Spray or brush oil on the top of the dough, Cover and let rise again for 1-1 1/2 hours, or until again doubled or even tripled.
- Preheat the oven to 425F and put a baking stone on a rack in the bottom third of the oven.
- Put a cake pan on the rack under the baking stone.
- Cut 3 squares of parchment and spray each with a bit of cooking spray.
- Oil your counter lightly. With oiled hands or an oiled bowl scraper, splorch the dough out onto the counter. Be gentle. At this point, you don’t want to press out much of the air if you can help it.
- Cut the dough into three equal pieces (I weighed mine. I won’t tell if you just want to eyeball it. Give your friend the smaller loaf and keep the bigger ones for yourself).
- With oiled hands, form each piece into a rough round, gathering the excess dough underneath to keep the top somewhat taut. Place each rough round, gathered side down, on its own piece of parchment on a rimless cookie sheet, cookie shovel or pizza peel.
- Brush the back of a sage leaf with your egg yolk glue. Press it gently into place. Keep gluing and placing until you have 3 sage leaves glued onto each loaf.
- Liberally sprinkle flour all over the top of the loaves. Cover each loaf with plastic wrap and let sit out until puffy, about 30 minutes. The design on your bread won’t be as defined now.
- Put two of the loaves in the fridge. Take the remaining loaf and sprinkle some extra flour right over the leaves.
- Take a pastry brush and gently brush off a fair amount of the flour. Make sure to brush any off the parchment, because it will burn in the oven.
- Carefully peel the sage leaves off.
- Slide the loaf, parchment and all, onto the hot baking stone.
- Toss 2-3 ice cubes into the cake pan underneath and quickly close the oven.
- Bring the second loaf out of the fridge to sit at room temperature while this loaf bakes.
- Bake for 18-20 minutes, or until the internal temperature is right around 200F (195-205F is fine).
- Remove loaf to a rack to cool.
- Repeat with the second loaf, bringing the third out of the fridge when that one goes in the oven.
- Cool the loaves to room temperature. Enjoy within a day or two. To keep longer, put in a freezer bag and suck out the air with a straw before sealing it. Freeze for up to a month. Thaw in the sealed bag until the loaf reaches room temperature.
Did You Make Any Changes?
Notes
Nutrition

Hi, y’all! I hope you’ve enjoyed this post and hopefully also learned a thing or two.
If you like my style, I invite you to sign up for my occasional newsletter, The Inbox Pastry Chef.
Expect updates on new and tasty recipes as well as a bit of behind-the-scenes action. I hope to see you there!
Thank you for spending some time with me here today. Take care, and have a lovely day.


Join in Today!
Hi Jenni, I’ve made this recipe four times now (my last batch is currently rising) and I get so many compliments. It is truly delicious. The pumpkin adds such a softness to the bread and the herbs add a wonderful subtle array of flavors. I love making three small loaves so there is always one or two to give away! Thank you so much for this recipe!!! 🙂
Blessings,
Mariel
Hello! How long and what temp for making rolls?
Thanks so much!
Hey, Andrea! Bake at the same temperature for probably around 15-18 minutes. If you have an instant read thermometer, you’re shooting for 195-200F 8n the centers. Enjoy!
Excellent results. I made the bread to go with a goat stew baked in a pumpkin and the combination was delicious. Good instructions and I learned some great techniques that have improved my other bread making, like kneading longer, more rising time and not being afraid of a wetter dough.
I am so happy the meal was a success–and that stew sounds incredible, Judith! But more than that, I am gratified to know that you generalized from this recipe to bread baking in general. That is what it’s all about! Thank you so much for commenting!
These loaves look and sound delicious! I love how you’ve decorated them.
Thank you so much, Karen! I was really inspired by Heather’s post. =)
I couldn’t wait to try these and my family devoured them. The recipe does not disappoint ( as always, Jenni is very thorough and descriptive) I”m not sure if I splortted and sproinged in the right steps, but they turned out beautifully. BTW, I did use canned pumpkin and added about 1 oz. extra of water.
I really need to try it with a more vibrant pumpkin puree, or even with sweet potato. I want that gorgeous golden color that yours had, Amy! So happy that you, John and your family enjoyed the bread! <3
Just beautiful loaves and I do love that you made this with pumpkin. I must try these – such great holiday breads or everyday breads for a wonderful autumn meal (with soup! or stew!). The directions don’t seem long and scary but maybe because I like making bread. Question, three loaves is a lot for my household. How do you think these will freeze? I’ll try anyway. Beautiful. And I loved what Heather did decorating her loaves (pretty brilliant) and yours too!
Bread usually doesn’t mind freezing, so just wrap it well and stick it in there as soon as it has cooled to room temp. Should be fine for at least 3 weeks-1 month. =)