The biscuit method is a method for making quick breads such as scones and, well, biscuits. That’s American biscuits, not cookie-biscuits, if you’re visiting from across the Big Blue Ocean.
Would you like to save this post?
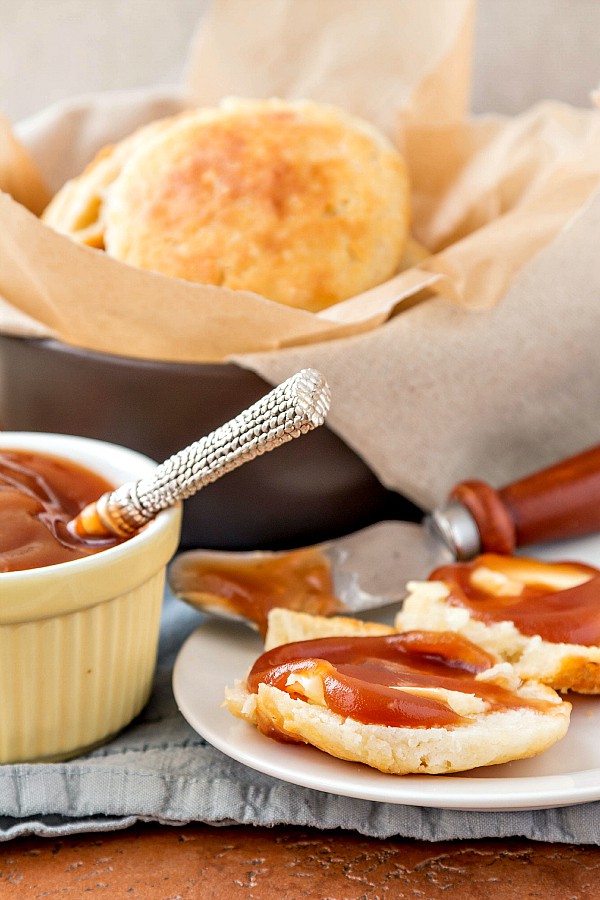
How to Perform The Biscuit Method
So, here’s how it goes.- Mix all your dry ingredients together with a whisk: flour, baking powder and/or baking soda, salt, sugar, dry spices, etc.
- Cut your very cold fat into about 1/2 inch chunks (if you’re using shortening, or part shortening, put that stuff in the freezer. I vote all butter, personally, for flavor and for no trans fats, but do what you want).
- Toss the butter/shortening with the dry ingredients.
- Using your fingers, break up the butter/shortening, rubbing it into the flour. When you’re done, the pieces should be anywhere from the size of grits to the size of peas. Nothing too much bigger than a pea. If your hands are warm, throw everybody into the fridge to firm up.
- Pour in your liquid (milk/cream/half and half/buttermilk–whatever the recipe calls for). Toss together with the dry. Don’t mix viciously.
- Turn your dough out onto a lightly floured surface and pat into a square about 1/2″ thick.
- Cut into squares (no waste) or circles. (You can re-roll the scraps, but those biscuits will be tougher. I vote squares).
- Brush with cream/butter/egg wash. Bake at about 400 degrees, F, until risen and golden brown and lovely.
Biscuits and other Biscuit-like items on Ye Olde Blogge that Utilize The Biscuit Method for Mixing
Here are some biscuit and pie crust recipes you might want to try out. Take a look in the instruction section of all the recipes. I’m sure you’ll be able to recognize the basic method.- All Butter Angel Biscuits
- High-Rise Flaky Cheddar Bay Biscuits
- Spicy Cheese Biscuits
- Plum Cobbler
- Mother Leavee’s Plum Kuchen
Pie Crust Recipes on Ye Olde Blogge that Utilize The Biscuit Method for Mixing
- Basic Pate Brisee (and a primer on why pie crust shrinks and how to keep that from happening)
- Lazy Baker’s Puff Pastry (scroll down past the tart recipe to get to the puff)
Shop the Method
Like most of the basic mixing methods, you don’t need a ton of fancy equipment to perform them properly, but here are a few of my recommendations for baking sheets, pie plates, biscuit cutters, etc, you might find useful. These are affiliate links. If you make a purchase through one of my links, I will earn a small commission. Your price is unaffected. First up, a bench knife is a must-have. For me, I usually cut my biscuits in squares so I don’t have any dough to re-roll. A bench knife does this beautifully. As well, you’ll find tons of ways to use it in performing the biscuit method and beyond. Best less-than-six dollars you will ever spend. If you do like round biscuits, I can recommend this set of graduated cutters. Choose your biscuit size from petite to mondo to any size in between. And of course you can use them to cut cookies and pie crust, as well. If you like fluted biscuits, this set of fluted cutters also gives you a choice of size. I love a good aluminum pie pan. Light weight, conductive so you get great browning of the bottom crust, and inexpensive What’s not to love? The standard size is 9″ or you can go crazy and get a 10″ pie pan. Last up, it’s absolutely necessary to have at least one heavy-duty half-sheet pan that will not warp in the oven. I like my Nordic Ware half-sheet pan. Give it a look.


Join in Today!
Third experiment: I used “your” recipe from the book you mentioned with these changes: half OJ and half buttermilk (to make 3/4 cup), no raisins, 1 1/4 cups cranberries. I baked it 55 minutes. We think it is perfection. Great flavor and texture. When it first came out of the oven, it was to die for because the crust was kind of caramely. I don’t know why people make fancy baked goods when you can achieve perfection so easily. And it still looks appetizing after you cut it! I think I have been watching too much British Baking Show where they make these fancy things that look like hell after they cut even one piece.
I’d like to freeze some and see how it does but we are eating it too fast.
ROFL! I often say I blame the Food Network for making folks think they can’t cook and bake. Simple can be perfect! I am so glad you’ve hit upon your perfect loaf, Donaleen!
I think I found your recipe AND it cuts in the butter but uses a quarter cup. It says the recipe is from the book you mention.
https://www.geniuskitchen.com/recipe/cranberry-thanksgiving-bread-161131
Experiment 2 results: (more orange juice, no buttermilk) and using melted butter: we think we miss the buttermilk. Not sure about the melted butter.
Oh, hooray! Thank you so much! Merry Christmas!
I think I’d miss the buttermilk too. Maybe do half buttermilk and half orange juice?
And there is a video of them making it. But now explanations of the method.
https://www.youtube.com/watch?time_continue=16&v=1wFXD64rhgQ
I have a recipe for cranberry orange quick bread that uses the biscuit method. Does this method make a difference in quick breads?
I’m not sure this will answer your question, Donaleen. Does it make a difference as opposed to what? A different method? It would depend upon the proportion of ingredients. Generally speaking, biscuit method gives you a sort of dough that you can pat into a pan while the muffin method and creaming method yield more of a batter. Biscuit method usually contains more fat in relation to flour, and that coats the flour resulting in a more tender quick bread. I hope this has helped. If not, please email me with more specific questions and I will help as much as I can. onlinepastrychef (at) yahoo (dot) com Thank you!
Thanks for the response. This is a very normal quick bread recipe except for the cutting in of the butter. I have found other recipes with the same ingredients and quantities but using melted butter which is added to the wet ingredients. Here is the recipe with cutting in the butter:
Mix together 2 cups flour, 1 ½ tsp. of baking powder, ½ tsp. baking soda, ½ tsp. salt (I use less) and a scant cup of sugar. Cut in 2 tbsp. of butter and the grated rind of 1 orange. Juice the orange and add enough water to make ¾ cup. Beat one egg and add to the batter with one cup raw cranberries, cut into halves. Mix well. then pour batter into a greased pan. This makes one 9x5x3 pan or 2 small loaves. Bake 350 degrees for 55 to 60 min.
Man, I love a good cranberry 9range loaf! I’m actually surprised that they have you cut 8n just 2 Tablespoons of butter, but it probably gets distributed more evenly than if you just melted the butter and added it with the wet ingredients. My guess is that the cake is somewhat more tender when you cut in even that small amount of butter since at least some of the flour gets coated with fat. It might be an interesting experiment to make the cake twice, once using each method, and see if you can detect a difference in tenderness.
I just started making this one. We like it. Do you have a favorite? I have it in the oven now and I melted the butter this time. But there are two things that will be different. Last time I had only one orange in the house and I could not bear to use water so I used buttermilk. I love buttermilk in baked goods. This time I had enough orange juice. It may take more than one experiment.
Somewhere I have an excellent recipe for cranberry bread that is actually printed in the back of a children’s book called Cranberry Thanksgiving. It is very good, but I have to find the book again! I bet the bread was excellent with buttermilk. Buttermilk helps with tenderness too. You’ll have to let me know how your experimentation goes, Donaleen!