
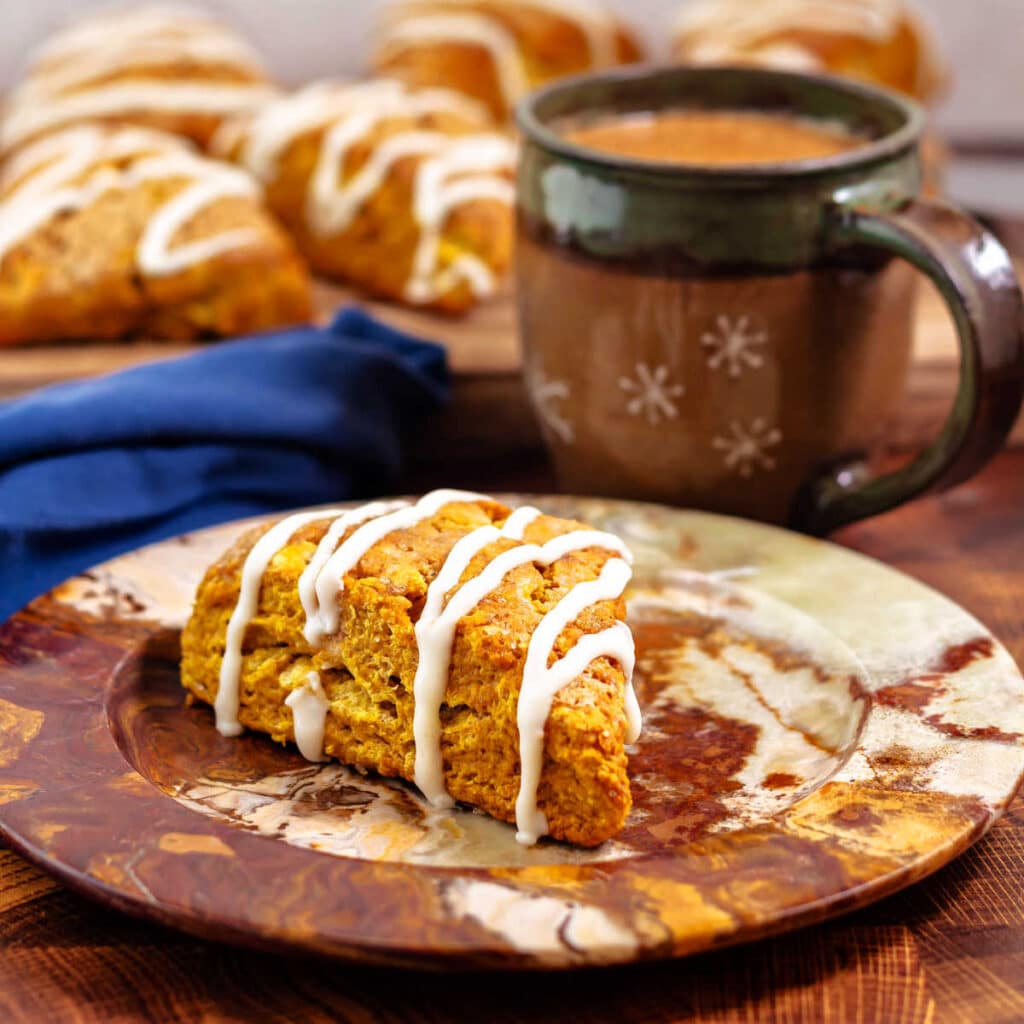
These layered pumpkin cream scones rise tall and proud, with tender, buttery layers, a moist, warmly spiced crumb, and a sparkling, crunchy sugar topping. The secret? Cooking down the pumpkin puree with spices to concentrate its flavor and remove excess moisture, so the scones rise beautifully without spreading.
Pumpkin spice and cardamom bring plenty of cozy fall flavor, while a light drizzle of orange glaze adds little bursts of citrusy brightness. They’re absolutely lovely with a cup of coffee or tea.
If you’ve ever been disappointed by a dry, bland pumpkin scone, these beauties are here to change your mind!
Pastry Chef Online Participates in Affiliate Programs. If you make a purchase through one of my links, I may earn a small commission. For more information click to read my disclosure policy
Pumpkin Cream Scones, At a Glance
✅Skill Level: Beginner
✅Skills: Making a Reduction, The Biscuit Method, Folding/Layering Dough
✅Type: Breakfast Biscuit
✅Number of Ingredients: 15, including finishing and glaze
✅Prep Time: 45 minutes
✅Total Chill Time: 1 hour, 30 minutes
✅Cook Time: 18-23 minutes
✅Yield: 8 scones
Jump Straight to the Recipe
Why You’ll Love These Scones
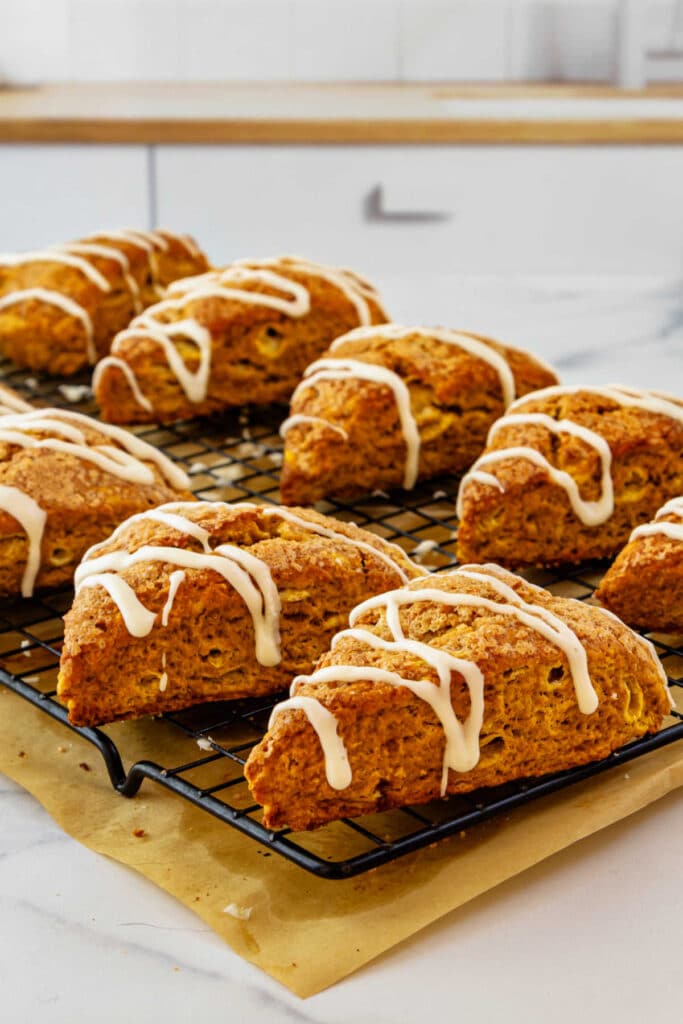
Friends, these are not your run-of-the-mill scones. Let us count the ways:
- Cooking down the pumpkin puree with some of the spices and salt removes excess water and concentrates the pumpkin flavor. Less moisture means the scones hold their shape and rise tall in the oven. The spices also become more fragrant as they heat.
- Heavy cream adds plenty of fat to carry flavor and helps keep the crumb nice and moist. No dry scones here!
- A judicious amount of butter adds richness and helps create those lovely layers as it melts and releases steam in the oven.
- Pumpkin spice goes into both the cooked puree and the wet ingredients, while a touch of cardamom adds another layer of warm, aromatic flavor.
- A generous amount of sparkling sugar on top of each scone provides a glittery, crispy crust.
- A restrained amount of sweet orange glaze plays beautifully with the pumpkin and cardamom without overpowering them.
Ingredients and Substitutions
If you are familiar with The Biscuit method and how to make scones, please feel free to jump down to the recipe. Otherwise, we’ll look at all the ingredients, some likely substitutions, and go through the Scone Making Process.
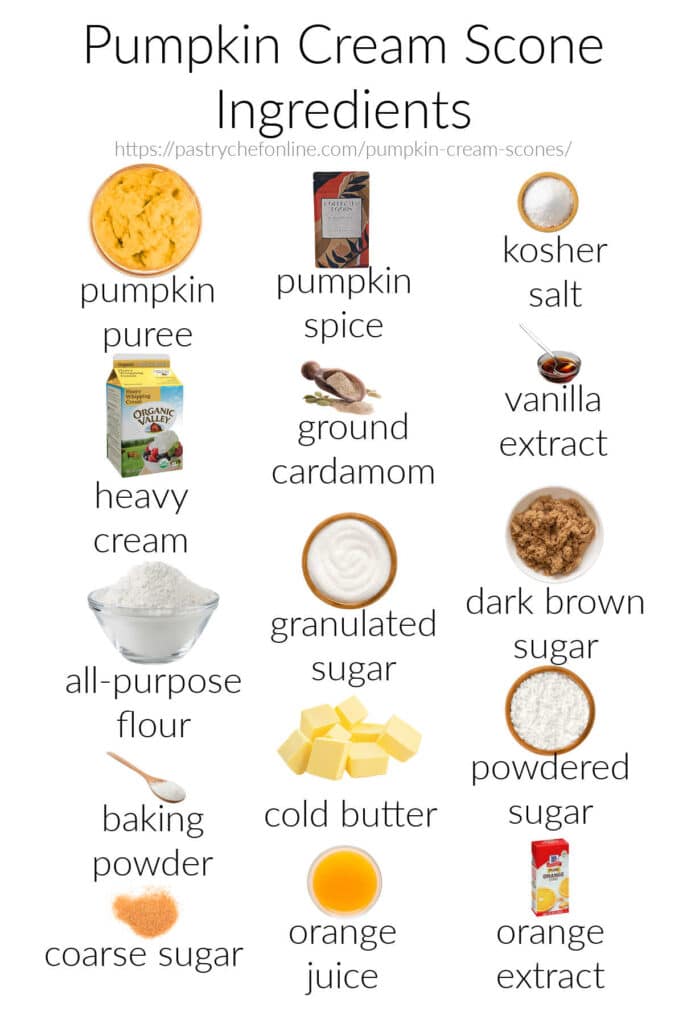
- Pumpkin puree: Provides bulk, fiber, mellow sweetness that is a blank slate waiting to be perked up with spices. You can substitute the same amount of butternut squash puree or similar (by weight), although the water content may be slightly different.
- Pumpkin spice: Used twice, once in the pumpkin reduction and then again straight from the jar when mixing up the pumpkin cream, pumpkin spice brings warmth and cozy fall flavor. Some of it blooms with the puree while the rest blooms in the oven. This lends an overall deeper pumpkin spice flavor.
- Kosher salt: Pumpkin is a vegetable, and it needs to be salted. The salt in the recipe snaps the pumpkin and spice flavors into focus, lending a depth of flavor you wouldn’t get without it.
- Heavy cream: A good amount provides the bulk of the liquid in the recipe as well as plenty of fat to limit gluten development and promote a moist crumb.
- Ground cardamom: Just a touch adds a wonderful citrusy, floral, sweet, and gently piney flavor that brings to mind evergreen trees and bright fall skies.
- Vanilla extract: Lends a mellow, woody sweetness to the spicing, rounding out the assertive spices.
- All-purpose flour: Allows for enough structure to hold the scones together without making them chewy.
- Granulated sugar: Provides sweetness, helps keep the crumb tender, and assists with browning.
- Dark brown sugar: Adds more sweetness with a little depth from molasses. It also helps to keep the scones moist at room temperature. If all you have is light brown sugar, that’ll work just fine as well.
- Baking powder: Allows the scones to rise high. Use fresh baking powder, because it loses its oomph over time, and you want the highest possible rise.
- Cold butter: Butter provides fat to carry flavor and assist in browning. It also provides pockets of steam that encourage layering when baking. Some gets rubbed into the flour mixture to moderate gluten formation while some gets left in large flakes which lead to lovely, subtle layering.
- Coarse sugar: Gives the scones a lovely sparkle and crisp crunch on top, providing a wonderful contrasting texture as well as a touch more sweetness.
- Powdered sugar: Used in the glaze, powdered sugar gives the glaze sweetness and body as well as the white color.
- Orange juice: The liquid in the glaze, a little orange juice gives us a little citrusy, floral brightness.
- Orange extract: Because there is so little glaze that the orange juice alone doesn’t really provide a ton of orange flavor, just 2-3 drops of extract in the glaze really amplifies the citrusy goodness.
How to Make Layered Scones
In a nutshell, here’s what you’ll be doing to make these scones:
- Reduce the pumpkin with some of the spices and all of the salt.
- Mix with cold heavy cream, the rest of the spices, and the vanilla. Cover and chill.
- Whisk together the flour, granulated sugar, brown sugar, and baking powder. Rub in some of the butter while pressing the rest into flakes. Toss together, cover, and chill.
- Fold the pumpkin cream mixture into the dry ingredients until you have a shaggy dough.
- Turn out onto a floured surface, press and fold, building in layers.
- Do the final shaping and cutting, and freeze for about 45 minutes.
- Brush scones with cream, and sprinkle with sparkling sugar. Bake.
- Once cool, drizzle on a little orange glaze.
Note you’ve got two “chill times,” one in the fridge for the dough components (pumpkin cream and flour/butter mixture), and another in the freezer for the shaped scones.
Make the pumpkin reduction and cream first. This gives it a bit of a head start in the refrigerator, while chilling the flour/butter mixture ensures that the mixture stays as cold as possible while working with it.
Once you shape the scones, you’ll put them in the freezer for a good 45 minutes before baking. This gives you plenty of time to preheat your oven. It also helps the scones keep their shape and rise as high as possible once they hit the hot oven.
Okay, now that we have the answer to “why are we chilling everything?” out of the way, here’s the procedure, along with some Helpful Visual Aids:
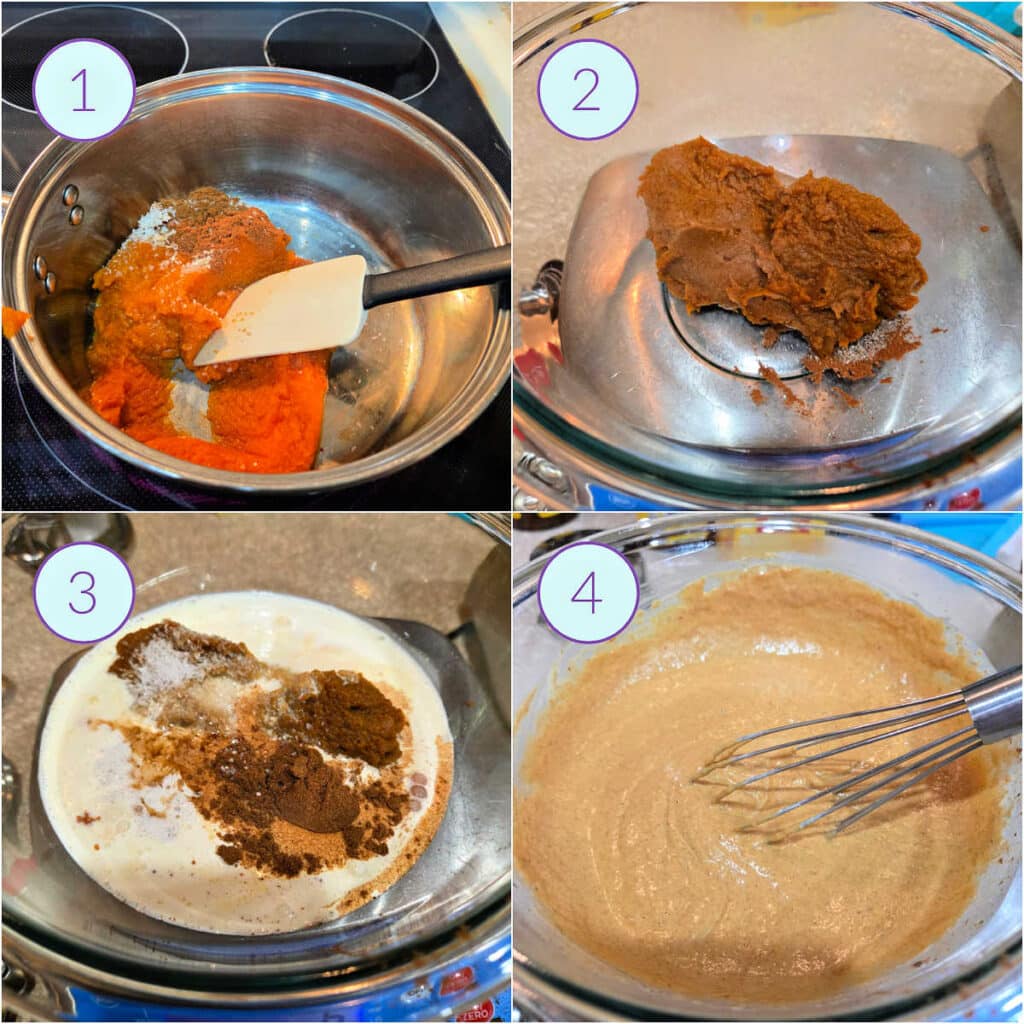
- In a small saucepan, combine the pumpkin puree with some of the pumpkin spice and all of the salt.
- Heat, stirring frequently, until noticeably deeper in color. Use weight targets in the recipe to be sure the mixture has reduced enough.
- Add the reduced puree to cold heavy cream, the rest of the spices, and the vanilla.
- Whisk together, cover, and put in the fridge to chill.
Jenni Says: Don’t rely on cooking time alone when reducing the pumpkin. Different brands contain different amounts of water, so use your kitchen scale to check the weight. You’re looking for 189 grams of reduced pumpkin, spices, and salt. This helps ensure your scones hold their shape and rise beautifully. Here’s how I did it:
● weighed out my initial amount of puree into my saucepan and added the pumpkin spice and salt
● put a small plate on my scale and zeroed it out
● periodically scraped the puree/spice mixture onto the plate to check for my target weight
● when it reached the target weight, I scraped it into a bowl and added the cream, the rest of the spices, and vanilla.
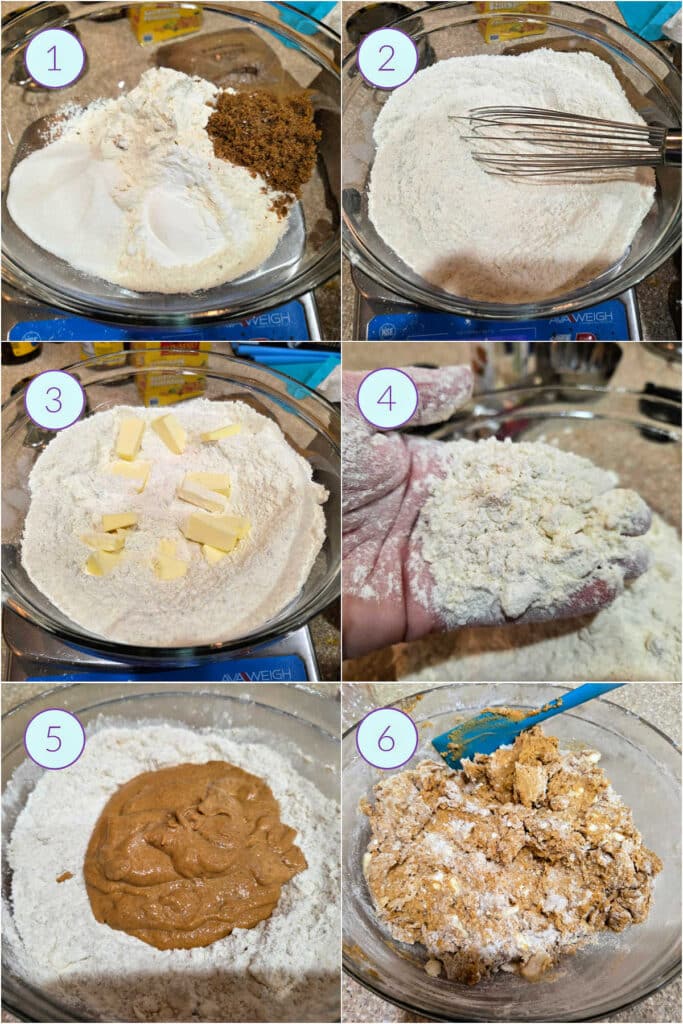
- In a large bowl, add the flour, sugar, dark brown sugar, and baking powder.
- Whisk well to combine.
- Toss in the cold butter, cut into small chunks.
- Rub roughly half of the butter into the flour/sugar mixture. Press the other half into flakes, and toss together. Cover and refrigerate.
- Scrape the chilled pumpkin cream into the chilled dry ingredients.
- Use a spatula to fold and press the wet ingredients into the dry. The mixture shouldn’t be uniformly orange. You don’t want to overwork the dough, so it’s okay to leave it a little floury looking.
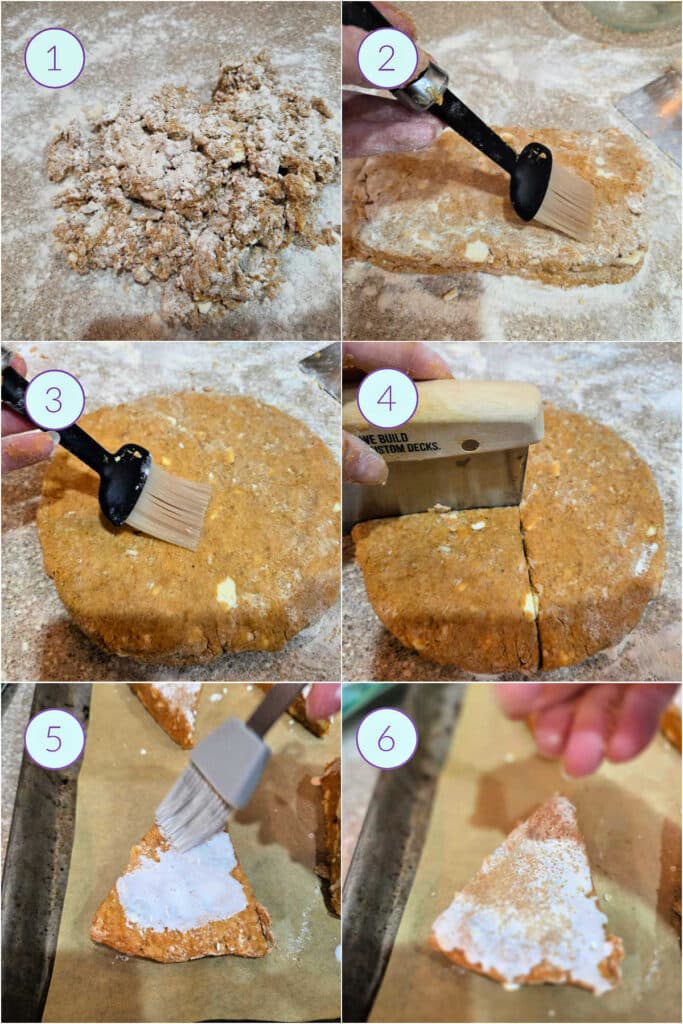
- Lightly flour a clean work surface, and scrape out all the dough, including any floury bits.
- Press the dough into a square, and use a bench knife to fold it in half. Rotate the dough 90 degrees, and then brush off any excess flour before repeating the patting-folding-turning maneuver three more times, for a total of 4 folds.
- After the 4th fold, use your hands to finesse the square into a circle around 8″ / 20 cm in diameter. Brush off any excess flour.
- Use your bench knife to cut straight down through the scone dough to make 8 wedges, roughly equal in size. Freeze for 45 minutes while preheating your oven.
- Brush each partly-frozen scone with heavy cream, and….
- …sprinkle with sparkling sugar before baking. Cool completely, and then pipe or drizzle on a little orange glaze.
Jenni Says Brushing off excess flour keeps the layers from completely separating and reduces any pale streaks you could otherwise get in your scones. It doesn’t really change the flavor or texture of the scones, but they are more aesthetically pleasing if you take the time to brush off flour after making each fold.
Tips for Making Tall, Layered Scones
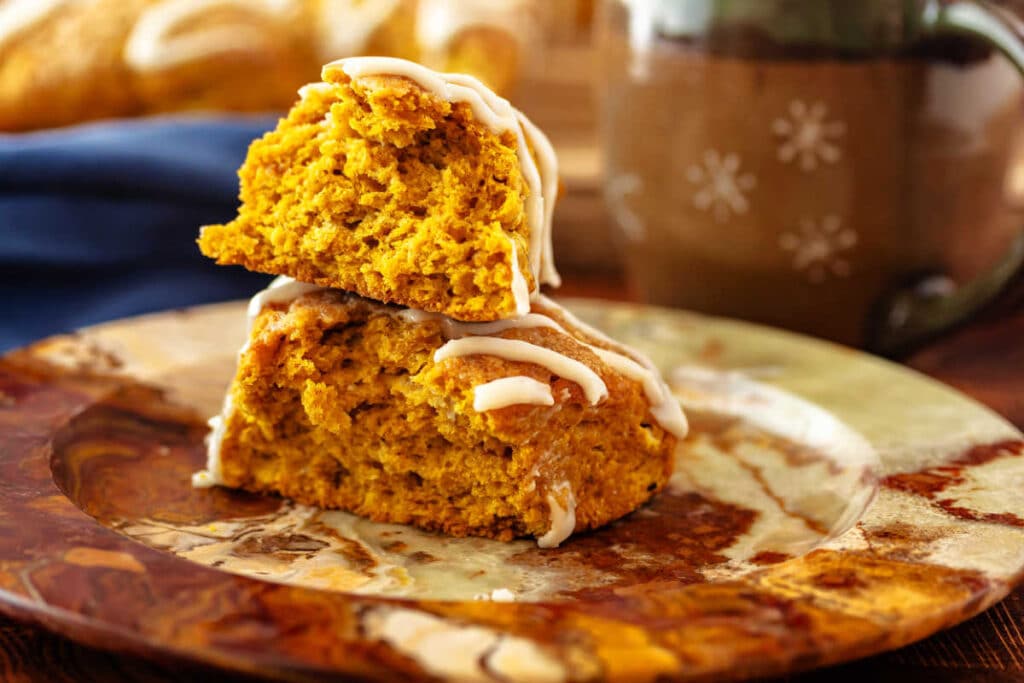
Note: All-butter scones tend to develop more pronounced layers than all-cream scones, which is one reason I used a hybrid approach.
Here are my best tips for ensuring a super high rise for the best possible results:
- Keep everything cold. Chilling the wet ingredients as well as the dry ingredients before combining ensures that the larger flakes of butter stay in discrete pieces rather than melting into the surrounding dough. Cold butter pressed into flakes = higher rise.
- Make sure your baking powder is fresh. Baking powder loses its leavening power over time, so check that yours is still active. And since this is a majority-cream scone, we need all the lift we can get.
- Use a light hand when mixing the dough. Mixing too vigorously can develop too much gluten. This can make your scones read as too dry or too chewy and result in tunneling during baking rather than a light and even rise.
- Brush off excess flour between folds. Too much loose flour can keep the dough from sticking together when you make your folds. This can result in scones that actually come apart rather than baking into beautiful subtle layers.
Storing and Freezing
Once cooled and glazed, keep any leftover scones well-covered at room temperature for 2-3 days. For best texture, reheat in the toaster oven for about 5 minutes at 350°F / 177°C.
Baked scones freeze beautifully as well. To freeze them, after they have completely cooled, put them in a zip top freezer bag or other airtight, freezer-safe container, and freeze for up to 8 weeks. Defrost as needed at room temperature, still in the bag or container, and then reheat as described above.
If you think of it or already know you want to freeze some of your baked scones, consider glazing them after thawing so the glaze looks fresher. They’ll still taste great either way, so it’s your call.
You can also bake the scones from frozen. Once shaped, allow them to freeze completely on a baking sheet before storing them in a freezer bag or other airtight, freezer-safe container for up to 8 weeks. Bake from frozen whenever the urge strikes. No need to adjust the temperature, but know that they may take an extra couple of minutes to bake. Use visual and temperature cues from the recipe to make sure they are baked through, and then you can let them cool and glaze them before digging in.
More Scones, Pumpkin, and Breakfast Goodies
Scone folks, if these pumpkin cream scones scream fall, you must try my ginger peach scones in the summertime. Ginger and peaches in a cream scone topped with an oatmeal streusel. It’s like a peach crisp in scone form.
If you love the pumpkin and orange combination, you will want to check out my cranberry pumpkin muffins. They are bountiful, crammed with chopped fresh cranberries and toasted pecans, and are flavored with pumpkin spice, cardamom, and orange zest. Yum!
If you’re more into layered goodies, you cannot go wrong with homemade Danish. Use my Danish dough to make bear claws or maybe some cinnamon orange morning buns.
For a truly outrageous pumpkiny breakfast, try my pumpkin babka with gingersnap filling. Stunning as a loaf or sliced on a plate, and delicious in your tummy!
Questions?
If you have any questions about this post or recipe, I am happy to help.
Simply leave a comment here and I will get back to you soon. I also invite you to ask questions in my Facebook group, Fearless Kitchen Fun.
If your question is more pressing, please feel free to email me. I should be back in touch ASAP, as long as I’m not asleep.
A Note About Measurements
My recipes are almost all written by weight, including liquids, unless otherwise specified.
For accuracy and consistency of results, I encourage you to buy–and use–a kitchen scale.
I promise that baking and cleanup will be so much quicker and easier.
This is the scale that I recommend for home use. I have owned and used one for years.
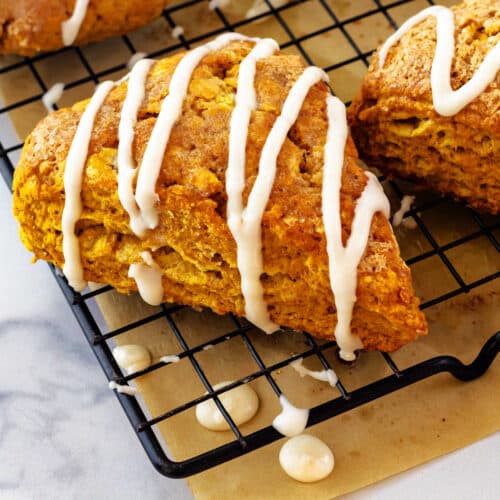
Layered Pumpkin Cream Scones
Ingredients
Pumpkin Reduction
- 230 g pumpkin puree 8 oz or about 1 cup
- 1 ½ teaspoons pumpkin pie spice
- 6 grams kosher salt about 1 1/4 teaspoons Morton's kosher salt. If using Diamond Crystal, use 2 teaspoons
Wet Ingredients
- all the pumpkin reduction (See Above)
- 1 teaspoon pumpkin pie spice
- ¼ teaspoon ground cardamom
- 150 grams heavy cream 5.3 oz or about ⅔ cup
- 1 teaspoon vanilla extract
Dry Ingredients
- 300 grams all-purpose flour 10.6 oz or about 2½ cups
- 40 grams granulated sugar 1.4 oz; or about 3 Tbsp
- 40 grams dark brown sugar 1.4 oz or about 3 tablespoons, packed
- 1 Tbsp baking powder 12 g
- 70 grams unsalted butter, cold 2.5 oz or 5 Tbsp
To Finish
- 40 g heavy cream 1.4 oz or about 3 Tablespoons, for brushing
- 32 g coarse, sparkling sugar 1.1 oz or about 2 Tablespoons plus 2 teaspoons, for sprinkling (such as Sugar in the Raw)
To Glaze (Optional)
- 75 grams powdered sugar
- 2-3 teaspoons orange juice freshly squeezed or strained bottled
- pinch salt
- 3 drops orange extract
Instructions
For the Pumpkin Reduction
- In a small saucepan, combine the pumpkin puree, 1 1/2 teaspoons pumpkin spice, and the salt.
- Heat over medium-high heat, stirring frequently to avoid sticking, until the pumpkin is noticeably drier and the puree is a deep rusty orange color. The combined starting weight of the puree plus spices and salt is about 239 grams. Shoot for a final reduced weight of 189 grams. Check every couple of minutes by scraping the puree onto a plate to weigh it. Always zero out the weight of the plate before weighing the puree.
For the Wet Ingredients (Pumpkin Cream)
- Once the puree has reached the target weight, put it in a medium-sized bowl and add 150 grams of cold cream, the additional 1 teaspoon of pumpkin spice, 1/4 teaspoon of cardamom, and 1 teaspoon of vanilla. Whisk well to combine.
- Cover the pumpkin cream, and refrigerate it while you assemble the dry ingredients.
For the Dry Ingredients
- In a large bowl, combine the 300 grams of all-purpose flour, 40 grams of granulated sugar, 40 grams of dark brown sugar, and 1 Tbsp of baking powder. Whisk well so the leavening is evenly distributed.
- Add the 70 grams of cold butter, cut into small chunks.
- Rub about half the butter into the dry ingredients. This helps coat the flour with fat to control gluten development.
- Press the rest of the butter between your fingers, flattening it into flakes. These larger pieces of butter help to define the layers. Toss everything together well. Refrigerate for about 45 minutes.
To Shape and Finish the Scones
- Once the pumpkin cream and dry ingredients are nice and cold, it's time to make the scone dough.
- Scrape the pumpkin cream into the dry ingredients, and use a spatula to fold and press the wet mixture into the flour/butter mixture. Don't worry if there are some floury bits left. Rather that than overworking the dough trying to get it uniformly orange and ending up with tough scones.
- Lightly flour a clean work surface, then scrape the dough out along with any remaining loose flour.
- Press the dough into a square roughly 8-9" / 20-23 cm. Use a bench knife to help you fold the square in half, and then give it a 90° turn. Brush off any excess flour from the surface.
- Repeat the preceding step 3 more times, pressing the dough into a square, folding it over, and turning it 90°. Make sure to brush off excess flour after each turn.
- On the last turn, press the rectangle of dough out into a roughly 8" / 20 cm round about 1" / 2.5 cm thick. Brush off the surface once more.
- Use your bench knife or a large pizza cutter to cut the round of dough into 8 wedges. Place each shaped scone on a parchment-lined half sheet pan, and then freeze for 45 minutes.
- Set a rack in the middle of your oven and heat to 425°F / 218°C. Pour the heavy cream into a small bowl and have your sparkly sugar ready to go. I gave your actual gram amounts, but honestly, it's kind of a judgment call. You need some of each.
- Once the scones are firm and the oven is nice and hot, brush each scone with some cream, and then liberally sprinkle with coarse sugar. Do one scone at a time, because otherwise the cream might freeze, keeping the sugar from sticking.
- Once all the scones are finished with cream and sugar, pop them in the oven and bake until well-risen, firm on top, and deeply golden brown on the bottoms. Use an instant-read thermometer to check the internal temperature. You're shooting for 195 – 200°F / 91 – 93°C. In my oven, they take 21 minutes. Start checking at about 18 minutes, just to be safe.
- Remove the scones from the baking tray onto a cooling rack to cool completely. Then drizzle lightly with orange glaze. (See below) If you can stand the wait, allow the glaze to set up for about 30 minutes or so before serving.
For the Orange Glaze (Optional)
- In a small bowl, add the powdered sugar and a tiny pinch of salt. Whisk to combine.
- Add 2 teaspoons of orange juice and about 3 drops of orange extract. Whisk until you have a smooth, thick glaze. If it is not quite coming together, add a few more drops of orange juice, a little at a time, until you have a thick glaze that will hold its shape when drizzled or piped.
- Transfer it to a small piping bag to apply, or just drizzle it on using a fork or spoon.
Did You Make Any Changes?
Notes
Nutrition
Would you like to save this post?
Did You Love These Pumpkin Cream Scones? Please Rate and Review!
It helps me and other readers so much if you take a moment to rate and review this recipe.
Your star rating and comments help others decide whether the recipe is worth making, and your feedback helps me continue improving recipes here at Pastry Chef Online.
Other lovely ways to share include pinning or posting on your favorite social media platform.
Thank you so much for taking the time!


Hi, y’all! I hope you’ve enjoyed this post and hopefully also learned a thing or two.
If you like my style, I invite you to sign up for my occasional newsletter, The Inbox Pastry Chef.
Expect updates on new and tasty recipes as well as a bit of behind-the-scenes action. I hope to see you there!



Join in Today!