This Easter bunny hill cake is a cute Easter cake for kids your family will enjoy making and eating together! It’s one of my favorite easy Easter cake ideas. I think you’ll really enjoy it!
You can make this guy with store-bought cake and frosting or start from scratch with this old-fashioned 1-2-3-4-yellow cake and American buttercream frosting.
Find more Fun Easter Desserts here, you guys. Thanks for stopping by!

Easter Cake Idea: Using Candy for Easy Cake Decorating
I went through a phase where I wanted to decorate cakes perfectly. There is certainly still a time and a place for that sort of precision, but today is not one of those days.
Today is the kind of day that you get in the kitchen with your kids to make a fun Easter centerpiece that doubles as an Easter dessert. Or an Easter dessert that doubles as a centerpiece, depending on how you look at it!
Make use of store-bought candy to use as decorations.
Pastry Chef Online Participates in Affiliate Programs. If you make a purchase through one of my links, I may earn a small commission. For more information click to read my disclosure policy
There is no reason to get out piping bags and make 10 different color icings when you can just place some little malted milk ball eggs, Easter Peeps or other candies and still end up with a super cute cake with way less work.
Decorating an Easter Bunny Hill Cake
Today, I want to show you how I make an Easter bunny hill cake. It’s not so much about the flavor, although of course you want it to taste good.
You can use any flavor of butter cake that you want–chocolate, vanilla, strawberry, carrot cake, red velvet–whatever you like.
You can also make whatever frosting you want to as well. I made cream cheese frosting.
Do make sure it’s a light-colored frosting because you’ll be tinting it green.
Here’s a rundown of all the steps in making an Easter bunny hill cake, y’all. To clarify, all the steps after you have your cake and icing.
This is a great project to do with your kids!

- Tint the frosting green. Use 2-3 drops of food coloring to get the color green you want. You may need more or less–the amount is up to you. Stir the coloring evenly into your frosting. No need to separate the frosting into different bowls since you’re making all of it green.
- Tint Your Coconut (optional). Sweetened flaked coconut is an easy go-to for grass. All you have to do to dye it green (or any color you like) is to add a couple of drops of food coloring to a large zip top bag, add some shredded coconut, zip up the bag, and then smoosh it around until the color is evenly distributed and your coconut is nice and green.
- Fill your cake. Sandwich your two cake layers together with frosting. Use about 1/2 to 3/4 cup of frosting for the filling.
- Cut the layer cake in half. Slice the filled cake down the center into 2 halves.
- Sandwich the halves together. Plop maybe 1/3 cup of frosting on top of one half of the cake and then stack the other half on top. You will end up with what looks like half of a 4-layer cake. Here’s where your Easter bunny hill cake really starts to take shape!
- Put the cake on a stand. Place the cake, cut sides down, into the center of a serving platter. Now instead of a half a cake, it will look like a hill in the middle of your plate.
- Frost the cake and the platter. Use the rest of your frosting to frost the cake. Make sure you leave enough to add a thin layer to the platter. Then it will look like a hill in a green field of grass as opposed to a hill in the middle of a shiny platter.
- Add the tinted coconut. Spread the green tinted coconut onto the platter and over the cake. Use your hands to gently press some coconut onto the sides of the cake as well.
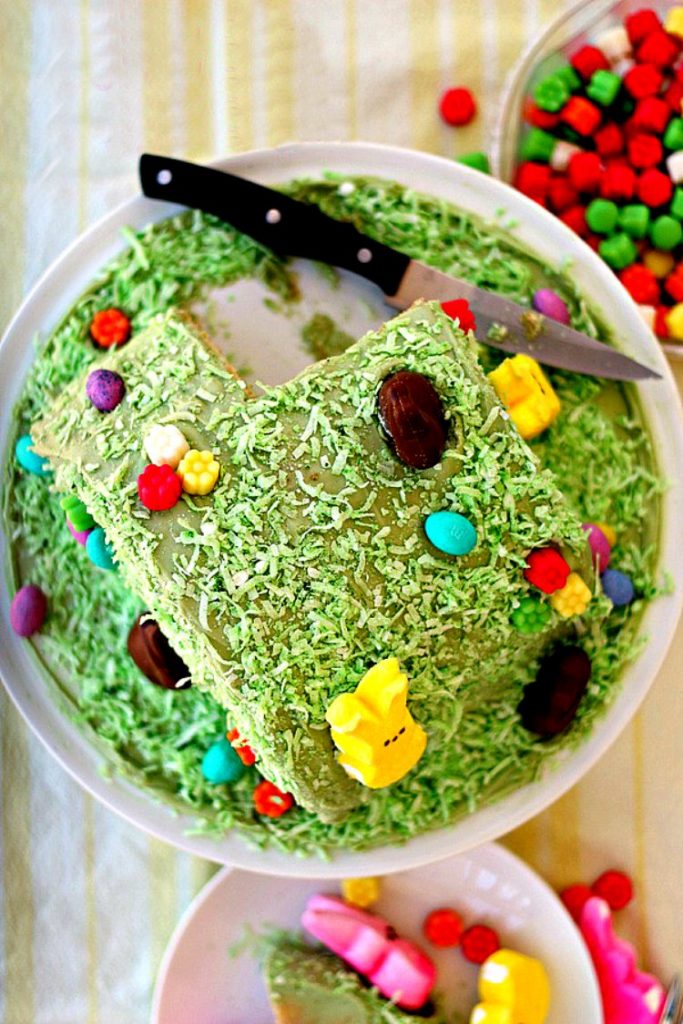
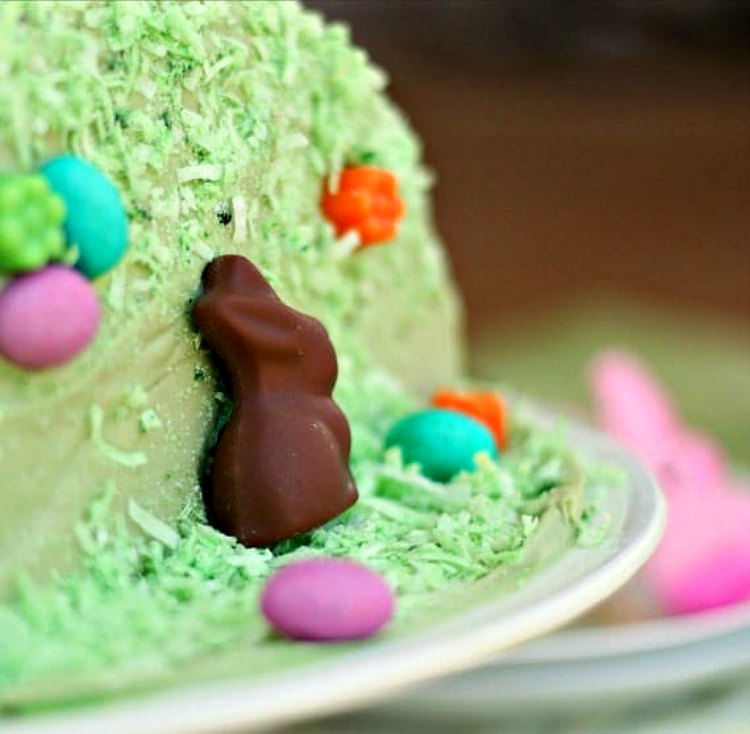
- Use whatever candies you desire to decorate your cake. I used malted milk eggs, chocolate bunnies, little flower candies, and Easter peeps to decorate my Easter bunny hill cake. Use whatever candies you think will look best.
Scroll down to the end of the post to see a video of me doing these steps. It should be helpful for more visual learners.
Equipment Recommendations
- 8″ or 9″ round cake (2 layers)
- tinted frosting of your choice (green, in this case)
- cake platter or stand
- shredded coconut for tinting (very easy to do by mixing the coconut with a couple of drops of food coloring in a big zip top bag)
- icing spatula
- assorted Easter candies of your choice Easter Peeps bunnies are an especially nice touch since they come in so many flavors and are the perfect Easter candy!
This is a wonderful project to do with children.
Depending on their age and their skill level, they can:
- help make the cake and frosting
- ice the cake
- place the decorations wherever they want
I also love the idea that the Easter Bunny Hill Cake can serve as a festive centerpiece on your Easter table.
When dinner is over, you can serve this guy for dessert!
Another Easter Cake Idea for You
I just found this really cute Easter bunny cake made using the same technique of cutting a layer cake in half and stacking it.
Just a little bit of carving and two paper ears later, you have a cute bunny cake to serve for Easter dessert!
Questions?
It will help me and other readers so much if you take a moment to rate and leave a review for this recipe.
You can use the stars to rate 1-5 (5 is best), and leave a review in the comments. It helps me make adjustments if any are needed, and comments help others decide whether the recipe is worth making.
Other ways to share include pinning, and/or sharing on your favorite social media platform.
Thank you so much for taking the time!


Easter Bunny Hill Cake
Ingredients
- 2 8 ” cake layers any flavor
- 4 cups cream cheese frosting or your favorite light colored frosting
- 1 cup sweetened coconut flakes
- green food coloring
- assorted Easter candies 2 cups
Instructions
- Fill and frost the cake, using 3/4 cup frosting between the layers and 2 cups frosting on the top and sides of the cake.
- Using a serrated knife, cut the cake in half. Stack the two halves of the cake so it looks like half of a 4-layer cake.
- Turn the cake on its side on a cake stand, cut side down.
- Smooth the frosting and use the remainder of your frosting to spread a thin layer on the cake stand.
- Dye the coconut flakes by adding 2-3 drops green food coloring to the coconut in a large zip top bag. Close the bag and massage the coloring into the coconut until evenly colored.
- Sprinkle/pat the coconut in a light layer over the "hill" and sides of the cake and on the cake stand.
- Decorate the cake by placing your favorite Easter candies wherever you’d like.
Did You Make Any Changes?
Video
Nutrition
Thank you so much for taking the time to read today. I hope you and your family have a wonderful Easter!
Have a lovely day!

Hi, y’all! I hope you’ve enjoyed this post and hopefully also learned a thing or two.
If you like my style, I invite you to sign up for my occasional newsletter, The Inbox Pastry Chef.
Expect updates on new and tasty recipes as well as a bit of behind-the-scenes action. I hope to see you there!


Join in Today!

What a fun idea for a super cute and simple-to-make Easter cake! Mine would have a plethora of Peeps 🙂
All the Peeps! This was so much fun to decorate, and a completely stress free way, too, so bonus!
I like this kind of cake project because I kinda hate piping bags (they frustrate me!) so this is kinda perfect. Also a great excuse to load up on a variety of Easter candy and chocolates. Because I need an excuse 😉
Yes–no special equipment needed. Plus, the less precise it is, the cuter it is (I think, anyway). Glad you like it Janice. And let’s just pretend that you *do* need an excuse and that I gave it to you! =D