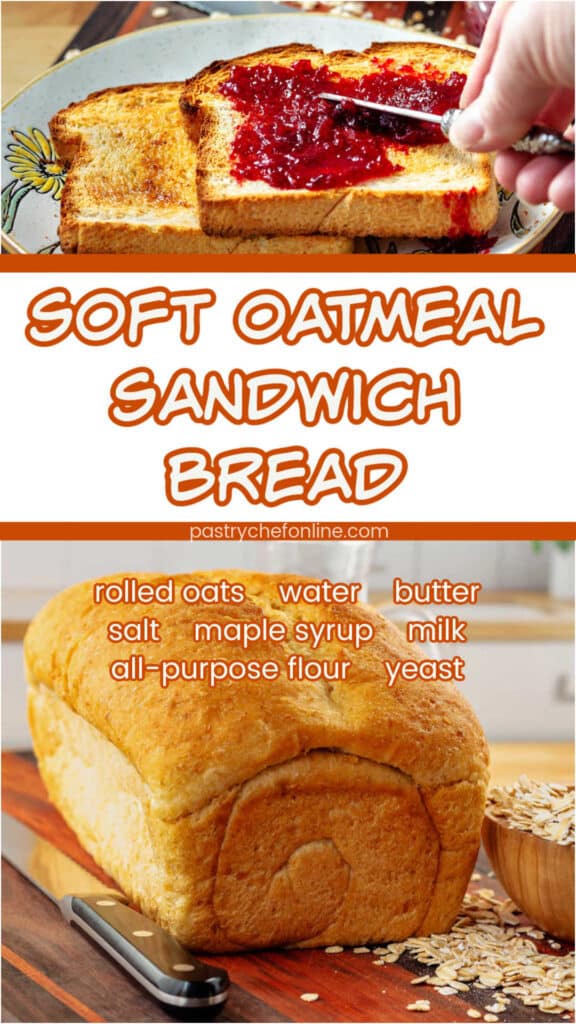
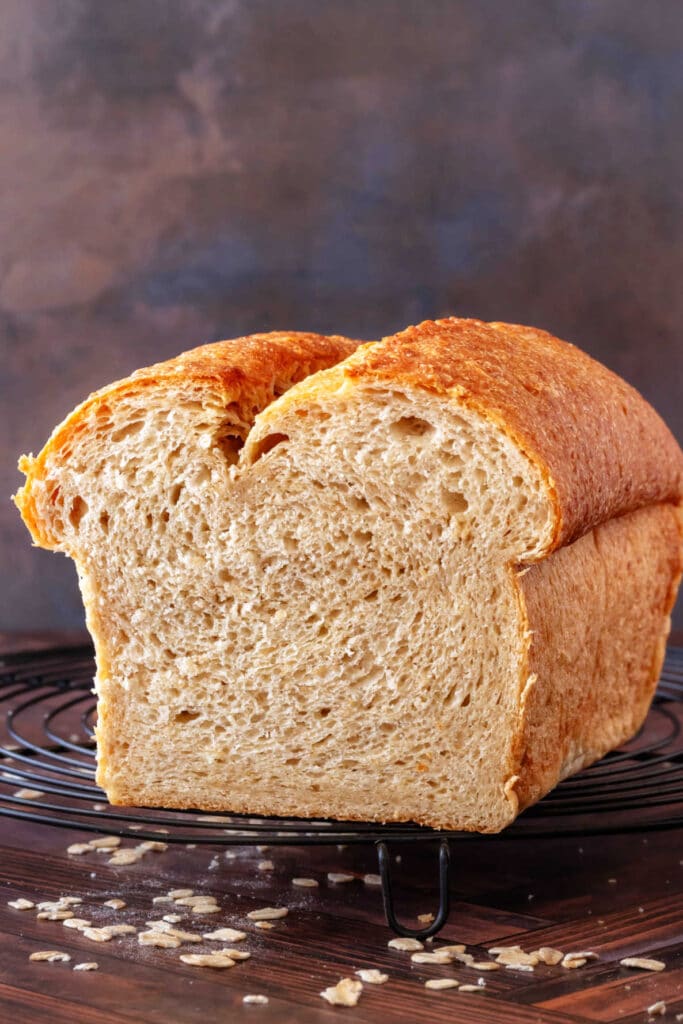
You need this oatmeal sandwich bread recipe in your life. It rises beautifully, toasts well, and makes an excellent sandwich bread.
Made with rolled oats, butter, and a touch of maple syrup, it’s a welcome addition to any meal, and it makes an especially nice base for French toast. If you like a nice soft sandwich bread, you may want to check out my potato sandwich bread as well.
For ease of browsing, you can find all my bread recipes in one place.
Pastry Chef Online Participates in Affiliate Programs. If you make a purchase through one of my links, I may earn a small commission. For more information click to read my disclosure policy
Looking for other loaf sandwich breads? Consider my grits bread, or milk and honey bread recipes.
My new favorite! Easy to make without a bread machine and actually doesn’t break apart when making sandwiches.
Reader Lynetta
Oatmeal Bread, At a Glance
✔️Skill Level: Intermediate
✔️Skills: Mixing/Kneading, Shaping a Loaf, Baking
✔️Type: Loaf Bread/Sandwich Bread
✔️Number of Ingredients: 8
✔️Prep Time: 25 minutes, including kneading
✔️Combined Rise Time: 3-4 hours
✔️Baking Time: 40 minutes
✔️Yield: 1 loaf, or 16 sandwich slices
Related Reading: What Does Yeast Do In Baking?
Jump Straight to the Recipe
What a great recipe! Followed the very clear directions, pictures were a wonderful guide.
Reader Carlin
Came together easily, not overly sticky, beautiful.
The hard part is waiting for cooling because the aroma is amazing.
Why Make This Loaf
Many oatmeal loaves are rustic and/or made with whole wheat flour and other healthier ingredients.
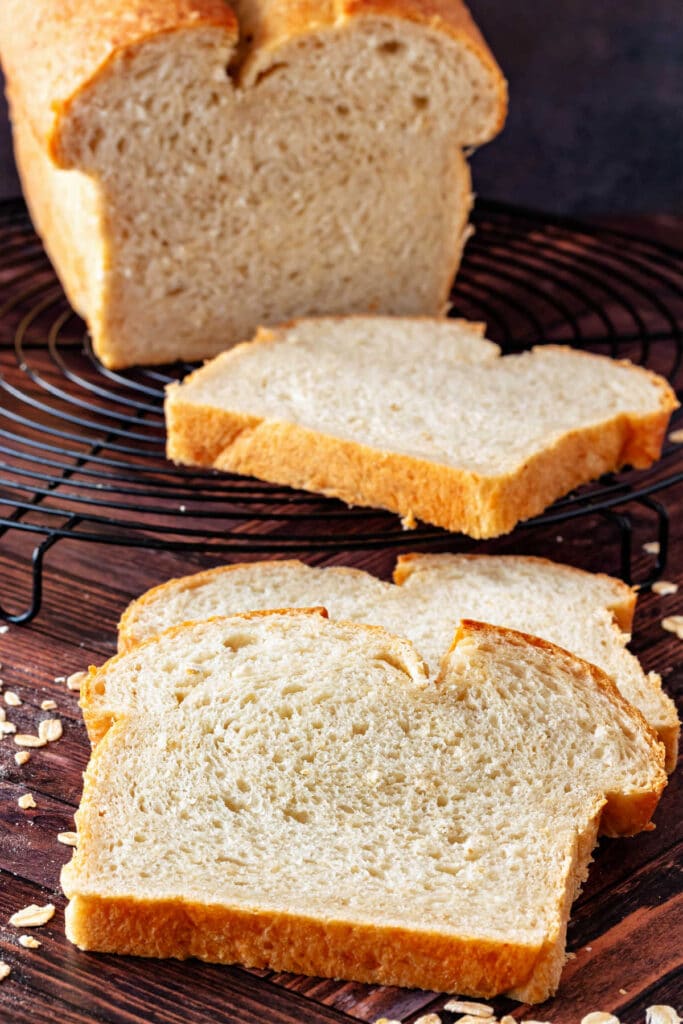
While this bread does contain a hefty amount of oatmeal, it’s otherwise a pretty standard milk bread, which means it’s sweet and soft with an added, cozy, oaty dimension.
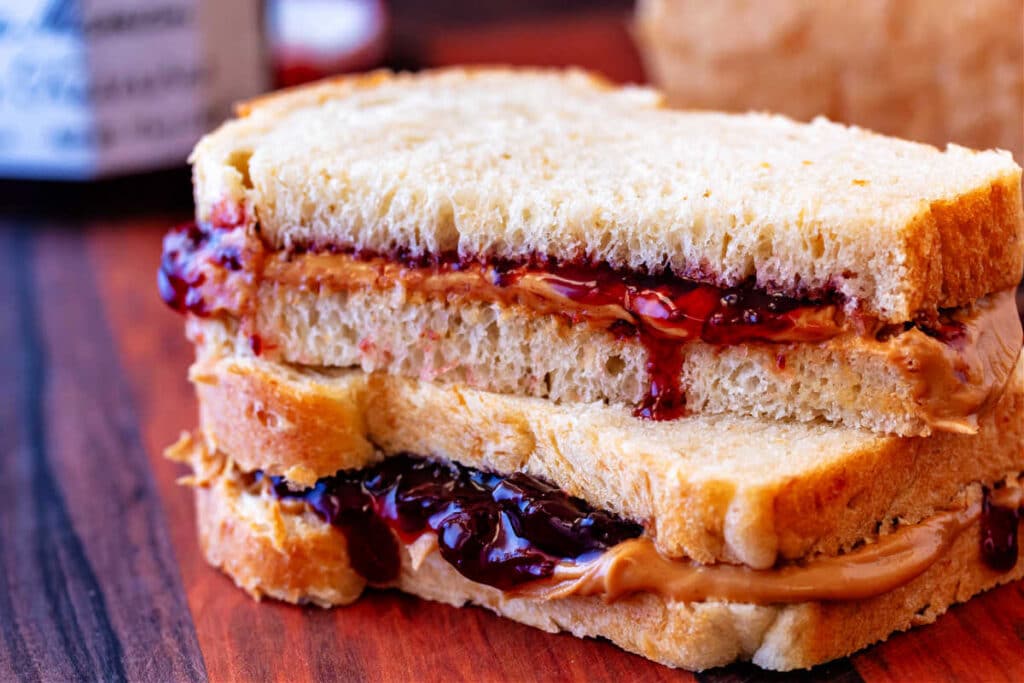
That means you can still make a mean PB&J or bologna and cheese sandwich that a kid would be happy to eat while still feeling good about yourself that you made bread, that it’s sweetened with a less-refined sugar (maple syrup), and that it has a bit extra soluble and insoluble fiber in it.
What I mean to say is this oatmeal bread isn’t necessarily health food. It’s healthier food. For me, it’s the best of both worlds.
If this kind of bread checks all your boxes and you make it, I have a favor to ask:
When you do make this recipe, it will help me and other readers if you:
✅Rate the recipes using the stars in the recipe card
✅Leave a review when prompted in the recipe card (If it’s a positive review, and I hope it is, I’ll use it in the post as social proof)
✅Leave a comment on the post
Thank you so much!
How to Make Oatmeal Bread
If you’re an old hand at making bread, feel free to jump to the recipe.
Otherwise, I’ll go over the ingredients with you, offer substitutions, and show you what your dough should look like every step of the way.
Ingredients and Substitutions
Here are the ingredients you’ll need to make this bread. I’ll give substitutions where it makes sense to do so.
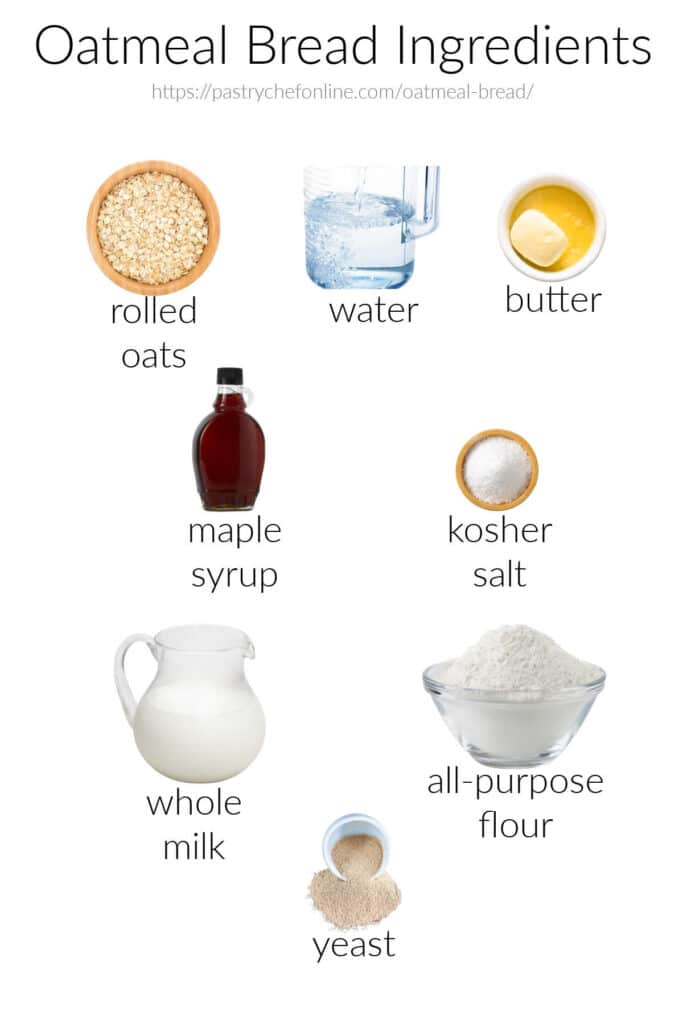
- rolled oats: I use old-fashioned oats. Quick oats should work just fine, although you may need to cut back on the water a bit. I wouldn’t recommend using instant oats just because they won’t add a lot of texture and chew
- water: To par-cook the oatmeal and start softening it. It will cook completely as the loaf bakes, but it’s nice to get a start hydrating the oats straight off the bat
- butter: Brings some fat to tenderize the crumb, carry flavor, and assist in browning
- maple syrup: Adds a bit of sweetness and extra moisture to the dough. You can also substitute an equal weight of honey, golden syrup, or sorghum syrup. You can use molasses, but just know it will darken the crumb quite a bit
- kosher salt: Helps moderate yeast growth and bring out the flavor in the oats, butter, and maple syrup
- whole milk: Adds more liquid as well as some milk sugar (lactose) for a milky sweetness and milk solids to assist with browning
- all-purpose flour: I use King Arthur, which is a high-protein all-purpose flour. If using a lower-protein all-purpose such as Gold Medal, decrease the water for cooking the oats by 1/2 ounce to 10.5. You can substitute bread flour, but in that case, increase the cooking water for the oats to 12 ounces
- yeast: I use instant yeast, but either instant or active dry should do. As long as your yeast isn’t ancient, you shouldn’t need to proof it. Just add it on top of the flour before mixing and kneading
Procedure
This is a fairly straightforward loaf to make. It rises really well and the resulting bread has a lovely, soft, and moist crumb.
In a nutshell, here’s what you’ll do:
- Cook the oatmeal in some water.
- Add it to your mixer bowl and stir in butter, salt, maple syrup, and milk.
- Mix and knead.
- Let the dough rise until doubled.
- Press out the gases and shape the loaf.
- Let the loaf rise.
- Bake, cool, and enjoy.
Again, if you are familiar with the breadmaking process, you can jump straight to the recipe.
If you’re newer to baking yeast bread, I’ll go through the process and share some photo collages that will help you understand what to look for in a well-kneaded dough, what fully risen dough looks like, how to shape a loaf, and more.
Let’s start with making the dough.
Making the Dough
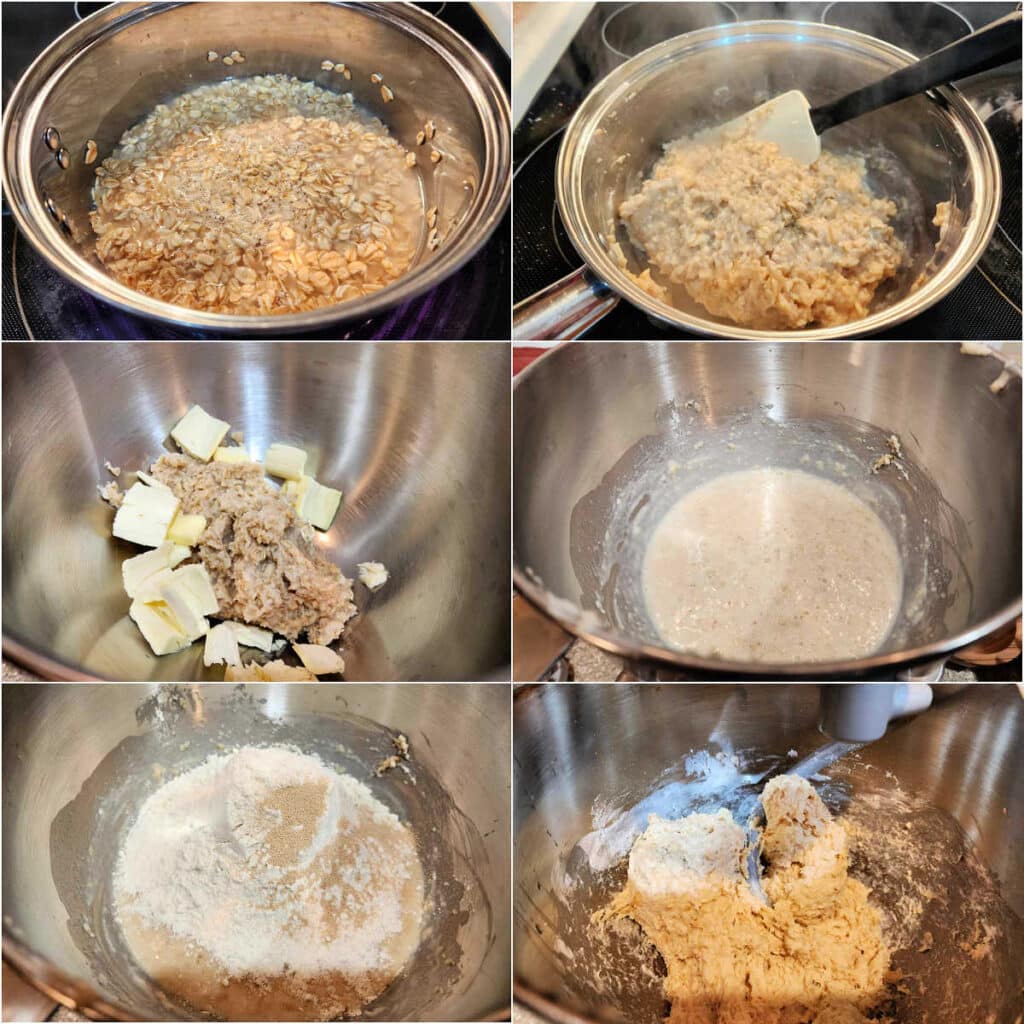
- Add oatmeal and water to a pan. Note that you’ll be using less water than is called for on the back of the bag or box. Use old-fashioned oats, the kind that take about 5 minutes to cook on the stovetop.
- Bring to a boil and cook the oats for 1 minute. They’ll be very thick.
- Remove from the heat and scrape them into the bowl of your
stand mixer along with the butter. Stir well until the butter is completely melted. - Stir in the milk, maple syrup, and salt.
- Scale out and dump the flour on top and then add the yeast on top of the flour.
- Mix on low speed with the dough hook until all the flour is incorporated, about 1 minute. The dough will be wet and sticky.
I do recommend you use a
Kneading the Dough
As I said, the kneading takes a fairly long time, so here are some photos of how the dough will change along the way.
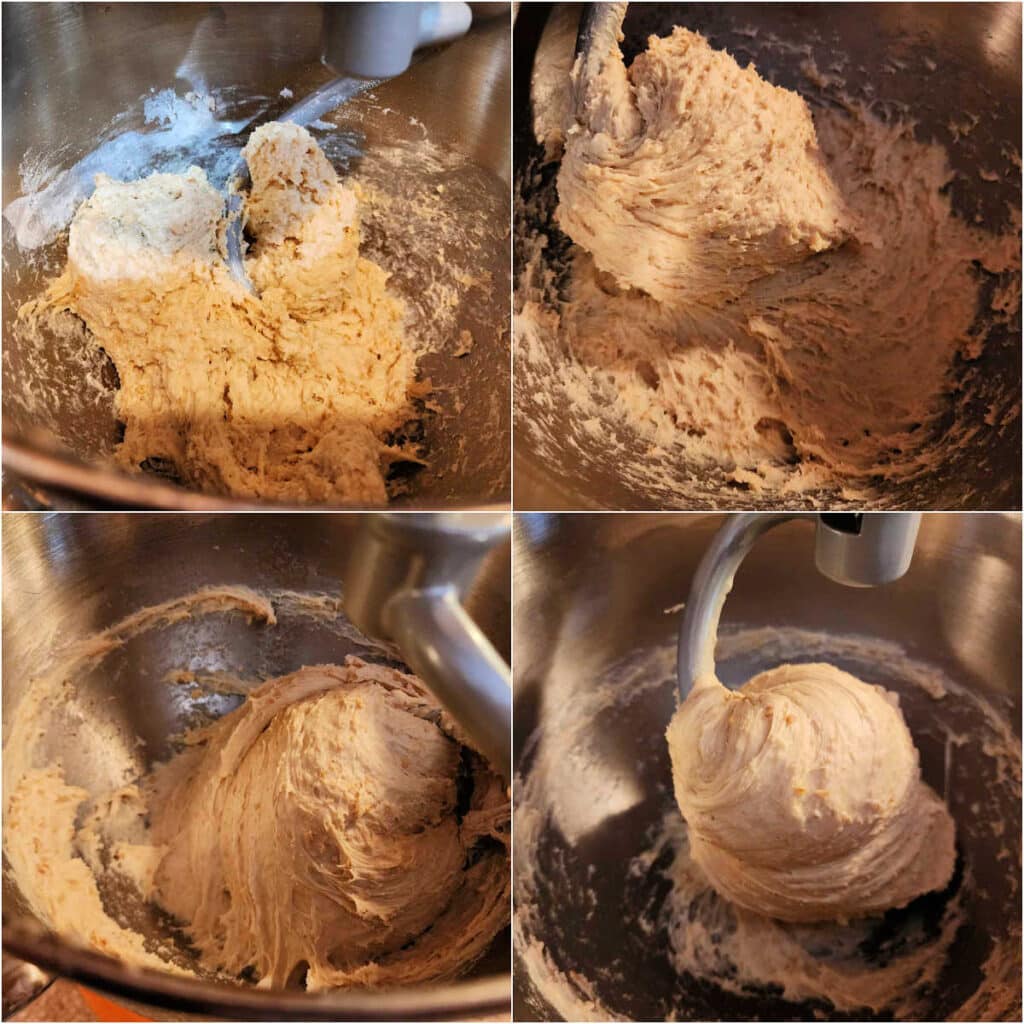
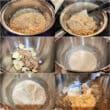
- The dough after 1 minute of mixing on low speed. It has no structure or stretch at this point.
- The dough after 3 minutes of kneading on speed 4 (medium/medium-low). Notice how much dough sticks on the sides and in the bottom of the bowl. The dough is starting to wrap itself around the dough hook and you can see the beginnings of some gluten formation.
- After 7 minutes of kneading, the dough is starting to clear the sides of the bowl and has a lot more structure. It looks much smoother than it did just 4 minutes previously.
- The finished dough after 10 minutes of kneading. See how it almost completely clears the sides of the bowl with just a bit of moderate sticking in the bottom of the bowl.
Lesson: Resist the urge to add more flour. If measured correctly, the dough will come together as the dough hook works to activate the gluten through agitation.
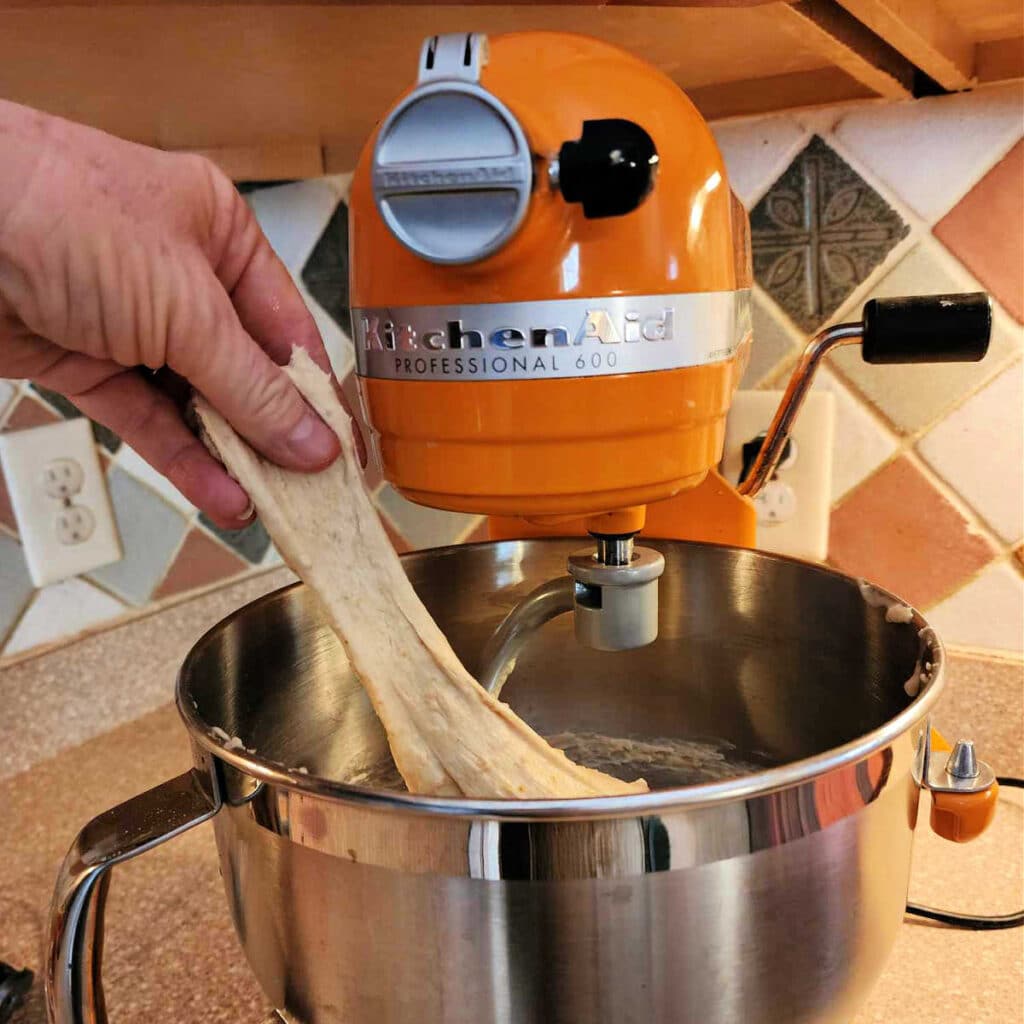
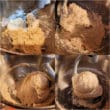
The dough will be soft and very stretchy. It will stick to your fingers. To prevent this, rub your hands with a teaspoon or so of neutral oil or spray them with a bit of pan spray before handling it.
Behold the stretchy dough:
Rising and Shaping
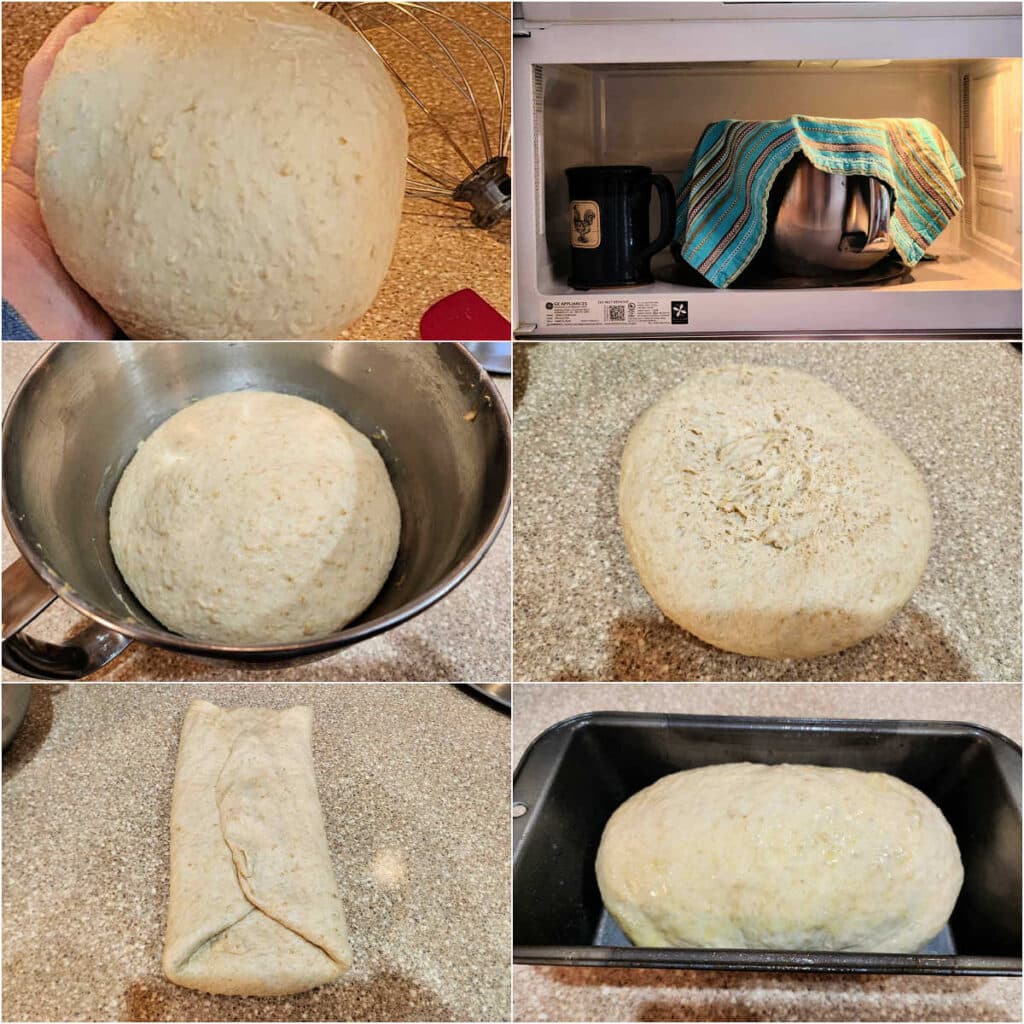
- Gather the dough into a smooth ball, and plop it back into your mixer bowl.
- Spray the top with pan spray, cover, and let rise in a cozy place until doubled in volume, 90 minutes to 2 hours. I set up my cozy spot by boiling a mug of water, sliding it to one side of the microwave, and putting the covered bowl in next to the hot water. Then I close the door to keep the heat inside.
- Once the dough has risen to double in size…
- …dump it out onto a clean work surface and press out the gases.
- Shape the dough into a rough rectangle, bring both long sides in to overlap a bit in the middle, then roll up the dough into a cylinder.
- Plop the shaped dough into a 9″ x 5″ loaf pan, spray the top, lightly, and you know what comes next, right?
Second Rise
Yes, the second rise!
Would you like to save this post?
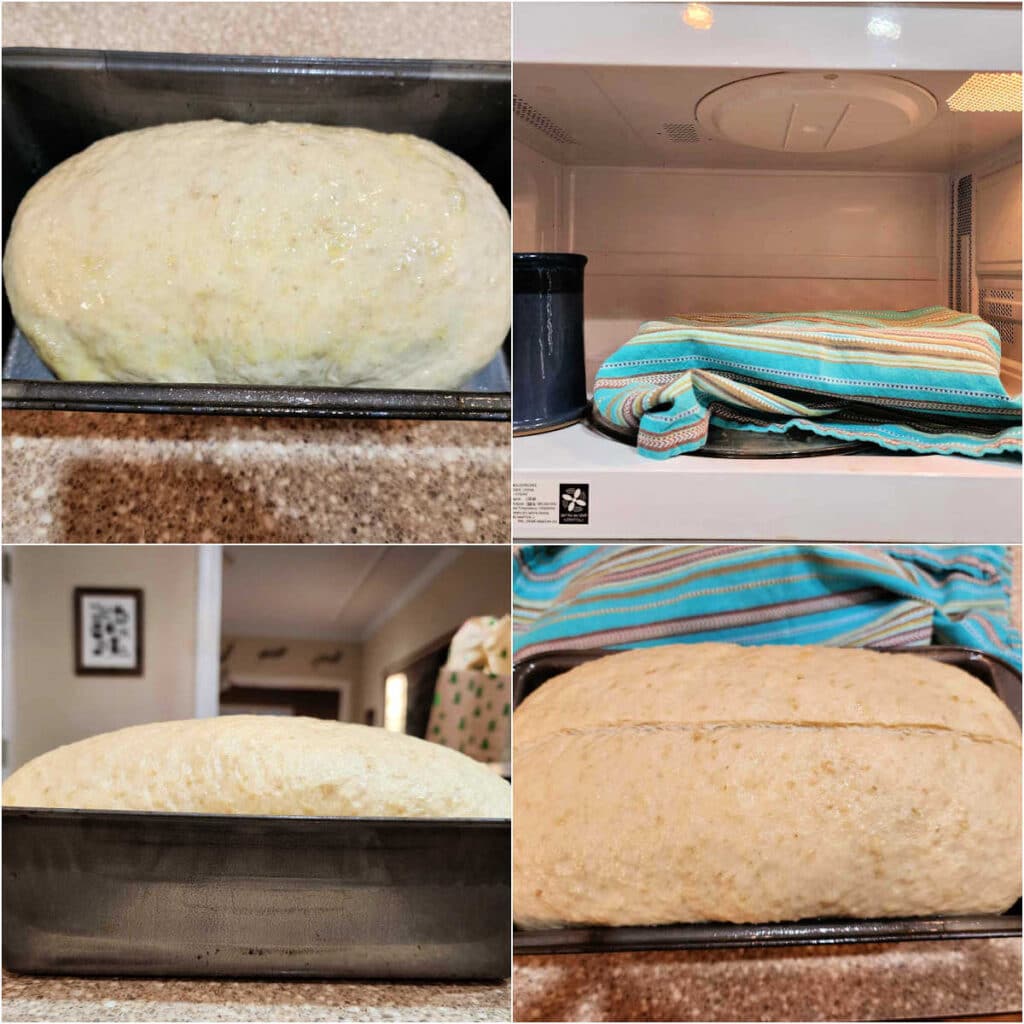
- Cover the shaped and sprayed dough with a towel and…
- …let it rise in a cozy place until…
- …it rises about the rim of the pan by about an inch or so. This will only take about 45 minutes.
- Make a shallow slash along the center of the loaf, and then bake.
This bread bakes in about 40 minutes at 350F.
Variations
Please try this bread as a swirl bread. Add about a teaspoon of cinnamon to the dough along with 6 ounces of chopped dates (the bagged kind you can find near the raisins at the grocery store).
Add the swirl from my cinnamon raisin bread recipe, and you are good to go! Or just make the cinnamon raisin bread, because that’s excellent too!
Option for an Overnight Rise
With almost any yeasted recipe, you can magically put the yeast to sleep by refrigerating your dough at any stage.
This makes yeast dough really forgiving if you have a tight schedule.
The most reasonable times to stop and refrigerate your dough are either
- just after you make the dough and before the first rise
or
- after you shape the dough and pan it up after the first rise.
At either of these points, simply cover the dough, either in the mixing bowl or loaf pan, and refrigerate overnight.
Pull out the dough the next day, let it come back to room temperature for an hour or so, then proceed with the recipe, making sure the dough doubles in the mixing bowl in a cozy place or that the loaf rises above the rim of the pan by about an inch or so.
Easy!
Serving Suggestions
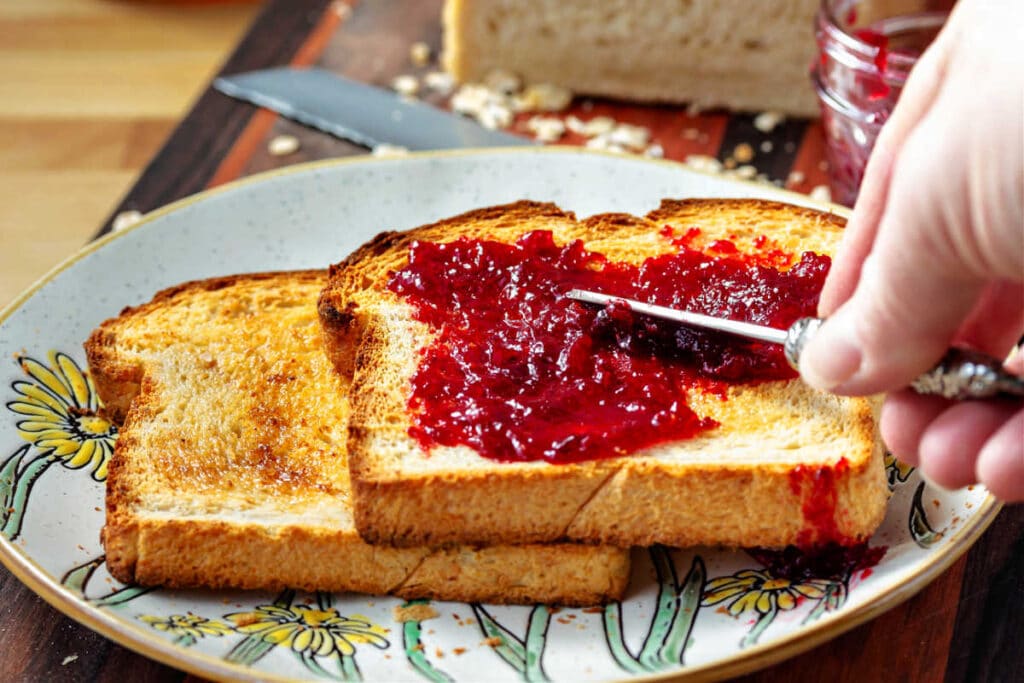
Anywhere you’d use a store-bought sandwich bread, you can use this oatmeal bread. It slices beautifully into thick or thin slices, making it great for hearty slabs of toast or a substantial sandwich.
It’s fantastic with salted butter and jam–don’t miss it with my cran-raspberry jam. That’s how I’ve been devouring mine! Or go super retro and enjoy it with peanut butter and homemade grape jam.
If it starts to get stale on you, turn it into bread pudding, or make French toast with it. The cozy oatiness plays well with maple syrup, especially since the loaf has maple in it.
If you find an especially luscious way to serve it, please let me know what you come up with!
Oatmeal Bread Q & A
It should stay nice and fresh for 2-3 days, well-covered, at room temperature. If you have a big family, it may not last that long. If you need to keep it longer, freeze it.
I slice it with a serrated knife, then place the sliced loaf in a heavy-duty zip-top freezer bag, press out all the air, and then seal it. I pull slices as needed and thaw them either in the microwave for a few seconds or put them straight into the toaster oven if I’m making toast. If you freeze it as soon as it cools down, it will be soft and moist, so place a piece of parchment between slices to make it easier to get them apart once frozen.
Need a gluten-free oat bread option? Check out Sandi’s recipe. She’s a wizard with gluten-free baking!
If you prefer to lean more into the savory side of sandwiches–tuna salad, cold cuts, grilled cheese, etc–do give my sun-dried tomato pesto sandwich bread recipe a try. Thanks to minced, oil-packed sun-dried tomatoes and basil pesto, it has enough flavor to really highlight savory ingredients without overpowering them.
Questions?
If you have any questions about this post or recipe, I am happy to help.
Simply leave a comment here and I will get back to you soon. I also invite you to ask questions in my Facebook group, Fearless Kitchen Fun.
If your question is more pressing, please feel free to email me. I should be back in touch ASAP, as long as I’m not asleep.
A Note About Measurements
My recipes are almost all written by weight, including liquids, unless otherwise specified.
For accuracy and consistency of results, I encourage you to buy–and use–a kitchen scale.
I promise that baking and cleanup will be so much quicker and easier.
This is the scale that I recommend for home use. I have owned and used one for years.
Love This Oatmeal Bread? Please Share It and Review It!
It helps me and other readers so much if you take a moment to rate and review this recipe.
Your star rating and comments help others decide whether the recipe is worth making, and your feedback helps me continue improving recipes here at Pastry Chef Online.
Other lovely ways to share include pinning or posting on your favorite social media platform.
Thank you so much for taking the time!

Oatmeal Bread Recipe
Video
Ingredients
- 4 oz rolled oats not instant or quick-cook, 113 grams or 1 cup
- 11 oz water 312 grams or 1 1/4 cups plus 3 Tablespoons
- 2 oz butter, cut into small pieces 57 grams or 4 Tablespoons
- 4 oz whole milk 113 grams or 1/2 cup
- 1.5 oz maple syrup 43 grams or 4 Tablespoons
- 2 teaspoons kosher salt I use Morton's, 10 grams
- 15 oz all-purpose flour I use King Arthur, 425 grams or about 3 1/2 cups
- 1 teaspoon yeast 4 grams
To Finish
- 1 oz butter melted
Instructions
- In a medium saucepan, bring oats and water to a boil, stirring frequently.
- Reduce heat to a simmer and cook, stirring constantly, for 1 minute. The oats will be very thick and stodgy.
- Remove the oats from the heat and scrape them into the bowl of your stand mixer.
- Add 2 oz/57 grams cold butter, milk, maple syrup, and salt, and whisk to combine and completely melt the butter.
- The mixture should now be warm but not hot, about 100F.
- Dump all the flour on top of the oat mixture, and add the yeast last.
- In a stand mixer fitted with the dough hook, mix until all the flour is incorporated and you have a shaggy dough, about 1 minute.
- Increase mixer speed to medium-low (Speed 4 on a KitchenAid) and knead for 10-12 minutes until the dough mostly clears the sides of the bowl but is still sticking in the bottom. Dough should be smooth (oatmeal notwithstanding), somewhat sticky, and very supple and stretchy.
- With oiled hands, gather the dough into a smooth ball, put it back in the mixing bowl, spray the top lightly with pan spray or brush it lightly with neutral oil, and cover.
- Let the dough rise in a cozy place (I like to use the microwave with a mug of boiling water next to the dough) until doubled in volume, about 90 minutes to 2 hours.
- Spray a clean countertop with a little pan spray or rub it with some neutral vegetable oil
- Scrape the risen dough out onto the prepared surface and evenly press out the gases and shape the dough into a rough rectangle.
- Fold the long ends of the rectangle in towards the center and then tightly roll up from a short end. Place the loaf, seam-side-down, into a 9" x 5" loaf pan, and lightly spray the top.

- Cover and let rise again in a cozy place until the dough rises about 1" above the rim of the pan, about 45 minutes-1 hour.
- Place a rack in the bottom third of the oven and preheat to 350F/160C while the dough is rising.
- Make a shallow slash all along the center-top of your loaf and place in the hot oven.

- Bake for 35-40 minutes until golden brown. The internal temperature of the bread should be between 195-200F. My bread was done in 42 minutes.
- During the last 5 minutes or so of baking, melt the remaining 1 oz/28 grams of butter in the microwave.
- Remove the baked loaf to a cooling rack and brush the top of the loaf liberally with butter.
- Allow the loaf to cool in the pan *turned on its side* for 15 minutes. Then remove it from the pan to cool on a rack, right-side-up, to cool completely before slicing and enjoying.
Did You Make Any Changes?
Notes
To Substitute Bread Flour
Increase the water from 11 oz to 12 for cooking the oats and substitute 14 oz bread flour for the 14 oz of all-purpose. Note I use King Arthur all-purpose which has relatively high protein for all-purpose flour. If using Gold Medal or similar, decrease the water to 10.5 oz.For an Overnight Rise
Make the dough, let it rise, shape it, put it in its loaf pan, and then refrigerate it overnight. Bring it out the next day and let it sit out in a cozy place for about an hour, or until it rises above the rim of the loaf pan by about 1″, before baking. You could also make the dough, spray and cover it, and refrigerate overnight. Shape it the next day and let it rise in a cozy place until it reaches 1″ over the rim of the pan, and then bake.Nutrition
Would you like to save this post?

Hi, y’all! I hope you’ve enjoyed this post and hopefully also learned a thing or two.
If you like my style, I invite you to sign up for my occasional newsletter, The Inbox Pastry Chef.
Expect updates on new and tasty recipes as well as a bit of behind-the-scenes action. I hope to see you there!

Thanks so much for spending some time with me today.
I really hope you enjoy this homemade oatmeal bread. It is so cozy and good!
Take care, y’all.


Join in Today!
I have been looking for a good oat bread recipe and now I’ve got it! WOW! This is so easy and delicious!! The butter and maple syrup flavor it subtly – I am sharing this recipe with my friends!
Yay, Laura! I am thrilled you love it and are sharing the recipe, too! I love how this bread smells in the oven. I’ve also made it with chopped dates and cinnamon in the dough for more of a breakfast bread, and that works really well too. Enjoy every bite!
Amazing! One of my favorite breads to make. It has so much flavor and the recipe is easy to follow.
I am thrilled you like it, Josette! This is one of my favorite loaves on the site. So cozy!
I made this bread yesterday and it is SO GOOD! I like that with the oats being slightly cooked, they don’t leave pieces of dry oats in the finished bread and the texture is perfect. I could hardly wait for the bread to cool so I could have a buttered piece. It was delicious! Even my husband, who is a bread lover, said it was really good and he liked it. It’s soft, moist, and perfect for so many uses. I am anxious to see how it works for sandwiches because I like soft bread. Also a side note, after the first rise, I divided the dough and put the dough in two loaf pans that were just a little bit smaller than a 9×5 because there are just the two of us and we can’t eat a whole large loaf fast enough before it starts to spoil. I double bagged one of the loaves, wrapped it tightly in foil, and put it in the freezer for later. This will help me see how the bread texture is after it’s been frozen and thawed. This may be a good recipe to use as Christmas gifts along with a jar of homemade apple butter!
LaFern! I am so happy you made the bread! I always slice them and then freeze, pulling out slices to thaw when I need them. Hopefully your frozen loaf will be just as good as the fresh when you finally thaw it to use. Enjoy every bite!
Couldn’t you do the mixer, kneading, and first rise in a breadmachine thrn let it rise in a loaf pan and bake in the oven??
I expect you probably could. I don’t have a bread machine, so my only concern would be if the bread machine will hold that volume of dough. But it’s worth giving it a shot. Let me know how it goes, Donna. I hope you enjoy the bread!
Recipe is very good. Makes amazing toast too. Instructions were easy to follow
I am so happy you like the recipe! And I agree about the toast.
What a great recipe! Followed the very clear directions, pictures were a wonderful guide.
Came together easily, not overly sticky, beautiful.
The hard part is waiting for cooling because the aroma is amazing.
So glad you love it, Carlin! It really does smell ridiculously good, right?! 🙂
My new favorite! Easy to make without a bread machine and actually doesn’t break apart when making sandwiches. Speaking of bread machine, I did try this in mine and it rose too fast and deflated. I’ve also tried this with cinnamon and raisin added, perfect!
I’m so happy you love the loaf, Lynetta! So good for sandwiches. Also, good to know it won’t work in a bread machine. I don’t have eine, so I never make bread machine-optimizes recipes. And it really does like the addition of cinnamon and raisins. 🙂