
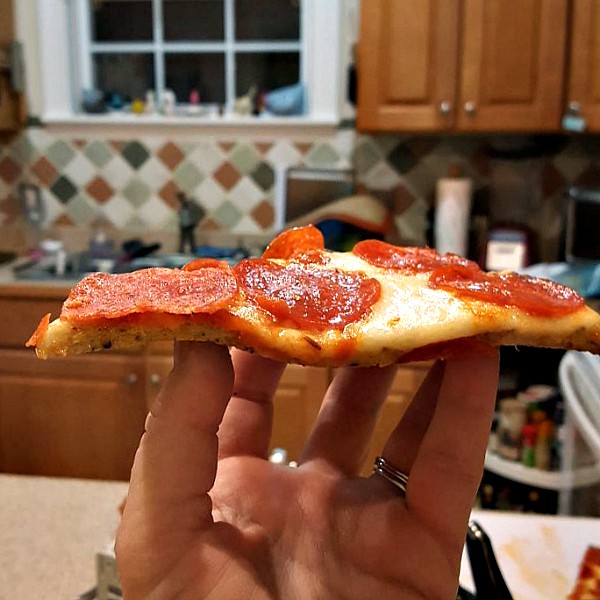
I’m kind of new to cauliflower pizza crust, but by crackie, if I’m going to make a low-carb substitute for regular crust, I’d better be able to pick it up.
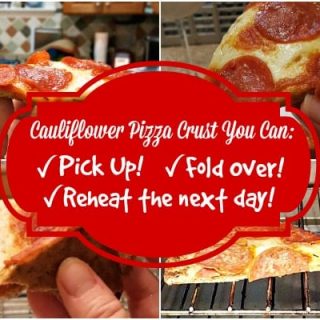
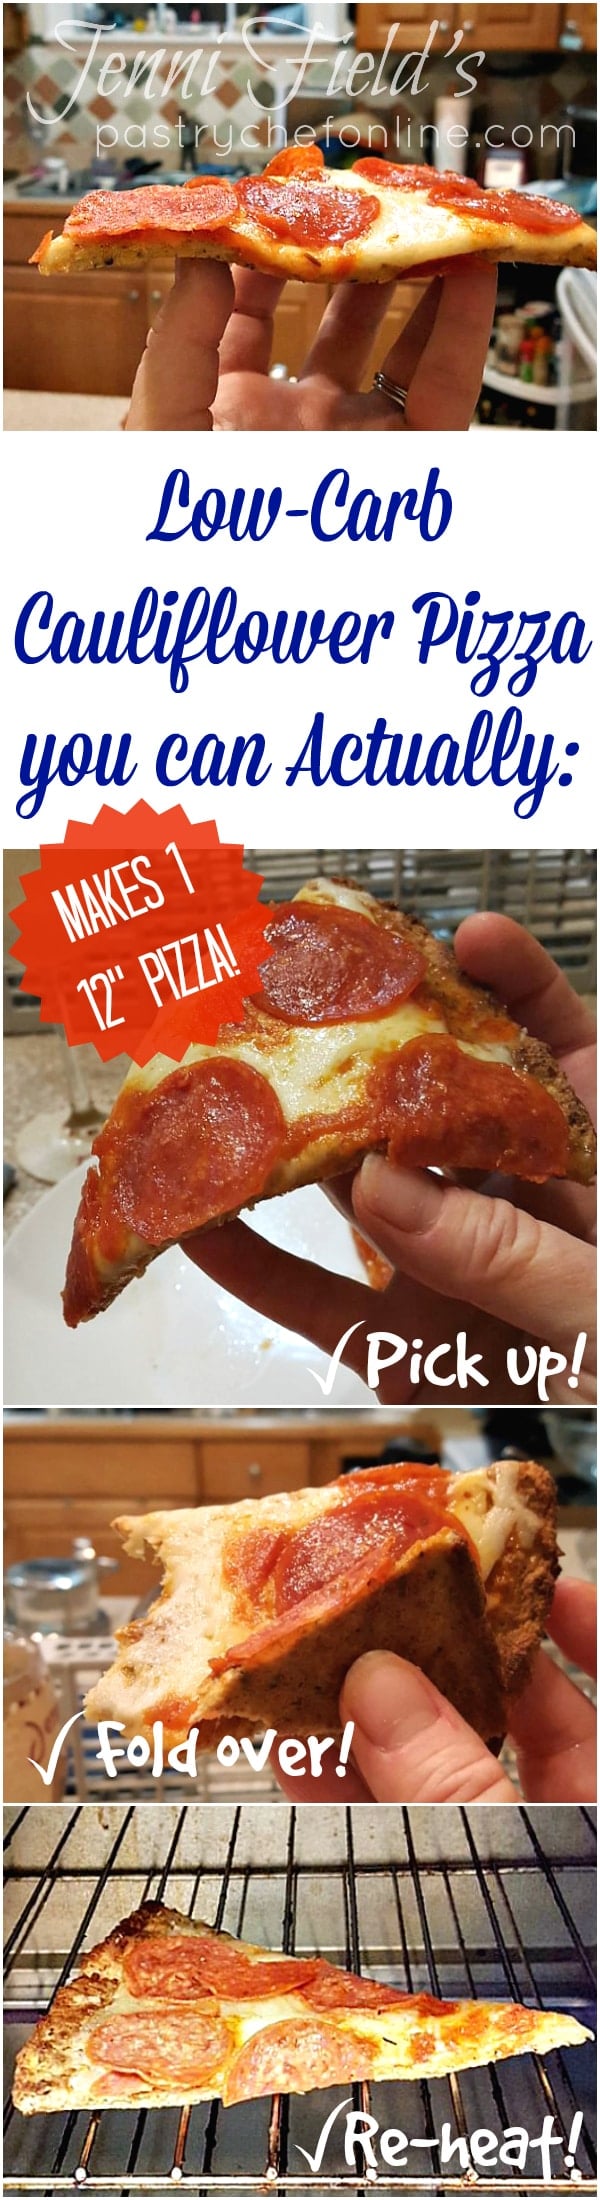
So after some tinkering, I give you cauliflower pizza you can pick up. Not only that, but it also reheats well, or you can eat it cold out of the fridge, just like in your college days. Let’s make some, shall we?
This makes a great appetizer or snack for a gathering. For ease of browsing, here are all of my appetizer recipes.
Another great one to try is my Grandma pizza dough for perfect pan pizza. Thanks stopping by!
You Have To Be Able To Pick It Up!
I really am very new to cauliflower pizza crust, but I’ve been dabbling in eating a bit lower carb these days to make it possible to eat reasonable portions of all the desserts I make for the blog.
So, after hearing a lot about cauliflower pizza, and knowing first-hand how versatile and delicious cauliflower is (hello, sausage and peppers with cauliflower rice), I went out onto the Hinternets to see about this crust.
Lots of the recipes out there are accompanied by pretty pictures of pizza on plates, pizza on baking trays, pizza on baking stones, etc. but very few showed photos of folks actually picking up the pizza in their hot little hand and chowing down on it as God intended.
Pastry Chef Online Participates in Affiliate Programs. If you make a purchase through one of my links, I may earn a small commission. For more information click to read my disclosure policy
Nope–most folks who make cauliflower crusts are really just making a delicate, pizza-shaped edible tray.
Delicious, I’m sure, but really too floppy to pick up. A bit crumbly and prone to tearing. Definitely knife and fork pizza.
If that’s your thing, then a great cauliflower crust can be had–there are tons of recipes that are all pretty similar and all will produce a lovely crust that you can cut in pieces and then lift the bites of pizza to your face. Go for it, y’all. No judgment here, I promise.
But if you, like me, believe in your soul that pizza should be picked up and that being able to pick up a piece of pizza in one hand and eating it out of your fist it is part of what makes pizza so great, join me on my adventure to make a pizza crust that is:
- crisp on the edges
- one-hand-pick-up-able
- (reasonably) foldable like New York thin crust
- reheatable or cold-eat-able this post is for you.
This cauliflower pizza crust really is all those things: crisp on the edges, pick-up-able, foldable and reheatable.
You Can Turn Your Cauliflower Pizza Crust Into Cauliflower Noodles!
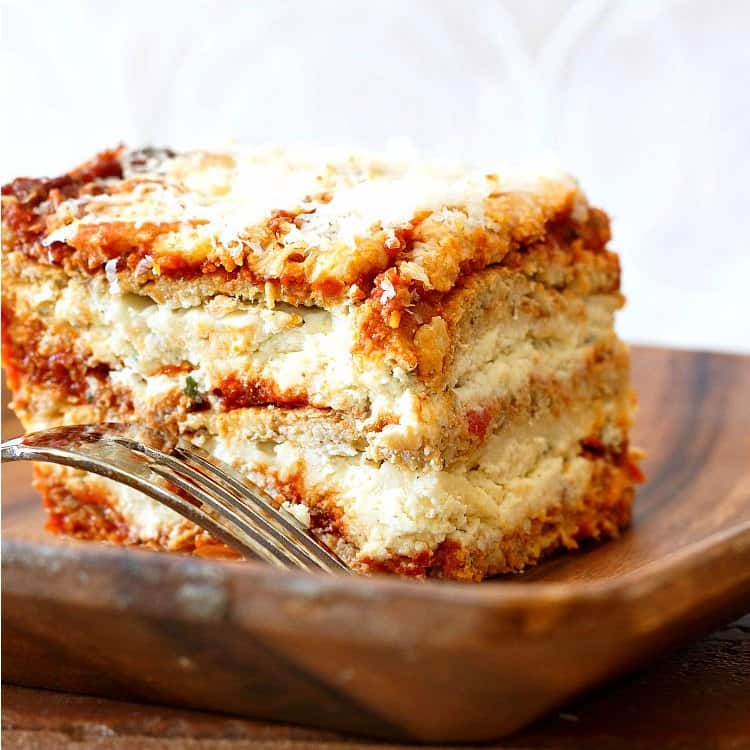
Love this recipe? Grab my Low Carb Lasagna recipe, made with Cauliflower Noodles!
Pretty much the only difference between my cauliflower pizza crust and the cauliflower lasagna noodles is that I spread out the mixture as thin as I can to make the noodles.
Tips for Making Cauliflower Pizza You Can Pick Up

There are a few rules that you need to follow to make sure your pizza maintains structural integrity even in the fridge and even with a fair number of toppings on it.
Let us always promise to follow these rules lest we be sad and end up with knife and fork pizza, even after all our hard work.
Seriously, do follow the rules.
Are there a lot of rules? Yes. Are they hard to follow? No.
- Get and use kitchen scale. I have an Escali Primo that I’ve been using for years, and I highly recommend picking one up. Each head of cauliflower is different: some are small and some are as big as your head. So go with the weight of the florets, not “1 cauliflower” to make sure that you always have the right ratio of cauliflower to binder.
- Bake your cauliflower pizza crust on a pizza stone. It retains heat and ensures your pizza crust bakes evenly and all the way through. I have had this Pampered Chef number for 25 years and it works great, but also consider a pizza steel. I’ve heard wonderful things about them.
- Once you have processed all your cauliflower in your food processor, leave that guy out. You’ll be using it again. No need to wash it first.
- Consider grabbing a nut milk bag. It’s great for straining all kinds of things, including squeezing out cauliflower for cauliflower pizza! And draining pizza sauce (see Rule 7).
- Build your pizza crust on a flat cookie sheet (or the back of a rimmed sheet) covered with parchment paper. You’ll need to bake on parchment, so make sure you have some.
- Put the cheese on first. Yes, that’s right. You can add extra cheese on top of everything, but lay down a thin layer of cheese first to act as a barrier to any juiciness that might want to seep down in and make your cauliflower crust soggy. Depending on your toppings, spread on a thin layer of goat cheese or cream cheese, or use thinly sliced mozzarella. You can grate the cheese too–just make sure it is at least mostly covering the whole crust except for the edges.
- Don’t use pizza sauce straight from a jar. The sauce is too wet, so either strain it through a fine mesh strainer until it’s thick or reduce it on the stove top. Either way, you will be rewarded with a more intensely-flavored sauce since you’ve gotten rid of a lot of the water. Evenly spread or drizzle on about 1/2 cup of sauce on top of your cheese layer.
- Since there is no gluten in this crust to hold it together, piling on a ridiculous number of toppings is not your best plan. Stick with 2-3 toppings.
- Speaking of toppings, don’t use a lot of high moisture toppings. Anything that will give off liquid during cooking (most high moisture veggies like onions, peppers and mushrooms), should get a quick sweat in a pan on the stove top to cook off some of the liquid before using them as toppings. Par-cook bacon if you’re using that, too.
- Larger pizzas have less structural integrity (think of those crazy 2-foot diameter pizzas and how floppy they are), and you are limited by the size of your stone, so make pizzas no larger than 12″ in diameter or plan on cutting larger ones into squares rather than traditional triangular slices. The recipe that follows makes enough dough for 1 true 12″ pizza.
Enough talk. Let’s make cauliflower pizza crust you can actually pick up. And fold. And reheat. As God intended. Amen.
And at the end of the day, you have to ask yourself: “Do I really want low-carb cauliflower pizza I can pick up, or am I okay with knife and fork cauliflower pizza?”
If your answer is that it’s really not pizza unless you can eat it by hand, give this a shot. You will not be sorry. I promise.

Don't let its small price and small size fool you. The Escali Primo is an accurate and easy-to-use food scale that I have used for years. It's easy to store, easy to use, has a tare function, and easily switches between grams and ounces/pounds for accurate measurements.
Cauliflower Pizza You Can Pick Up, Fold, and Reheat the Next Day
It will help me and other readers so much if you take a moment to rate and leave a review for this recipe.
You can use the stars to rate 1-5 (5 is best), and leave a review in the comments. It helps me make adjustments if any are needed, and comments help others decide whether the recipe is worth making.
Other ways to share include pinning, and/or sharing on your favorite social media platform.
Thank you so much for taking the time!

Cauliflower Pizza Crust You Can Pick Up
Ingredients
For the Cauliflower
- 28 oz 1 pound, 12 oz cauliflower florets (some stem is okay, but mostly use the florets)
For the Crust
- all the cauliflower (12 oz after processing, cooking, and squeezing)
- 1 teaspoon kosher salt (less makes a bland crust, so please use it)
- ½ teaspoon dried thyme
- ½ teaspoon dried oregano
- 1/4-1/2 teaspoon freshly ground black pepper
- 1/4-1/2 teaspoon onion powder
- 1/4-1/2 teaspoon garlic powder or granulated garlic
- 2 oz full-fat cream cheese
- 2 Tablespoons finely ground flax-seed (if you buy pre-ground, you want it finer even than that, so run it through your blender or food processor to get it as fine as you can). I do this in bulk when I buy ground flax and then store it in a gallon zip-top bag in the original box in the fridge.
- 1 oz shredded cheddar cheese (I love the flavor the cheddar adds. You can sub Parmesan if you’d like, but do use fresh and not canned. The cheddar is way cheaper, so there’s that)
- 2 large eggs
Instructions
For the Cauliflower
- Place a rack in the center of the oven. Put your pizza stone on the rack. Preheat the oven to 375F.
- Have a rimmed baking sheet ready (it doesn’t need to be sprayed or lined with parchment or anything)
- Process the cauliflower in 3-4 batches until it is as fine as you can get it. It should be the consistency of wet sand. Much finer than for cauliflower rice. If you buy “pre-riced” cauliflower, you will still need to process it, so save your money and just buy whole heads. When each batch is finely processed (about 30 seconds or at least 8-10 2-second pulses), scrape it out onto the baking sheet.
- When all the cauliflower is on the baking sheet, spread it out as evenly as you can.
- Place the tray in the oven on top of the pizza stone and roast for 20 minutes, stirring and turning the cauliflower once after ten minutes.
- Remove from the oven and allow to cool until it is no longer steaming, stirring every once in awhile–about 10-15 minutes. Leave the oven on and the stone in place.
- Once cool enough to handle, scrape all the cauliflower into a lint-free kitchen towel (or put it in a nut milk bag if you have one)
- Be aggressive with your squeezing. After processing, cooking, cooling and squeezing out excess water, you should have 12 oz of cauliflower pulp to use to make your pizza. Tada!
- Once again–you’re losing an entire pound in weight, so squeeze mightily!
To Make the Pizza Crust
- In the bowl of your food processor fitted with the metal blade, combine the cauliflower pulp and all the rest of the ingredients. Pulse and process until everything is evenly combined.
- Taste a tiny bit (if you’re concerned about food safety, use Pasteurized eggs or taste the mixture before adding the eggs) and adjust seasoning as necessary.
- Line the back of a rimmed baking sheet or a flat cookie sheet with a sheet of parchment and scrape the dough out into the center.
- Using your hands, pat into a 12″ circle. Once it’s mostly there, use one hand cupped around the edge to form the outer crust and use the other hand to pat the dough out evenly. When you’re done, you’ll have a lovely even circle of dough with no cracked edges. You can build up the edge just a wee bit thicker than the rest, but it’s not necessary. Dough will be about 1/4″ thick.
- Open the oven and slide the parchment onto the pizza stone.
- Bake for 12 minutes.
- Rotate the parchment 180 degrees and bake an additional 12 minutes.
- Pull the parchment out onto a flat cookie sheet. Place a round cooling rack on top of the crust and then carefully flip the whole thing over so the parchment is on top. Slide the crust back onto the pizza stone and peel off the parchment. Bake an additional 10 minutes.
- Do the cookie sheet/cooling rack maneuver again to flip the crust right-side up onto the stone, turn off the oven, prop open the door a bit and let the crust sit to dry further for another 15 minutes.
Build Your Pizza
- Spread on a thin layer of spreadable cheese (goat cheese or cream cheese) or evenly cover the crust with a thin layer of shredded mozzarella or other shredding cheese (Cheddar or what have you)
- Spread or drizzle on your reduced/drained pizza sauce (it should be almost as thick as tomato paste. Use about 1/2 cup. You can also just save the sauce for dipping the baked pizza in if you’re concerned about the moisture.
- Add your toppings. Make sure none of the raw toppings are too large or thick, so cut as needed. Sweat any high moisture toppings for a few minutes in a skillet to get rid of some of the moisture.
- Par-cook bacon if using.
- Arrange toppings evenly on the cheese. Add a bit more finely grated cheese if you want–Parm or Romano or grana–whatever you like.
- Use a cake spatula or pizza peel to place the pizza back on the stone and bake for 10 minutes at 375F.
- Remove the pizza and allow to cool for 2-3 minutes before slicing and serving. Pick up at will. Enjoy.
- **Optional** After baking, place a rack on the top setting and broil the pizza for 1-2 minutes to get a bit of color on the cheese and toppings.
Did You Make Any Changes?
Nutrition

Hi, y’all! I hope you’ve enjoyed this post and hopefully also learned a thing or two.
If you like my style, I invite you to sign up for my occasional newsletter, The Inbox Pastry Chef.
Expect updates on new and tasty recipes as well as a bit of behind-the-scenes action. I hope to see you there!


Join in Today!
WAY,WAY,WAT TOO MUCH TIME FOR A PIZZA. I did read the 1 hr 45 mins. Prep time, but it took even longer with the clean-up, the chopping, the sautéing,,the homemade sauce. WE WERE FAMISHED BY THE TIME THE
PIZZA WAS READY TO EAT. By now, I could have prepared almost anything. My husband was ready to call pizza delivery— keto or not(. (they do have a cauliflower crust).
After all that, we rated it only OK. Thanks for sharing your recipe. You obviously care about attention to detail with all the in and out of the oven.
BUT, for the time involved , II definitely will NOT be making it again.
Sorry you didn’t love it. It does take a bit of prep, and I try to show all of that in the post. I’m sure there are much less labor intensive pizzas out there. Take care!
MMM YUMMZ. Made this tonight and am very pleasantly surprised. It was very flexible and the tip about sprinkling some cheese on first was brills. FYI no pizza stone so I didnt use it. Not a prob. Also, I grated my cauli prior and froze it. Lots of water was separated after thawing so super easy to drain off before cooking. Nutmilk bag did the trick for me. I think if it is freezable as a whole crust I would vacuum seal it for sure. But I am seriously doubting that experiment, just from my kitchen experience. I used 1/2 dry and 1/2 fresh parmesan also, as thats what I had. And grated white cheddar. I was shocked at the amount of liquid in the sauce, so thanks for that one also. I definately want to make this one again. Just a final note on the cauliflower flavor… for me it was mild. I could taste it, but not overwhelming. If I didnt like cauliflower I may not care for this recipe at all. But we all love it and this is a big win for us. Thanks so much 😉
Hooray! I am so glad you guys liked the crust! Seems like folks who don’t like cauliflower would do better to make some other sort of crust, I guess. Although if you didn’t like cauliflower, I guess you could up the seasonings a bit more to mask the flavor. Also really great to know it turned out just fine even without a pizza stone. Sweet!
I literally just made this and ate a piece. 2/3 of my children are currently eating it and loving it. I even had to leave out the last crust baking step before the ingredients (we were running out of time) and it still came out perfect!
I am wondering, do you think it’s possible to make, freeze and reheat these for later use? It’s time consuming but would be worthwhile to make several at once because it is that good.
Thanks!
Hey, Nicole! I am so glad you and your family are liking this crust! Yay! I haven’t tried to freeze them, but they do hold up well in the fridge. And since most of the liquid gets super squeezed out of the cauliflower, I don’t think anything awful would happen if you make and freeze these in batches. Just be sure to wrap them really tightly and let them come to room temp before unwrapping so they don’t get wet. If they do become a little fragile, I am pretty sure putting them in the oven for a few minutes should help with that. If you do try freezing them, please let me know how they do, and I can add that to the post! Thanks, and enjoy!
Thanks!!! I’ll give it a try!
Have you ever tried making a Vegan version of this? I have several Vegan family members and I’m always looking for new things to make. Thanks!
I haven’t, but I can do some research for you. Off the top of my head, you could probably use flax eggs and Daiya cheese, but I’m not really sure if these products would have the “holding Power” as the non-vegan ingredients. I’ll comment again when I find one that looks good. I’ll also ask some vegan friends.
Great! Thank you! 🙂
but can you taste the cauliflower when you do this recipe?
Honestly, since so much of the liquid gets squeezed out, the pulp that is left has very little flavor. Plus there’s cheese and spices in it which help to mask any cauliflower flavor. I can’t tell you if you will or will not taste it, but I would say if you can taste it, it will be pretty mild.
Just thought you should know I don’t leave comments but I tried this and used almond mill in place of the flax seed and it is the best recipe ever thank you so much!
I am thrilled you like it! I love your almond meal sub, too. I’ll have to give that one a whirl!
Jenny: I have tried cauliflower pizza crust and been sorely disappointed.
I’m going to give yours a try and see how it goes.
My favourite topping is fresh tomatoes and black olives.
Is this okay with this providing I use Roma and scoop any seeds out?
I’d make sure to slice them pretty thinly, but Romas tend to be meatier and less “runny” than other types, so I you should be fine if you just use a few slices scattered over the top. Let me know how it goes, Charlie!
I have made plenty of “Knife and Fork” cauliflower pizza crusts, your rules blew my mind…and the cheese down first …. BRILLIANT! Hold it, fold it, reheat it…. AMEN indeed!
Yeah, baby! Let me know how you like it! I doubt it’s possible to truly replicate a “regular” crust with cauliflower, but this comes pretty darned close! Enjoy, Katryna!
Yummies!! Looks absolutely delicious!
Thanks, Ansh! I’m super happy with it!! Yay!
This is completely intriguing, and you my friend, showcased its virtues splendidly. Bravo!
Why, thank you, Brooks!! This was fun to work on–and it was very tasty too, so hooray!!