This is a baking troubleshooting guide I put together to answer some of your baking questions. Answers to some questions I get asked a lot, answers to questions you might not have thought of, and answers to questions that can help you become a better baker.
This is part of my Fundamental Friday series where I help to demystify techniques or explain them as fully as possible. For ease of browsing, they’re all in one place. Enjoy!
Common Baking Questions Answered
Even folks who bake on a regular basis have questions pop up sometimes about ingredient function or mixing methods.
Here’s a sampling of these baking-related questions along with as complete an answer as I can give in a list as well as links to more thorough explanations.
This is generally a function of too low an oven temperature.
You want cupcakes to set up gradually and just have the barest dome–the better to accept frosting.
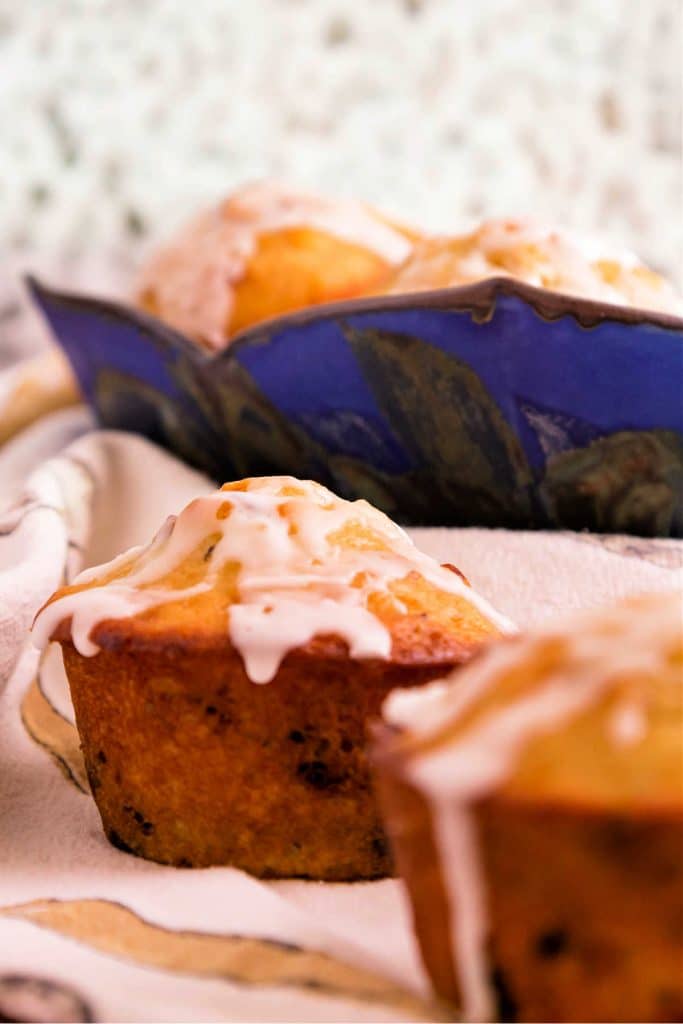
With muffins, you want the edges to set up quickly, forcing the rest of the batter UP. As the muffins set rapidly from the outside in, you end up with a majestic peak. So, cupcakes bake at 325-350 degrees, F, and muffins bake at 400-425 degrees, and sometimes even a bit higher.
For more information, check out The Muffin Method.
This is caused by too much gluten development in your batter.
When mixing using the muffin method (all wet onto all dry and stir), mix just so the batter is barely together.
Lumps will sort themselves out of their own accord, but once you get that liquid in the flour, gentle is the name of the game.
Use a low-protein flour like cake flour, as well. That should help.
Learn more about how to choose the right kind of flour here.
If you’re not looking for flakes, you want a really wet dough–so wet that you have to flour your hands in order to form the biscuits.
The “extra” liquid will produce a lot of steam in a hot oven, and this will help your biscuits bake up fluffy, light, and tender.
Stay away from any recipe that talks about “kneading the biscuit dough.” That’s a recipe for “tough”. It’s okay for flaky biscuits, but if you want those really tall, fluffy Cracker Barrel biscuits, go with a very wet dough.
Everyone’s favorite food geek, AB, has a really good Southern biscuit recipe that illustrates this.
Learn more about how to do The Biscuit Method.
Butter melts very quickly, and all at once. At one temperature, it’s solid, and then you blink, and it’s all melted.
If the butter melts before the structural elements (starches and egg proteins) set up, you’ll end up with a very flat, oddly shaped wafer of a cookie.
All-butter cookies tend to spread more than cookies made with all (or part) shortening. If you don’t want to go the shortening route (I try and stay away from it, although it is good for some stuff), try shaping your cookies and then putting the whole tray in the fridge or freezer for thirty minutes or so–the race between butter melting and starches and proteins setting up will be more even this way, and you’ll get less spread.
Oh, also, don’t flatten the dough much–just lightly press down. You want the dough to be thick enough that it takes the heat a while to penetrate. Meanwhile, your starches and proteins will have a chance to start setting. And don’t put your dough on hot cookie sheets.
If you have to re-use a cookie sheet, run it under cold water for a few seconds to cool it off. Then dry it and bake on that.
Learn about The Creaming Method for making cookies, or check out all my cookie recipes.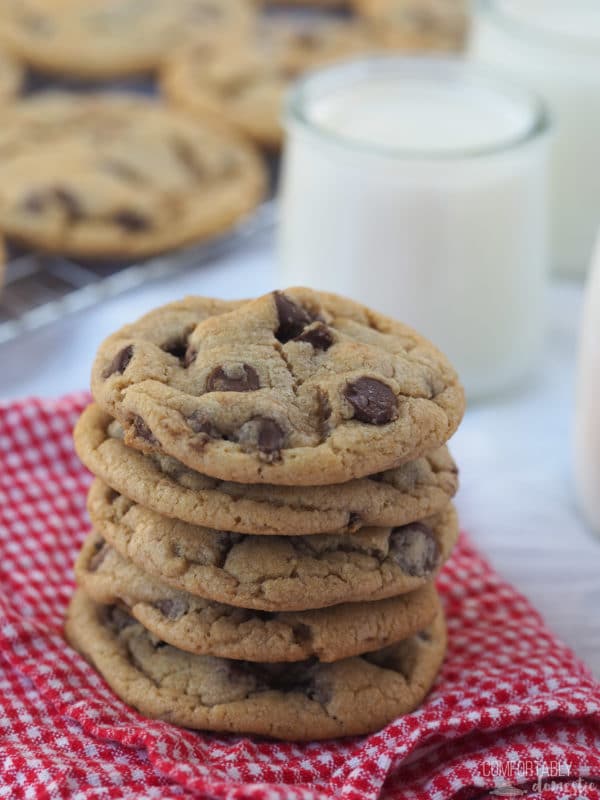
If you’ve prepared your pans properly (points for alliteration), you won’t have any trouble turning out your cakes.
For flat-bottomed, straight-sided pans, spray the bottoms and up the sides thoroughly with pan spray–pick your favorite–cut a piece of magical Release foil or some parchment paper to fit in the bottom. Then, lightly spray that, too.
Once your cake is out of the oven, let it cool for 10-20 minutes in the pan. This gives the still-woogly starches and proteins time to set up more firmly and not break into chunks when you try and turn it out.
Once the cakes have cooled a bit, place a cooling rack on top of the cake pan. Holding the two firmly (with oven mitts or towels, please) flip them over.
Whack the bottom of the pan lightly (Is it possible to whack lightly? Whatever.) and remove the pan. Pull it straight up so you don’t mess up your cake.
If the top of your cake isn’t flat, you’ll want to cool it right side up. Put another cooling rack on top (which is really the bottom) of your cake. You now have a cake sandwich with cooling rack bread. Grasp this whole contraption firmly, and turn it all over. Remove the first cake rack, and let your lovely cake cool, right side up.
Find all my cake recipes (and poundcake recipes) in one place. Well, two places. But still.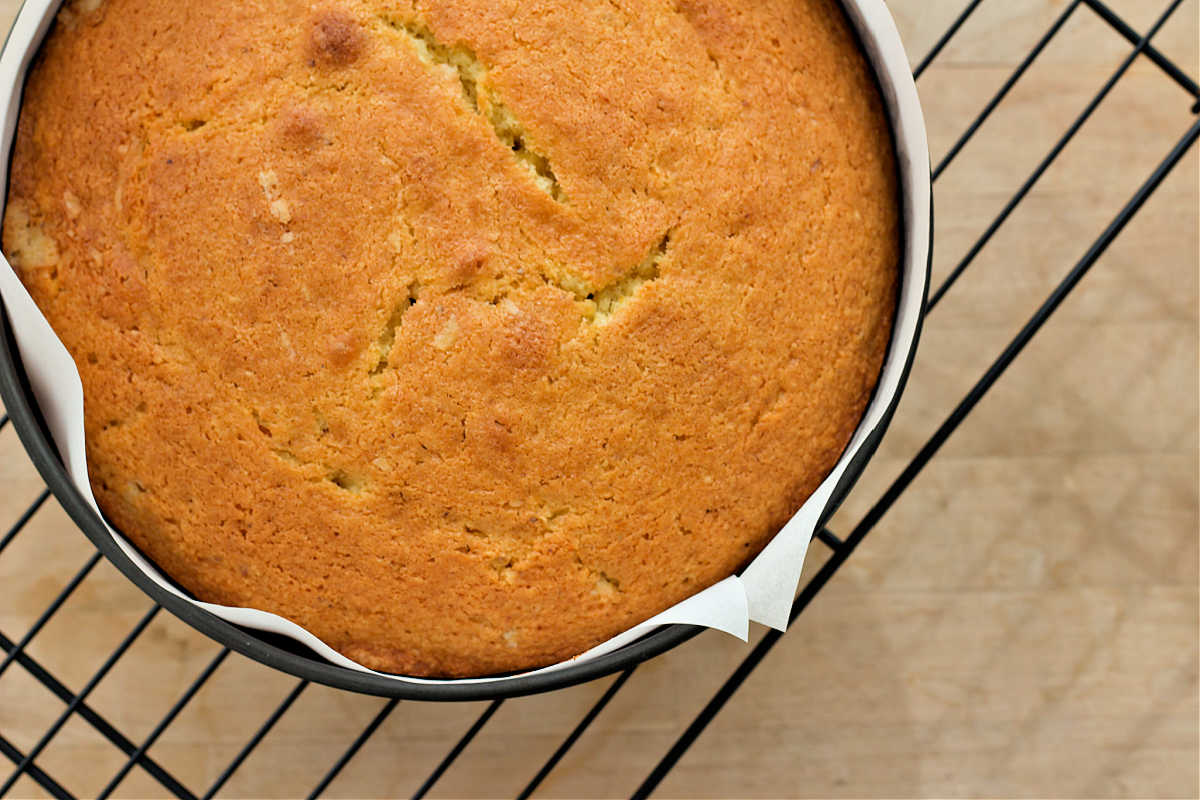
First, brush all the crumbs that you can off of the cake. Use a pastry brush for this.
Make sure your icing is thin enough to spread. Test it–if it wants to curl up around your spatula as you’re trying to ice, it’s too thick and needs to be thinned out with a little water, milk or other liquid.
Once your icing is the correct consistency, apply a very thin coat of icing all over the cake. This is the “crumb coat.” It is a coat of icing designed to trap any crumbs that might be lurking, ready to make your icing job all speckled and sad.
Put your cake in its swanky new crumb coat into the fridge to let the icing firm up.
After half an hour or so, you can add your final icing coat.
Do the sides first with a small, offset spatula. You don’t have to be very neat at this point. Just get frosting on the cake.
Once the sides are all covered, hold your spatula 1/4″ away from and parallel with the sides of the cake.
Angle the spatula to scrape away extra icing. Then, slowly spin your turntable, scraping the extra icing into the bowl.
Next, scrape/dump a ton of icing on top of the cake, spreading it out to hang over the edges of the cake by a little bit.
Scrape extra icing back into the bowl.
When the icing is as thick as you want it (maybe 1/3″), perform the little sides-of-the-cake number again–just the scraping portion.
What you now have is a cake with smooth sides and a little icing “perimeter wall” standing up maybe 1/2″ all the way around the cake.
Knock those edges down using your icing spatula in a sweeping motion from the edges to the center of the top, one section at a time. scraping all the extra icing back into the bowl.
Now you should have a fairly smoothly iced cake to decorate however you’d like. Tada!
Find all my icing and frosting recipes here.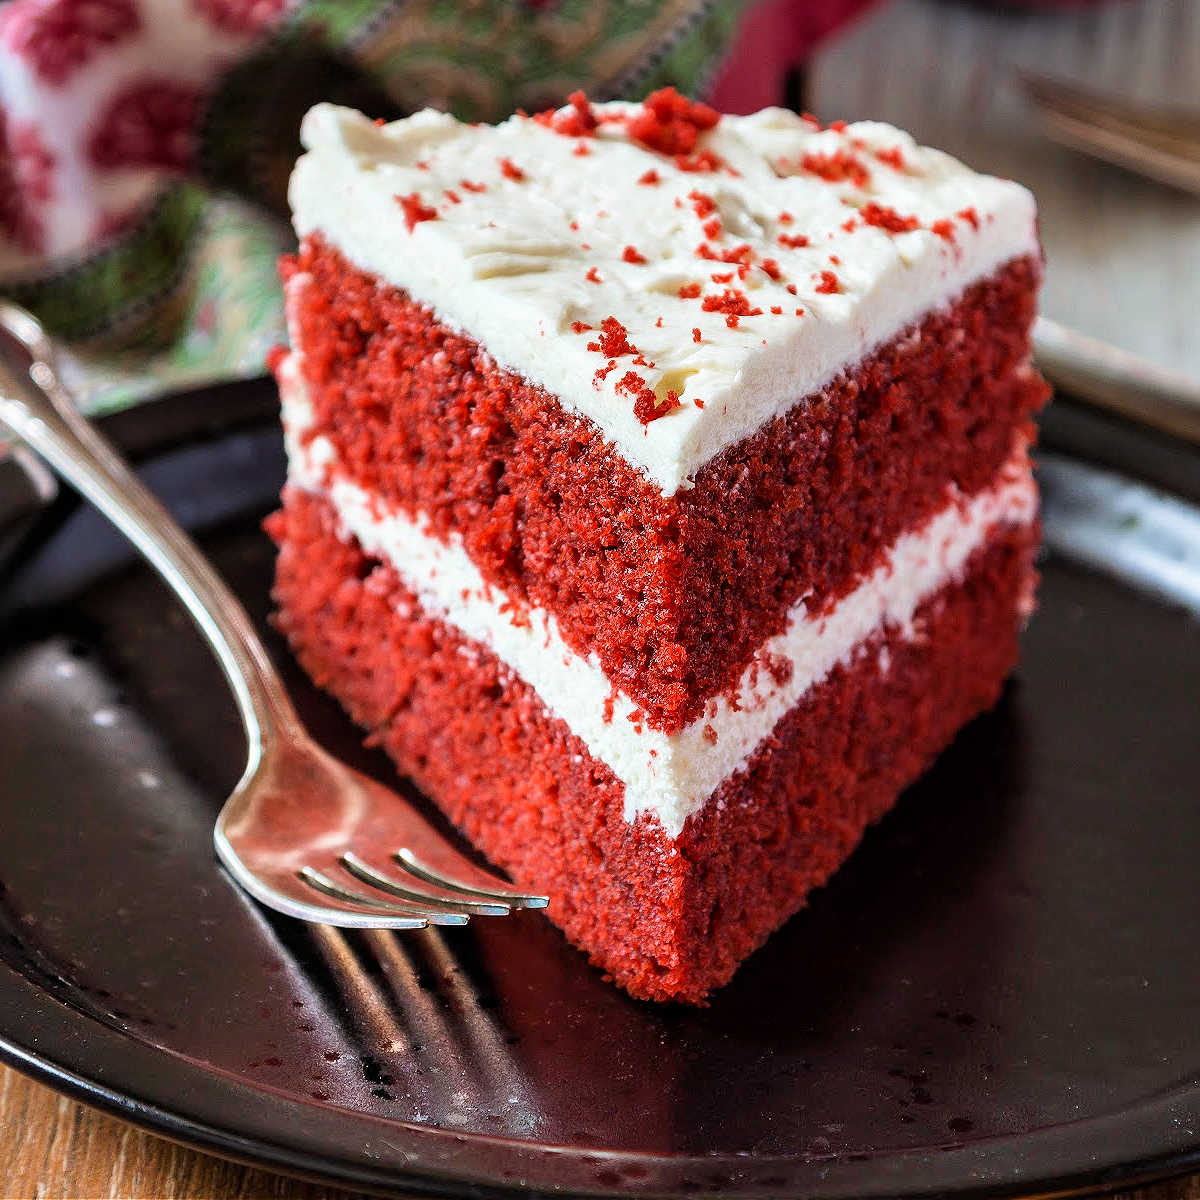
And there you have it friends, answers to your baking troubleshooting questions.
Pastry Chef Online Participates in Affiliate Programs. If you make a purchase through one of my links, I may earn a small commission. For more information click to read my disclosure policy
If you have any other questions, don’t hesitate to get in touch. I am happy to help. Just shoot me an email!
If you enjoyed this post and want more of the same, here’s how to sign up for my newsletter. I’d love to pop into your inbox occasionally to say howdy!

Hi, y’all! I hope you’ve enjoyed this post and hopefully also learned a thing or two.
If you like my style, I invite you to sign up for my occasional newsletter, The Inbox Pastry Chef.
Expect updates on new and tasty recipes as well as a bit of behind-the-scenes action. I hope to see you there!
Thanks for spending time with me going over some baking troubleshooting questions. Take care, and have a lovely day!


Join in Today!
Just a point of contention – you don’t actually WANT to get peaks on your muffins. Peaked muffins have been overmixed. A properly mixed muffin not only doesn’t have tunnels, it also has a rounded, bumpy top.
Point of contention duly noted. I, however, will continue to make peaked muffins. The peak comes more from the higher baking temperature, causing the sides to set up quickly and thus pushing the center higher, and less from over-mixing, in my opinion. Regardless, thanks for stopping by. 🙂
This is awesome. I’m going to print it out and put it in my recipe book.
Might I be so bold as to add a question: why does my pastry always, ALWAYS shrink so much when I’m pre-baking it? It always shrinks down below the sides. Drive me nuts!
will
http://recipeplay.com
Jenni,
You’re a genius! I have a question for you … you said mix wet into dry for muffins … what happens if you mix dry into wet? Just curious because adding an egg to dry mix always bugs me. I don’t feel like it mixes in well (and I’m so lazy I don’t want to lightly beat it in a cup before adding — more dishes to wash).
Merry Christmas Jenni. Do you do your baking in a gas or electric oven?
Merry Christmas Jenni!! I’ve enjoyed your posts and look forward to the new year.
Thanks for writing on my blog the other day! Sorry for the delay – wrapping up work before winter break has slowed my work on my blog. I love your site and I think you’re right – we definitely have similar career paths and loves! Thanks for turning me on to your website – it’s great!
Merry Christmas, Jenni! I look forward to seeing what you’re cooking up next year!
Wow, you rock! You answered questions I didn’t even know I had. All these years my biscuits weren’t rising enough – now I know why. Since I’m Southern, I thought I was genetically defective, to have such tough biscuits. And I can’t wait to try the cookie and cake tips.
Merry Christmas, J and J! I hope you guys have the most awesomest of holidays.
Thanks for the baking tips, Jenni.