I’m glad you found me, because today I’m going to teach you everything you need to know about scalded milk and how to scald milk. And not only how to scald milk, but why to do it and even if it is really necessary to scald milk.
Let’s get to it, shall we?
This is only Fundamental Friday post number three, and I am already so glad I started this series, because it seems like everyone has a request! Yay!
Today’s topic: What is Scalded Milk, How to to do it, and maybe even more importantly, why or even do I have to in the first place.
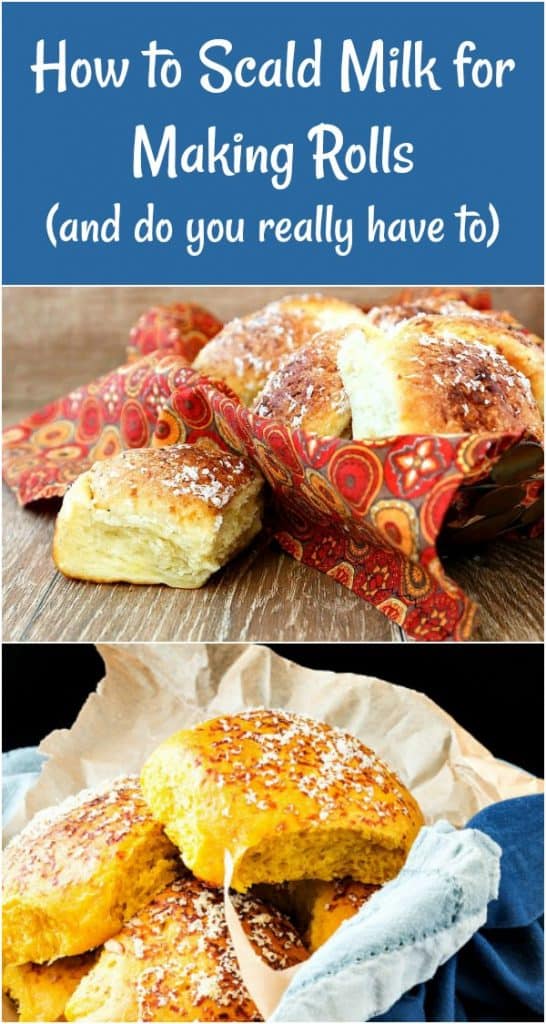
I wonder if you’re here because you want to make some soft dinner rolls?
Pastry Chef Online Participates in Affiliate Programs. If you make a purchase through one of my links, I may earn a small commission. For more information click to read my disclosure policy
Many older recipes for dinner rolls call for scalding milk. Read on to find out why, but first,
What Does It Mean to Scald Milk?
First of all, scalding is kind of a scary term. We think of molten coffee causing second and third degree burns. It was scalding hot. The child nearly scalded herself with the tea kettle. Scary stuff.
According to Dictionary.com, there are two main definitions of scald:
- to burn or affect painfully with or as if with hot liquid or steam
- to heat to a temperature just short of the boiling point: to scald milk.
And that second definition is the one meant when folks talk about scalding milk.
Scald, as it relates to food (specifically dairy) is also a fairly old term. Back before Pasteurization, milk did have to be scalded to:
- kill bacteria
- stop enzymatic activity
- denature proteins (that can get in the way of gluten formation, so this last one is specifically related to scalding milk before making bread.)
Pasteurization Changes Everything. Or Does It?
Now that milk is routinely Pasteurized, bacteria and enzymatic activity are not so much an issue since Pasteurization is a heating process that shuts down most enzymatic activity and kills most bacteria. And the milk proteins will most likely denature at Pasteurization temperature, too.
But, since nothing is ever simple, most Pasteurization processes involve holding the milk at a temperature that is below scalding temperature (180F) for certain periods of time.
For example, Organic Valley (love their half and half in my coffee!) Pasteurize their milk by holding it at 161F for 15 seconds, and this is 19F below scalding temperature.
It’s also 21 degrees above the temperature at which heated foods are deemed safe, so most likely, all bacteria are killed (they quote 99.9%) as well as the enzymes. And again, most likely the proteins have denatured enough to not mess with your yeast in your bread recipes.
Any dairy product that says “Ultra High Temperature Pasteurization” or UHT has been heated to a billion degrees. Oh, okay. Not a billion. 280F, actually.
Still, no respectable enzyme or bacteria would be able to withstand that amount of heat. Besides, that’s way over the scalding temperature, so using UHT dairy without scalding is probably fine.
So, Do I Really Have to Scald Milk?
I know I seem to be hemming and hawing a bit, using words and phrases like probably and most likely, but there’s also tradition to consider. And there’s also erring on the side of Extreme Caution.
First, tradition. Many tried and true bread recipes, especially in older cookbooks, specify “scalded milk,” “milk, scalded and cooled” or some variant thereof.
In older books, at the time the recipes were written, the scalding really was necessary to kill off any nasty bacteria that might be lurking, to switch off the enzymes as well as denature the proteins that don’t play nicely with yeast.
But in newer recipes, it’s really more a matter of tradition as well as of expediency.
If you want your bread to rise faster, starting with warm liquid rather than cold is going to speed up your process since the overall dough temperature, and therefore that of the yeast, will be raised.
Next, caution. In all honesty, I never scald my milk before using it, and I’ve never run into any issues.
Still, if you want to make absolutely sure that you don’t have any bacteria or foreign yeast or something lurking in your milk, you have come to the right place to learn how to scald milk.
And if you’re making yogurt or cheese (like homemade paneer), scalding–and possibly even reducing the water content by holding it at higher temperatures so some of the water can evaporate–is necessary.
If you’re not dealing with cultures (yogurt, cheese, etc) and you are wondering whether or not to scald your milk before using, I’d say not to worry. But I’d also say that if you are worried, heat organic milk or any dairy that is traditionally Pasteurized (161F for 15 seconds) to the scalding point, or 180F.
Any milk or dairy that says UHT or “Ultra-Pasteurized” you can use as is.
If you want to warm it up a bit before using, that’s perfectly fine, too. You just don’t necessarily have to scald it.
Do I Need Scalded Milk to Make Rolls?
Many people find this post around the holidays. I expect it is partly because people bring out old family recipes for rolls, and the instructions call for scalded milk but don’t explain what it is or how to do it. So they go to Google and type in “how do I scald milk?” or “what is scalded milk,” or maybe “do I need to scald milk?” And you find me.
And I pretty much say no, you don’t have to scald your milk before making rolls. The Pasteurization process pretty much takes care of the three big reasons why they used to scald milk in the “old days:”
- to stop enzymatic activity
- to kill any bacteria
- to denature the proteins that inhibit gluten formation
What About Scalding Milk for Loaves of Bread?
I have read, and a reader commented recently, that loaves made with scalded milk rise higher than loaves made with cold milk.
This could be because the cooled, scalded milk (warm milk, in other words) decreases the rising time, but there could be other reasons that I am just not sure of.
When it comes to food safety, there is no reason to scald your milk these days, but for a potentially higher rise with not much extra effort, go ahead and scald/cool before you mix up your dough.
Recipes for Soft Dinner Rolls
I have a couple of excellent (if I do say so myself) recipes for Thanksgiving rolls, and I don’t scald the milk before making them. And they’re delicious. Give them a try. I think you’ll really like them!
- Garlic Parmesan Pull-Apart Rolls have Parmesan in the dough and then grated on top as well. Full of flavor and nice and soft
- Garlic Chive Pull-Apart Rolls Are you sensing a theme? These rolls are very similar to the garlic Parm rolls and just as tasty
- Soft, Buttery Pumpkin Dinner Rolls bake up a beautiful orange color. They’re super buttery and flavored with herbs rather than sweet pumpkin spices. Great for Thanksgiving
- Soft Potato Cheese Rolls are made with milk (which I do scald for this recipe since I put the milk and butter together to heat up and melt the butter). Make these with any flavor of instant mashed potato you like. I recommend the Idahoan® brand for best flavor and texture. Full disclosure, I’ve worked with Idahoan® before and truly do love their instant mashed potatoes
It looks like I’ve talked about the why before the how. Sorry. Let’s do that now, shall we?
Way back at the beginning of the post, I talked a bit about why scalding is scary, and it’s mostly the connotation: Eeek! She scalded herself when the pasta pot fell over! Yikes, right?
But remember, when we talk about scalding milk, we mean to heat it to below the boiling point.
Granted, that’s still pretty hot, but since you don’t bring it to a boil, as long as you are watching it, nothing awful is going to happen. Honest.
How to Scald Milk, Step by Step
Here’s how to scald milk:
- Use a heavy-bottomed saucepan and pour in your cold milk.
- Set the pan over medium heat.
- Stir it fairly frequently with a wooden or heat-proof silicone spatula. I prefer something that makes contact with the bottom of the pan across a wide area. If you do have any sort of minor sticking issues, they’ll be easier to mitigate with a spatula than with a spoon since you can scoop up any offending sticking bits in just a couple of passes.
- Take the milk’s temperature occasionally. You’re shooting for 180F. I honestly don’t know, but I’d venture to say that 15 seconds at 180F would be more than sufficient. (Get a reliable instant read thermometer. You’ll use it for way more than just taking the temperature of milk.)
- If you don’t have a thermometer, you’ll know you’ve reached the right temperature when there is the barest film of foamy cream on the surface of the milk, tiny bubbles have formed around the sides of the pan and wisps of steam are coming off the surface.
- Remove from heat, and you’re done.
- Cool to desired temperature and use in your baking or cooking.
Your Troubleshooting Guide
- Your milk could boil, and once it does, it can boil over incredibly quickly. How to avoid this problem:
- Don’t walk away from your milk.
- For insurance, use a pan that is much taller than you think you need so if it does start to boil, you can pull it off the heat without making a big fat mess.
- Keep the heat on medium.
- When you see the signs (film of cream, tiny bubbles around the sides, wisps of steam), remove it from the heat.
- Your milk scorches and leaves a gross brown or black film on the bottom of your pan and your milk now tastes awful. How to avoid the problem:
- Don’t walk away from your milk.
- Stir frequently with your spatula and then look at the edge that comes into contact with the bottom of the pan. If it seems to have a bit of buildup of milk solids on it that you’ve scraped up from the bottom, turn the heat down little bit.
- Look for the Telltale Signs of Scalding, and quit when you get there. Remember that nowadays, by and large, scalding is more about tradition and not starting with cold milk than it is about killing bad stuff, so if you start to get nervous, stop.
- Your milk doesn’t bubble around the edges. No thin film of cream forms on the surface. There are no wisps of steam. How to avoid this problem:
- Turn on the stove.
- On second thought, maybe you shouldn’t try this. Time to phone a friend.
There you have it! The whys, there wherefores, a bit of science and the hows.
I hope you have found this helpful. And if you have a request for a Fundamental Friday post, do leave it in the comments.
Lots of the fundamentals live in my brain, but when dealing with specifics, I like to do some research so I make sure to give you good information. These are the sites I went to for fact checking:
- The Engineering Toolbox: Temperatures for Pasteurization
- Organic Valley: Pasteurization
- the kitchn: Scalding Milk: Is It Really Necessary?
Have a Question for Me?
I’m happy to help. Don’t hesitate to email me or comment on this post.
Thanks so much for spending some time with me today. Have a wonderful day.


Join in Today!
If I added scalded milk to flour before cooling it, will it have a negative affect?
Hey, Yadi. Yes, if you add steaming hot milk to your flour, the flour could gelatinize before being mixed, leading to dry, hard lumps in whatever you’re making. It is best to cool the milk to warm and mix immediately upon adding the milk to the flour.
I have a question for Fundamental Friday – how to properly make clarified butter. I appreciated the information on scalding.
Thanks!
Tatiana
Tatiana, I already have a post that might help! https://pastrychefonline.com/how-to-make-browned-butter/ should give you all the information you need. The only difference is that you take the butter off the heat before the milk solids brown. Let me know if you’d like more clarification and I will do a post for you!