You are going to love this hot chocolate custard with coffee marshmallows!
If you are a hot chocolate lover, you will probably enjoy learning all the options in my Swiss Miss Ingredients post.
For ease of browsing, here are all my beverage recipes. Thanks for stopping by!
Welcome to this month’s Progressive Eats meal, and what a doozy! New permanent member Susan from The Wimpy Vegetarian has chosen a fantastic theme: Weekend Ski Party. Nice, right? It conjures up images of swooshing down the slopes all day and then filling up on warming, cheesy, gooey, comfort food with a hot toddy to warm you from top to toe.
If you’re unfamiliar with the concept, a progressive dinner involves going from house to house, enjoying a different course at each location. With Progressive Eats, a theme is chosen each month, members share recipes suitable for a delicious meal or party, and you can hop from blog to blog to check them out. This month, I picture us all shooshing from one stop to the next. Won’t you join us?
We have a core group of 12 bloggers, but we will always need substitutes and if there is enough interest would consider additional groups. To see our upcoming themes and how you can participate, please check out the schedule at Creative Culinary or contact Barb for more information.
Pastry Chef Online Participates in Affiliate Programs. If you make a purchase through one of my links, I may earn a small commission. For more information click to read my disclosure policy
Weekend Ski Party…?
I have been skiing exactly 1 1/2 times in my life. The first time was with our youth group from church. We went to Sugar Mountain, NC. Most of the kids at our church had ski clothes. Some even had their own boots and their own skis. We had never been skiing, so I had nothing. The helpful information the church sent home suggested using Scotch Guard on a pair of jeans and having thermal underwear as well if we didn’t own ski clothes. So that’s what we did.
SSSShhhhhhhhhhhhsssssshhhhhhhhhhhh…..shhhhhhhhhsssssshhhhhhhhhhhhhhh The sound of the Scotch Guard as my mother waved it back and forth over a forlorn pair of jeans. The jeans darkening with what we thought was a shellac-like imperviousness to ice and snow. Cotton thermals from Sears? Check. And we were off.
Friends, let me tell you. I have never spent so much time on my ass as I did during that ski weekend. Sliding down hills on my posterior seemed so much more safe than descending strapped to two tongue depressors. Bunny slope? Kiddie slope? Mostly flat areas? My ass came to know them well.
And the snow, compacted by jeans-clad bottom, laughed at my Scotch Guard. Mocked it. Soaked into the knees of my jeans and of course the seat, leaving dark blue patches on my long johns. Long Jennis? I kept those thermal underwear for years, and those blue patches, while lightening with wash after wash, still mocked me and my pitiful attempts at skiing.
The lodge was home base. It was where I could safely wander around in normal people shoes without being looked at funny. Awkward poles and wet clothes put away, warm and cozy in sweats, most of the people there who were not in my group had no idea I had spent humiliating hours out on the slopes on my ass. I could pretend to be someone who had returned from a supremely satisfying day of swooshing about without the need to snowplow. For all anyone knew, I was someone who could ski!
And what about that extra 1/2 time of skiing? That too was with our youth group. I put wanting desperately to fit in with this church group ahead of sure humiliation and went back the next year. Although year two was humiliating in a different way: I didn’t ski at all. The cost of the weekend trip without lift tickets and ski rental was $13, so I went the cheap route. And the route where my ass wouldn’t be wet and numb all weekend long.
Since my real experiences with skiing were less than idyllic, I have created a ski lodge in my mind. A lodge where skiing is totally secondary to chatting by a fire, an afterthought to a long, lingering, multi-course breakfast. In my lodge, shaggy area rugs are scattered around. There are roaring fires in stone fireplaces (one of which is arched), plenty of board games to choose from, tons of guilty pleasure books lining the bookshelves and a hot beverage never more than an arms length away.
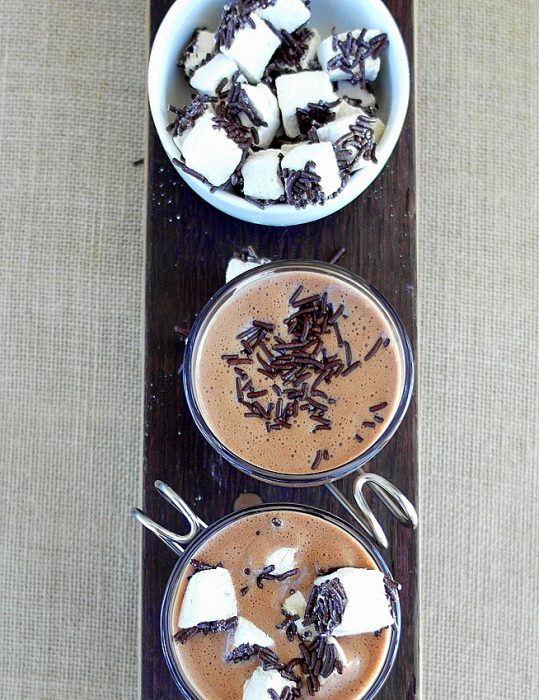
Hot Chocolate Custard
Some beverages are made to be guzzled down to quench thirst. Other beverages are meant to be sipped and savored. Guess which kind of beverage this is?
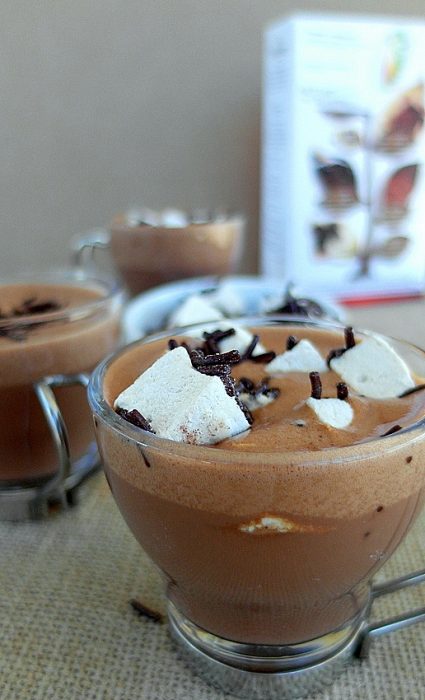
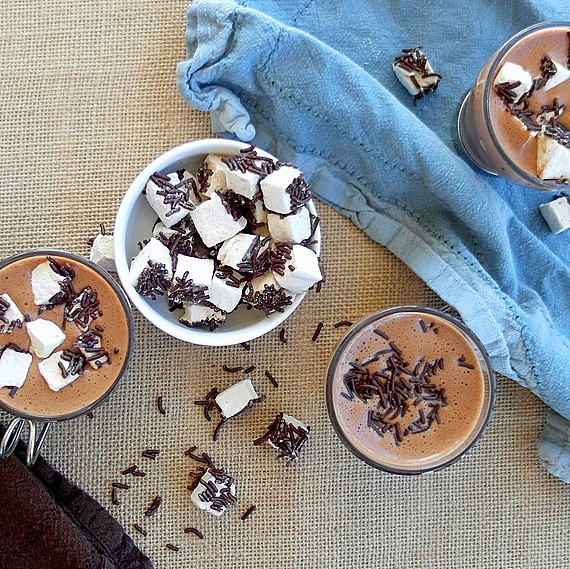
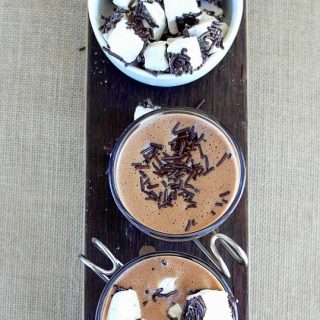
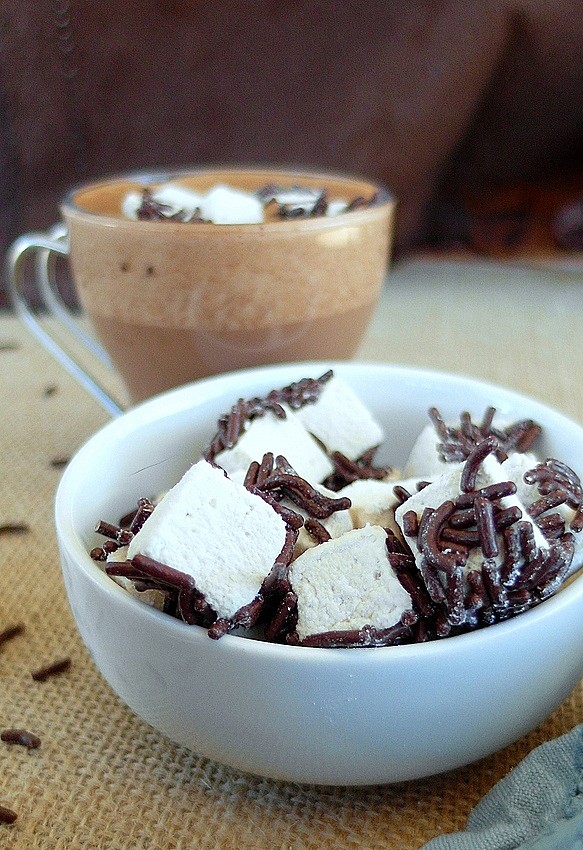
This hot chocolate custard is rich enough to serve as dessert. The mini coffee marshmallows make a perfect, cute but sophisticated garnish as they slowly melt into the chocolate.
A few years ago, I mentioned that I add an egg yolk to my hot chocolate, and lots of folks were appalled. But think of it as a hot chocolate eggnog and that might help. The yolk adds just a bit more richness, a little more body to the drink, allowing it to straddle the line between drink and dessert. The marshmallows push it over that line squarely into the dessert category.
Serve this is small portions. If you’d like to lighten it up a bit so it’s more a beverage than a dessert, by all means leave out the yolk and make it with all milk. Do try it in its original form at least once though. It is deeply satisfying and delicious. And it’s also the house beverage of my imaginary ski lodge.
It will help me and other readers so much if you take a moment to rate and leave a review for this recipe.
You can use the stars to rate 1-5 (5 is best), and leave a review in the comments. It helps me make adjustments if any are needed, and comments help others decide whether the recipe is worth making.
Other ways to share include pinning, and/or sharing on your favorite social media platform.
Thank you so much for taking the time!

Hot Chocolate Custard
Ingredients
For the Base
- 4 oz good-to-excellent quality dark chocolate
- 12 oz whole milk
- 4 oz half and half
To Finish
- 2 oz whole milk
- 1-2 Tablespoons sugar or brown sugar (to taste, and completely optional, especially if you’re garnishing with marshmallows)
- 1 egg yolk
- heavy pinch of non-iodized salt (kosher, sea salt, etc)
- All of chocolate base
- ¼ teaspoon pure vanilla extract or vanilla paste
Instructions
For the Base
- Finely chop or grate the chocolate. Set aside.
- Bring the milk and half and half to a simmer over medium heat, stirring occasionally.
- Once the milk is hot, stir while slowly adding the chocolate a bit at a time. Stir until smooth.
- Bring the mixture to a very slow boil/high simmer and cook for 2-3 minutes, stirring constantly. This just concentrates the mixture and thickens it up a bit. This is an optional step, but I highly recommend it.
- Let this base sit for at least an hour or cool it down and refrigerate it overnight.
To Finish
- In a small bowl, whisk together the whole milk and egg yolk.
- Whisk this mixture into the chocolate base aong with the salt and, whisking constantly, heat the chocolate to 165F.
- Taste and add the sugar (if using). Strain the mixture into a pitcher. It should be very frothy and have a nice head on it. If not, whisk and whisk until it does.
- Pour into demitasse or espresso cups, garnish with coffee marshmallows (or the garnish of your choice) and indulge.
Did You Make Any Changes?
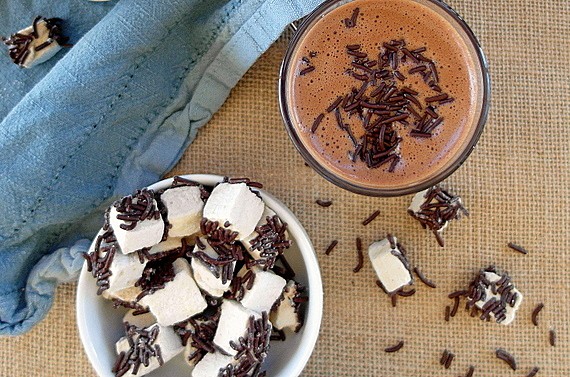
Coffee Marshmallows
Ingredients
- 4 ½ Tablespoons powdered gelatin (4 Tablespoons plus 1 1/2 teaspoons)
- 9 oz 1 cup plus 2 Tablespoons cold water
- ¼ teaspoon kosher salt
- 2 ½ Tablespoons instant coffee
- 1 teaspoon coffee extract (optional, but I like the extra top notes. Your call)
- 21 oz 3 cups granulated sugar
- 2 cups light corn syrup (not sure of the weight on this one)
- A mixture of half powdered sugar/half corn starch for dusting both the pan and the marshmallow
- real chocolate sprinkles optional
- *or* melted and tempered chocolate *or* melted good quality coating chocolate
Instructions
To Prepare the Pan
- Spray your pan (rimmed cookie sheet/jelly roll pan/1/2 sheet pan/9″x13″ Pyrex) with pan spray. This is what will hold your plastic wrap in place.
- Press a sheet of plastic wrap down onto the pan making sure it sticks along the bottom and up the sides. Use two overlapping sheets if necessary.
- Dust the plastic wrap with a very heavy dusting of half powdered sugar/half corn starch. I use a fine mesh strainer for this.
- Set the pan aside.
To Make the Mallows
- In the bowl of your stand mixer (at least 5 quart or just make 1/2 the recipe), pour in the water. Sprinkle the gelatin evenly over the surface along with the salt, instant coffee and optional coffee extract. Let sit for 5 minutes so the gelatin can soften and bloom.
- Place the bowl on the mixer fitted with the whip attachment and turn it on low. Let it slowly mix while you do the next steps.
- In a medium, heavy-bottomed sauce pan, bring the sugar, corn syrup and about 1/4 cup of water slowly to a boil, stirring occasionally to make sure all the sugar is wet.
- Once it has come to a boil, slap the lid on and let boil 2-3 minutes to wash down any sugar crystals.
- Remove the lid and cook until it reaches 244F. I use my instant read thermometer for this, but you can also buy a candy thermometer that stays in the pan. This will only take a couple of minutes once you take the lid off, so be ready.
- Once the sugar syrup reaches 244F, remove the pan from the heat. Turn up the mixer speed to medium-low and carefully stream the sugar syrup into the gelatin mixture.
- Let whip at that speed for a minute or two and then turn the speed up to medium and let whip for a minute or two. Once the mixture starts to thicken a bit, turn the speed up to high–be careful. If it’s not thick enough, it will slosh out and it’s still hot, so go slowly.
- Leave the mixer on high speed until the the mixture is very thick and pretty much fills the entire mixing bowl. It will triple in volume and be a very light beige color. Before it gets too thick, taste it and add more instant coffee and/or extract if you think it needs it.
- Whip until warm but not hot.
- Spray a large spatula with pan spray and scoop all the mallow out into your plastic wrap-lined pan.
- Spray the top of the candy with pan spray and use the spatula to spread it as smoothly and as evenly as you can in the pan.
- Sift another heavy coat of the powdered sugar/corn starch mixture on top of the mallow and let it sit for several hours or overnight to cure. You can cover it loosely.
- When cured, cut your mallows into whatever shapes/sizes you like. I use a pizza cutter that I coat with pan spray, but use what works best for you.
- Once cut, toss them all in a bag with powdered sugar/corn starch to cover.
- Fish them out and knock off the excess.
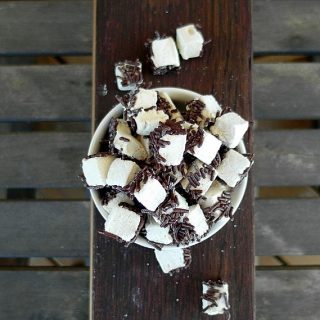
- If you’d rather, you can press chocolate sprinkles into the cut sides of the mallows rather than tossing them in the powdered sugar mixture. You can also dip the bottoms (or bottom halves) of the mallows into tempered chocolate or coating chocolate and set them on parchment to set up.
- I cut my mallows into about 1/3″ cubes so they wouldn’t be too big for the espresso cups.
Did You Make Any Changes?
I can guarantee you that one sip of this “drinkable dessert” will make memories of even the most humiliating ski outings fade into the background. And if you’re an experienced skier, this hot chocolate custard will make a blissfully satisfying end to a perfect day on the slopes.
Now that you’ve had your drinkable dessert first, please take a look at all the other Weekend Ski Party offerings from the talented Progressive Eats crew. If this menu doesn’t warm you up, I don’t know what will.

Hi, y’all! I hope you’ve enjoyed this post and hopefully also learned a thing or two.
If you like my style, I invite you to sign up for my occasional newsletter, The Inbox Pastry Chef.
Expect updates on new and tasty recipes as well as a bit of behind-the-scenes action. I hope to see you there!

Join Us for a Weekend Ski Party!
Appetizers
Drinks
Soup
Main Course
Bread
Veggies/Side Dishes
Desserts
Thank you all so much for spending some time cozying up to the fire for Progressive Eats Winter Ski Party event!
Have a lovely day.
Hi, y’all! I hope you’ve enjoyed this post and hopefully also learned a thing or two.
If you like my style, I invite you to sign up for my occasional newsletter, The Inbox Pastry Chef.
Expect updates on new and tasty recipes as well as a bit of behind-the-scenes action. I hope to see you there!


Join in Today!
Hi Can you make coffee marshmellows in a way that when you add boiling water on top it makes a cup of coffee? Thank you
Hi, Jim! Did you see my response on facebook? The short answer is yes, but you’d have to make sure the mallows were really intensely coffee-flavored. And then I guess there’s the issue of do you want gelatin in your cup of coffee, since there’s so much gelatin in mallows? Still, it would be fun to give it a try!
This hot chocolate custard looks just dreamy. I’m a chocolohic and would kill to have one or 2 cups of it! Be sure it will soon happen in my kitchen 🙂
It is pretty darned fantastic, Sylvie! I hope you enjoy it! It really is especially good with the coffee marshmallows, but if you don’t feel like making them, you could top each little cup with some espresso whipped cream. =)
I was a die-hard skier for many years – I chose San Francisco over LA solely on the basis that it was closer to decent skiing, and the company I worked for at the time had openings in both cities. I’m so happy you guys all hopped on board for my ski weekend party, and with such gusto. These hot chocolate custards look absolutely amazing. And your video for making marshmallows is wonderful!! I’m skiing tomorrow, and would give a lot to ski down the mountain to one of these.
I sometimes wish I knew how to ski, but honestly, I don’t like to be cold! lol I will be more than happy to meet you at the lodge and hand you a steaming cup of hot chocolate custard, Susan! I love this theme, though. Winter Ski Party could just as well mean “comfort food,” and I’m all for that!
Oh my heavens Jenni, this is just too much to take in at one shot, I guess I will have to have at least two or three just to make sure I really do like them, ROFL! And you’re not the only one who spent most of their time scooting down the hill instead of skis. After doing fairly well on the bunny slope, I made the mistake of letting my friends talk me into trying a bigger hill. I fell so many times that I gave up, put my skis over my shoulder and walked down! 🙂 I could have really used one of these custards to soothe my frazzled nerves that day! 🙂
At least you conquered the bunny slope! Only my bottom mastered that one! lol =)
I love making homemade marshmallows. Absolutely no comparison to store-bought is there?
You are so right! And so many more options for flavoring too, Lana!
This sounds and looks like a truly decadent apres-ski dessert. Love the coffee marshmallows and the hot chocolate custard sounds amazing!
Thank you so much, Jeanette! It is very rich, even made with mostly milk. That’s why it’s in tiny, tiny cups. Just enough! =)
Sounds so much better than ordinary hot chocolate. And homemade marshmallows really puts it over the top.
The coffee mallows were a late addition to the post, but once I got them in my head, I couldn’t not make them, Barbara! 🙂
You are braver than I am. I never even went up the slope so got saved from landing on my bottom. Not that I haven’t had “landings” on my bottom in a busy snowy streets (multiple times). Yes, I am that unbalanced. I don’t know how to walk on ice or snow.
Though I love your hot chocolate custard, it is the marshmallows that will be the weekend project with my teen. She will love it. Thanks for the video.
I don’t think so much brave and young and overly optimistic, Ansh! The mallows are fantastic–you guys are going to love them! It’s like beaten coffee Jell-o! =)
Coffee marshmallows? Ultra rich hot custard? I’d be happy to hang out with you in the lodge with one of these babies!
P.S. My first ski experience sounds EXACTLY like yours–except since I was an Iowan skiing in Wisconsin, many of us were wearing scotchguarded jeans :/
I’m glad I’m not the only one with a Scotch Guard horror story, Liz! Hanging out in the ski lodge with these little guys to keep us company more than makes up for it! =)