Here is my list of ten cooking basics that, if you master them, will make you a better cook. Call it Cooking 101 Basics, if you will. Or Chef 101. These are the techniques to have in your back pocket to help you cook more automatically and with more freedom so you aren’t tied to cooking from recipes.
You might also be interested in my must-have tools for bakers and/or this list of Kitchen Tips to make you a better baker. You may be surprised that some of my most valued pieces of cooking/baking equipment only cost a few dollars!
This post is part of a Fundamental Friday series of cooking tips, answered questions, and explanations of technique. For ease of browsing, you can find all my Fundamental Friday posts in one place. Thanks for being here!
The Question
Most of the time, I write about baking, but I also do a lot of cooking. The Beloved and I do actually eat foods that do not fall into the Dessert category. So, when I asked on twitter and facebook awhile ago what I could write about that would be really helpful to my readers and fans, I was pretty excited that this came rolling in:
“For those learning how or just beginning to take cooking seriously, what’s some good advice?”
Of course there are more than ten things you need to know to be a better cook, but ten is a nice round number, and with each tip and trick we learn, we become better cooks.
Pastry Chef Online Participates in Affiliate Programs. If you make a purchase through one of my links, I may earn a small commission. For more information click to read my disclosure policy
Some of us are farther along on our journeys to becoming Intuitive Cooks–folks who cook by feel, by season, by flavor and without books. So after reading my list, please leave your suggestions in the comments.
Here we go: my Ten Basics to Make You a Better Cook.
Invest in Good Knives (and Take Care of Them)
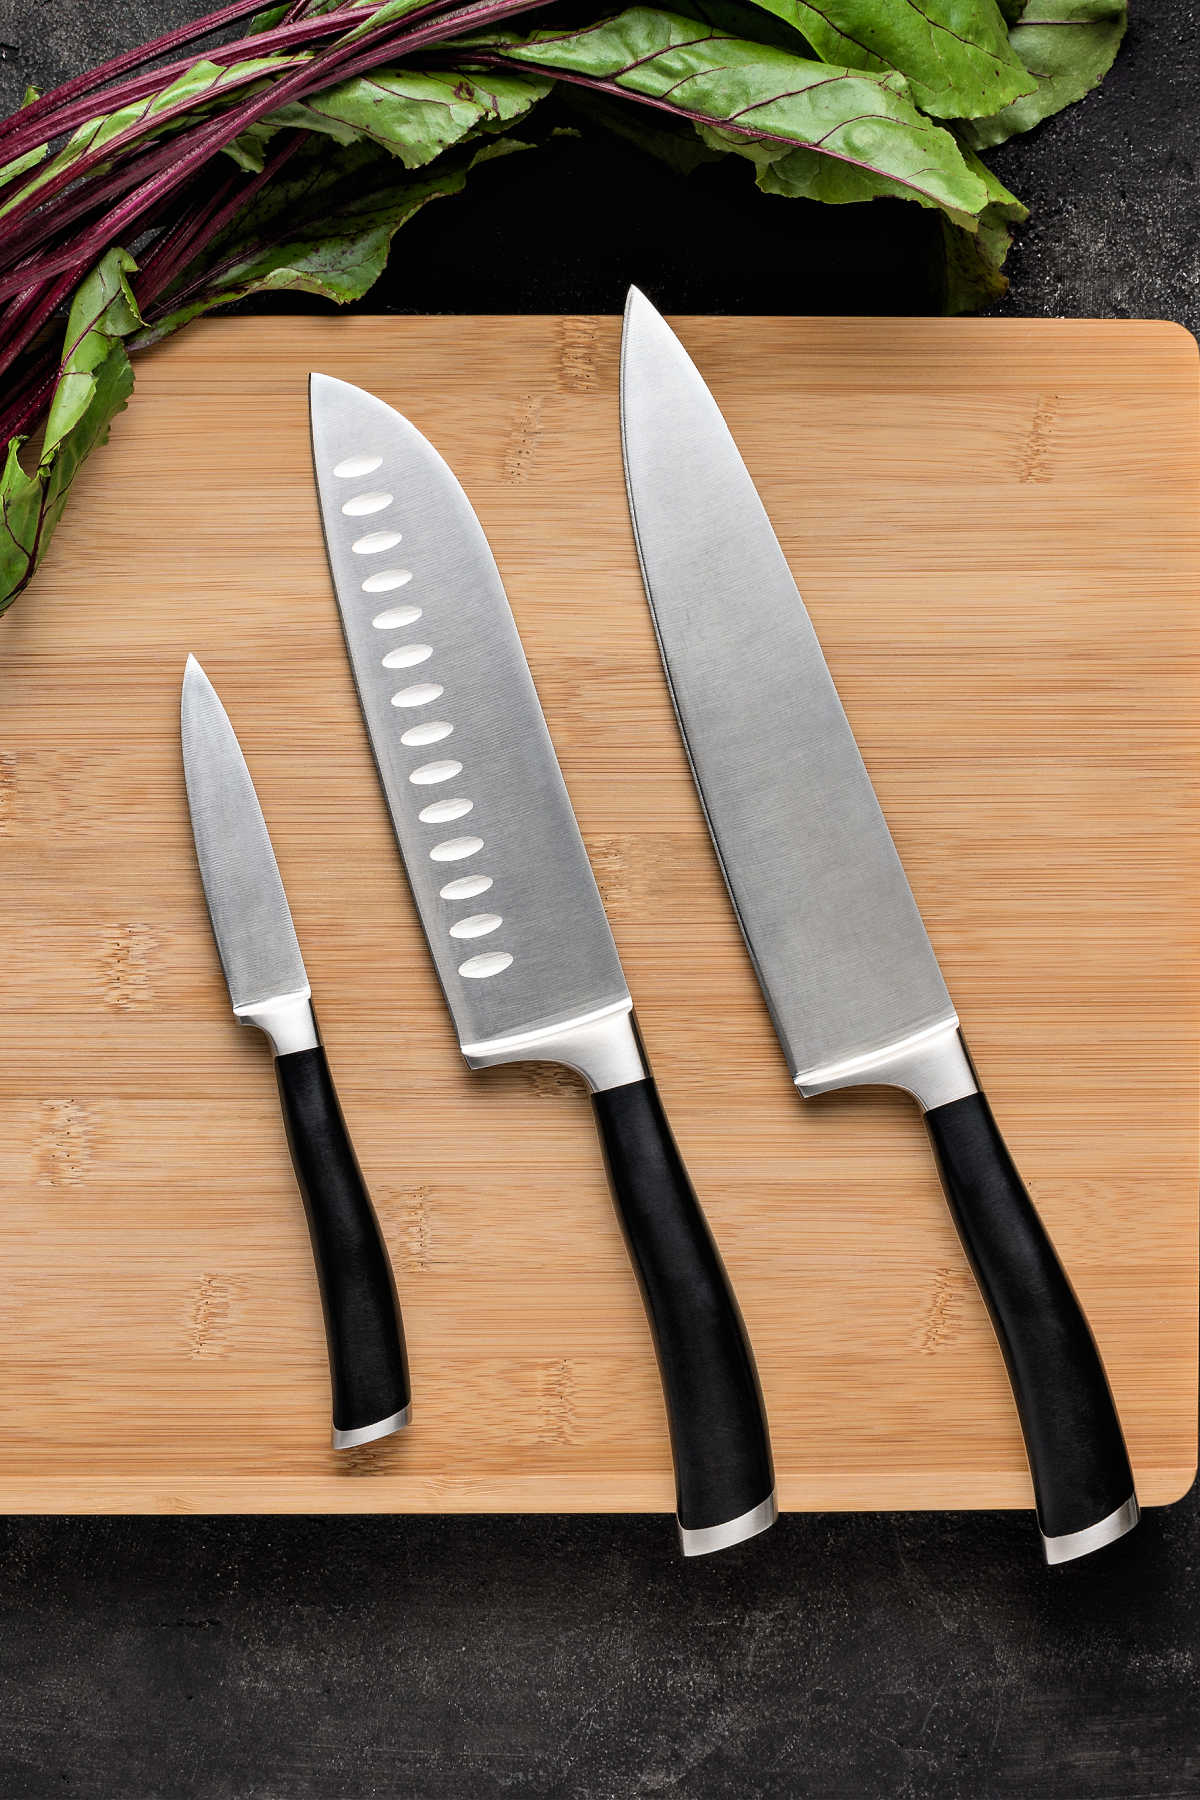
I could talk about the pros and cons of the big names in knives, but at the end of the day, mostly it comes down to personal preference since they’re all fine knives. Just look for “full tang,” which means the blade extends down into the entire length and breadth of the handle.
Why is this important? The full tang gives the knives better balance with more weight in the handle. This keeps your hand from getting too tired when doing a lot of chopping or cutting.
Until you find the brand that works best for you, I’d go to a knife shop and actually hold the knives you’re considering. Some work better for folks with larger hands. Some work better for smaller hands. Some are lighter, and some are heavier, so take the time to hold the knives and see which brand feels the best in your hand.
Once you have them, use a “sharpening” steel before you use them each time that you use them. Note that a steel does not sharpen your knives.
What it does is called “honing,” and it straightens out the edge back into a sharp point if it has gotten rolled over from cutting.
Have your knives sharpened (which is actually giving the knife a new edge and not just straightening out the old one) at least a couple of times a year and much more frequently if you use them on a daily basis.
Sharpening once or twice a month would not be out of the question if you are using your knives every day. There are plenty of knife sharpeners available for purchase, but for my money, a sharpening stone and water will do the trick. That’s what all the chefs and cooks in the restaurant used.
NOTE: Do watch some videos on how to properly use a sharpening stone. If you are at all unsure, have your knives professionally sharpened.
Heat Your Pan(s) Before Cooking
Heating your pan should be the first step you take to make 99% of your dishes. Here’s the “order of operation” to make sure your food doesn’t stick.
- Heat the pan first.
- Then add the fat.
- Let the fat get hot.
- Last, introduce the food to the pan
A friend got an entire set of the Calphalon for a wedding present. This was thirty years ago, so it wasn’t the new kind of non-stick Calphalon but the anodized aluminum.
She hated them, because she said that everything stuck in them.
I asked her if she had been heating the pan/adding fat/heating fat before introducing the food.
She said no and immediately changed her ways. Lo and behold, she had many fewer issues with food getting stuck in her pans.
Corollary: Leave the Food Alone
Most folks have this almost undeniable urge to mess with food once it’s in the pan.
But if you want the food to brown, you need to just leave it alone and let it sit there and sizzle merrily.
After a couple of minutes, you can wiggle the food gently with tongs. If it’s ready to turn, it will release easily. If it’s not ready, you’ll know, because it will be stuck.
Leave it for another minute or two and then try again.
If you keep messing with your food, it will show you its displeasure by falling apart.
Even Cutting Means Even Cooking
I’m not saying that you need to practice your knife skills every night, but when you realize that foods of different sizes, shapes and densities cook at different rates, you’ll understand that cutting foods into even pieces–rather than just madly chopping–will serve you better in the long run.
I realize this is a short entry, but it’s an important one. If you want all your pieces of onion to cook at the same time, it pays to cut them in even pieces.
Here’s a great infographic that shows what the different classic Western knife cuts are and what size they should be. Within reason. No need to bust out your ruler.
Season as You Go
Using salt in cooking and in baking is so important, I even wrote whole posts about it: what salt does in desserts and what does it mean to salt to taste.
Add just a pinch of salt at the beginning of cooking and pretty much each time you introduce another ingredient.
That way, the salt enhances the whole dish as it cooks. The salt will have time to get “pulled into” the food through osmosis.
When you salt just a tiny bit all along, you very well could end up using less salt in total than you would have had you waited to salt at the very end.
Would you like to save this post?
And your food will taste well-seasoned rather than salty.
Learn How to Build Flavors
Every cuisine has its own flavor-builders based upon aromatics. Here’s just a short list:
- In France, there’s mirepoix (onions, celery, and carrots)
- In Italy, Spain and many Latin countries, it is some form of sofrito/soffrito (tomato or tomato paste, onion, garlic, herbs, and peppers)
- In Creole and Cajun cooking, it’s the Trinity (onions, celery, and bell pepper)
- In India, it’s onion, possibly tomato and whatever mixture of spices (masala) is going to go in a particular dish.
- In Chinese cuisine, it’s often garlic, ginger, and scallions
When you understand that a wide variety of dishes from all over the world start with “chop onions/carrots/celery/bell pepper, etc and sizzle in a pan until they turn translucent,” cooking becomes more intuitive.
Starting with that one base instruction, you can make anything from a Thanksgiving stuffing to a Beouf Bourguignon to biryani.
Know How to Make a Pan Sauce
Elevate that piece of chicken you just sauteed by making a quick pan sauce.
And when I say quick, I mean it really does only take a few minutes.
Here’s what you do:
- Remove the meat and set aside, covered in foil.
- Pour off most of the fat (if there is any left in the pan). If there isn’t any left, add a little butter or oil
- Deglaze the pan with about 1/2 cup liquid–stock, water used to cook vegetables
- Brighten the flavor with a Tablespoon of acid–citrus juice, vinegar, wine
- Reduce over medium-high heat until syrupy
- Off the heat, swirl in a bit of cream, olive oil or butter for a silky consistency.
- Hit with complementary fresh herbs and season if necessary (it might not need it)
Here, I will recommend the book where I learned this technique.
Aptly titled “How to Cook without a Book,” I learned so much from it. If you’d like to get away from using recipes and get on with the business of cooking, I recommend you pick up your own copy!
Understand Carryover Cooking
Carryover cooking is this: food continues to cook after it leaves the heat source.
There was already heat being radiated into the food during cooking, and that heat continues its Journey to the Center of the Food, even when removed from the heat source, sort of like how a star that dies millions of light-years away from us still shines for us here on Earth until the last of the light the star emitted actually reaches us.
The greater the mass of the food, the longer carryover cooking happens and the more the temperature will rise.
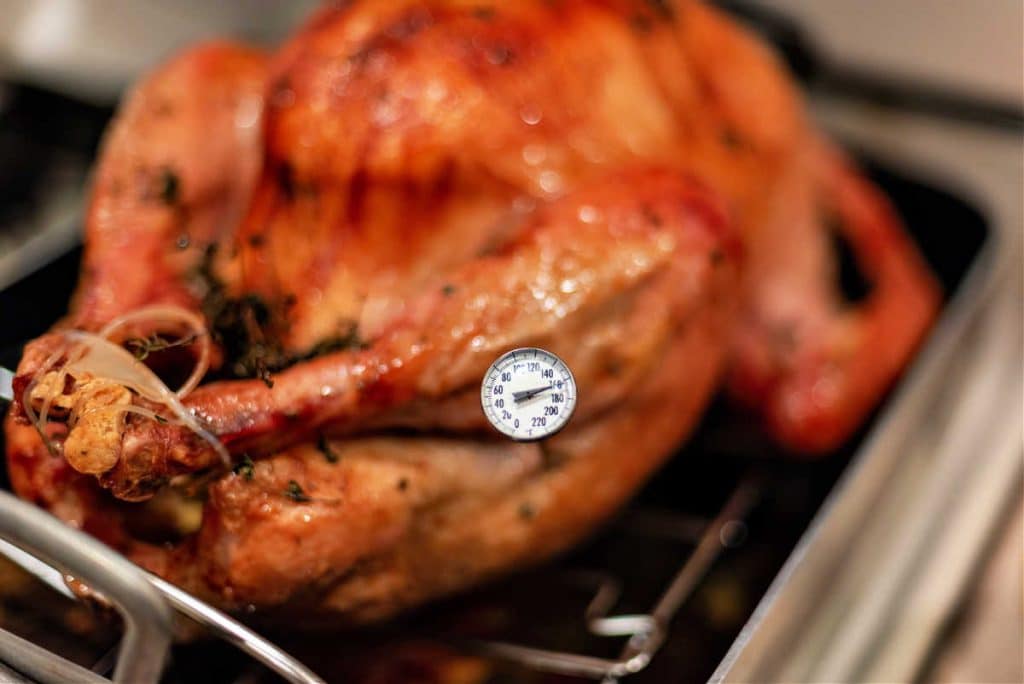
For small cuts of meat such as chicken breasts, carryover cooking may only account for an additional 3F degrees or so. For huge things like rib roasts and big old turkeys, the temperature can easily rise an additional 10, 15 or even 20F!
With that in mind, take your turkey out of the oven when the thigh meat hits about 160F. Your turkey and your guests will thank you.
NOTE: The same holds true for custards, cakes, and baked goods. For example, if your cake is done at 200F, take it out at 195F, and let it coast the rest of the way.
Get an Instant Read Thermometer
Taking the internal temperature of the food you cook is the most effective way of knowing when the food is done or not.
This holds true not only for meat and poultry, but also for breads and cakes.
This does not mean that I think you should be dependent upon the thermometer, though.
Use it to test, and then check with your senses so you know what “done” looks like, smells like, feels like.
Using an accurate will help you to trust your senses so as you learn more and practice more, you won’t have to wonder, “Is it done?”
You’ll know that it is.
Know How to Thicken
This might seem like a weird one, but it really isn’t. This truly is a cooking basic you should master, because not all thickeners are appropriate to all cooking situations.
The success of a dish has a lot to do with texture, consistency, and mouthfeel, so if you understand thickening, you can fine-tune your consistency so it is perfect.
There are plenty of ways to thicken dishes. Look. Here are some now.
Not all of these will work in all instances, but it’s good to have them all in your arsenal.
- Flour meats before browning. Not only will the flour give a nice crust, it will also help to thicken your sauce for stews and braises.
- Start with a roux: equal parts of fat and flour cooked together for at least a couple of minutes. The lighter in color the roux, the more thickening power. Roux is what gives classics like Bechamel sauce their thick and silky texture.
- Stir in pureed starchy vegetables such as potatoes.
- In things like tomato sauce for pasta, use an immersion blender to puree some of the sauce while leaving some “chunky.” You can also puree the entire batch, depending on what texture you want.
- Reduction. Reduce the sauce by keeping it at a heavy simmer or a very gentle boil to concentrate flavors and give more body.
- Starch slurry. Whisk some cold stock or water together with flour, corn starch or potato starch. Stir into your hot sauce to thicken.
- Beurre manie: knead together softened butter and flour and then drop bits of it in your sauce until it is as thick as you’d like.
- Bread: whisk in bits of soft breadcrumbs to help thicken up gravy or sauce.
- Thicken and enrich with egg. Temper a beaten egg or two with some of your hot sauce/broth and then whisk the whole thing back into the pot. The egg will bring richness and silkiness to the dish.
- Whisk in some cornmeal or masa harina to Mexican and Tex-Mex style dishes. Toast it in a skillet first until fragrant. This brings a nice corniness to the dish as well as serving to thicken it up.
- No cornmeal? Finely crushed tortilla chips work really well in a pinch. Go crazy and use flavored ones to thicken your chili!
And there you have it. My list of cooking basics. Ten Things Everyone Should Know About Cooking. I also got some great responses from Facebook, including working clean (cleaning as you go), and being mindful of cross-contamination (thoroughly cleaning or using different cutting boards for meats and vegetables).
If you’d like to add to this list or if you learned something you didn’t know before, please have at it in the comments!
If you enjoyed this post or found it useful, I’d love for you to consider signing up for my newsletter. You’ll get emails when I have new posts up, or the occasional seasonal email. Here’s how:

Hi, y’all! I hope you’ve enjoyed this post and hopefully also learned a thing or two.
If you like my style, I invite you to sign up for my occasional newsletter, The Inbox Pastry Chef.
Expect updates on new and tasty recipes as well as a bit of behind-the-scenes action. I hope to see you there!

Thanks so much for reading, and have a wonderful day.


Join in Today!
Thanks for writing this. The pan sauce instructions were really helpful (they, all were, actually!).
Hey, Art! So glad the instructions are helpful–I try to be as explicit as possible, so hooray! The whole pan sauce thing alone went a long way towards changing the way I cooked. Enjoy!
I’m in my 70’s and learning so many things I never knew before.Better late than never and I have wonderful recipes and tips from so many good cooks.I’m retired now and have time to try new things and learn from the best. Jenni… I appreciate your knowledge about so many things.Some people are naturals at cooking and some like me struggle but I can do it if I practice. I have become a pretty fair baker.Especially pies. A fan
Aw, Doris, I am so happy to know you! =) Hope you and your family have a spectacular Thanksgiving!
As long as I’ve cooked, as much as I’ve cooked, even as much as I write about it, I always, always learn something by reading. This post is a doozy. So many “must-know” lists are personal preference, I believe, as in “you must have this-or-that in your pantry.” Your list really does get down to some very essential basics for someone who really wants to learn to cook well. Much appreciate.
Wow, Rosemary, thank you so much! I agree with you that many things are personal preference, so I did try to get to some more-or-less “universal truths” of cooking. I really appreciate the visit and the compliment! And I learn new things every day, too!
Great Post, I love the tip on the thermometer maybe my turkey will not dry out so much this year. I also agree on the knives, I have a set that I love and it makes all the difference when preparing a meal.
That thermometer tip really is a good one–especially when just a few degrees can make the difference between wonderful and not-so-much! So glad you stopped in; I know your turkey will be fabulous this year!
If it’s a skill you really want to learn (bread, pasta, pie crust, etc.) keep trying. After many attempts, I’m just beginning to know if something is going to work by just looking, feeling, smelling it. I guess that’s the difference between knowing how to cook or just following a recipe.
Yes, learning to cook/bake is a process, and you only get better and better and more sure of yourself the more you do it, that’s for sure!
I should clarify – the sharpening service will cost about $50. I think the set of knives was about $180.
question about the knives – I have a set of Berndes knives that my husband bought for me on a whim. I think they’ve gotten quite dull though. They are made from “ice hardened quality steel” and I don’t know what the heck that means, even after Googling it. What I want to know is whether I can sharpen them myself. They weren’t expensive enough to justify professional sharpening I don’t think (about $50). Plus, I do use my knives every single day, so they probably need lots of sharpening! What do you recommend? Also – what is a steel? Thanks for the great info Jenni!
I have no idea what ice-hardened steel is unless that’s the tempering process they use–that they at some point plunge the steel into ice. They don’t really say what the steel is made of–you really want “high carbon steel.” Some knives don’t take sharpening well for one reason or another–once the edge is gone, you can’t get it back. The guy I have used to sharpen ours charges $1/inch of blade, which isn’t prohibitive, if you want to go the pro sharpening route. Again, you might take them to the place and they may tell you that they aren’t “sharpenable,” though.
A steel is made either of lightly textured steel or ceramic, and is just a long rod that you run both sides of your blades down a few times each before cutting. There’s a steel in that photo of the knives in the post. =)
I’m not sure how helpful my response is, but I’ve not heard of those knives and “ice hardened steel” doesn’t really tell you anything about what’s *in* the steel. I’m not a knife expert by any stretch, but I did find this really useful “Knife myths and facts” sheet that you might find helpful (I learned some stuff myself while reading it): http://www.chefschoice.com/tips_myth_all.html
For the past few hours I have been traveling through some significantly boring deserty parts of southern Idaho and reading page after page of your website out loud to my husband (he’s driving). You have lightened up our travel time with your fun writing style and great understandable explanations. We were lead to your site because of googling something about whey and have stayed here for the past two hours because of all the great formation…I keep saying, “oh, I want to know about that!”…click, read, click, read, click, watch, click, read, discuss. As per the above top ten article, I am in total agreement about the sharp knives. They are my #1 must have kitchen tool. I’m with you on the stainless steel cookware, too. Great info and tips on making a pan sauce and thickening. There are only a couple of things that I’d like to add. First, keep a nice variety of herbs and spices on hand. I like to keep some of my herbs and spices whole and then grind them as needed in a coffee grinder dedicated for that purpose. I use a microplane for whole nutmeg and I am always amazed at the beautiful aroma that comes from such a small amount of freshly grated nutmeg as opposed to bottled preground nutmeg. The second tip fits in with “heating the pan”. Get a cast iron frying pan. It is my favorite type of frying pan for browning meats. Okay so I’ll be quiet now. Again, great website. Adding it to my “must visit often” list.
Oh, those are wonderful additions! And I am More Than Pleased that I am a part of your road trip! (Hi, husband!)
You know, I almost put down “own at least one cast iron skillet.” And now *you* have written it down for me–yay!
And a microplane is a beautiful thing, isn’t it? I use it for nutmeg as well, and hard cheeses and chocolate and citrus and… =)
When making a repeat dish, never assume the components or ingredients are always identical in taste and texture. Ingredients can vary from batch to batch and even based on different seasons.
Amen. Taste as you go and adjust as necessary!