 Well, hello there, friends! Welcome to my happy little tutorial on torting, filling and frosting a cake. Originally, I was just going to put together a picture tutorial, but then I realized that I hadn’t made a video in awhile. So this is a special Two-for-One picture and video tutorial! (Wild applause).
All the pictures are of assembling the Mango Lassi Genoise, and the video is of assembling a peanut butter and jelly genoise. You will see that the steps are pretty universally applicable, whether you want your cake to have 2, 3 or even four or more layers. I hope you find it helpful, so without further Ado, please enjoy both the pictures and the video.
Leveling a Cake
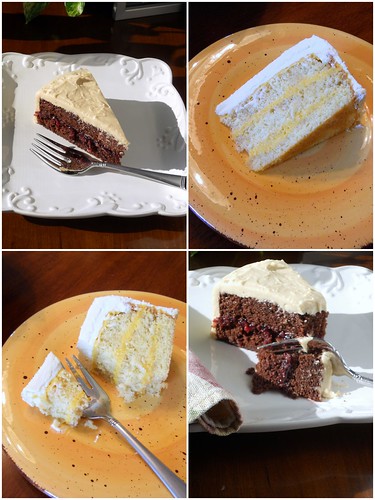
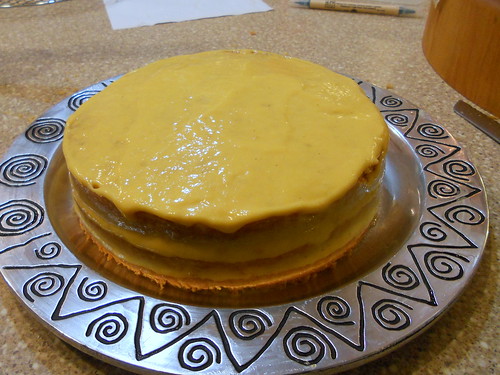
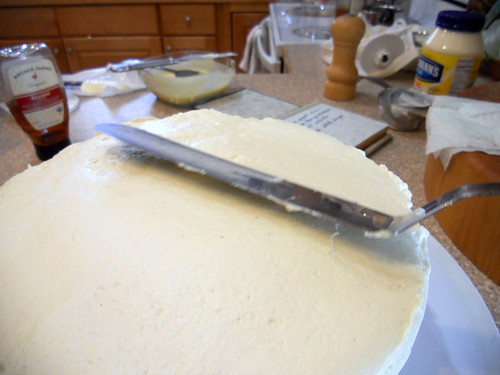
This is a mandatory step when working with genoise and an optional step when working with butter cakes. For genoise, you must remove the top and bottom crusts from the cakes. This allows the soaking syrup to penetrate into the crumb. It also gives a more professional look to the cake when it is cut–notice in the pictures of the Mango Lassi Genoise that there is no brown crust of cake under the frosting. Fancy.
With a butter cake, you only need to level if the cake is domed at all. Even then, if you don’t mind a slightly rounded top on your cake, don’t worry about it. But for cakes that will be stacked, go ahead and cut off the dome. Do this by holding a long serrated knife parallel to the surface of the cake and sawing the very top off.
Well, hello there, friends! Welcome to my happy little tutorial on torting, filling and frosting a cake. Originally, I was just going to put together a picture tutorial, but then I realized that I hadn’t made a video in awhile. So this is a special Two-for-One picture and video tutorial! (Wild applause).
All the pictures are of assembling the Mango Lassi Genoise, and the video is of assembling a peanut butter and jelly genoise. You will see that the steps are pretty universally applicable, whether you want your cake to have 2, 3 or even four or more layers. I hope you find it helpful, so without further Ado, please enjoy both the pictures and the video.
Leveling a Cake
This is a mandatory step when working with genoise and an optional step when working with butter cakes. For genoise, you must remove the top and bottom crusts from the cakes. This allows the soaking syrup to penetrate into the crumb. It also gives a more professional look to the cake when it is cut–notice in the pictures of the Mango Lassi Genoise that there is no brown crust of cake under the frosting. Fancy.
With a butter cake, you only need to level if the cake is domed at all. Even then, if you don’t mind a slightly rounded top on your cake, don’t worry about it. But for cakes that will be stacked, go ahead and cut off the dome. Do this by holding a long serrated knife parallel to the surface of the cake and sawing the very top off.
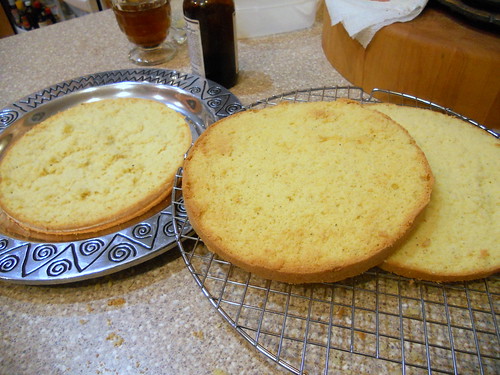
 This is a genoise. Notice the top crust is thicker and is
therefore easier to remove.
This is a genoise. Notice the top crust is thicker and is
therefore easier to remove.
Torting a Cake
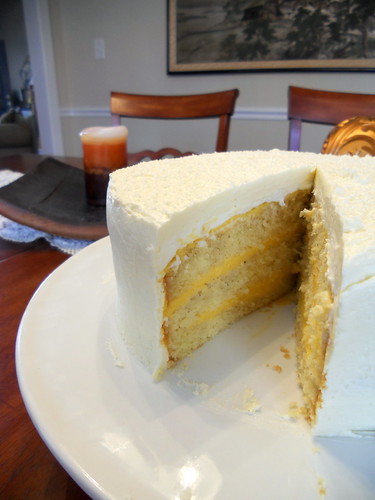
Torting is another optional step. It’s just a fancy word for splitting a layer in half–or thirds–horizontally. With butter cakes, most folks just stack two layers on top of each other with one layer of filling. There’s absolutely nothing wrong with that, but if you’d like more layers of filling without having a cake 47 inches tall, torting is the answer.
With a butter cake, the best way I have found to torte is to wrap a long piece of dental floss around the cake, cross the ends, and then pull to split the cake. This Does Not Work for genoise. A genoise is a very tough cake (before soaking with syrup), and wrapping floss around the cake only makes it squeeze together like an hour glass. Then the layer tears and does not slice cleanly. In the picture, you’ll see three layers. I torted them from one 2-ish inch tall genoise. See the layer to the left–how it’s all uneven and kinda stupid looking? That’s what dental floss does to genoise. Lesson learned.

 To torte a genoise, you’ll need to use a big serrated knife. The process is identical to leveling, but you’ll just split each layer in half or into thirds. I’ve read in some books to place toothpicks around the equator of your cake as a guide. I tried it once, and it just made me mad. I find it is helpful to put the cake on a turntable and then hold the knife almost stationary while spinning the cake and sawing farther and farther in until the layers come apart.
Filling a Cake
Filling a cake is the part where you put something Tasty between the layers, both to add moisture and flavor as well as to stick the layers together. Lots of folks use some of their frosting to fill their cake. And that’s tasty, especially if you Love Frosting, but don’t discount some other filling ideas: ganache (flavored or otherwise), jam, custard, fruit curd, stabilized whipped cream, sliced fruit in gelatin, gravy…maybe not that last one, but you get the idea, I think.
To torte a genoise, you’ll need to use a big serrated knife. The process is identical to leveling, but you’ll just split each layer in half or into thirds. I’ve read in some books to place toothpicks around the equator of your cake as a guide. I tried it once, and it just made me mad. I find it is helpful to put the cake on a turntable and then hold the knife almost stationary while spinning the cake and sawing farther and farther in until the layers come apart.
Filling a Cake
Filling a cake is the part where you put something Tasty between the layers, both to add moisture and flavor as well as to stick the layers together. Lots of folks use some of their frosting to fill their cake. And that’s tasty, especially if you Love Frosting, but don’t discount some other filling ideas: ganache (flavored or otherwise), jam, custard, fruit curd, stabilized whipped cream, sliced fruit in gelatin, gravy…maybe not that last one, but you get the idea, I think.
 Anyway, filling can be as simple as just scooping some of your Preferred Filling into the middle of your cake and spreading it out to within 1/4″ or so of the edge of the cake. Or, you could take the extra step of piping an “icing dam” around the edge of your layer before adding your filling. This is an especially useful step when your filling is darker than your frosting–say chocolate ganache with coconut buttercream or something. It keeps the filling inside where it belongs and eliminates the worry of Bleed-Through.
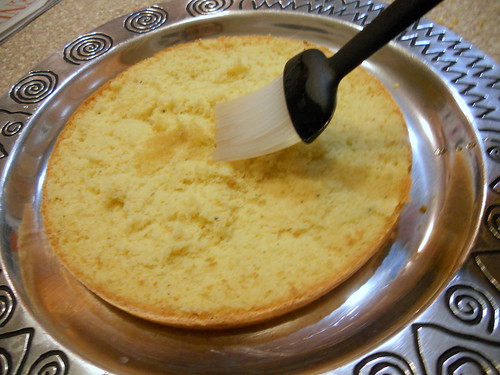
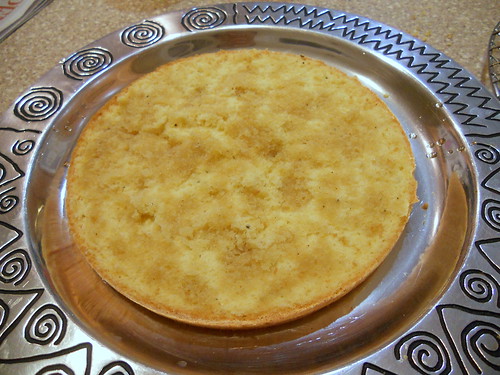 With a genoise, you will always want to brush or spray your layers with a soaking syrup. RLB’s ratio is 2:1 water to sugar with another 1/4-1/2 part of liqueur. She says to use 3-4 tablespoons (1 1/2-2 ounces) of syrup per egg in the recipe. So, for a 4-egg genoise, you’ll need 12-16 tablespoons of syrup (6-8 ounces). The liqueur you choose should complement your layer. I usually just use some vanilla as it pretty much goes with everything, but you are really only limited by your imagination.
I would not soak American-style butter cakes with a syrup as they have an unfortunate tendency to turn to mush when wet. Ew. The only time that I might use a bit of syrup is if the cake is going to be sitting in the fridge for two or three days before serving. I usually just wrap butter cake layers in plastic wrap and foil when still very hot and then throw them in the fridge or freezer to cool to room temperature. This keeps the cake nice and moist since the water that would normally evaporate during cooling can’t escape.
Frosting a Cake
Some cakes don’t need frosting…Yeah, right. Who am I kidding?! I love frosting, and I have never (rarely) met a layer-type cake that couldn’t be enhanced by some. Those folks who say, “Oh, all it needs is a dusting of powdered sugar!” are lying.
The Crumb Coat
To get a nice, professional, crumb-free coat of icing is a two-step process. The first step is to ice the whole cake with a very thin layer of frosting or even some of your filling. Consider it thin layer of tasty glue that catches and holds the crumbs to keep them from Dispersing in your finished frosting. With the mango lassi cake, I used a thin layer of my gelatin-stabilized mango curd for the crumb coat, because I knew it would set up. With the PB&J cake, I just used a thin coat of the peanut butter buttercream. You can watch that in the video to see all the steps, but here’s the completed crumb coat on the mango cake:
With a genoise, you will always want to brush or spray your layers with a soaking syrup. RLB’s ratio is 2:1 water to sugar with another 1/4-1/2 part of liqueur. She says to use 3-4 tablespoons (1 1/2-2 ounces) of syrup per egg in the recipe. So, for a 4-egg genoise, you’ll need 12-16 tablespoons of syrup (6-8 ounces). The liqueur you choose should complement your layer. I usually just use some vanilla as it pretty much goes with everything, but you are really only limited by your imagination.
I would not soak American-style butter cakes with a syrup as they have an unfortunate tendency to turn to mush when wet. Ew. The only time that I might use a bit of syrup is if the cake is going to be sitting in the fridge for two or three days before serving. I usually just wrap butter cake layers in plastic wrap and foil when still very hot and then throw them in the fridge or freezer to cool to room temperature. This keeps the cake nice and moist since the water that would normally evaporate during cooling can’t escape.
Frosting a Cake
Some cakes don’t need frosting…Yeah, right. Who am I kidding?! I love frosting, and I have never (rarely) met a layer-type cake that couldn’t be enhanced by some. Those folks who say, “Oh, all it needs is a dusting of powdered sugar!” are lying.
The Crumb Coat
To get a nice, professional, crumb-free coat of icing is a two-step process. The first step is to ice the whole cake with a very thin layer of frosting or even some of your filling. Consider it thin layer of tasty glue that catches and holds the crumbs to keep them from Dispersing in your finished frosting. With the mango lassi cake, I used a thin layer of my gelatin-stabilized mango curd for the crumb coat, because I knew it would set up. With the PB&J cake, I just used a thin coat of the peanut butter buttercream. You can watch that in the video to see all the steps, but here’s the completed crumb coat on the mango cake:
 The Finish Coat
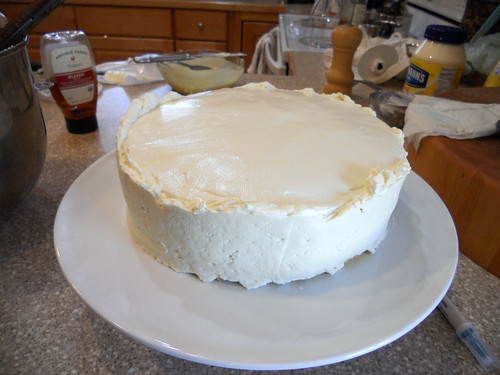
The steps to complete the finish coat are the same as for the crumb coat. The only difference is that you’ll spread on the frosting a bit thicker and take more care in making sure the frosting is smooth.
The first thing to do is to spread frosting on the sides of the cake, holding the spatula parallel to the side of the cake and perpendicular to the cake stand/turntable. (You can start with the top, if you want. Some folks do). To smooth out the sides, hold the spatula in place and spin the stand all the way around.
The Finish Coat
The steps to complete the finish coat are the same as for the crumb coat. The only difference is that you’ll spread on the frosting a bit thicker and take more care in making sure the frosting is smooth.
The first thing to do is to spread frosting on the sides of the cake, holding the spatula parallel to the side of the cake and perpendicular to the cake stand/turntable. (You can start with the top, if you want. Some folks do). To smooth out the sides, hold the spatula in place and spin the stand all the way around.
 The white on top of the cake is a Greek yogurt layer and is not a part of the finished frosting.
Next, heap a bunch of the frosting on the top of the cake and spread it out evenly, holding the spatula parallel to the top of the cake and spreading the frosting back and forth. Make sure to always keep the spatula in contact with the frosting. If you pull the spatula straight up and away from the frosting, you run the risk of pulling up some of your hard work and a bit of cake along with it. Always the slide the spatula off to the side of the cake as opposed to lifting straight up.
Let the icing extend over the sides of the cake by a bit. You’ll clean this up in the next step.
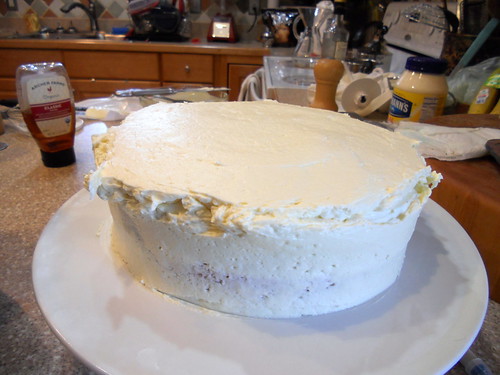 Next, go around the sides of the cake again, holding the spatula vertically and parallel to the sides. Scrape any excess frosting back into your icing bowl.
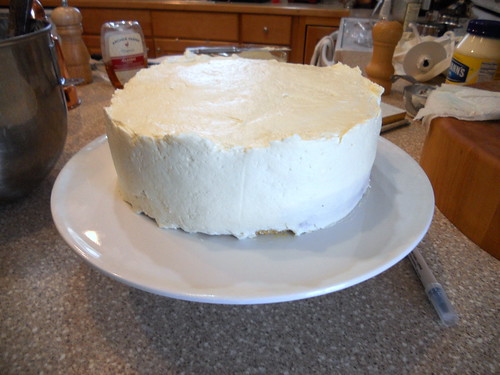 Now all that’s left to do is get rid of those little Up-Sticking Parts of your frosting. Do this with the back of your spatula. Swoop in from the side, knock each up-sticking part down and pull towards the center of the cake. Do this all the way around, and, aside from maybe a little more finessing, you are done!
Tada!!
And now, for folks who love to watch things In Motion, here’s the video tutorial, starring a peanut butter and jelly genoise: PMAT Live! Episode 19: How to Torte, Fill and Frost a Cake.
If you’d like the recipes for the component parts of the PB&J cake, click on through to YouTube. All that information is in the video description. So, that’s pretty much it. I hope you find the information useful. Take care, and have a lovely day!


Join in Today!
Missed what I wanted to see…when I torte a butter cream cake, the issue is picking up the torted layers. They crack or fall apart. You used a heavy cake, so this was not an issue. What do you do?
Really great question, and I’m sorry I didn’t address it in the video, Carol. You can either use a cake shovel (basically a really large metal spatula or even a pizza peel. When I’m being very well behaved, I put each layer on a cardboard cake round and use that to transfer them.
This is a great post. Thanks so much (now I might have to go make a Super Bowl cake instead of the cupcakes I planned.) I’m so inspired!
Aw, I’m sure the cupcakes will be great, but there is definitely something to be said for a Big Old cake! 🙂
I took a cake decorating course a few months ago and I think I made more icing during those weeks than I had my entire life.
Very cool post.
Ha! I bet so, Maureen! So many ways to frost and fill a cake, but as long as the frosting actually gets on the cake, as far as I’m concerned, it’s all good!
I haven’t frosted a whole cake in a while now. This post made me crave doing it. Will do soon!
A whole cake is a big commitment for us. We usually give at least 2/3 of whatever-I-make away to get it out of the house! But there is something very satisfying about having a whole cake, even if I do give it away! 🙂
Yes, having a whole cake is a big commitment for us. I usually give at least 2/3 of anything I make away just to get it out of the house, but it is kind of satisfying to frost a big old cake, even if most goes to the neighbors! 😆
Fantastic tutorial! I enjoyed it and learned a bit… I can bake the cakes… but not so good at making them pretty!!
I’m so happy you found it helpful, Carrie! 🙂
What a great tutorial and a great looking cake!