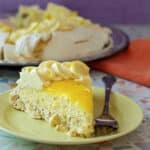
Lemon Cloud Pavlova: A Trio of Lemon Textures
This Lemon Cloud Pavlova delivers everything you love about lemon meringue pie in a completely different form. A crisp, marshmallowy pavlova shell cradles airy lemon mousse, silky lemon curd, and billowy lemon whipped cream for a dessert that's cool, creamy, crisp, chewy, and bursting with bright lemon flavor. Elegant enough for a holiday table yet unexpectedly make-ahead friendly, it's the kind of dessert people remember long after the last slice disappears.
Servings 10
Calories 399kcal
Ingredients
For the Pavlova Shell
- 4 large egg whites
- 270 grams granulated sugar 9.5 oz or about 1 1/3 cups
- kosher salt heavy pinch
- 1 teaspoon vanilla extract
- 1 Tbsp cornstarch
- 1 teaspoon lemon juice
- zest of 1 medium lemon
For the Lemon Curd
- 270 grams granulated sugar 9.5 oz or about 1 1/3 cups
- zest of 5 lemons
- 6 egg yolks
- 2 whole eggs
- 270 grams freshly squeezed lemon juice 9.5 oz or 1 cup and 2 Tablespoons, strained before measuring
- 2 Tbsp cornstarch
- ¼ teaspoon kosher salt
For the Main Filling
- 350 grams lemon curd (above) 12.3 oz or about 1 1/3 cups
- 175 grams heavy cream 6.2 oz or about 3/4 cup
- 1 teaspoon sugar honestly, just grab a little bit in your hand
- pinch salt
- ¼ teaspoon vanilla
For the Lemon Whipped Cream
- 150 grams lemon curd (above) 5.3 oz or about 1/2 cup plus 2 Tablespoons
- 175 grams heavy cream 6.2 oz or about 3/4 cup
- 1 teaspoon sugar again, just add a little
- pinch salt
- ¼ teaspoon vanilla
To Assemble and Serve
- Pavlova shell
- the remainder of the lemon curd
Instructions
For the Pavlova Shell
- Set a rack in the middle of your oven. Draw an 8" circle on a 1/2 sheet of parchment paper, turn it over so the ink is on the underside, and line a half-sheet pan with the parchment.
- Preheat the oven to 300°F / 150°C.
- Separate the eggs, reserving the yolks for the curd.
- Add the whites, sugar, salt, and vanilla, and lemon juice to the bowl of your stand mixer. Give the mixture a whisk, and let the mixture sit for 30 minutes to an hour. This will help bring the whites to room temperature, making whipping easier, while dissolving the sugar for a smooth meringue. NOTE: Because a lot of the sugar is dissolved in the egg whites, it takes longer to whip this meringue to full volume. But you will end up with a very stable meringue, so the extra time is worth it.
- Add the 1 Tablespoon of cornstarch.
- Start the mixer on medium speed and, once it becomes opaque, increase the speed to high and whip until you achieve stiff peaks. This will take about 10 minutes. You'll know it's done when peaks stand up straight in the bowl when you raise the whisk.
- Add the lemon zest and whip in on high speed for a count of ten.
- Scrape all the meringue out into the middle of the circle and spread it out with an offset spatula. Shoot for a disc that is higher in the center and slopes gently towards the edges. This does not have to be perfect. The main thing is that you try to keep the meringue nice and round.
- Put the meringue in the oven, immediately turn the thermostat down to 250°F / 120°C. Bake for 1 1/2 hours. To minimize cracking (and it will crack a little), don't open the oven while baking.
- Turn the thermostat down to as low as it will go. For my oven, that's 170°F / 78°C. Continue baking for 30-45 minutes to continue to dry the shell without it browning any further. This ensures a thicker, crispy, outer shell to hold our luscious lemon filling.
- Turn the oven off and allow the meringue shell to cool in the oven for several hours or overnight. For longer storage, place it in a large, air-tight container and keep it at room temperature until ready to fill.
For the Lemon Curd
- In a medium bowl, combine the sugar and lemon zest. Rub the zest into the sugar with your fingertips until it feels like damp sand and smells intensely lemony. This simple (and theoretically optional) step releases the oils from the zest, giving the curd a more rounded lemon flavor and a gloriously bright yellow color. It's worth the couple of minutes it takes.
- Juice the five lemons you zested along with 2-3 more. Strain and measure out 270 grams, and add the juice to the sugar/zest mixture.
- In a medium saucepan or saucier, combine the 2 whole eggs, 6 egg yolks, cornstarch, and salt.
- Scrape in the sugar and juice mixture. Keeping the sugar separate from the yolks until time to start cooking and whisking ensures that the sugar doesn't start denaturing the proteins in the eggs too quickly. This results in a smoother curd.
- Rinse out the bowl and save to hold the strained curd.
- Over medium-to-medium-high heat, whisk the mixture constantly until it begins to steam, thicken, and boil. Turn the heat down to medium-low and continue cooking, still whisking constantly, for an additional full minute. This 1-minute boil is made possible by the addition of cornstarch to the curd. It also ensures that the cornstarch gets to its peak thickening capacity.
- Strain the thick curd into a medium-sized bowl, pressing the curd through a fine-mesh strainer with a silicone spatula to remove the now-spent lemon zest and any eggy bits that might be lurking. Be sure to scrape the back of the strainer to get all the smooth curd into the bowl.
- Press plastic wrap directly onto the surface of the curd and refrigerate until cool. It doesn't have to be chilled. Shoot for about 60-65°F / 15-18°C.
For the Lemon Mousse Filling
- Add 175 grams of cold heavy cream, sugar, salt, and vanilla to the bowl of your stand mixer. Whip until the cream begins to mound in the bowl and the whisk leaves defined tracks.
- Scrape in 350 grams (just over half) of the cool lemon curd and whisk on high speed until the mixture reaches stiff peaks. Scrape the bowl once during whipping to ensure everything is evenly incorporated.
- Scrape the lemon mousse into a medium-sized bowl, and place in the fridge while you make the lemon whipped cream. Do not bother to wash or even wipe out the mixer bowl.
For the Lemon Whipped Cream
- In the bowl of your stand mixer, add 175 grams cold heavy cream, sugar, salt, and vanilla. Whip until the cream begins to mound in the bowl and the whisk leaves defined tracks.
- Scrape in 150 grams of lemon curd (about half the remaining curd), and whisk on high speed until the mixture reaches stiff peaks, scraping the bowl once to ensure everything is evenly incorporated.
- Scrape the lemon whipped cream into a pastry bag or zip top bag fitted with a large star tip.
To Assemble, Chill, and Serve
- Gently peel the parchment paper from the bottom of your pavlova shell and place it on a serving platter or cake stand.
- Insert the tip of a small, serrated knife into the top of the shell about 1 1/2" / 35mm from the edge. Using an up-and-down sawing motion, cut out a circle from the shell.
- Break the circle in 4-5 large pieces, and firmly press them down into the marshmallow layer, making a "crater" in the top of the shell about 1" deep. Don't worry if the circle breaks up even more. No one will see this part. We're just making room for the lemon mousse.
- Spread the lemon mousse into the cavity, smoothing the top with an offset spatula. Wipe off the spatula.
- Spoon the bright yellow curd over the mousse.
- Use your offset spatula to carefully spread the curd over the mousse layer.
- Pipe the lemon whipped cream decoratively around the outer edge of the meringue and into the bright lemon curd. This acts not only as a decorative and textural element but also as a way to camouflage where the curd meets the shell.
- Refrigerate the Pavlova for at least 4 hours or even overnight. You may lightly cover the Pav with plastic wrap once the cream has set up nicely. Alternatively, refrigerate the piping bag of lemon cream and wait until just before serving to pipe it on. The cream will have firmed up while in the fridge and will pipe beautifully, holding knife-sharp edges.
- Slice with a serrated blade and use a cake server to plate slices of your magical lemon creation. If I were you, I'd present the whole dessert before slicing so you can hear everyone's oohs and ahs over your lemon masterpiece.
- Store leftovers in the fridge. In my testing, I can confidently say the meringue shell will stay delicately crispy for up to 4 days.
Notes
- This is not a traditional pavlova shell. This shell is intentionally baked longer than a classic pavlova, creating a thicker, crispier exterior that can be filled several hours ahead without losing its crunch. The marshmallow center takes a back seat by design.
- The lemon mousse filling, bright curd, and lemon cream need time to set. When freshly made, everything is a bit too soft to slice cleanly. The time in the fridge ensures your pavlova slices more like a pie, holding its shape nicely for serving. That's why I say it needs a minimum of 4 hours in the fridge. Don't hesitate to assemble it all the day before and let it set up overnight.
- Don't skip rubbing the zest into the sugar. It takes only a minute or two but makes a noticeable difference in both the flavor and the gorgeous yellow color of the curd.
- Spread out your timeline.
- Day 1: Make the meringue shell.
- Day 2: Make the filling, assemble the Pavlova, and chill for a minimum of 4 hours.
- Serving Day: If you refrigerated the piping bag of lemon cream separately, pipe it on now. Add any additional garnishes you desire, slice and serve.
Nutrition
Calories: 399kcal | Carbohydrates: 60g | Protein: 5g | Fat: 17g | Saturated Fat: 9g | Polyunsaturated Fat: 1g | Monounsaturated Fat: 5g | Trans Fat: 0.003g | Cholesterol: 189mg | Sodium: 106mg | Potassium: 112mg | Fiber: 0.4g | Sugar: 57g | Vitamin A: 721IU | Vitamin C: 15mg | Calcium: 49mg | Iron: 1mg