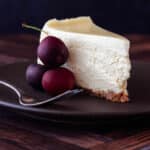
Bakery-Style Cheesecake
This classic bakery-style cheesecake is rich, dense, and creamy with a buttery graham cracker crust and a thin layer of sweetened sour cream on top. Buttermilk adds just enough tang to balance the richness for a cheesecake that’s substantial without being heavy.
Servings 12
Calories 603kcal
Equipment
- 1 KitchenAid Hand Mixer or stand mixer
- 1 Fat Daddio Push Pan Or a 9" springform pan
Ingredients
For the Crust
- 190 grams Graham cracker crumbs 6.7 oz, about 1 1/2 cups or 13 sheets, crushed, homemade or store bought (See NOTES)
- 57 grams butter 2 oz or 4 Tablespoons, salted or unsalted, very soft or melted
For the Cheesecake Batter
- 900 grams cream cheese 32 oz or 4 "blocks" at room temperature
- 260 grams granulated sugar 9.2 oz or about 1 1/4 cups
- 175 grams whole buttermilk 6.2 oz or about 3/4 cup, room temperature, not low-fat or non-fat
- 85 grams sour cream 3 oz or about 1/3 cup + 1 Tablespoon, room temperature
- 4 teaspoons vanilla extract 20 grams or 0.7 oz
- 1 Tbsp cornstarch 8 grams or 0.3 oz
- 1 Tbsp lemon juice 15 grams or 0.5 oz, freshly squeezed and strained
- 4 grams lemon zest from about 2 medium-sized lemons
- 4 grams kosher salt 1 scant teaspoon of Morton's, about 1 1/3 teaspoons Diamond Crystal, or about 2/3 teaspoon fine salt or table salt
- 4 eggs at room temperature
For the Sour Cream Topping
- 340 grams sour cream 12 oz or 1 1/2 cups
- 150 grams granulated sugar 5.3 oz or 3/4 cup
- 1 gram kosher salt slightly heavy pinch
- 1 teaspoon vanilla extract
Instructions
Mise en Place
- About an hour before you plan to bake, gather the cream cheese, sour cream, buttermilk, and eggs. Measure out the sour cream and buttermilk into the same bowl and then put the containers back in the fridge.
- Set a rack in the center of the oven and heat to 350° F / 177° C. Spray the bottom and sides of a 9" push pan or springform pan lightly with pan spray.
For the Crust
- Whether you make your graham crumbs in a food processor or by bashing them up in a zip top bag with a rolling pin, mix the Graham cracker crumbs and butter until evenly combined and the mixture holds together fairly well when squeezed.
- Press evenly and firmly into the bottom of a 9" push pan or springform pan. I use a small glass with a flat bottom to assist in getting the crust flat and nicely compacted.
- Bake for about 12 minutes until the crust has deepened in color just a bit.
- Remove from the oven to cool on a rack.
- Turn the oven temperature down to 325° F / 163° C.
For the Cheesecake Batter
- In the bowl you measured out the sour cream and buttermilk in, add 1 Tbsp cornstarch, the lemon zest, lemon juice, and vanilla, whisk together and set aside.
- In a large bowl or in the bowl of your stand mixer, beat the very soft cream cheese and salt until completely smooth. Start on low, but you can mix on medium if you need to.
- Add the granulated sugar and beat again on medium-low speed. Sugar is abrasive, so if you have any little lumps left in your cream cheese, this step should take care of them. Be thorough, scrape the bowl often, and make sure your mixture is soft and smooth.
- Pour/scrape in the buttermilk/sour cream mixture and mix on low to medium-low speed to evenly incorporate, scraping the bowl as needed. Mixture will now be much thinner and pourable.
- Add all 4 eggs and mix them in on low speed. Once the eggs are in, you don't want to beat any air in, so slow is the name of the game. Finish by hand, scraping the sides of the bowl and making sure all the eggs are incorporated and you have a gorgeous, smooth batter.
- Heat 6-7 cups of water on the stove or in the microwave until very hot. It doesn't necessarily have to be boiling, but it should be steaming.
Baking in a Water Bath
- Tear a long rectangle of aluminum foil and fold it in half so you have a square. Place the pan with the crust in it in the center of the square and bring up all the ends and sides, pleating it to form it to the pan. This does not have to be perfect. You just want to make sure the foil comes up higher than the water in the water bath will.
- Pour and scrape all the cheesecake batter into the foil-covered baking pan. Wiggle the pan a little to level the batter.
- Pull out the center rack, and place a half-sheet pan on the center rack.
- Put the cheesecake on the sheet pan and then pour in the hot water to come up the sides of the pan by about 3/4". I promise, it's all you need.
- Carefully slide the rack back into the oven to avoid sloshing, and bake the cake for about 55–60 minutes. Add more hot water during baking if needed to maintain the water level.If your oven has a pronounced hot spot that you know about, you can carefully rotate the pan inside the water bath. Otherwise, let the cake bake undisturbed.
- The cake is done when the top is a pale, buttery cream color, it looks marginally puffy around the edges, and the center jiggles but doesn't slosh. The internal temperature should read between 152°-155° F / 67°-68° C.
- Carefully pull out the rack, and pour the sour cream topping on top of the cheesecake. (Instructions below) Spread evenly with a small offset spatula, and push the rack back in. Continue baking for about 8 more minutes.
For the Sour Cream Topping
- While the cheesecake is baking, combine the sour cream, sugar, vanilla, and salt in a small bowl. Whisk well. The mixture will be grainy, but the sugar will dissolve within about 10 minutes.
- After 10 minutes, whisk again so the mixture is smooth, pourable, and creamy. Set aside.
For Gradual Cooling
- Turn the oven off, leave the cake in the water bath in the oven, and crack the oven door for about 45 minutes-1 hour.
- Remove the cake from the water bath, and carefully run a small offset spatula or thin knife down around the inside edge of the pan. This will make sure that, as the cheesecake continues to cool, nothing is stuck around the sides that could potentially cause a crack.
- Place the cheesecake somewhere cozy and draft-free. I use the microwave with the surface light on, taping the door to keep it cracked open by 4-5". Let it cool in the cozy place for 45 minutes-1 hour.NOTE: Leave the water bath in the oven until it cools completely so it's easier and safer to pour out.
- Remove the cake to a cooling rack on the counter at room temperature, and let cool for another 45 minutes to an hour. At this point, go ahead and take the foil off the pan. Then place the cheesecake in the fridge to cool completely and chill for at least 8 hours or overnight.
For Serving and Storing Leftovers
- Run a thin knife or small offset spatula around the inside edge/down the sides of the push pan or springform pan. Then place the push pan on a mug or small bowl so you can push the sides down to reveal the cheesecake. If using a springform, unlock the sides and carefully pull up to lift away from the cheesecake.
- Slice straight from the fridge, using a hot, clean knife to make each slice. For best flavor and texture allow the slices to sit out at room temperature for 30-45 minutes before serving. Cover leftovers with plastic wrap and refrigerate for up to 4 days. Honestly, I doubt it will last that long. Enjoy!
Notes
- If Using Store-Bought Graham Crackers: Increase the butter from 4 Tablespoons to 6–7 Tablespoons. Store-bought grahams are much drier than homemade and need more butter to bind them.
- Room Temperature Ingredients: The cream cheese, sour cream, buttermilk, and eggs should all be at room temperature before mixing. This is especially important for getting the cream cheese completely smooth and keeping the batter smooth as you add the remaining ingredients.
- About the Buttermilk: Use whole buttermilk rather than low-fat or nonfat. You can use all sour cream if you don't have or don't want to buy buttermilk. The recipe will work just fine, and the cheesecake will still taste great. Note that it will be less tangy, a bit denser, and will have a higher fat content than when made with whole buttermilk.
- Water Bath: A shallow water bath is plenty. You only need about 3/4" of hot water in a rimmed half-sheet pan; there's no need to haul out a deep roasting pan. If your oven heats unevenly, carefully rotate the cheesecake during baking; otherwise, leave it alone.
- Trust the Thermometer, Not the Clock: Start checking around 55 minutes, but pull the cheesecake based on its internal temperature, 152–155°F / 67–68°C, rather than baking for a specific number of minutes. The center should still jiggle slightly.
- Release the Edges After Baking: After the first stage of gradual cooling, run a thin knife or small offset spatula around the inside edge of the pan. The cheesecake may contract slightly as it continues to cool, and releasing it from the pan helps keep the edges from catching and potentially causing a crack.
- Plan Ahead: This is a make-ahead dessert. Allow roughly 2¼–3 hours for gradual cooling, followed by at least 8 hours in the refrigerator. Overnight is ideal.
- For the Cleanest Slices: Slice the cheesecake straight from the refrigerator with a thin knife dipped in hot water and wiped dry between every cut. For the creamiest texture and best flavor, let individual slices sit at room temperature for 30–45 minutes before serving.
Nutrition
Calories: 603kcal | Carbohydrates: 54g | Protein: 9g | Fat: 40g | Saturated Fat: 22g | Polyunsaturated Fat: 2g | Monounsaturated Fat: 11g | Trans Fat: 0.2g | Cholesterol: 163mg | Sodium: 580mg | Potassium: 217mg | Fiber: 1g | Sugar: 43g | Vitamin A: 1450IU | Vitamin C: 1mg | Calcium: 148mg | Iron: 1mg