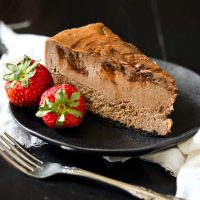
The Best Nutella Cheesecake Recipe
Rich, decadent, and oh so delicious, Nutella cheesecake with a rich Nutella swirl. You need this cheesecake recipe in your life!
Servings 16 slices
Calories 453kcal
Equipment
Ingredients
For the Crust
- 24 regular Oreos not double stuff
- 4 Tablespoons melted butter
- pinch of salt
For the Cheesecake
- 5 8 oz packages of cream cheese or 2 1/2 pounds, softened
- ¾ cup of sugar or up to 1 cup if you like things sweeter but the Nutella is already pretty sweet
- two teaspoons vanilla
- 1 teaspoon fine sea salt
- 3 tablespoons all purpose flour Optional: See Notes
- ½ cup of sour cream at room temperature
- 4 whole large eggs at room temperature
- one large jar Nutella 26.5 ounces, divided
Instructions
For the Crust
- Preheat oven to 300F.
- Wrap a 9" or 10" springform pan with 2 layers of heavy duty aluminum foil. Set aside.
- Put the Oreos in a heavy-duty freezer bag and roll over them with a rolling pin until they turn into fine crumbs.
- Pour the melted butter and a pinch of salt into the bag with the crumbs and smoosh it all around until the crumbs are pretty uniformly coated with the butter.
- Press the crumbs in an even layer over the bottom and a bit up the sides of a 9″ or 10″ spring form pan. (Your cake will be taller if you use a 9" pan and may also take a bit longer to bake, but either is fine.)
- Put the crust in the freezer while you prepare the batter.
For the Batter
- Put the softened cream cheese in the bowl of your stand mixer (or in a large bowl if you're using a hand mixer.) Mix on low speed until the cream cheese is completely smooth.
- Once your cream cheese is Lump Free, add the sugar, vanilla, salt, and flour. Continue to mix on low speed. You will be Tempted to turn up the mixer, but you’ll just be whipping air into your batter. Then it will rise up in the oven and Crack. Don’t let that happen to you. Just keep it on low and be patient.
- Beat in the sour cream on low speed, scraping the bowl as necessary.
- Add the eggs, one at a time, until they’re all incorporated, scraping the bowl well between additions. Again, keep it on low speed.
- Scoop about half of the jar of Nutella into your batter and mix it in thoroughly on low speed, scraping the bowl as necessary.
- Taste for salt and sweetness, and add a bit more of each if it needs it.
- Pour roughly 3/4 of the batter into your prepared pan.
- Mix in the rest of the Nutella to the remaining batter.
- Plop blobs of this batter all over the top of the batter already in the pan, and then use a knife to swirl the two batters together.
- Bring 1 to 1 1/2 quarts of water to a boil. Place the foil-wrapped cheesecake in a larger pan (a roasting pan works well), and put it in the oven.
- Carefully pour the hot water into the roasting pan and close the oven.
- Bake until the center is still wobbly but the sides are set. This will take about 1 1/2-1 3/4 hours, depending on your oven.
- If you have an instant read thermometer, you are looking for 160F in the center of the cheesecake.
- When the cheesecake is done, turn off the oven and open the door a little. Let the cake sit in there for another hour.
- Remove to a cooling rack and let cool for an additional hour or so. Leave the roasting pan with the water in the oven. You can deal with it once it is completely cool.
- Chill the cheesecake the fridge for a minimum of 6 hours or overnight.
- Serve very small pieces, because it is super rich. Enjoy!
Notes
Nutritional information is based on cutting the cake into 16 slices. If you make your slices larger, the calorie count will change.
A NOTE ABOUT THE FLOUR
I add a bit of flour to cheesecake recipes as insurance against curdling (if I were to accidentally bake it at too high a temperature) and also to keep the cheesecake from "weeping" liquid out of it if it's in the fridge for more than a couple of days. It is an optional ingredient. If you leave it out, you will definitely want to bake in a water bath to insulate the sides of your pan.WHY DO I HAVE TO BAKE CHEESECAKE AT SUCH A LOW TEMPERATURE?
In a word, eggs. The more slowly you cook eggs, the more creamy they will be when set. I generally bake my cheesecakes at a fairly low temperature, sometimes as low as 225F or 250F. The upside of this method is you end up with a super smooth and creamy cheesecake that also stays perfectly flat and crack free. The downside is it takes a super long time to bake, possibly as long as 3, 4, or even 5 hours depending on how much batter you have. And that is just kind of crazy, unless you have nothing better to do. My goal is to bake a cheesecake at a low enough temperature to keep it nice and creamy but not at such a low temperature that it takes forever to bake.WHY BAKE A NUTELLA CHEESECAKE (OR ANY CHEESECAKE) IN A WATER BATH?
The short answer is insulation. The temperature of water will never rise above its boiling point, so baking a cheesecake or other custard in a water bath ensures that the sides of the pan stay at no more than 212F or 100C. Baking in a water bath will automatically increase the bake time since the sides of the cake will take longer to set up. When baking a regular cake, the sides set up first and form a golden brown crust all around. This is absolutely not what we want in a cheesecake. We want a smooth creamy texture from top to bottom and from edge to edge.WHAT IF I DON’T WANT TO BAKE IN A WATER BATH?
Fair enough. Not everyone wants their baking to take extra time. Baking your cheesecake in a full crust–one that goes at least to the top of the filling, can also provide some insulation for your batter as it bakes. I’d still keep the heat relatively low, to no more than 325F and watch it like a hawk. As much as everyone says to look for a jiggle in the center of your cheesecake, I’m pretty paranoid about accidentally over-baking, so I always use my Instant Read Thermometer to check the temp in the center. I shoot for 160F.Nutrition
Serving: 1g | Calories: 453kcal | Carbohydrates: 32g | Protein: 7g | Fat: 34g | Saturated Fat: 19g | Polyunsaturated Fat: 9g | Cholesterol: 130mg | Sodium: 474mg | Fiber: 1g | Sugar: 24g