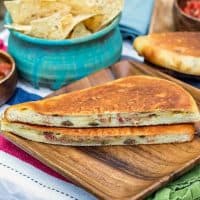
Cuban Sandwich Stuffed Cuban Bread
If you're a fan of Cuban sandwiches, you will love this all-in-one approach of Cuban sandwich fillings stuffed into Cuban bread dough then baked and pressed. It takes a bit of work, but it is so worth it. You'll have to make the braised pork the day before you plan on making the bread, so plan accordingly.
Servings 4 loaves
Ingredients
For the Cuban Bread
- 10 oz 1 1/4 cups warm-ish water (body temperature)
- 2 teaspoons sugar
- 1 Tablespoon yeast
- 9 oz about 2 cups all purpose flour
- 9 oz about 2 cups bread flour
- 2 oz 1/4 cup lard, melted
- 1 1/2-2 teaspoons kosher salt (See Procedure)
For the Braised Pork
- 2 Tablespoons olive oil
- ½ teaspoon hot pepper flakes
- 4 cloves garlic , smashed
- 1 pound pork shoulder (pork butt)
- kosher salt and freshly ground black pepper
- 2 teaspoons cumin
- 1 cup store-bought mojo sauce
- ¼ cup orange juice
- juice of one juicy lime
- ½ yellow onion , chopped
Other Cuban Fixin's
- Dijon mustard
- 4 slices ham
- 4 slices deli Swiss cheese
- 12 bread and butter pickles (sweet "discs")
- 2 big spoonfuls (it's really up to you) braised pork
To Press and Enjoy
- 2-3 Tablespoons softened butter
Instructions
For the Cuban Bread
- Mix together the water sugar and yeast and pour into the bowl of your stand mixer. Let stand (ha!) ten minutes or so until somewhat foamy.
- Whisk the two flours together really well and sift once.
- With the mixer on low and with the dough hook attached, add about 1/2 cup of flour alternately with just a bit of the lard. Keep adding some flour and then some lard until all the lard is in the bowl and you've used about 3/4 of the flour (about 13-14 oz).
- What you're shooting for is a soft dough that sticks in the bottom of the bowl and barely clears the sides of the bowl when the mixer is on low speed. The dough will be very soft. If the dough is more like batter, add a bit more flour until you get it to a soft dough state.
- Knead on low speed for four minutes and that's all. We don't care about the windowpane test because we're looking for a very soft bread and we aren't that concerned with major gluten development. Reserve the extra flour.
- Oil your hands and form the soft dough into a smooth ball. Plop it back in the bowl, spray with pan spray, cover and let rise in a warm place until doubled. Since we took great care not to add too much flour, this will only take about an hour.
- Use some of the reserved flour and sprinkle your work surface with it. Plop the dough out on the floured surface and cut into 4 equal pieces. My final dough weighed 26.6 ounces, so my pieces weighed just slightly more than 6.5 oz each.
- Cover three of the pieces of dough. Take the fourth and flour it all over. Don't go crazy; you just don't want the dough to stick.
- Roll out into a rough rectangle about 7"x10".
- Brush off any excess flour. Spread liberally with Dijon mustard leaving about an inch of space all the way around.
- Top the mustard evenly with a fourth of the filling mixture (See below) and roll up like you're making cinnamon rolls. Pinch the seam together really well and then fold up each end of the cylinder so nothing leaks out. Use some water to help you get the ends nice and sealed up.
- Turn the loaf over onto a parchment- or Silpat-lined baking sheet, spray with pan spray and cover with plastic wrap.
- Repeat with the other three pieces of dough. This dough expands mightily during the second rise, so you may only want to bake 2 per sheet, and certainly no more than 3. Don't even try to put all four on one sheet. You've been warned.
- Let the loaves rise in a warm place until they're about 2 1/2 times their original size, about 45 minutes. In the meantime, preheat the oven to 450F and place your racks in the upper and lower thirds of the oven. Put a pan of hot water on the lower rack making sure there's also enough room on that rack for one of your baking sheets. I used a 6" cake pan for my water so there would be room.
- Once the loaves are well risen and shockingly big, remove the plastic wrap. Brush the tops of the loaves with water and put your trays in the oven.
- Bake for ten minutes.
- Remove from the oven, brush the loaves with water again and put them back in, rotating the pans 180 degrees and switching racks.
- Bake another 6-8 minutes or until the loaves are an even medium golden brown and the internal temperature is 200F.
- Remove from the oven to cool completely.
For the Braised Pork*
- Rub the meat with salt, pepper and cumin.
- Pour the oil into your pressure cooker and let it get hot. Add the pepper flakes and garlic and fry for 1-2 minutes until fragrant and the garlic begins to turn golden.
- Add the meat to the pan and sear on all sides.
- Pour in the mojo sauce, juices and onion.
- Bring to a boil. Put the lid on your pressure cooker and then cook at high pressure for 30-45 minutes until the meat is falling-apart tender. Check after 30 and go from there.
- Let the meat cool in its cooking juices so it doesn't dry out and then refrigerate overnight. You will have lots of pork left over after making these sandwiches. Use it to make more sandwiches, add it to a Cuban-style hash, make carnitas or use your imagination to use up the leftovers.
To Make the Filling**
- Combine the ham, Swiss cheese, pickles and braised pork and coarsely chop, combining everything so all filling ingredients are evenly distributed.
To Press and Enjoy
- If you have a sandwich griddle--not a grill. Cuban sandwiches shouldn't have ridges or grill marks--use that. If you don't, use two cast iron frying pans.
- Heat both pans over medium to medium-low heat. If you get the pans too hot, your bread could char and that's no fun.
- While the pans are heating, spread the top of each loaf of bread with some of the softened butter. Preheat your oven or toaster oven to 200F to keep the sandwiches hot after pressing.
- When both pans are hot, brush butter in one of the pans and put the sandwich in on top.
- Press it down with the other hot pan--be careful and wear oven mitts--and let press/toast for about 3 minutes. Re-heat the top pan for a short while over high heat to recharge it, flip the sandwich and press again for another couple of minutes until both sides of the sandwich are flat, deeply golden brown and crisp. Keep warm while you press the rest.
Notes
*You can use Tyler's complete recipe, linked above in the post or you can just do what I did. I sort of followed his recipe and then took a couple of short cuts. I made mine in my pressure cooker in about 40 minutes. If you don't have a pressure cooker, use a slow cooker or Dutch oven and expect it to take a lot more times.
**If you decide not to chop your filling ingredients, layer them on half of the dough like you would make a "regular" sandwich, leaving an inch of space all around. Wet the plain edge and fold over the other side of the dough, pinching the seams well and trying to make as neat a package as you can. You will definitely have more filling in this style, but it will be a bit harder to deal with shaping. If you go this route, you will probably need to double the amounts of all the filling ingredients.