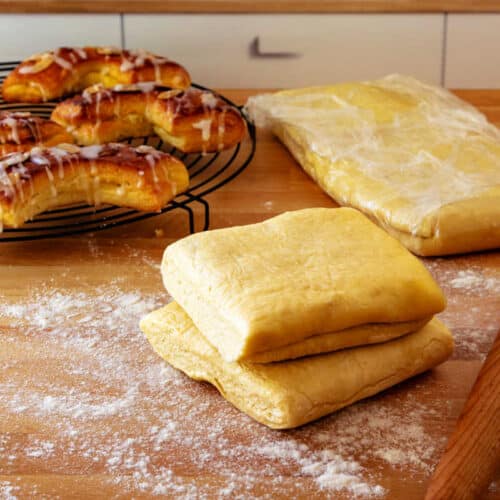
Danish Pastry Dough
Learn to make rich, buttery, flaky Danish pastry dough with a simple roll-and-fold method—no fussy butter block required! You'll learn how to keep your butter workable, when to chill your dough, and how to build beautiful layers for homemade bear claws, morning buns, fruit and cheese Danish, and more.
Servings 8 servings
Calories 295kcal
Ingredients
For the Dough
- 100 grams water 3.5 oz or 1/3 cup plus 4 teaspoons
- 5 grams instant yeast 1 1/2 teaspoons
- 30 grams unsalted butter 1.1 oz or 2 Tablespoons plus 1 teaspoon, very soft
- 38 grams granulated sugar 1.3 oz or 3 Tablespoons
- 13 grams dried milk powder 0.5 oz or about 2 Tablespoons
- 3 grams kosher salt If using Morton's, use a slightly generous 1/2 teaspoon. If using Diamond kosher, use 1 teaspoon. If using fine salt, use a generous 1/4 teaspoon.
- ⅛ teaspoon ground mace sub nutmeg if you don't have mace
- 1 egg large
- 1 egg yolk large
- 200 grams bread flour 7 oz or about 1 2/3 cups
- 50 grams cake flour 1.8 oz or a slightly scant 1/2 cup
For Laminating
- 125 grams unsalted butter 4.4 oz or 1 stick and 1 Tablespoon, very soft
Instructions
Mise en Place
- Make sure all ingredients are at room temperature. The butter should be very soft and of an easily spreadable consistency.
- If using active dry yeast instead of instant yeast, warm the water to a cozy-warm-not-hot temperature of about 100-110° F / 38-43° C, and stir in the yeast as well as a teaspoon of the sugar from the recipe. Allow it to get foamy before proceeding.
To Make the Dough
- Add all the dough ingredients except the butter to the bowl of your stand mixer fitted with the dough hook.
- Mix on speed 1-2 for about 2 minutes until the flour has mostly been incorporated.
- Add the softened butter and knead on speed 4-5 for about 5 minutes. The dough will be much smoother than when you start, but it won't be completely smooth or cohesive. Worry not. All the laminating will take care of that.
- Cover the mixing bowl and let it rest in the fridge for about 1 hour.
To Get the Butter Ready for Laminating
- Cut the 125 grams of butter into small pieces and spread them out in a small-ish bowl so they soften quickly. I put mine in the cozy microwave with the oven surface light on so it will get very soft.
- Whisk the butter until it is uniform with no lumps and easy to spread.
To Add the Butter to the Dough and Complete the First Fold
- Remove the dough from the fridge, and pat it out on a well-floured surface. Sprinkle a bit of flour on top as well.
- Roll the dough into a long rectangle, about 18-20" x 12" / 47-50 cm x 30 cm. Use a bench scraper to make sure the dough isn't sticking, sprinkling on a bit more flour as necessary.
- Once the dough is the correct size, brush off any excess flour from the surface.
- Use a plastic dough scraper or an offset spatula to evenly spread the softened butter across the bottom 2/3 of the dough, leaving roughly a 1" border along the sides but spreading it right to the bottom edge.
- Fold the bottom third up over the butter so you can't see any peeking out above the fold. Then, fold the top third down over the first fold to make an envelope about 12" / 30 cm long and 6" / 15 cm tall. Pull the corners a little and try to line up the edges as evenly as possible.
- Voila, you have gotten the butter into the dough and completed your first fold.
To Laminate
- Take your dough envelope and rotate it 90° so it's 12" / 30 cm tall and 6" / 15 cm wide. Roll it out as evenly as possible to the target 18-20" / 47-50 cm x 12" / 30 cm size, paying attention to the consistency of the butter. If it seems a little soft, let it firm up in the fridge for a few minutes. If it seems too firm, let it sit at room temperature for a few minutes before continuing. If any butter starts to leak out, rub a little extra flour on the butter and keep going. Brush off any excess flour.
- Fold the bottom third up and the top third down like you're folding a letter, and square up the edges as much as you can. Admire your work.
- Rotate the dough packet by 90°, and complete the previous two steps two more times for a total of 4 "simple folds," including the fold you did when you initially incorporated the butter. Please see the main post for other types of folds and lamination schedules.
- Wrap the laminated dough in plastic wrap and refrigerate it overnight. You'll find that it will puff up somewhat overnight. That's a signal that your yeast is healthy and working.
- The next day, let the dough temper until the butter and dough are equally workable, using the poke test described in the post. Roll, trim, and shape according to your chosen Danish pastry recipe.
Nutrition
Calories: 295kcal | Carbohydrates: 28g | Protein: 6g | Fat: 18g | Saturated Fat: 11g | Polyunsaturated Fat: 1g | Monounsaturated Fat: 5g | Trans Fat: 1g | Cholesterol: 88mg | Sodium: 164mg | Potassium: 74mg | Fiber: 1g | Sugar: 6g | Vitamin A: 562IU | Vitamin C: 0.1mg | Calcium: 31mg | Iron: 0.5mg