Pate Brisee Recipe
Pate brisee is a classic French pastry dough that is the equivalent of American pie crust. It works beautifully for sweet or savory pies, and it's pretty easy to make. This is definitely a recipe you want to keep in your back pocket for whenever you need to make pie crust.
The cook time given is for a par-baked or partially baked crust that you can then fill with whatever filling you like before baking everything together.
The cook time given is for a par-baked or partially baked crust that you can then fill with whatever filling you like before baking everything together.
Servings 2 9" pie crusts
Calories 224kcal
Ingredients
- 280 grams all-purpose flour 10 oz or 2 cups measured by whisking, spooning, and sweeping
- 224 grams unsalted butter 8 oz or 2 sticks
- heavy pinch of kosher salt I use Morton's probably about 1/2 teaspoon
- 15 grams granulated sugar 1 tablespoon (optional)
- 112 grams ice cold water 4 oz or 1/2 cup 4 (you will probably not need all of it, so only add until the dough comes together as per the directions below)
Instructions
- Whisk together flour, salt and sugar (if using).
- Rub in the butter by hand. Do this by pinching the cubes of butter together with the flour.
- Continue pinching and making smaller pieces of butter while smearing a little of the butter into the flour. The smearing part will add to tenderness by coating the flour really well. The pinching part makes sure you have some larger pieces of butter for flakiness. Do this kind of quickly so the butter doesn’t warm up and start melting into the flour. If things start getting warm, throw the whole deal into the fridge or even the freezer for a few minutes to cool things back down.
- Once you’ve got your flour mixture to a nice consistency, start sprinkling in the water, a little at a time. In between each addition, toss the mixture by reaching your hands down the insides of the bowl and tossing the flour, butter, and water all together so the water evenly wets the rest of the ingredients.
- Resist the urge to add extra water. Once the dough (which will still look like flour crumbles) holds together when you squeeze it, you’re there.
- The whole “stop the processor when the dough comes together in a ball” makes us want to add too much water. If the dough is coming together in a ball, it’s too wet. Remember, the flour hasn’t even had a chance to fully hydrate yet. It takes a strong person to walk away, but I know you can do it.
- Please see the post for rolling, blind baking, and other specific instructions
Notes
PS Make a ton of dough, roll it in pie or tart sized circles between parchment and freeze the lot. Now you'll have pie crust at hand whenever you need it.
PPS You can reuse your pie weight beans almost indefinitely. I like to use dried chickpeas, because they are small and don't smell funny in the oven.
Reuse your sugar until it turns golden at which point you can use it in baking like my caramel walnut shortbread cookies.
Rolling Out the Dough
I like to roll initially between two pieces of parchment paper. I roll it out about halfway, until it’s roughly 3/8″ thick (no measuring, just thicker than you want it to be when you’re done). Then, I peel off the parchment from both sides and put the dough on a well-floured work surface and continue to roll, flipping the dough and moving it frequently to make sure it’s not sticking. If it does stick a bit, use your bench knife to help gently un-stick it by sliding it under the stuck part. Once I have it rolled into about a 12″-14″ rough round, I roll it up with a sheet of parchment and set it aside.How to Patch a Cracked Crust
Easy, friends. Just cut a piece of your excess dough to fit over the crack. Wet the dough right around the crack–in this case, water is glue. Place the cut piece of dough over the crack, press it down well, then gently roll that area so the patch adheres.How to Line the Pan with Dough
The biggest rule about lining your pie pan is not to stretch the dough. And that’s because stretching activates gluten and will cause the dough to shrink when you bake it. Rather than pulling from the edges, push inward from the edges to carefully fit your dough down the sides and across the bottom of your pie pan. Rather than trimming your crust before putting it in the pan, use kitchen scissors to trim it once it’s in your pie plate. That way, you know exactly where to trim and don’t have to guess.How To Make a Decorative Crimp
There are plenty of ways to make fancy pie crust “treatments,” including cutting out shapes to “glue” on all around, adding baked pieces of dough after baking, and doing a classic crimp.
The classic seems to make everyone a little scared, but it’s easy to do. If you have fingers, you can do it.
Just pick any spot on your crust to start. Place your forefinger and thumb close together and set them down on the edge of the crust, sort of pinching in towards the center of the (eventual) pie.
Use your thumb to press the dough between those two fingers outward, forcing it to form a triangular shape as you press it out.
Next, move your thumb on the “outside” hand to the place where your finger was, and, and continue around the pie, using the last crimp from your finger as the starting place for the next as you crimp all the way around.
Some people prefer to use their knuckle to press out. Experiment with what works for you.
And there is no rule saying you can’t just press down with the tines of a fork all the way around. It will be lovely, regardless.
How to Blind Bake a Pie Crust
It’s time for a kitchen “secret:” You can put Saran wrap (and other high-quality plastic wrap) in the oven. Using plastic wrap is my preferred way of lining the crust for blind baking because it doesn’t poke holes in your dough and conforms very easily to the contours of the pie crust. My go-to pie weights used to be dry chickpeas, and I still recommend those, but sugar makes a great pie weight too.
If you hate the idea of putting plastic wrap in the oven, my other favorite lining options are:
- crumpled and uncrumpled parchment paper
- large commercial coffee filters
- Whether you use that or parchment or a coffee filter, carefully gather up the edges so sugar doesn’t go spilling everywhere and remove the whole thing to a bowl to cool off.
- Egg wash the rest of the crust.
- Poke holes with the tip of a knife to allow steam to escape and minimize the crust puffing up. It will still probably puff a bit, but it will be okay. I prefer using a knife to a fork, because the tines of a fork can leave big holes that could allow your eventual filling to leak out.
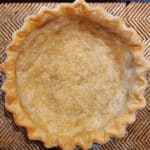
- Bake for another 10 minutes if you’re going to be adding a filling that needs to be baked, or bake until the crust is deeply golden brown all over if you are using an unbaked filling (like pudding or something). In this photo, since I’m using this crust to make a chess pie, the crust is only par-baked (which is just short for partially baked. No mysteries there!)
Nutrition
Serving: 1/6 of a pie | Calories: 224kcal | Carbohydrates: 19g | Protein: 3g | Fat: 15g | Saturated Fat: 9g | Polyunsaturated Fat: 5g | Cholesterol: 40mg | Sodium: 3mg | Fiber: 1g | Sugar: 1g