Crispy Homemade Butterfinger Recipe
If you are a fan of Butterfinger candy bars but you wish the chocolate were tastier, or you just want to use up leftover candy corn, or you just love crunchy peanut butter candy, you are going to love these. NOTE: All measurements other than teaspoons and tablespoons are by weight. ANOTHER NOTE: If you do not want to use candy corn to make these copycat crunchy Butterfingers, I give you an alternate in the notes at the end of the recipe.
Ingredients
For the Centers
- 1/2 cup corn flakes cereal, lightly crushed
- 8 oz peanut butter, I use Smucker's Natural
- 2 teaspoons cocoa powder, sifted
- 2 teaspoons dry milk powder
- 8 oz candy corn
- 2 oz water
- 2 teaspoons molasses, I use Grandma's
For the Coating Chocolate
- 8 oz milk chocolate chips, I use Ghirardelli
- 8 oz 60% bittersweet chocolate chips, I use Ghirardelli
- 1.6 oz refined coconut oil
Instructions
For the Centers
- Spread the corn flakes out in the center of a half-sheet-sized Silpat. Set aside convenient to the stove.
- MIx together the peanut butter, cocoa powder, and milk powder in a small bowl. Set aside convenient to the stove.
- Put the candy corn and water in a medium saucepan. Melt over medium-low heat, smashing the candies down with the side of a heat resistant spatula until the mixture is smooth.
- Increase heat to medium/medium-high and bring to a boil. Cook until the mixture reaches 290F.
- Add the molasses and swirl the pan to distribute it. Continue to cook until the candy reaches 305F.
- Immediately remove from the heat and scoop the peanut butter mixture into the candy. Be careful, and stir it together as completely as you can.
- Scrape the candy onto the corn flaked Silpat. Using the Silpat (and possibly an Ove Glove) fold the candy together with the corn flakes so it is somewhat layered. Fold the candy over, then press it out (again, with the Silpat folded over it), then use the Silpat to fold that.
- The candy will firm up in a couple of minutes at which point you can use a rolling pin directly on the candy to roll it out to about 1/4" and then fold it in thirds, like you're making puff pastry. Continue rolling and folding until the candy is stiff but not hard. Err on the side of too soft rather than too hard, or you won't be able to score it.
- Roll the candy one last time to 1/3" or so. Use a metal pizza cutter or a bench knife to score the candy about halfway to three quarters of the way through. You can choose to make them into small squares or into traditional bar shapes. It's your call.

- Allow candy to cool completely. Break along score marks.
To Dip in Chocolate
- In a microwave-safe bowl, melt the two kinds of chocolate chips and the coconut oil on medium power in 30 second bursts. Stir in between. When chocolate is mostly melted, stir until it is completely melted.
- Line a half sheet pan or two with Silpat. Keep them close.
- Brush off any errant candy crumbs from your centers. Put 5-6 into the melted but not super hot chocolate.
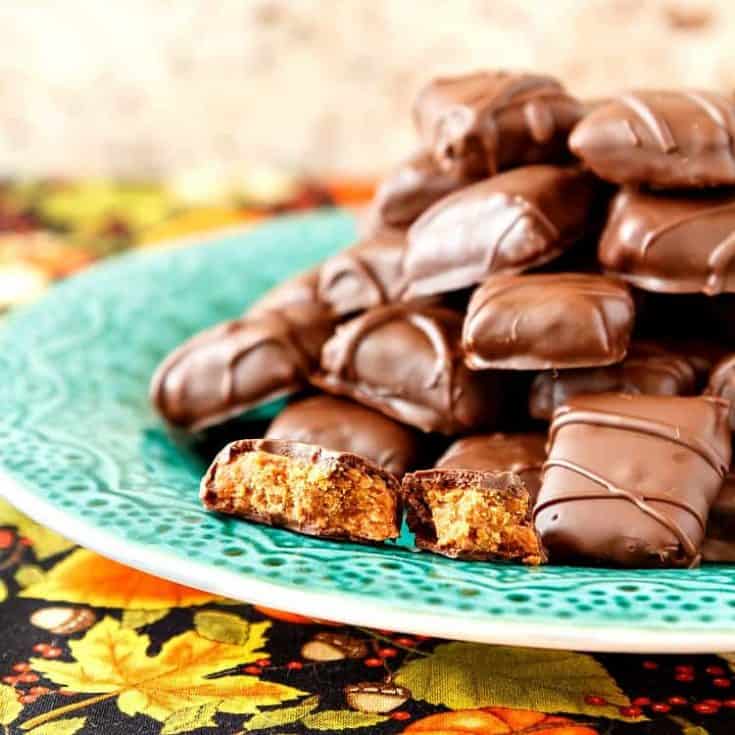
- Using a candy fork or just a regular fork, turn them to coat. Pick one up on the tines of the fork and tap it against the rim of the bowl to even out the chocolate and let the excess drip off. Make sure the candy is right-side up. You can tell because the bottoms are completely flat and the tops have a slight curve from the scoring. Place each dipped and drained center on Silpat to cool completely. This could take a couple of hours.
- You can stop with one dip, but I like chocolate, so I double dipped mine. Reheat the chocolate and dip and drain all the candies a second time. Allow to cool. I drizzled some additional melted chocolate over the tops of the candies. This is completely optional, but it looks cool.
- Store, uncovered, in a dry place to cool/set for a few hours or overnight. I put my tray in the microwave. The oven (as long as it's off and you don't forget they're there) is a great place to put them as well, especially if you have animals or kids who might try to sneak them. As long as you know where they are and you can sneak them, it's all good.
- Package however you'd like, in cello bags or small candy boxes, or just put them on a plate. Share, or don't. I'm not judging.
- These crunchy Butterfinger candy bars will stay crunchy for at least a week or two, depending on humidity. They will be gone well before they lose their crunchiness, though. Trust me.
Notes
If you prefer not to use candy corn as the base of these crunchy Butterfinger candy bars, you can use corn syrup, sugar and water.
Use:
- 4.5 oz of light corn syrup
- 3.5 oz granulated sugar
- 2 oz water.
- Stir together well, put the lid on your pan and bring to a boil.
- Allow this mixture to boil for a minute or two to wash down any sugar crystals off the sides of the pan, and then continue with the recipe as written.
The candy will not have that distinctive orange color, but it will taste almost exactly the same. And it will be vegetarian. To make these candies vegan, make sure to use all vegan chocolate for coating.
Nutrition Information based on 60 pieces of candy. If you make full-size bars, you'll get around 12-15 bars, so multiply the nutritionals by 4 or 5.
Nutrition Information
Yield
60Serving Size
1 pieceAmount Per Serving Calories 57Sodium 32mgCarbohydrates 7gSugar 6gProtein 1g